Quick Quilt Top Series – Delectable Mountains: Help us pick a design layout
This is the first article in our spring 2023 Quick Quilt Tops series. As part of this series, we’ll create a quilt together – from picking a pattern and a quilting design. You can read previous installments at this link.
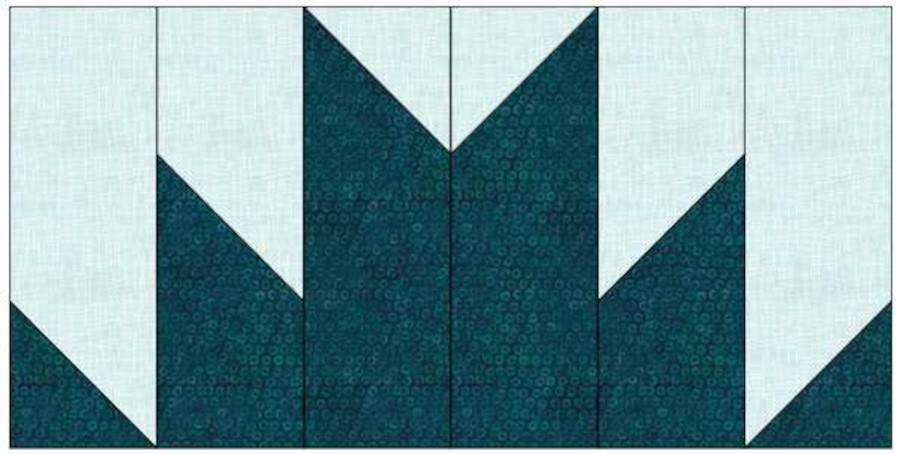
Delectable Mountains is an easy, fun block that can be twisted and turned to create some really cool designs! It’ has a dynamic interrupted diagonal flow that gives lots of energy and movement.
This block looks complicated but is really easy – my favorite kind! See links and tips at the end of the post on how to make the block.
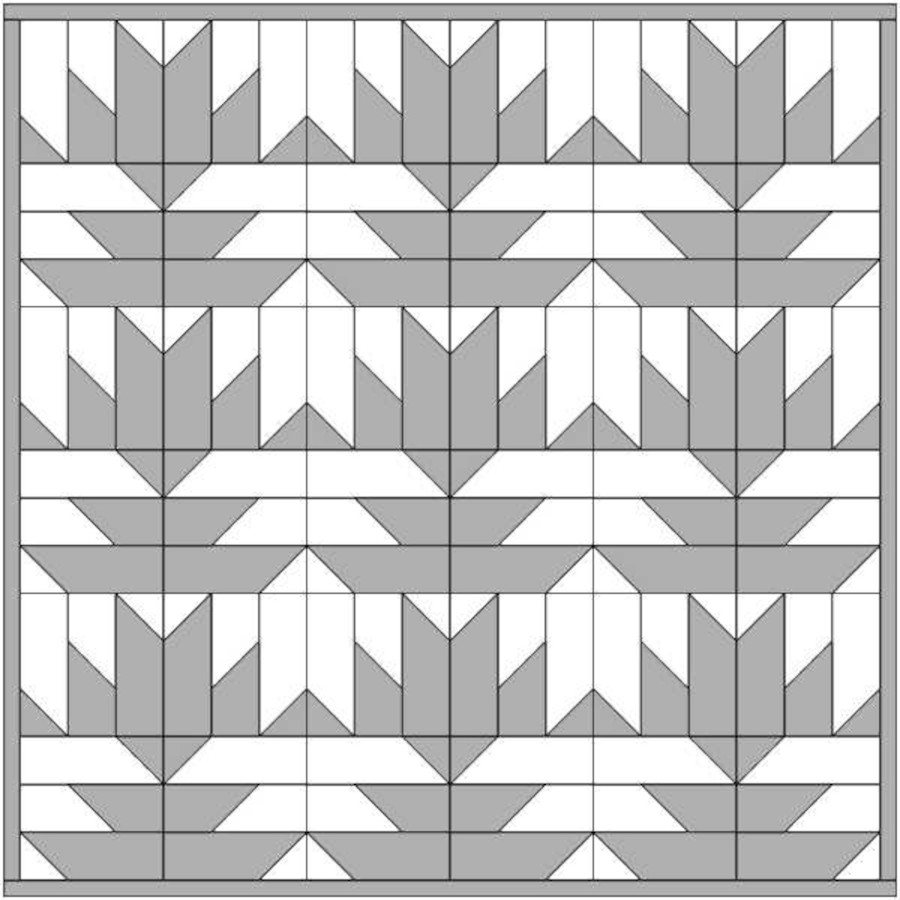
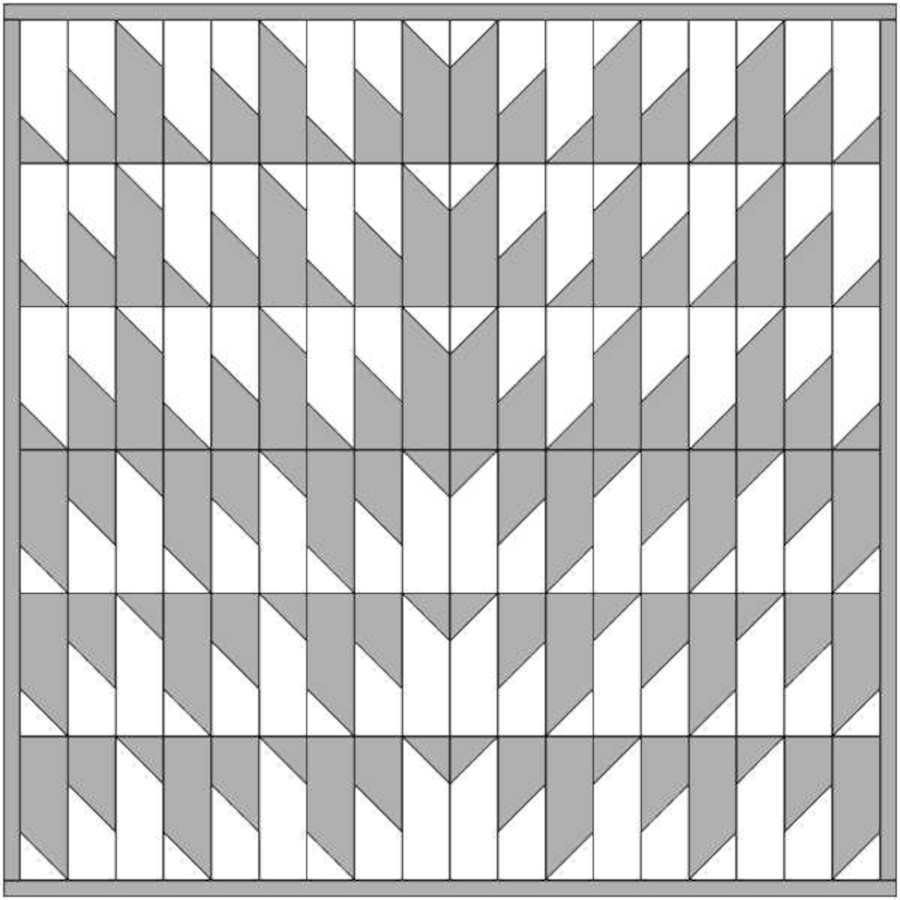
Detectable Mountains blocks

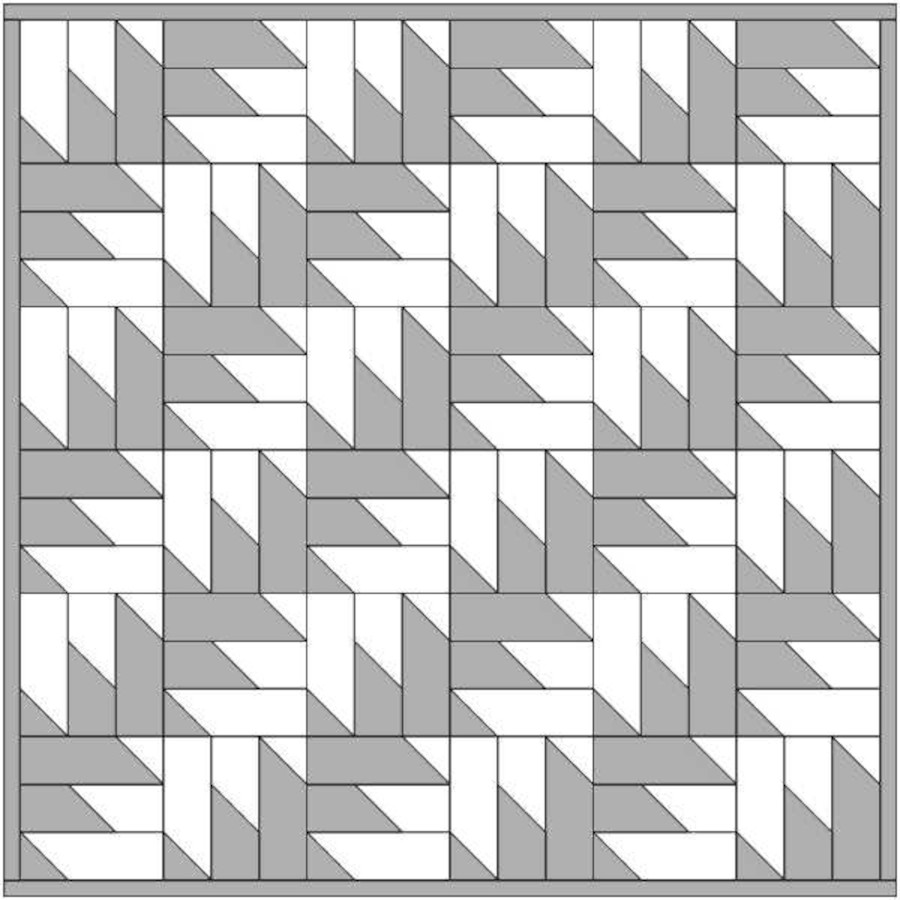
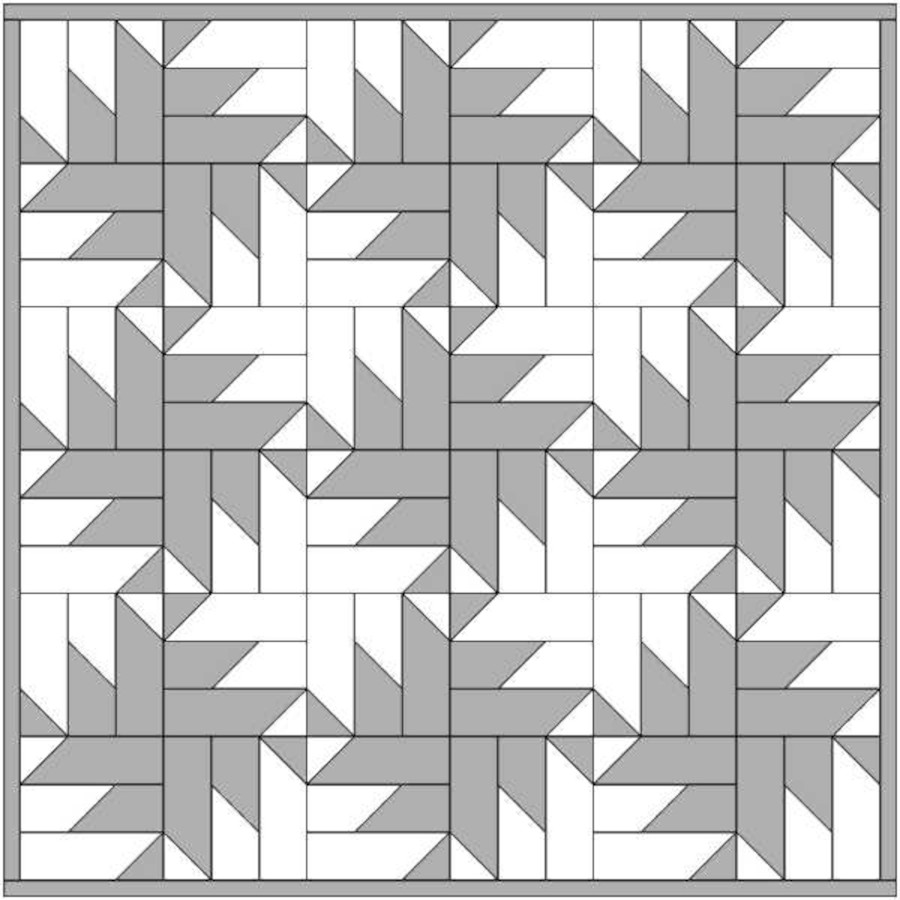
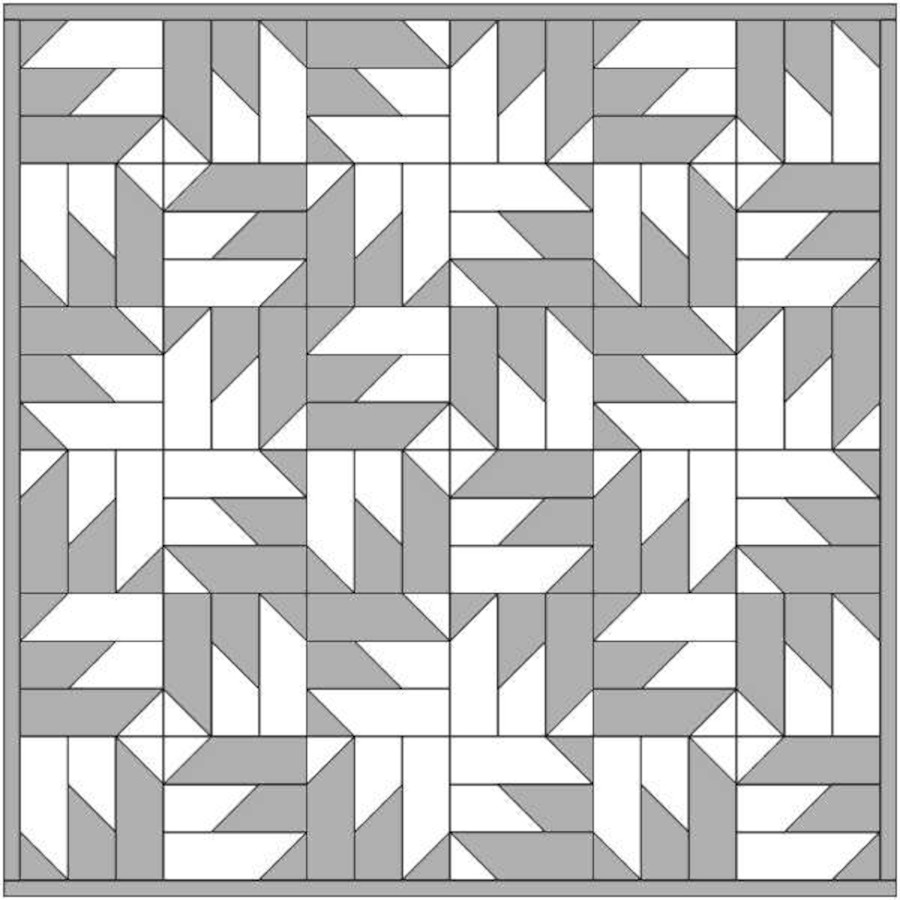
I’ve created 10 different quilt pattern layouts using Delectable Mountains blocks. EQ8 makes this a breeze! All the designs below use the same Delectable Mountains blocks, but I have rotated them in different ways, some go up and some go down.
Which pattern is your favorite?
Help us pick the pattern we’ll use for the quilt by voting for your favorite below. Once the votes are counted, I’ll sew up the most popular layout into a top and create some quilting designs for you to vote on again. Finally, I’ll quilt the top with the winning quilting design, and then we’ll give away the finished quilt, along with some APQS bling, to one lucky person!
Scroll to the bottom of this post to vote for your favorite design layout.
1 – Stacked Mountains
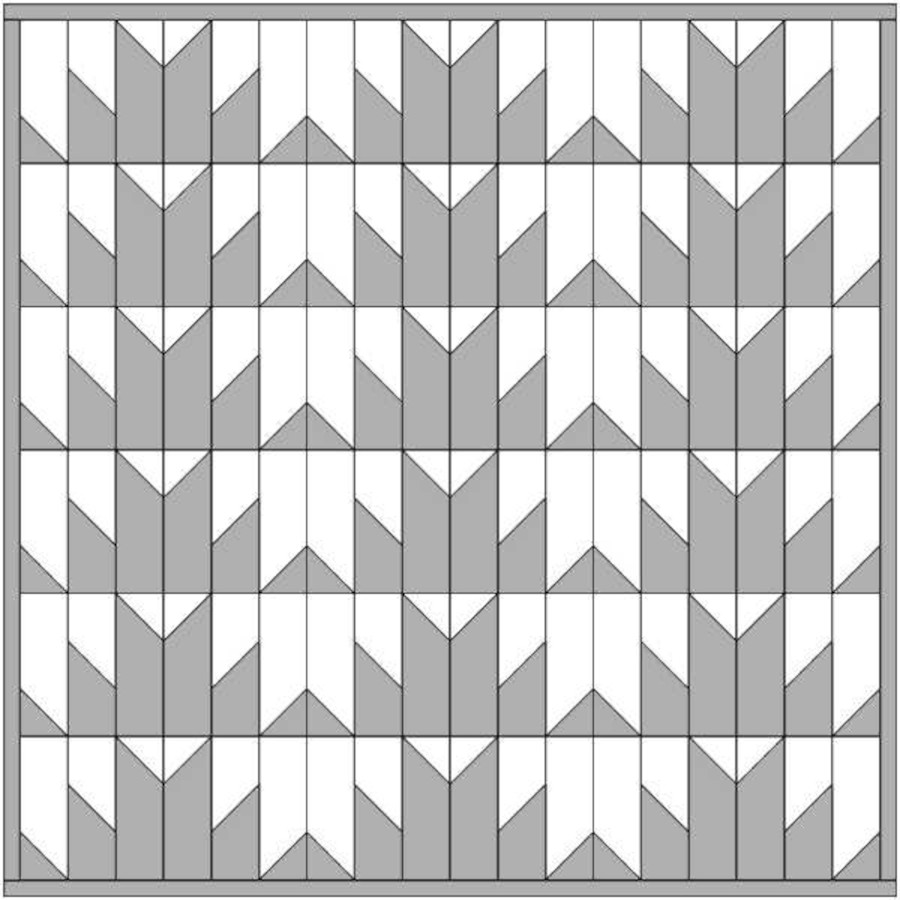
2 – Mirrored Mountains
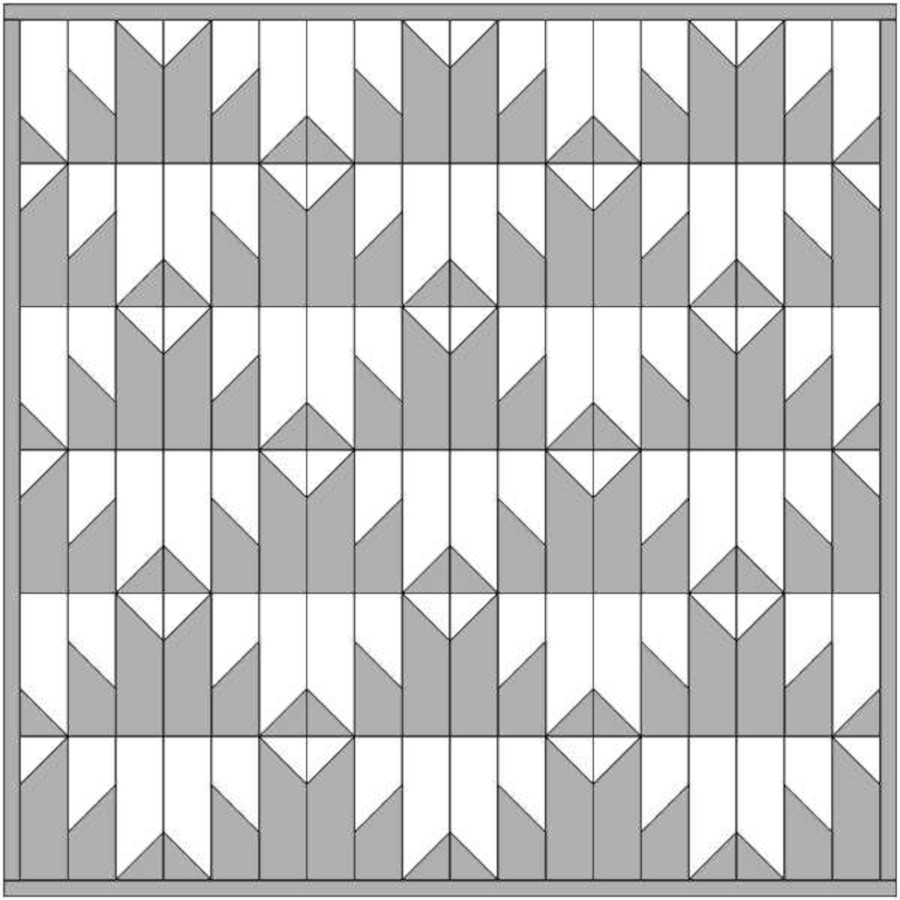
3 – Aztec
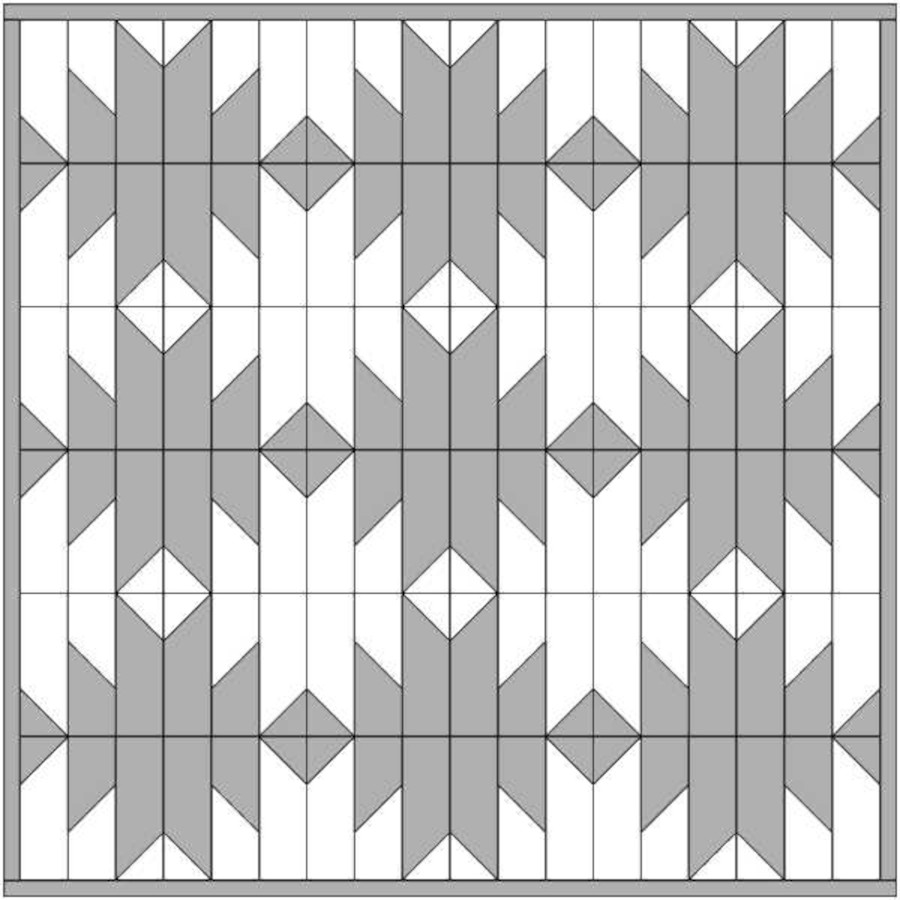
4 – Jagged Arrows
5 – Buzzsaws
6 – Buzzed Lightning

7 – Spinning Buzz
8 – Night and Day

9 – Sunset Reflected on Water
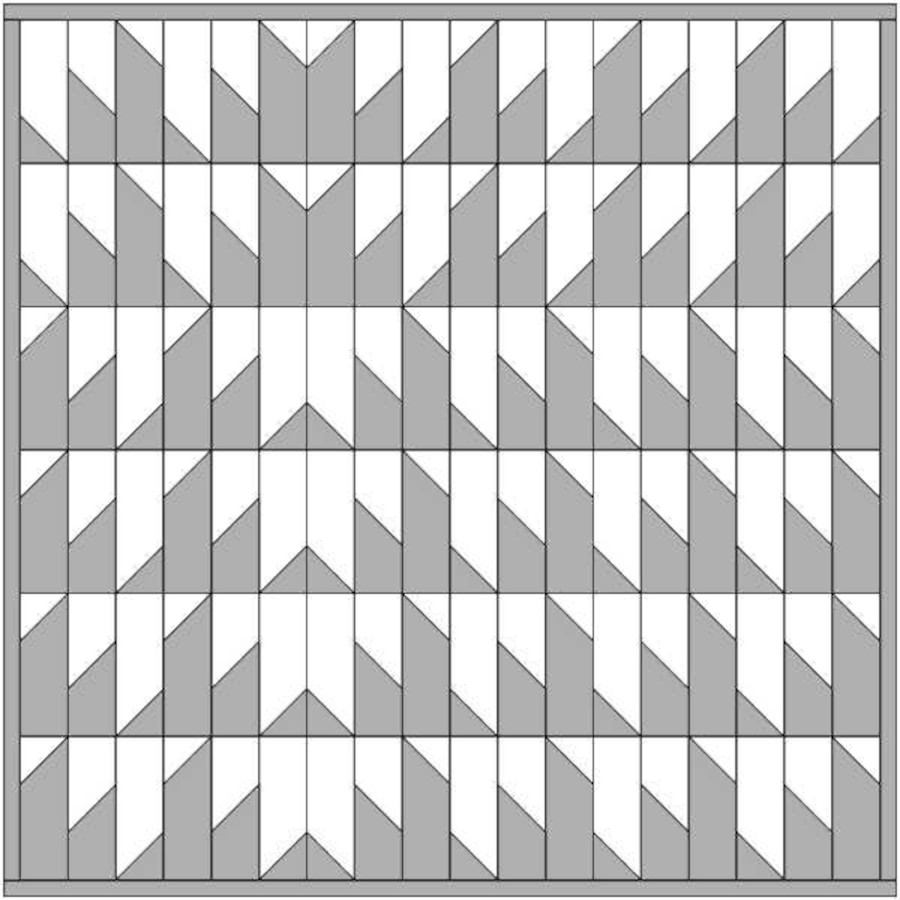
10 – Flowers in Pots
Bonus
If you want to play on your own, I’ve included a layout below with both up and down Delectable Mountains options. Simply make some photocopies, cut the units apart and play on your own.
If you’d like to see the previous iterations of our Quick Quilt Series, check these out: Half-square triangle, drunkard’s path, “Y block” , four-patch, One Round Log Cabin, and Flying Geese.
How to make your own Delectable Mountains quilt
If you want to make a Delectable Mountains quilt, here are some good links and tips:
- In one method, Delectable Mountains start out as a large half-square triangle (HST). It is cut into strips and rearranged, then resewn into the final block. Here’s a video for the HST method with four strips and this one with three strips.
- If you want mountains that (from left to right) go up in one block and down in another block, you need to carefully place the diagonal of the HST before cutting – to get one up and one down, cut one block from the bottom left to top right and the other from top left to bottom right or layer blocks right sides together (RST) as in the video.
- In this method, you work from strips (great for scraps!). Here’s a video for the strip method.
- Just like the HST method, to get mountains that go up and down, you need to sew the diagonal in opposite directions.
Hot tip: Because you are reversing the placement of the strips in both methods, the diagonal needs to be placed OPPOSITE of your desired diagonal placement. If you’re making pairs, it won’t matter, but some of my layouts require specific directions. If you cut with the diagonal going from bottom left to top right, the finished block will go from top left to bottom right.
Note: Both these methods result in a slight rectangle, since you are using up more seam allowance horizontally vs. vertically. If you want to make one of the designs that use a block on its side, you will need to end up with a square for all your blocks. Here are two methods:
- Square up with a ruler to the desired size (you WILL lose one or two of your HST points on the sides)
- After cutting into strips, trim the diagonally sewn strips (on the side away from the diagonal seam) to the unfinished size of the block PRIOR to sewing them into the finished block. This will take a little longer but will preserve your points. Make a test block to determine what size square or strips you need to start out with. The more strips, the more horizontal seam allowances.
If you want to make one of my designs, carefully note how many blocks are made in which direction (up or down) so that you have the block positioned correctly before you cut to create up or down blocks.
Feel free to share your own unique designs in the comments section!
Voting is now closed!
In the next blog post in this series (published on March 28), we’ll take the design with the most votes and create a variety of quilting designs for you to choose from. Finally, we’ll quilt the project with the quilting design that gets the most votes, and then give the quilt away to one lucky winner—along with some cool APQS bling!