
Get the perfect backing yardage for quilting projects every time
Download backing yardage calculation chart
Sometimes I walk into my sewing room, close my eyes and imagine that I’ve just stepped off “de plane” on Fantasy Island. A handsome man guides me to a dreamy quilting studio that’s so perfect I can’t imagine ever leaving. Every quilting tool and fabric imaginable are at my fingertips. There’s a place for everything, and everything’s in its place. When I finish a quilt top, someone taps on the bungalow door and delivers a backing fabric that matches it perfectly. It’s also perfectly square, meticulously pressed and exactly the right size. Ahh … heaven!
But then I snap out of it and back to reality, where my studio’s currently in a “re-org” mess, nothing’s in its place, and the idea of digging through piles of fabric to find enough yardage to make a quilt back is truly the fantasy.
Our blog post about making scrappy quilt backs is full of tips if your studio looks like mine and long hunks of fabric yardage are nowhere to be found. But let’s say that YOUR reality includes plenty of backing yardage for your next quilt and you just need to know how to put it together efficiently so you can get to quilting.
No matter what size quilt back you need, these tips are universal:
- If your fabric has “direction,” then use the layout that ensures the print is oriented correctly for your project even though it may not be the most efficient use of yardage. You may also need more yardage to match design elements.
- Busy prints act like great camouflage if you’re not confident about your quilting skills just yet.
- The backing fabric should be in the same state as the quilt top fabric. If the quilt top fabric was pre-washed, then wash the backing first. You want the top and backing to shrink in a similar fashion.
- Trim the selvedges off and use a ½-inch seam to construct the back. Set your stitch length slightly smaller than normal and use a matching thread. Press the seam(s) open to reduce bulk.
- Keep in mind that vertical seams are harder to load on to a longarm frame, and they can increase the chance of pleats and puckers in the backing. If you must use vertical seams, check to see if you can load the quilt sandwich sideways so that those seams are parallel to the backing roller instead of wrapping around it.
When you piece two fabric strips together for backing, it seems logical to put those seams right in the center of the quilt (either horizontally or vertically). However, quilt preservation experts and even judges will tell you that’s not the best place for them. Quilts typically get folded in half, then in half again for storage—right where that seam falls. That puts extra wear and stress right on the seam line that causes premature wear and tear.
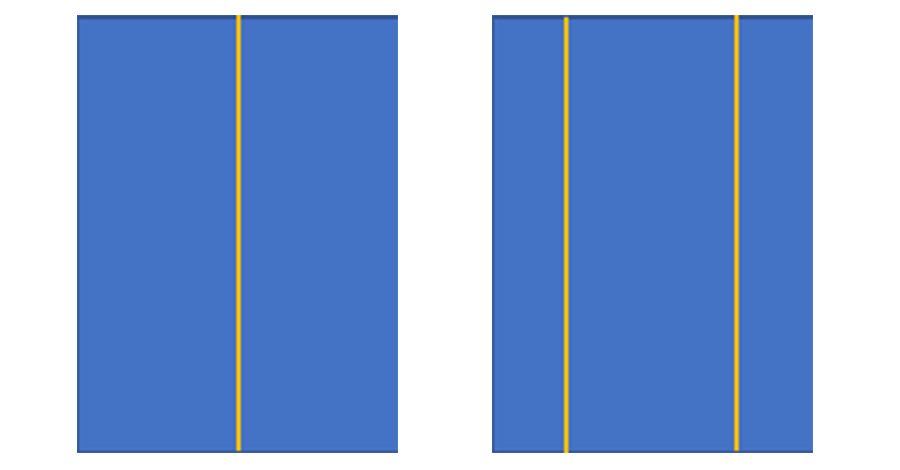
Instead, cut one strip in half lengthwise, and then attach half to each long side of the remaining strip. (When you need three strips, this will automatically happen.)
We’ve created a handy downloadable tool that will help you calculate backing yardage for your quilting projects. The chart is based on quilt sizes that include a 10-inch drop on three sides, along with an extra 8 inches of fabric in both directions to provide extra for longarm quilting. However, actual quilt sizes vary greatly. Just because a pattern tells you the quilt is “twin size” doesn’t mean it will fit your child’s bed.
Download our handy Reference Chart for Quilt Sizes for more information on standard bed sizes and simply use the Backing Yardage Calculation Chart below to determine how many yards you need to make a finished quilt a reality!


