
Attacking scrappy backs – here’s how to get your backing measurements right every time

As a quilter, you already have a superpower! If you are also blessed with awesome forethought and you buy backing fabric when you buy the quilt top fabric, you’re definitely a superhero! The rest of us plop the quilt top fabric bolts on the cutting counter with nary a thought for the quilt back … until we finally get the top done weeks (months? years?) later. Then we moan and groan that the fabric’s long gone from the shelves!
We swear that next time we’ll buy backing fabric when we buy the quilt top fabric (promises, promises). Then we use a random hunk of fabric or muslin, or piece together leftover quilt top scraps to make the backing. When a fabric is in short supply, it’s tempting to skimp on backing size and just “make do.”
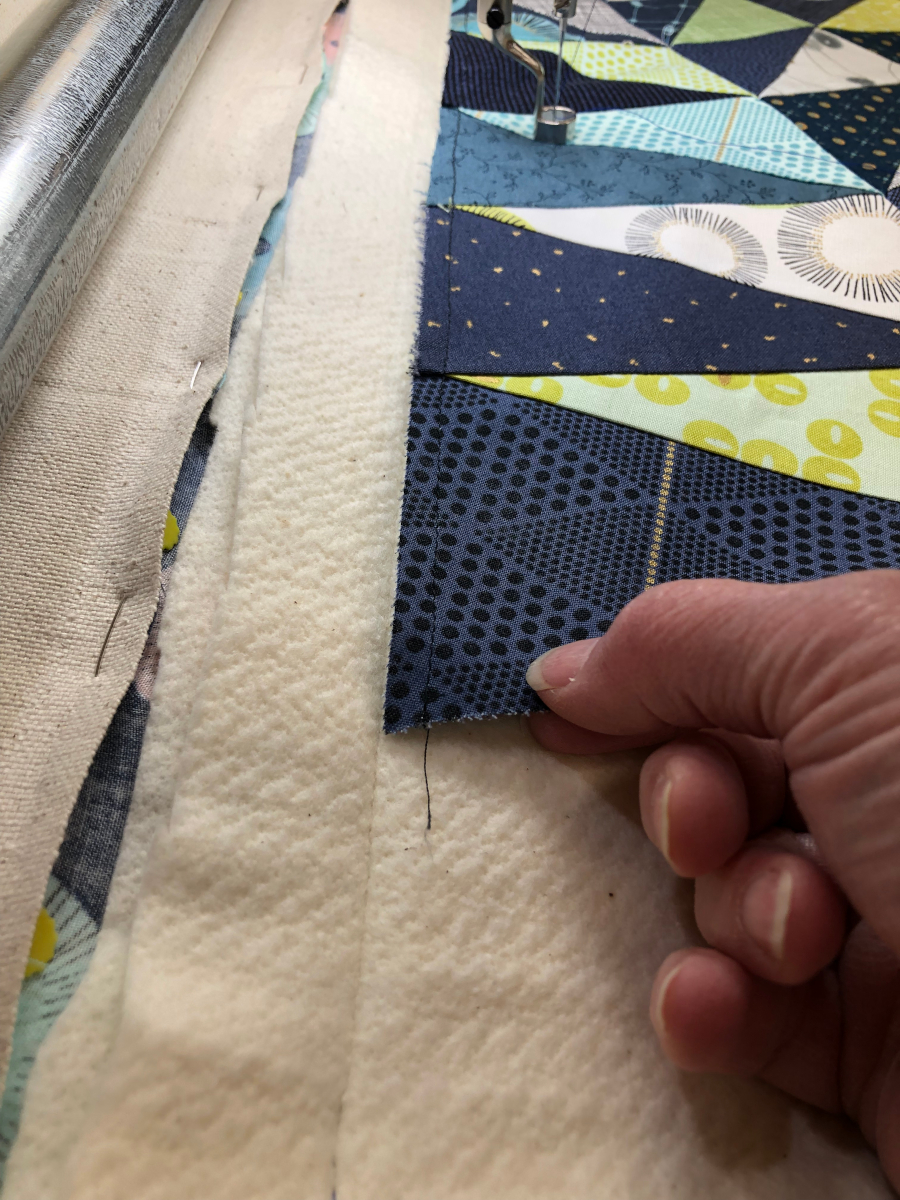
That’s not a good superhero move. It’s really important to make sure the backing is big enough for the quilt top, plus a margin of 4 inches on each side for longarm quilting. If you’re going to densely quilt the project or you’re using lofty batting, add another 3 inches to the bottom of the backing for safety.
If you’re not a longarmer, it’s tough to understand why the backing and batting need to be so much bigger—especially when one’s already scrimping to piece the backing together from scraps. If forced to choose between extra backing width or extra backing length, a longarmer will choose more length every time. Here’s why…
On a longarm frame, we attach the backing fabric to a “pickup” roller and then attach the batting and quilt top to the backing so they’re no longer independent of each other.
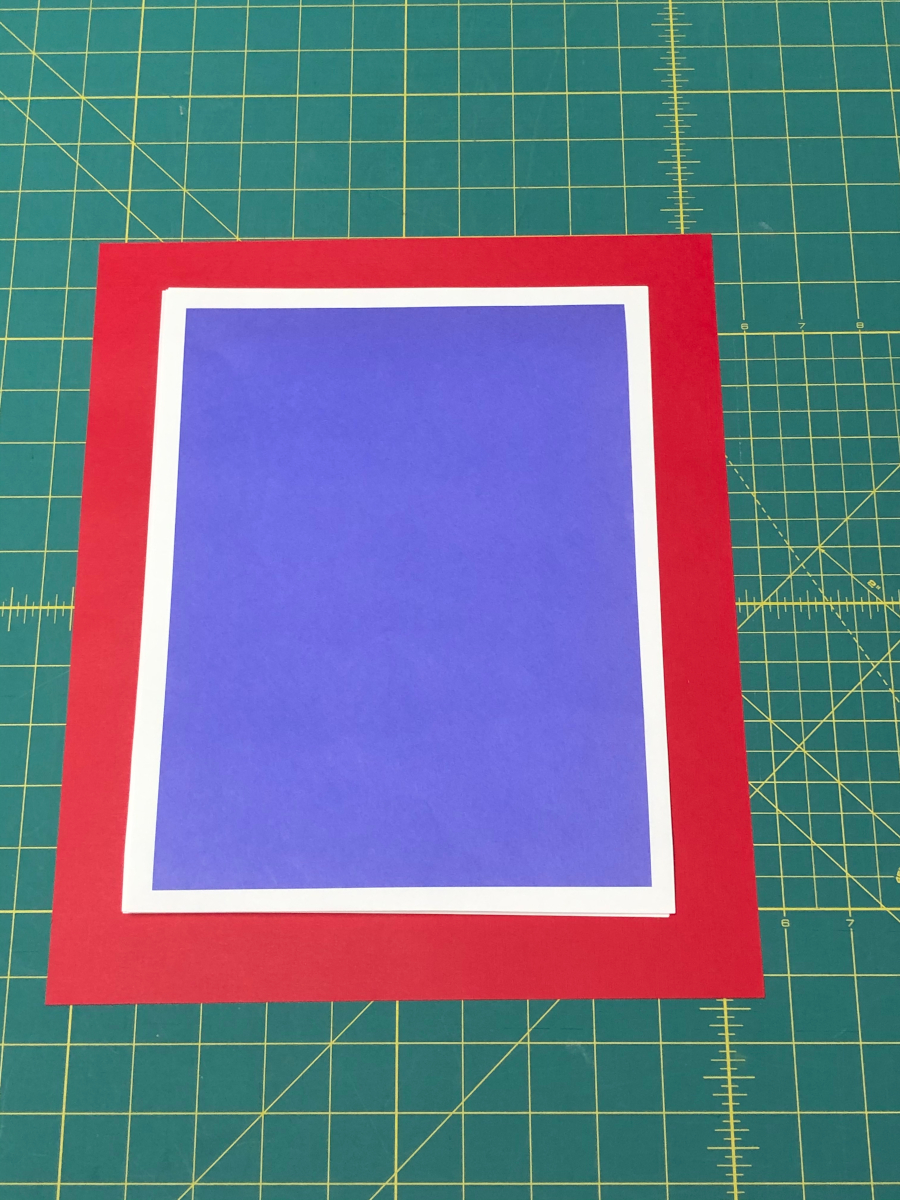
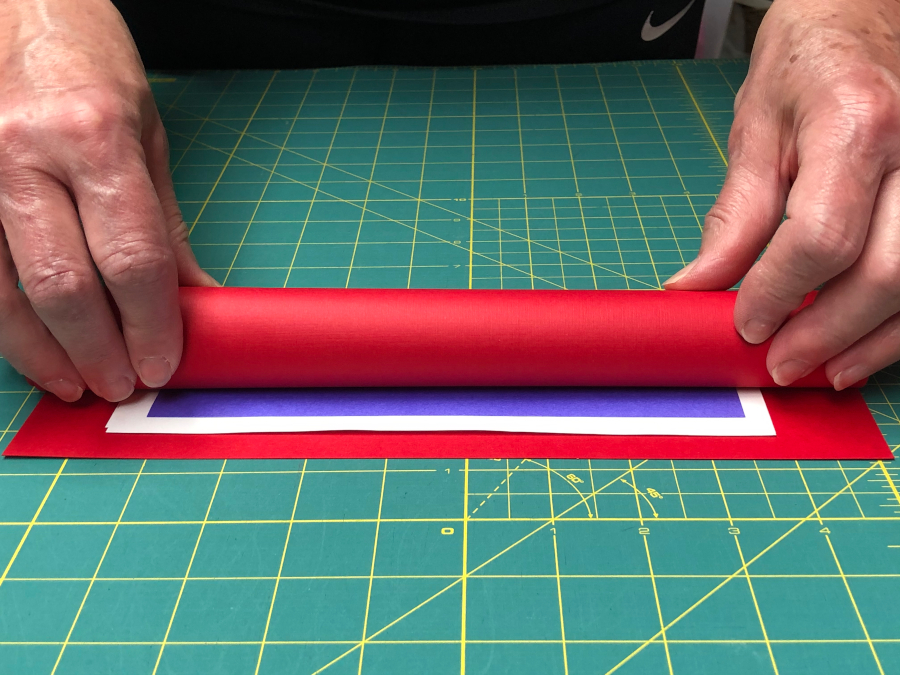
We wind the finished quilt portion on to that single roller as we go. But the three quilt layers don’t wind on the roller at the same rate. To illustrate, imagine stacking several sheets of paper together. In my example below, the purple paper represents a quilt top, and the pink paper is the backing. The white papers represent the batting.
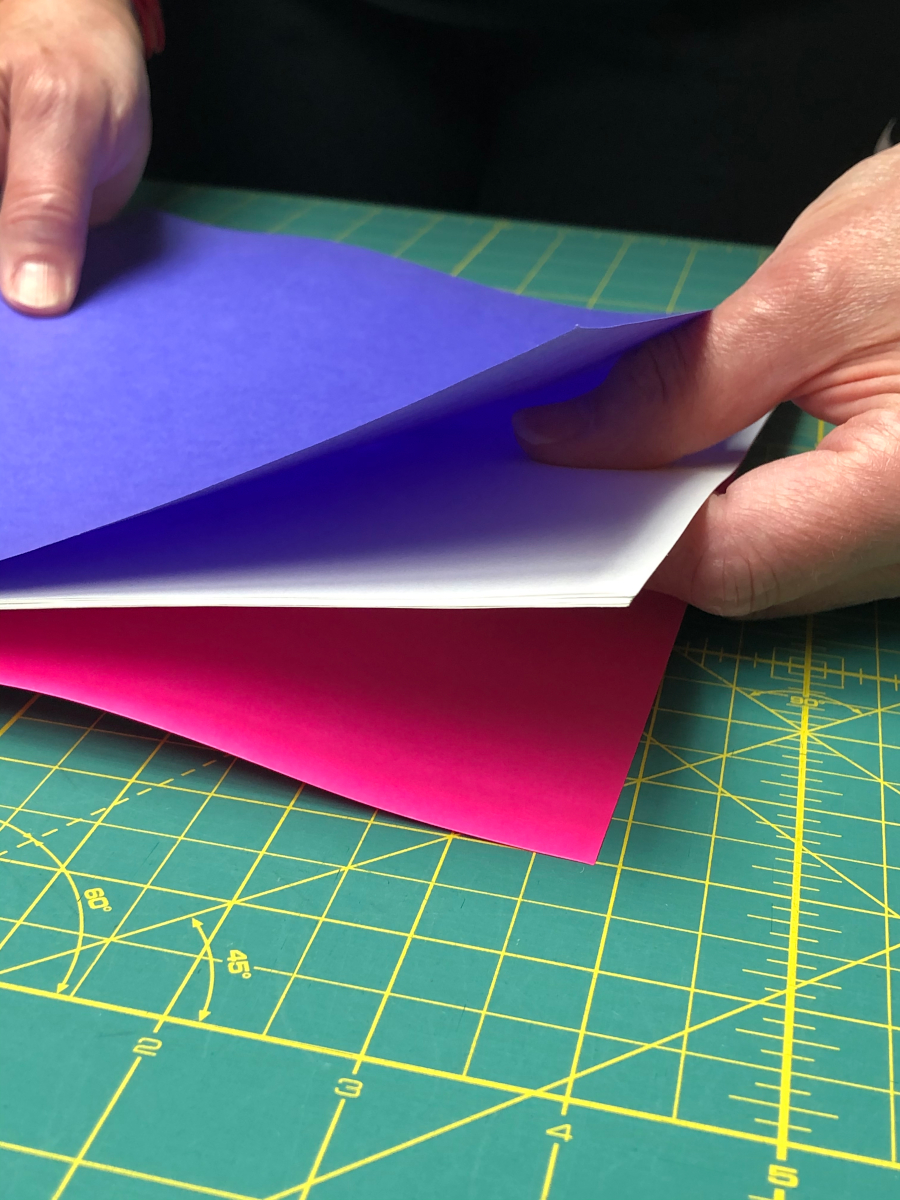
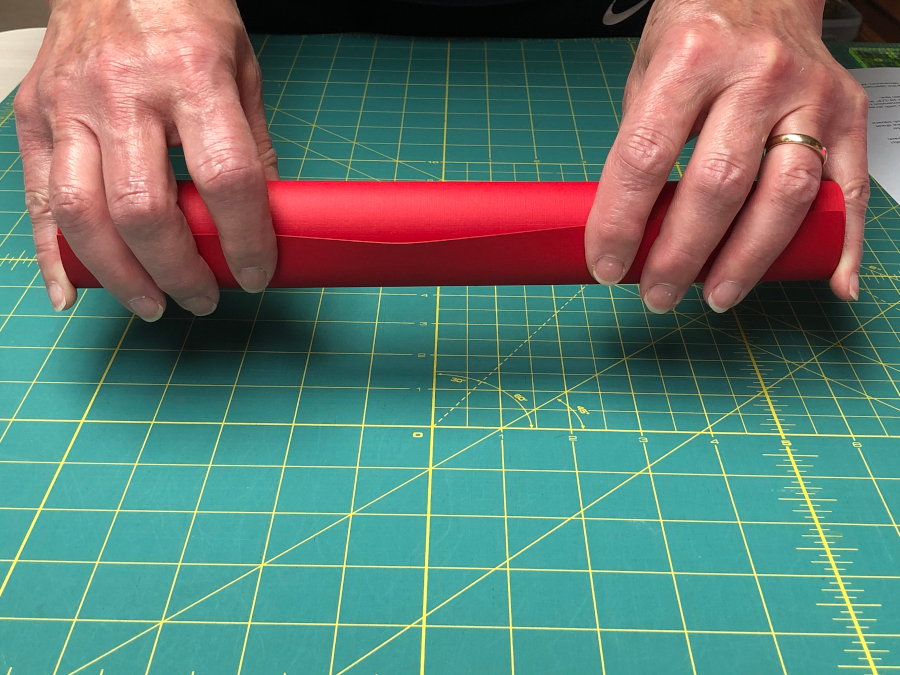
Keep one edge of the papers aligned and then roll the paper stack into a tube, starting at one end. This is just like the quilt layers roll on to a longarm frame.
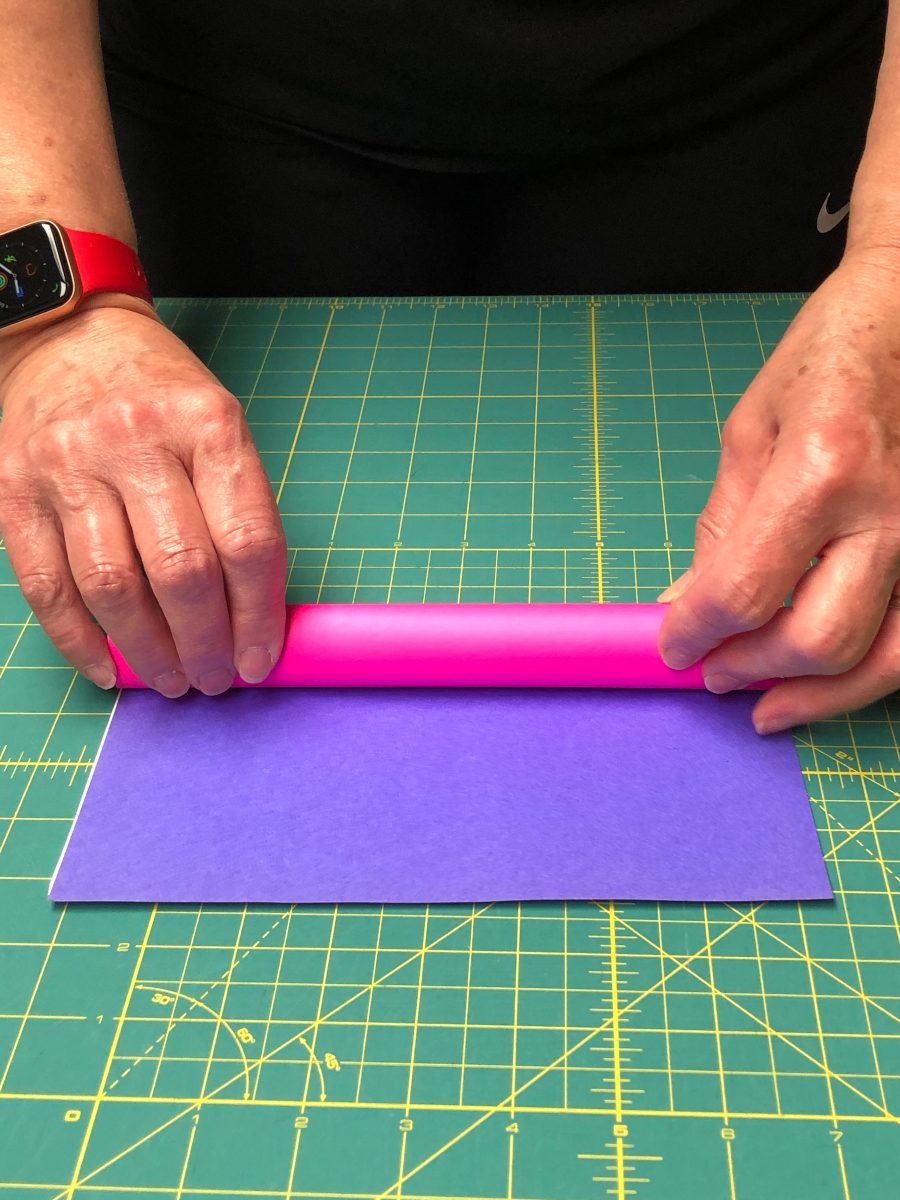
Even though the papers stacked nicely on top of each other when flat, look at how their bottom edges stagger when the stack is rolled up. The pink “backing” is now too short for this paper quilt top!
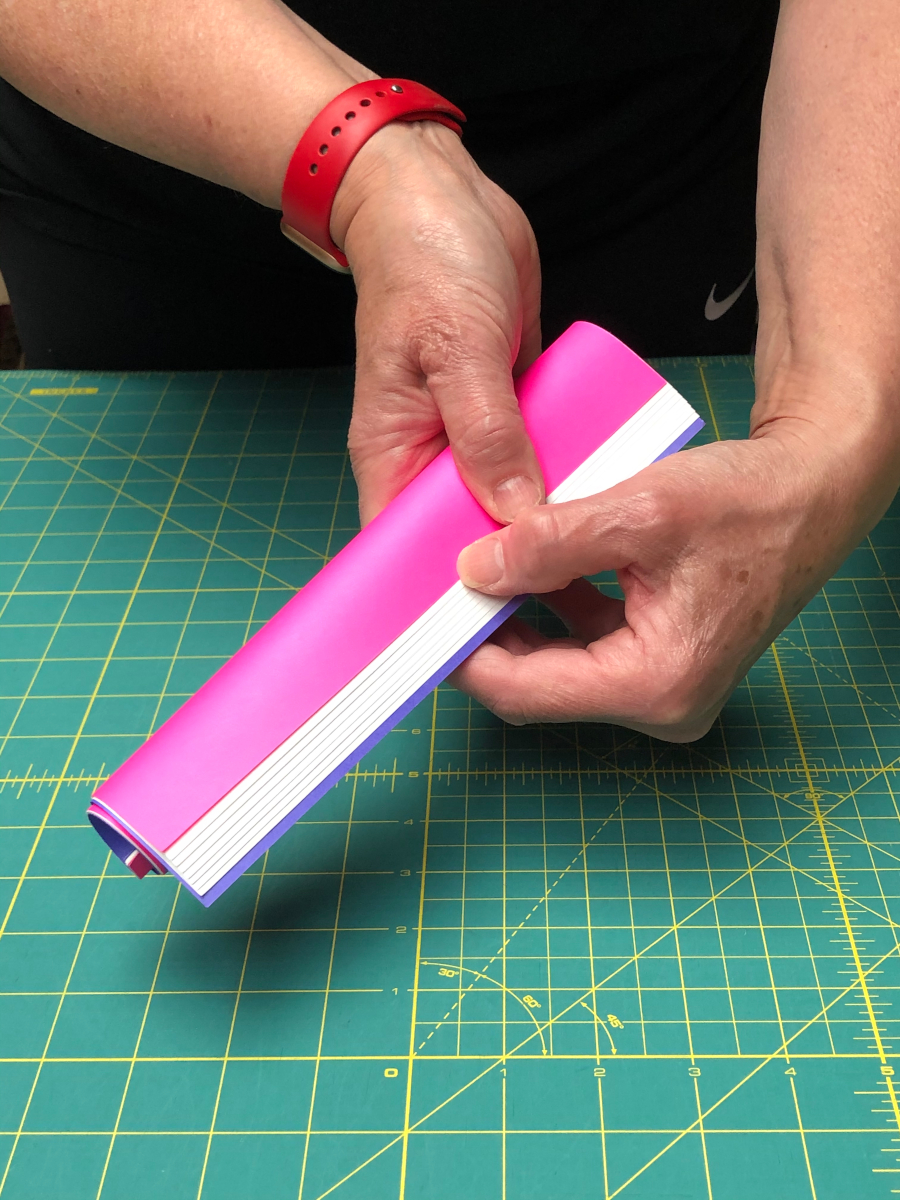
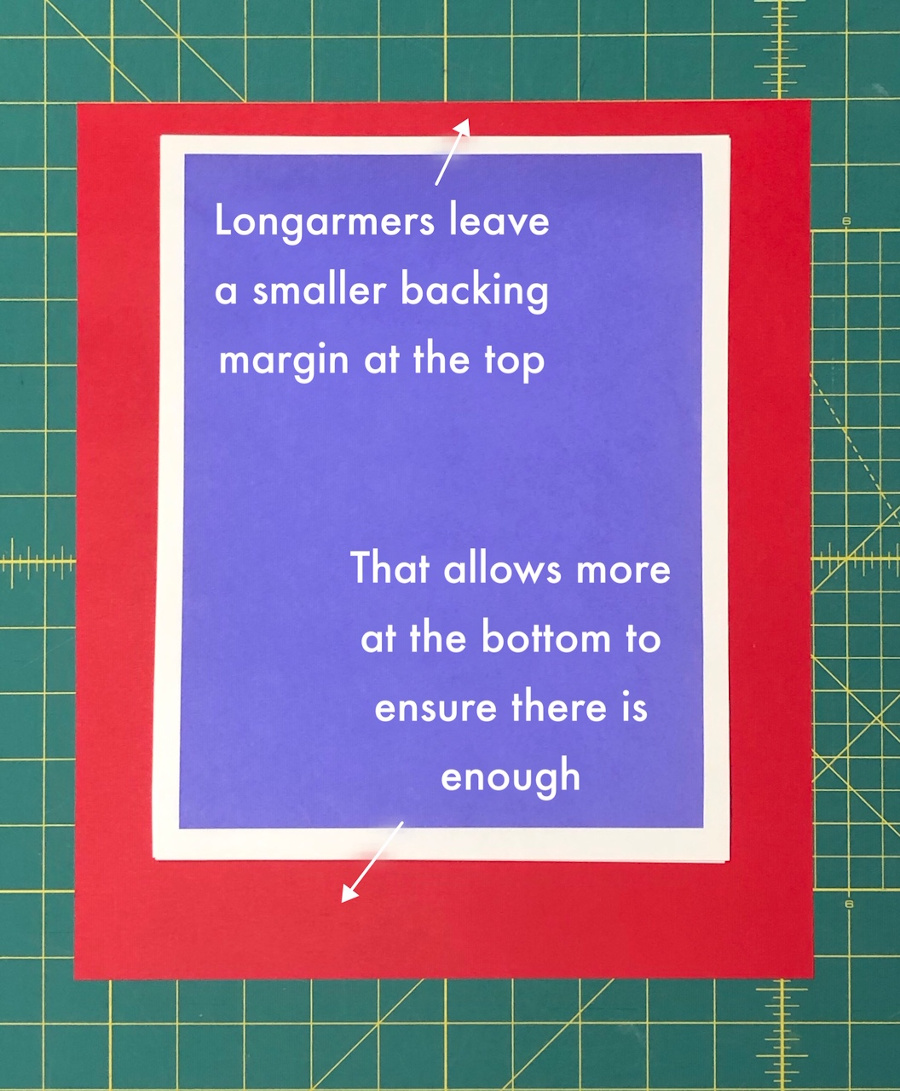
That’s exactly how things work on a longarm frame, and why we need extra backing (and batting) length—and even more length for heavy quilting or puffy batting. Let’s do the same illustration again … this time with a piece of red “backing” paper that’s larger than the other layers.
Now we’ve got plenty of backing!
To be clear, longarmers won’t actually “center” the quilt top so that all four sides have that extra 4-inch backing margin around the quilt, as you see in the photo above. We typically scoot the top down 1-2 inches from the top edge of the backing fabric before we secure it to the backing. This allows us room to quilt off the top’s edge if the design requires it but provides an insurance policy of having 4-6 inches of extra fabric at the quilt bottom.
Now that you know why longarm quilters are so demanding when it comes to backing size if you must scrap the back together, try these tips that will boost your backing superpower skills! You’ll need graph paper and some colored pencils or markers (ideally a different color for each different fabric you want to use for the backing).
- Measure your finished quilt top and then add 8 inches to the length and width to determine how large your scrappy backing needs to be. Draw a rectangle on one sheet of graph paper that represents that size. Make a note of the scale each square on the paper represents (e.g. each square = 2 inches).

- Gather your fabric scraps and trim the pieces into squares or rectangles with straight sides. To make life easy, cut each shape so it ends with a ½-inch dimension to account for seam allowances. For example, cut the scrap to 15-1/2” x 19-1/2” instead of 16” x 20”. Label the fabric scrap with the dimension and mark its grain line.
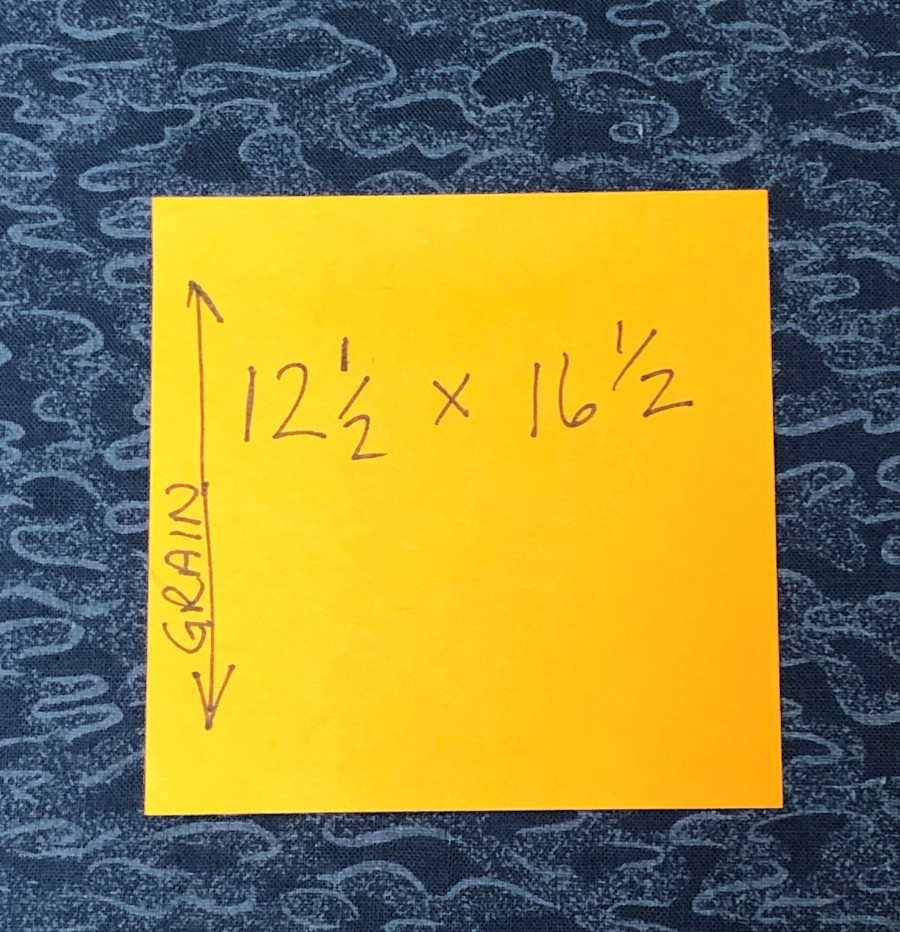
- Cut out a piece of graph paper that represents each scrap using the appropriate scale. However, cut it to match the FINISHED size of the scrap, excluding the seam allowances. Mark the finished size of the scrap and grain line on the graph paper. Color the paper scrap to represent the fabric. In the example, the fabric label shows the actual size of the scrap (12-1/2” x 16-1/2”) but the graph paper template size and label will be 12” x 16”.
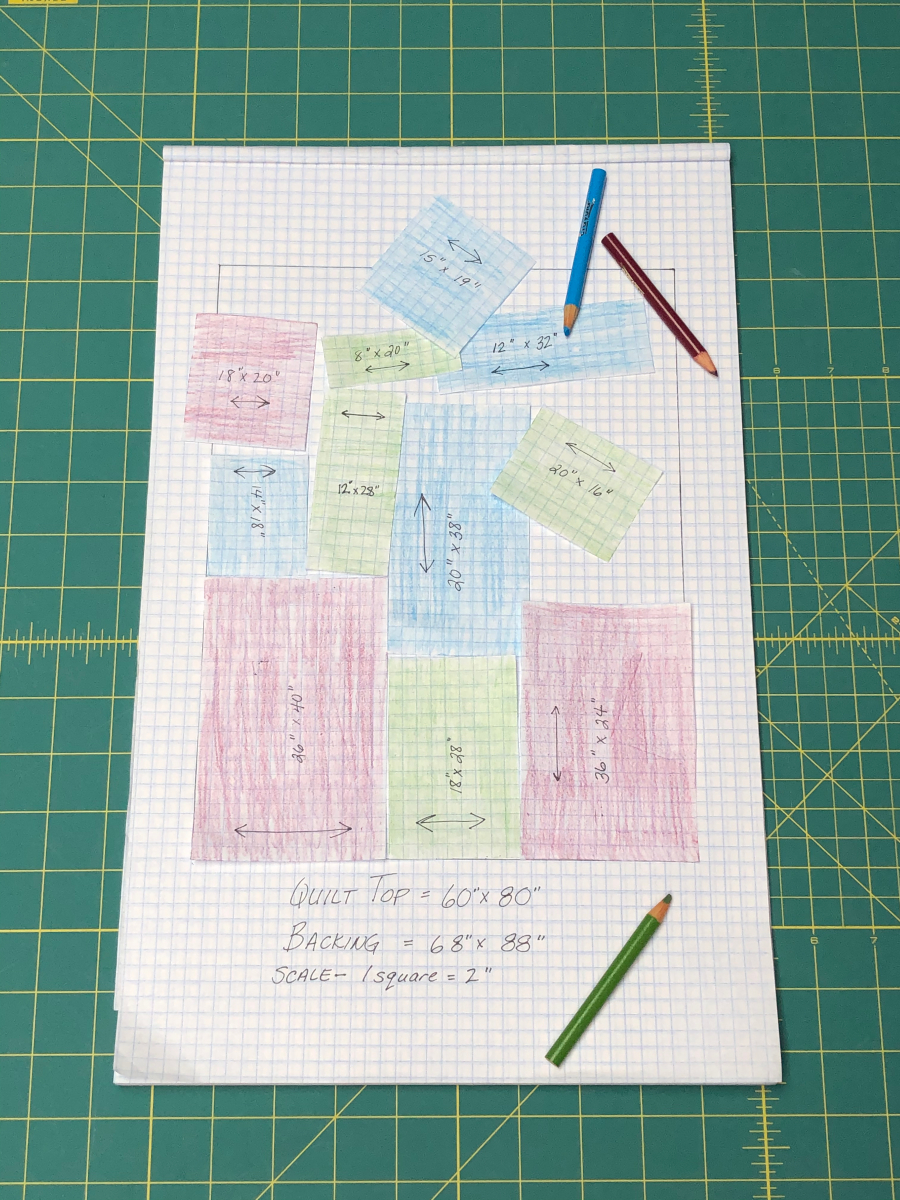
- Now place the colored graph paper pieces on to the template you made for the large backing piece, playing with these puzzle pieces to make it work. You may discover that you’ll need to trim some pieces further or split them and shift them more. It’s much easier to cut and shift paper pieces than the precious fabric!
- Though it may not be possible depending on your scraps, try to make the grain line go all the same direction. That greatly reduces the chance of puckers and tucks on the quilt back caused by shifting grain or stretching from the additional seams as it’s loaded or as the longarm moves over the quilt sandwich.
- Quilt backs load much easier on a longarm frame and don’t distort as much if the seams run horizontally. Try to keep vertical seams to a minimum.
- Work to keep seam intersections staggered to reduce bulk whenever possible. If bulky seams on the quilt top happen to align with a bulky intersection on the quilt back, it’s an invitation to distortion, thread breakage, and tension issues, or even a broken needle.
- Once you’ve completed the backing layout map with your graph paper pieces, it’s time to construct the quilt back. Tape the paper pieces in place on your layout map. Re-cut and label your fabric pieces as needed. You may even want to add letter labels to your layout map and to the fabric labels to help with construction.
- Press the backing seams open to help reduce bulk and help the backing roll on to the longarm frame smoothly.
- Backstitch any seams that will fall around the backing’s outer edge to prevent the pieces from pulling apart when it’s loaded on the frame.
Tuck these tips into your superhero suit, and the next time you need to attack a scrappy back, you’ll come out the winner in the battle!


