
Quilting the Quilt: Ready, set, quilt
For decades quilters only had their hands, a needle and thread as tools for putting quilts together. Then along came sewing machines to speed things up, and now longarm machines provide even more time-saving features such as computerization and eliminating basting.
However, not everyone has the space for a large longarm frame. While a regular sewing machine (often called a “domestic” machine) can still suffice for quilting quilts, it takes lots of maneuvering, patience, and stamina to quilt anything much larger than a lap quilt using one.
Squeezing a bulky quilt through its throat is like trying to stuff a watermelon into a juice glass! Now midarm and longarm machines are available in compact sit-down table versions or small stand-up “hoop frame” models. These can take up as little as 10-15 square feet of space—great for tight quarters. On a sit-down longarm machine you’ll gain lots of throat space to make quilting much easier, but you will still move the fabric under a stationary needle, much like moving a piece of paper underneath a stationary pencil.
Adding another table behind the sit-down machine’s original table helps support large quilts to make moving the fabric easier.
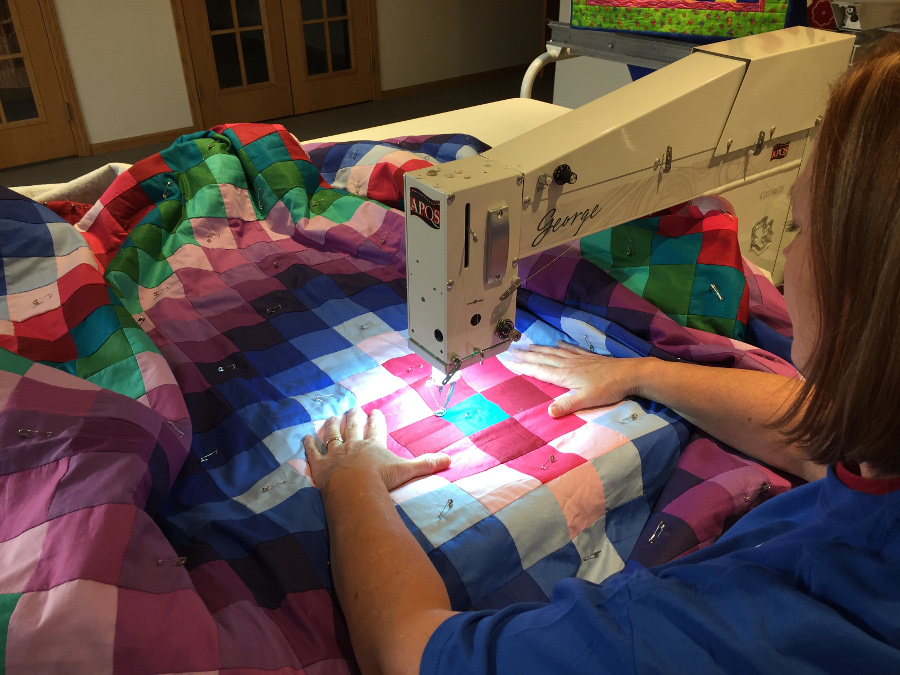
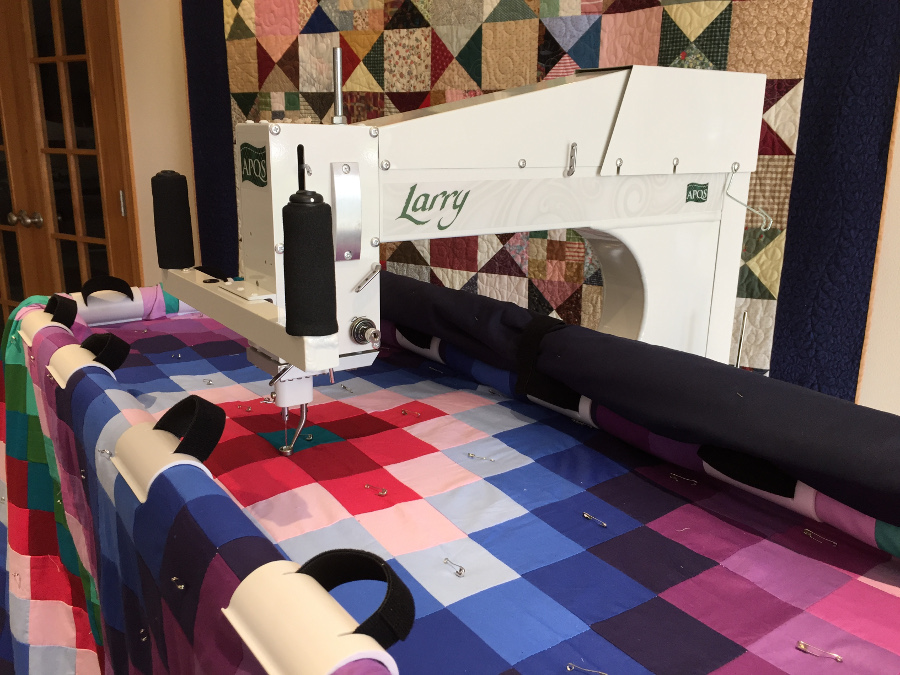
With a longarm hoop frame, the sewing machine moves across a stationary quilt sandwich. This is much easier for many quilters because it feels natural–like holding a pencil to draw on paper.
However, in either case the quilt must still be basted to keep the layers from shifting and to reduce the chance of pleats and puckers as you quilt. These steps will help ensure your project turns out wrinkle-free!
Step 1: Prepare the quilt layers
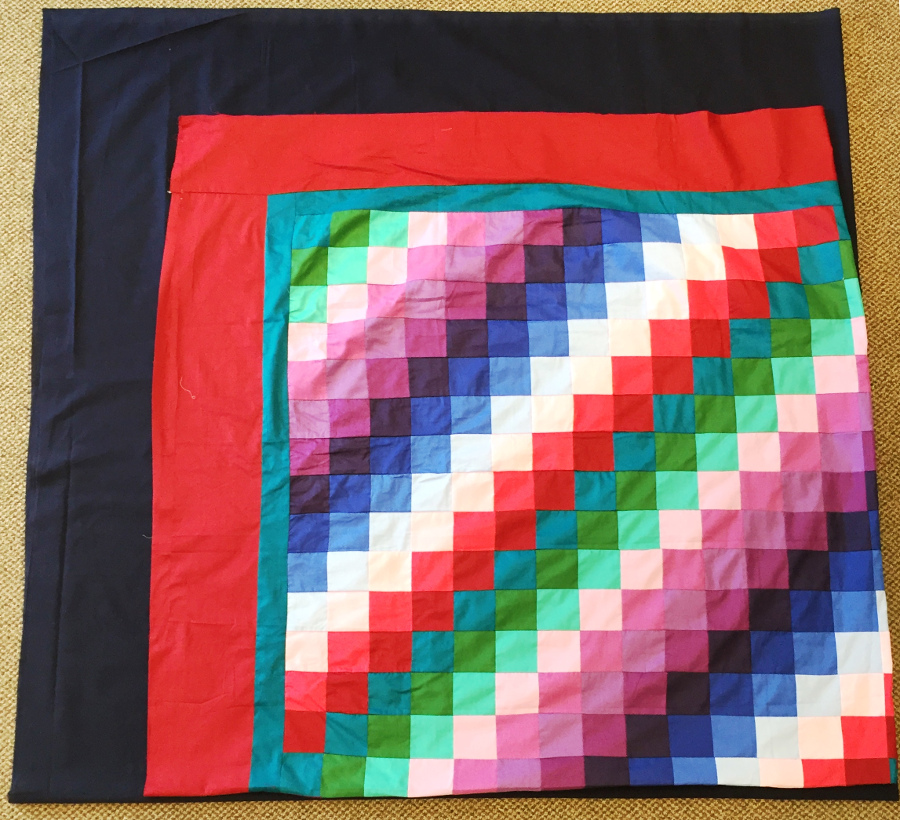
Make sure your backing and batting are larger than your quilt top. With a sit-down machine you can get along with only a couple of extra inches all around the quilt. However, the backing and batting may need to be 7-9 inches larger than the quilt top to allow enough fabric for attaching it to the hoop frame. To quickly verify everything, fold your backing fabric into fourths, and do the same with the quilt top.
Align the folded edges and then check the backing raw edges to ensure you have plenty of fabric. (You can also do the same with your batting piece—fold it in fourths and lay it between your top and backing for a doublecheck.)
Press the quilt backing and quilt top and trim all thread tails. To prevent the quilt seams from stretching or unraveling, be sure that you “back tacked” where any seam meets the outer edge of your quilt, such as the border intersections. You may even wish to baste the entire perimeter of your quilt just inside the ¼” seam allowance to prevent stretching as you quilt.
Step 2: Layer the quilt
Pin basting is done on a hard surface such as a table top or hard floor. Ideally, your surface should be at least as large as one of the “short sides” of your quilt, but that isn’t always possible. If you can’t find a table large enough to support the entire quilt, you can still baste
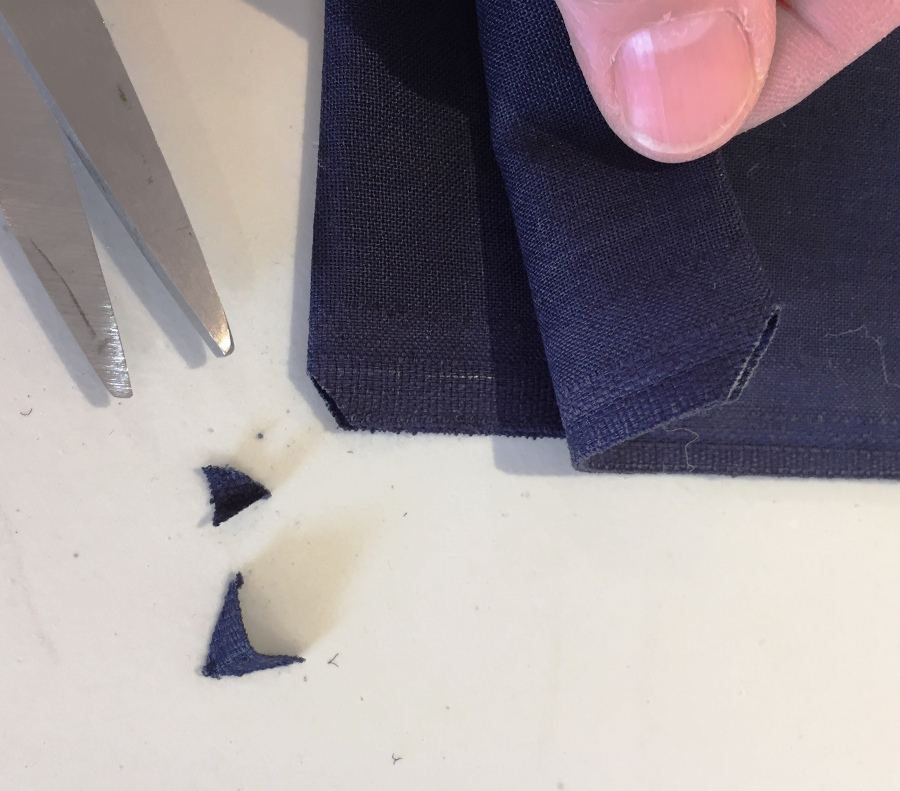
the layers in sections as described below. Find the “center” of the backing fabric by folding it in half and aligning the raw edges. Mark the center with a safety pin at the top and bottom, or snip a small piece from the fold to quickly mark the center.
Using painter’s tape or masking tape, secure the backing fabric to your table, wrong side up. Start in the center and work out toward the ends. Keep the backing smooth and flat, and pull it snugly. For larger quilts, you may need to let the sides spill off your table. In this case, secure only the sections that are on the table top. After you have layered the batting and backing and secured the center section, slide the “sandwich” to each side to secure the sides. Tape the loose backing section to the table and secure as described in Step 3.
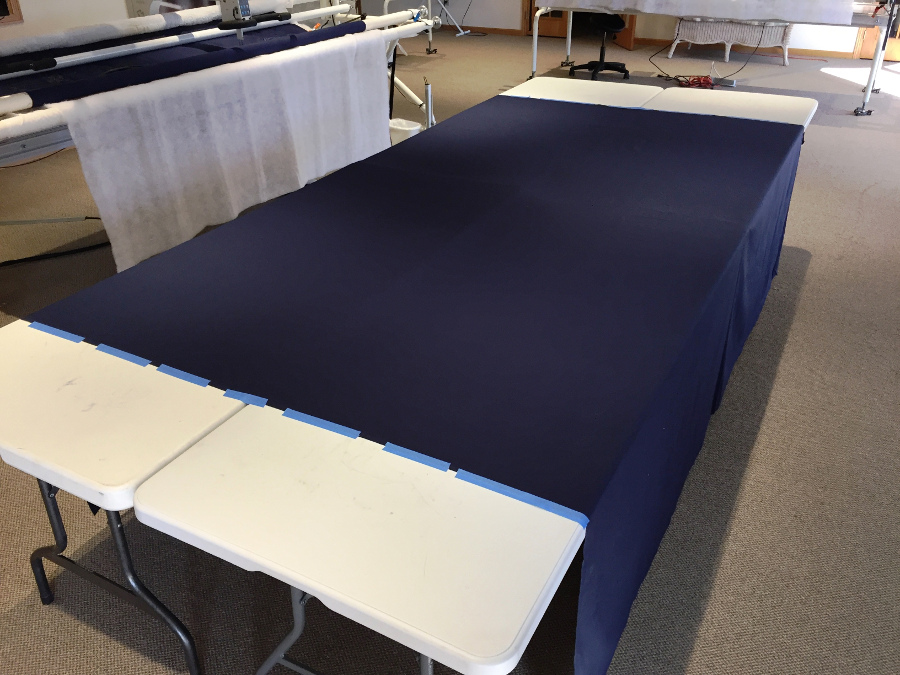
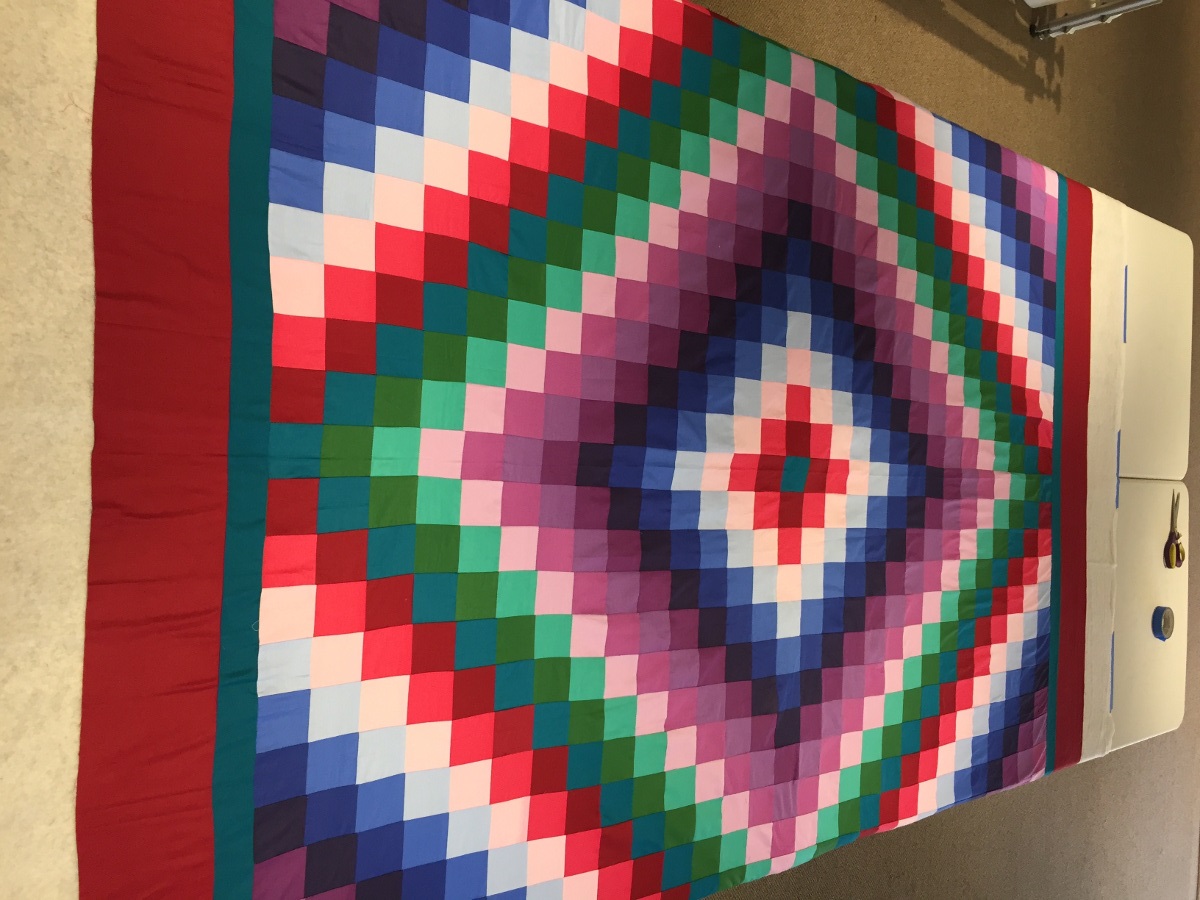
Now lay the batting gently over the backing fabric. Smooth the batting in place, but avoid stretching the batting. Make sure the batting is centered on the backing fabric. Next, find the center of your quilt top. Whenever possible, use a center seam as your “centering guide” to help keep your quilt square. Lay the quilt top on top of the batting, right side up. Align its center with the backing fabric center marks. Pat the quilt smooth from the center out, again avoiding stretching, pulling or distorting the quilt top.
Step 3: Baste the quilt layers together
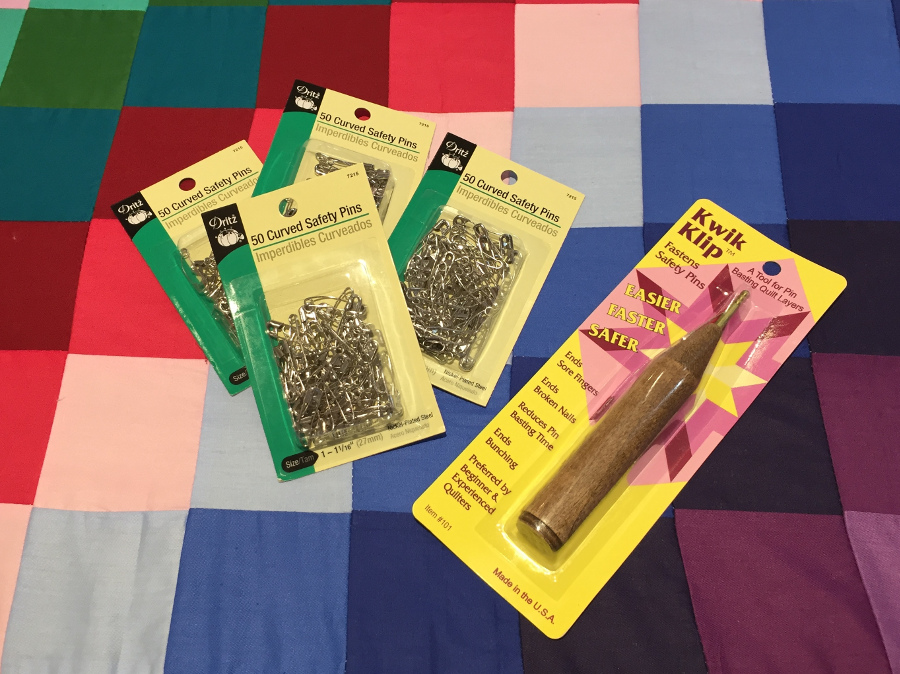
The last thing you want are puckers and pleats in your quilt. Take the time to properly baste the layers together and you won’t be disappointed. You can use safety pins, quilt basting spray, or even fusible batting. (Note: do not mark your quilt in advance before using fusible batting, since applying heat can actually “set” some marking tools.) Follow the package instructions with each product. However, if your quilt is large you may be happier with pins, which are easier to reposition if you encounter any fabric shift.
Use one-inch nickel-plated safety pins to hold the quilt layers in place. While larger pins are available on the market, you may be disappointed at the large holes left behind in your quilt. Nickel-plated pins prevent rust spots if you must leave the pins in your project for an
extended period.
A general “rule of thumb” is to space the pins about 4 inches apart (or even closer for some slippery polyester battings). You’ll find tools available to help you insert and close the safety pins—some as close as your kitchen drawer! A teaspoon can be used effectively to “catch” the tip of the pin as it enters and exits the fabric. Another tool, such as the “Kwik Klip™” can help close the safety pins and save on fingertips!
Try strategically placing the pins out of your intended quilting path. For example, if you want to stitch the quilt blocks “in the ditch,” put the pins in the open areas, avoiding the seams.
Remove the tape from the perimeter of the backing and turn the quilt sandwich over. Run your hand across the backing fabric. If your hand causes any fabric to “bunch up” against a pin, you’ll need to unpin that area and re-stretch that area to distribute the fullness.
That’s it! You’re ready to quilt!


