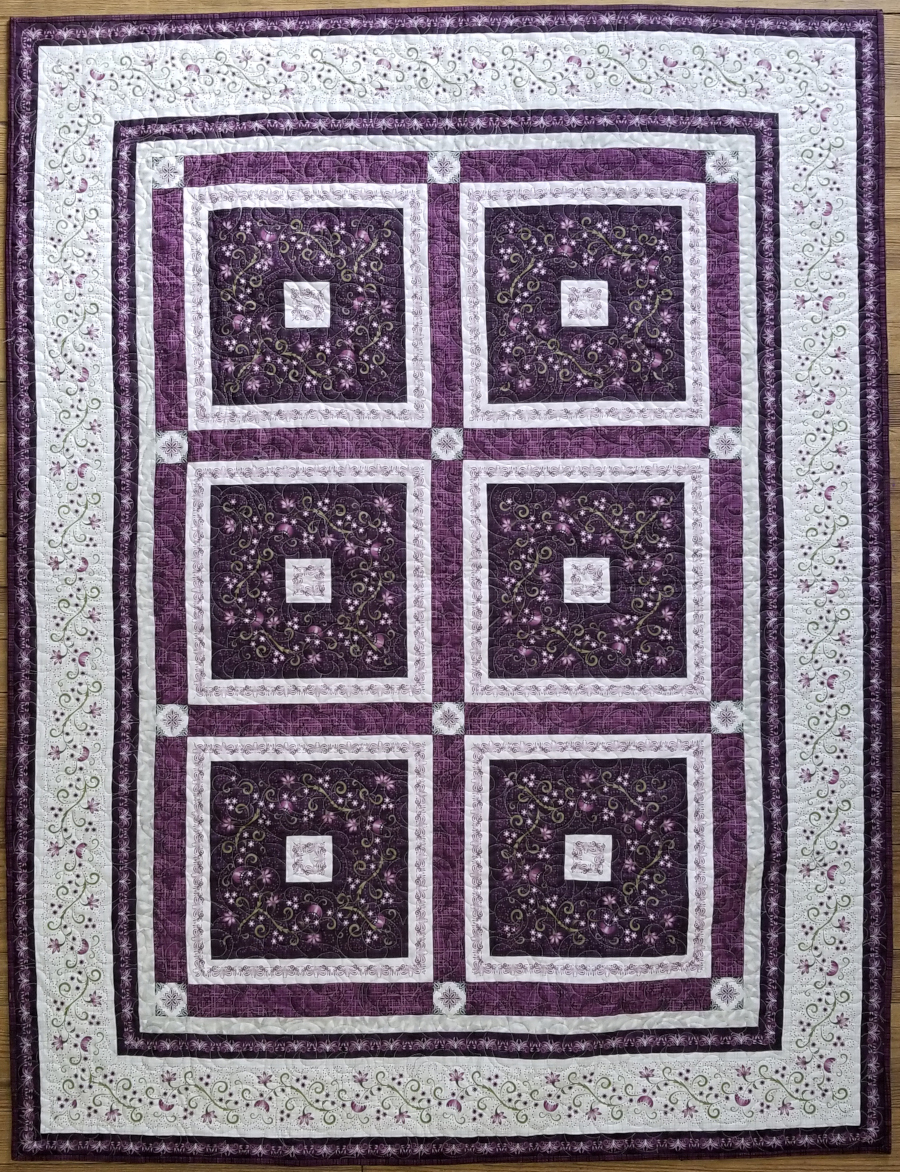
Free quilt pattern: Amour Quilt
Monique Jacobs of Open Gate Quilts is a quilter’s best friend. She is a mathematician who takes the math out of quilt making, a cheerleader for quilters, and a quilt and fabric designer who’s found her happy place—in her sewing room.

Monique’s goal in sharing her patterns, teaching, and knowledge is to make the quilter’s journey a pleasurable one. She came up with this month’s free pattern, “Amour Quilt,” to take advantage of border stripe fabric, such as those she designs for Maywood Studio. In this quilt, mitered corners and quarter-square triangles really make the border stripe sing!
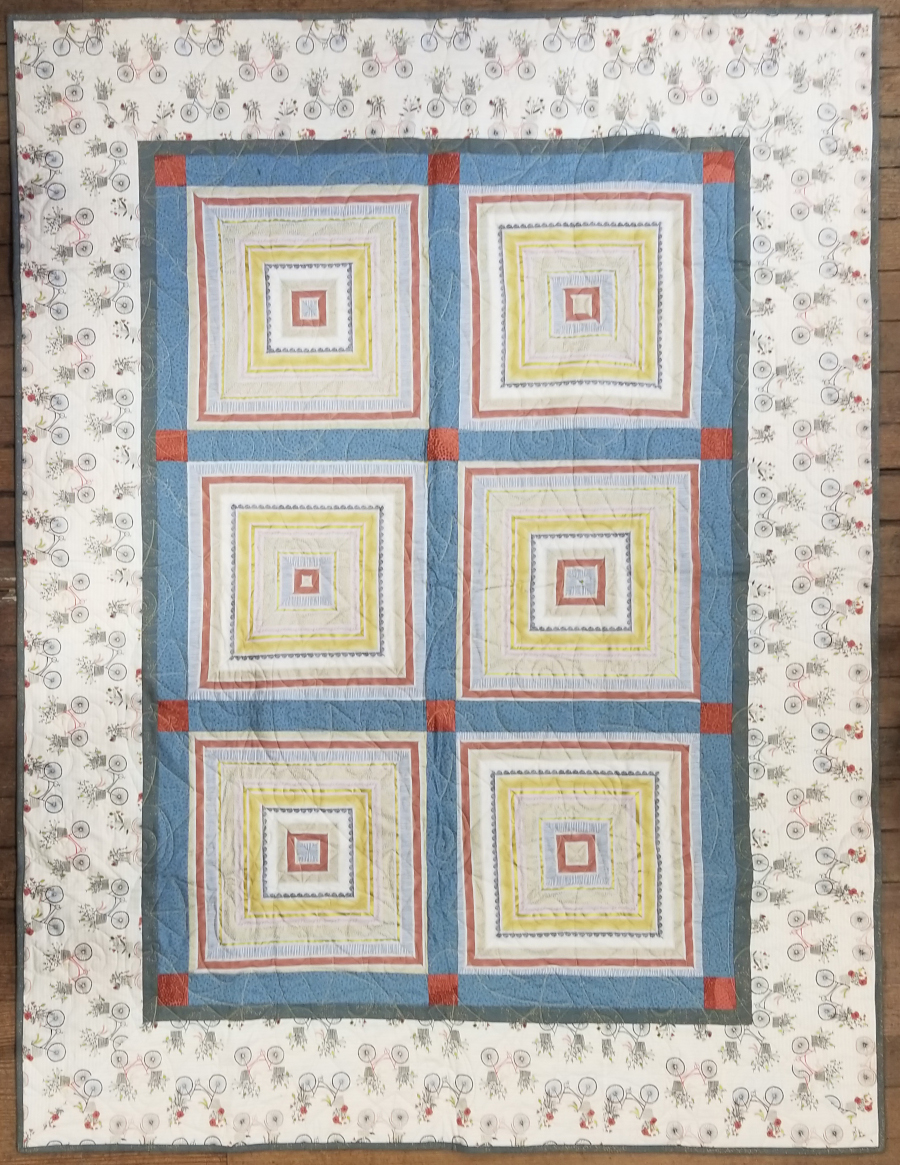
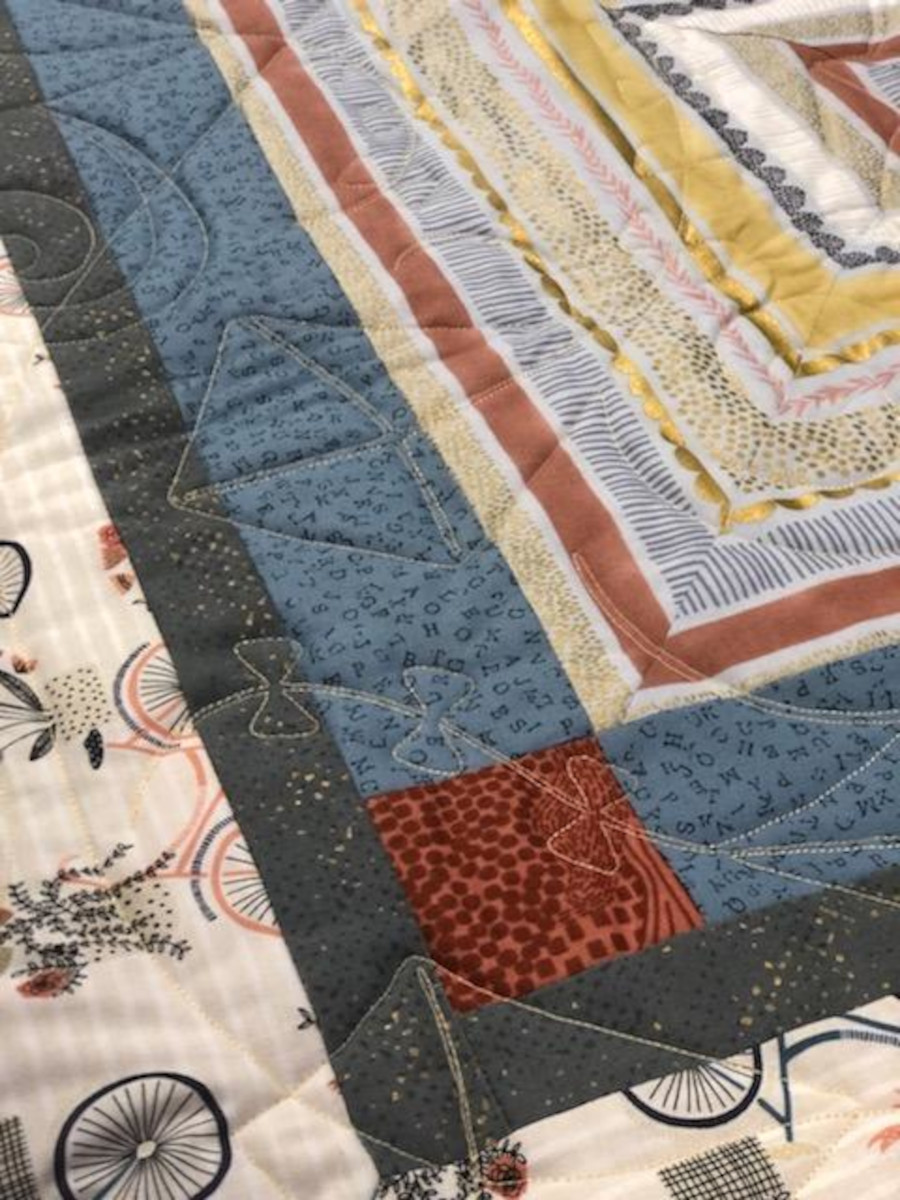
The staff at Hen and Chicks Studio used Monique’s pattern to make two more versions. The first uses a stripe fabric to make two sets of three matching blocks. An outer border of bicycles and flowers provided the chosen color scheme for the quilt. The top was quilted by Stephanie Unruh and Liz Meimann at A Quilted Memory. They chose the “Kites Flying” design by Anne Bright Designs to continue the playful feeling of the quilt.
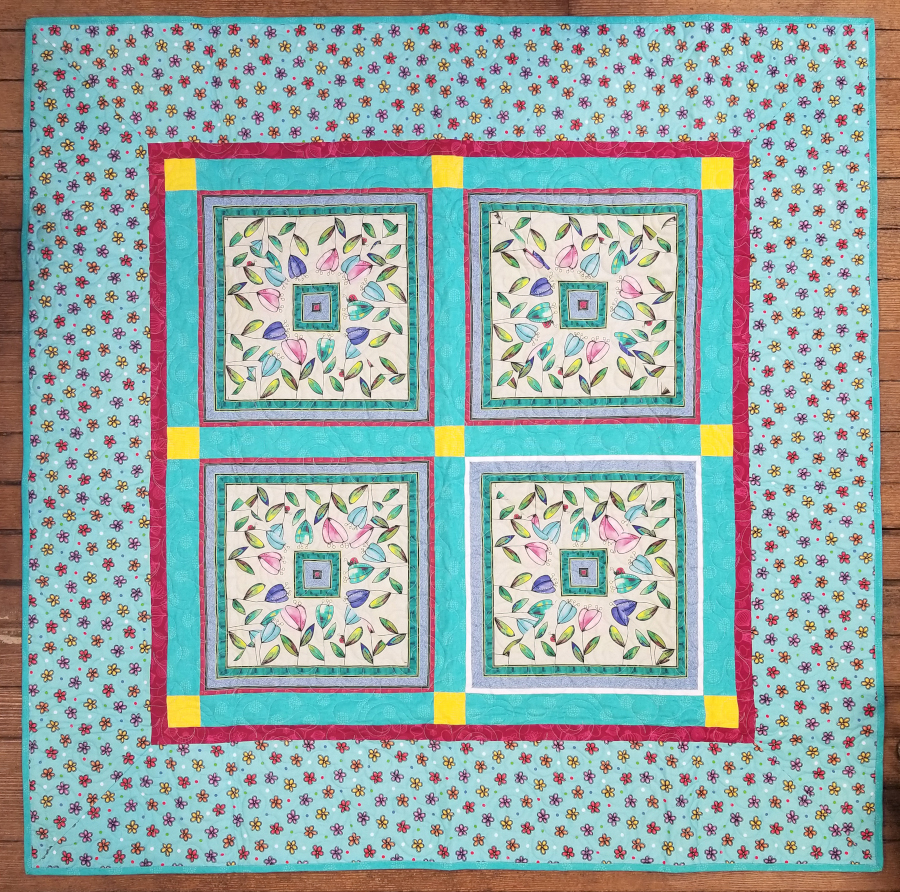
The second version is a square option that uses a border stripe fabric to make the bright blocks. Drawing inspiration from the daisies in the border, Stephanie and Liz used an allover flower-and-spiral design for this version.
Monique designed the Amour Quilt as a teaching tool. Her way of taking the pain and frustration of sewing a mitered border involves no math. It makes full use of beautiful stripes that work well as borders. Follow along as Jacobs shares the how-to:
- Cut border strips on the lengthwise grain of fabric as indicated in the pattern. Cutting it this way takes advantage of the lengthwise border print, and the lengthwise grain has less stretch and is more stable than the crosswise grain.
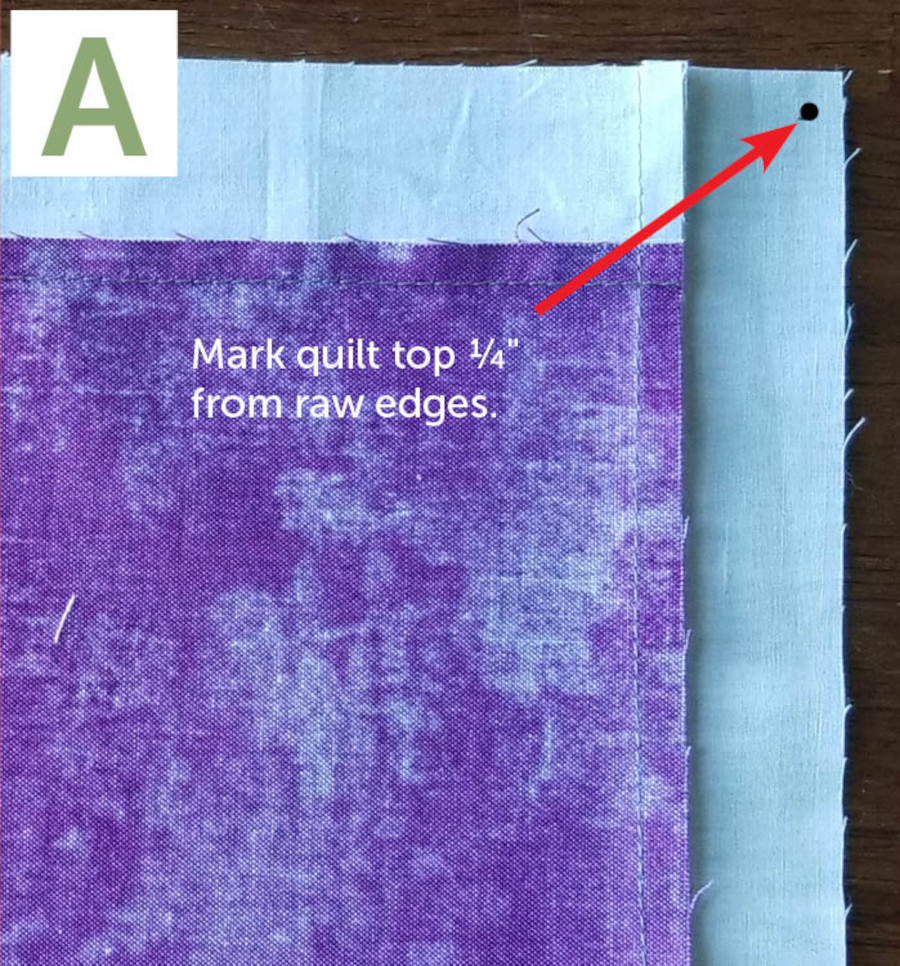
- Fold each border strip in half crosswise; finger-press to mark the center and open the border strip. Fold and finger-press quilt center side (long) edge in a similar manner. Make a mark ¼” from each end of the side edges of the quilt center along the ¼” stitching line (Photo A).
- Aligning marked centers of a side border strip and a side of the quilt center, mark the border strip with a pin at the same position as the mark on the quilt center.
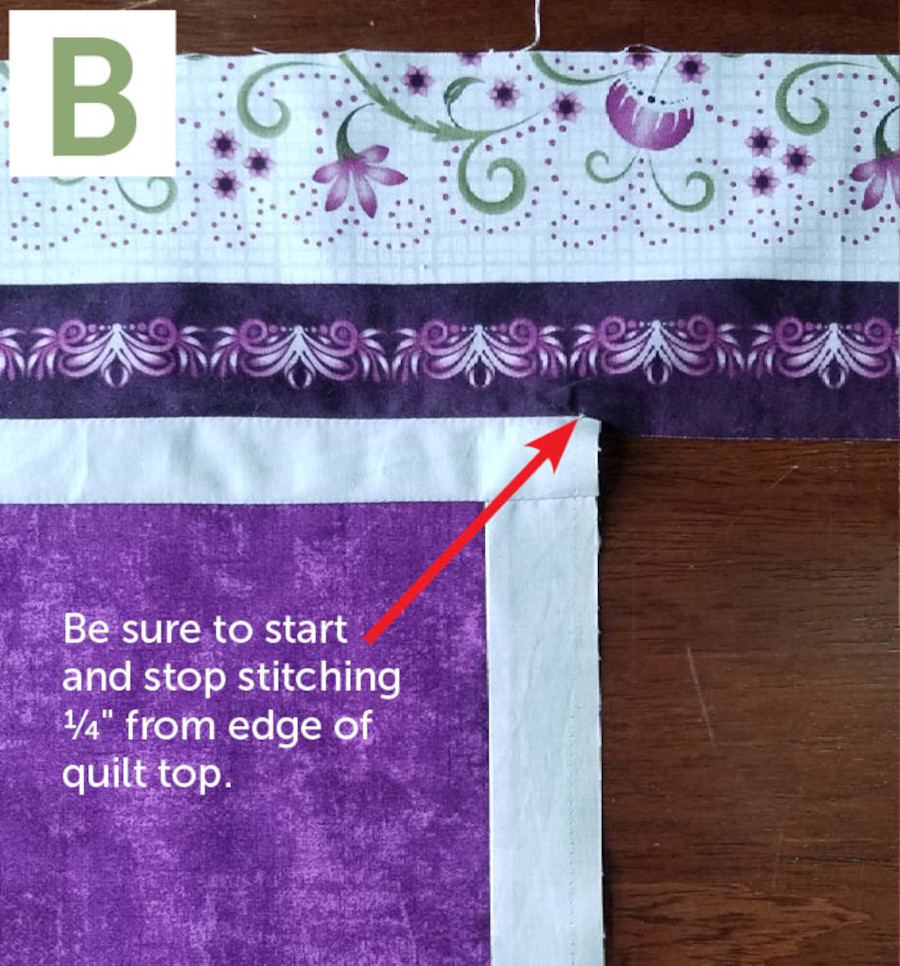
- With right sides together and centerlines and corner marks aligned, pin marked border to corresponding quilt center edge. Allow excess border length to extend beyond the quilt top. Join pieces, beginning and ending stitching with backstitching ¼” from the quilt center edge (as marked). Do not trim the border strip (Photo B).
- Repeat steps 2–4 with the remaining side border strip and quilt center. Repeat steps 2–4 with top and bottom border strips and the remaining edges of the quilt center.
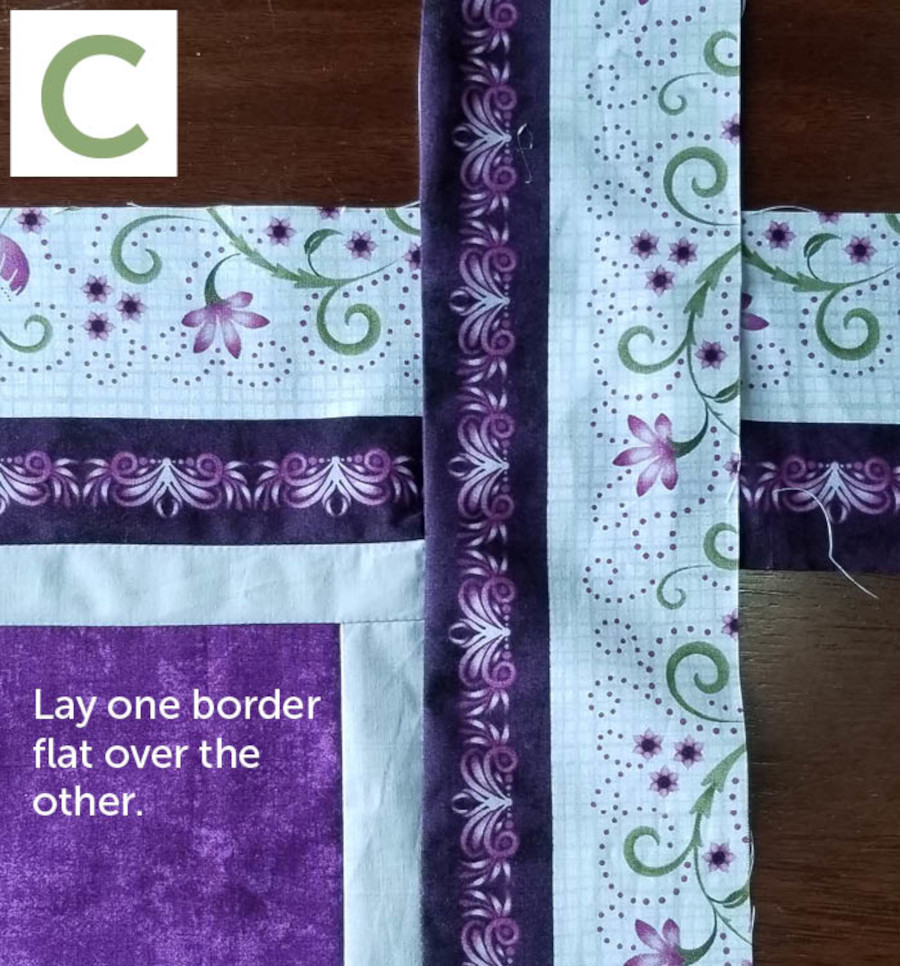
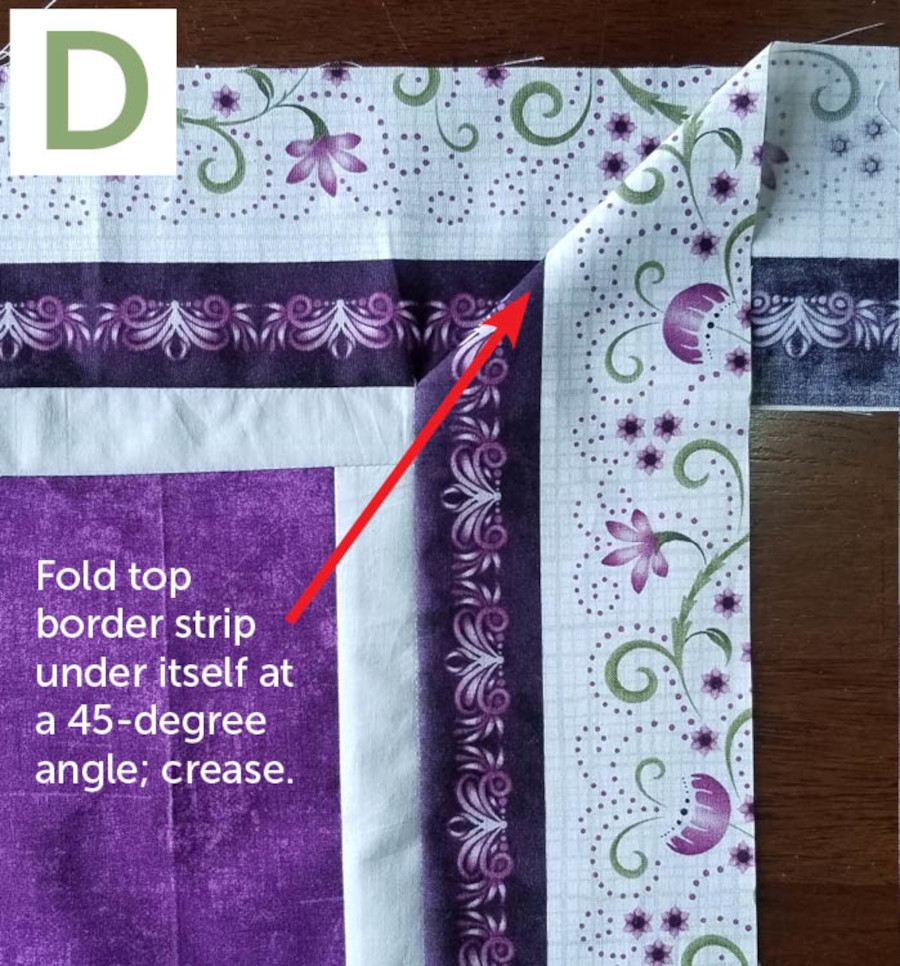
- With the right side up and working on an ironing surface, overlap border strips at one corner. Allow border strips to extend in a straight line beyond the quilt center (Photo C).
- Fold the top border strip, wrong sides together, at a 45-degree angle (Photo D).
- Press fabric to make a crease at an angle. Fold creased border end back on itself (wrong side out); following manufacturer’s instructions, fuse ¼” wide tape along the creased edge (Photo E). (Jacobs likes to cut her own strips from HeatnBond Lite but also uses ¼” fusible tape.)
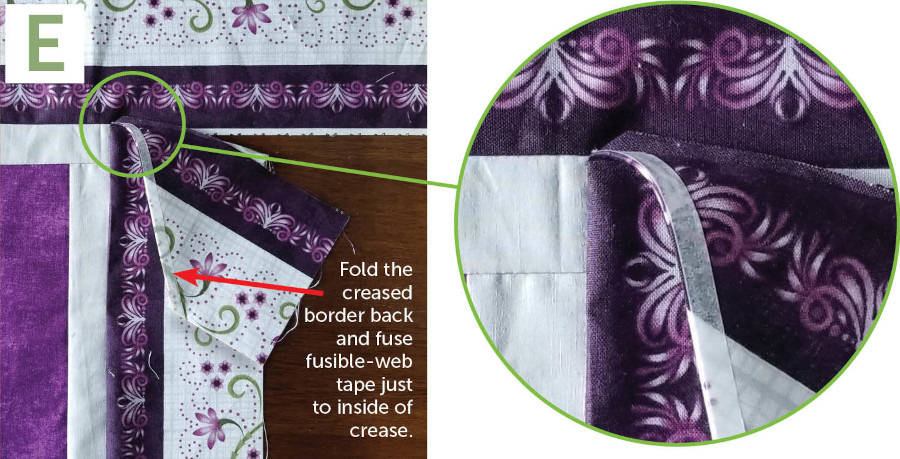
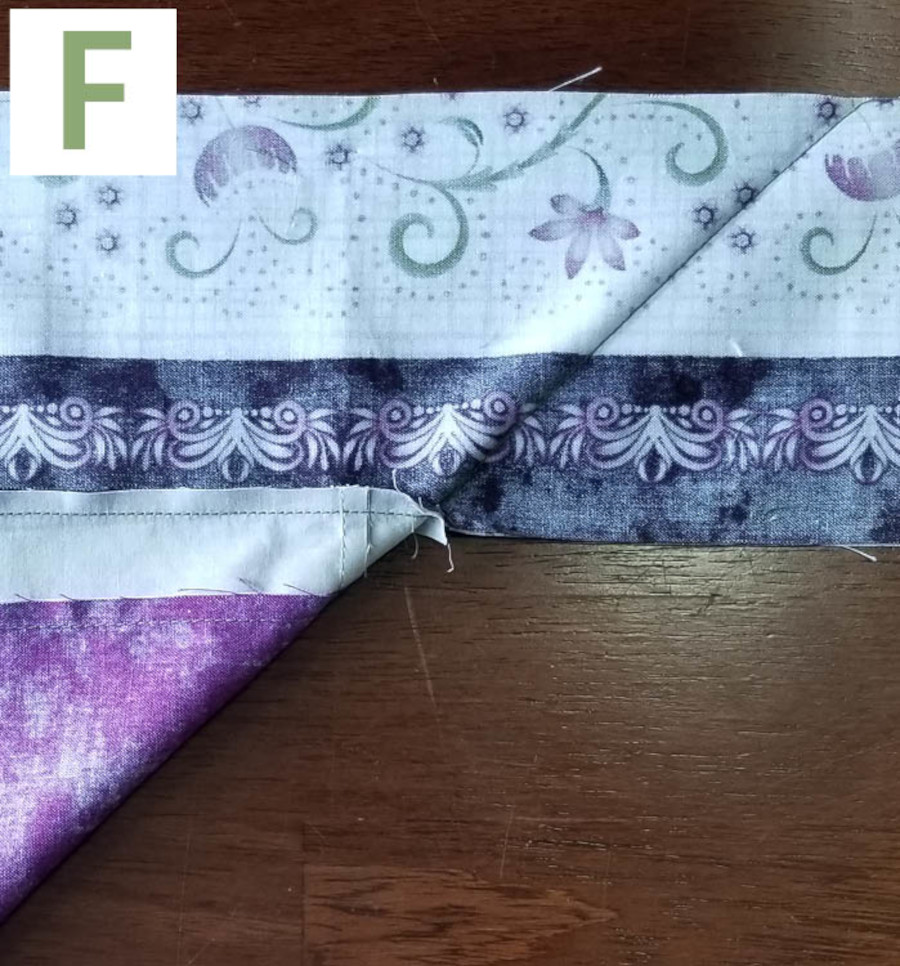
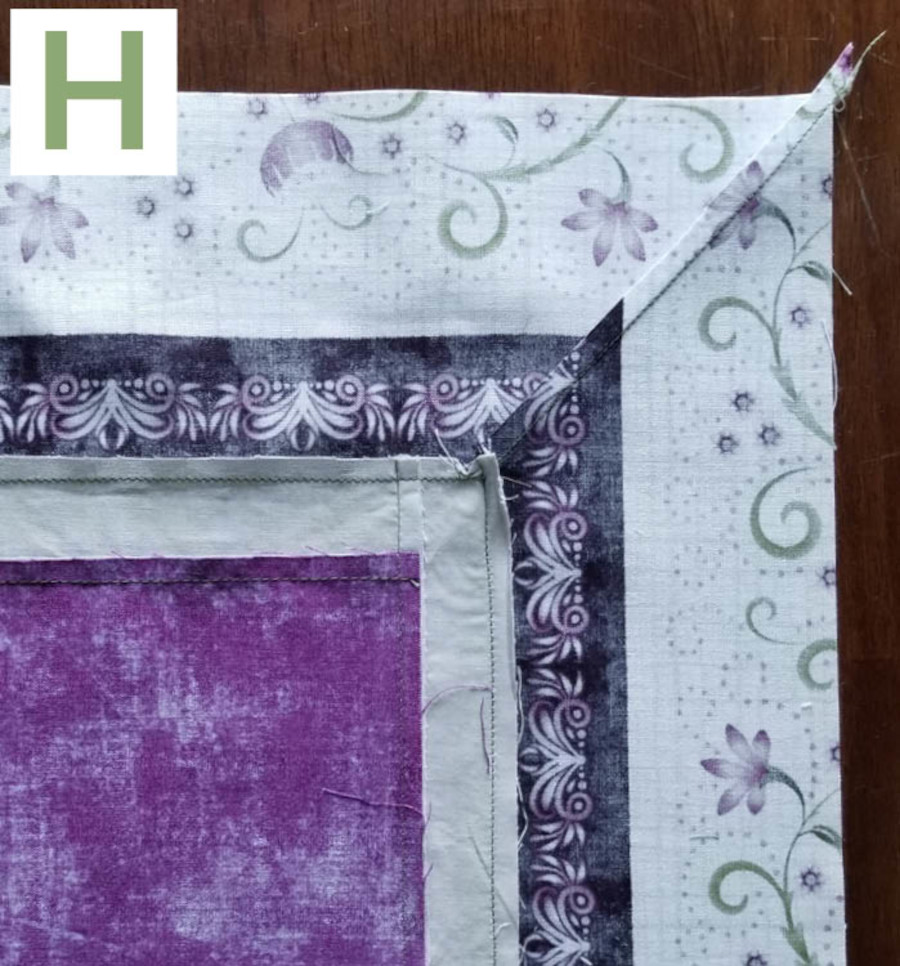
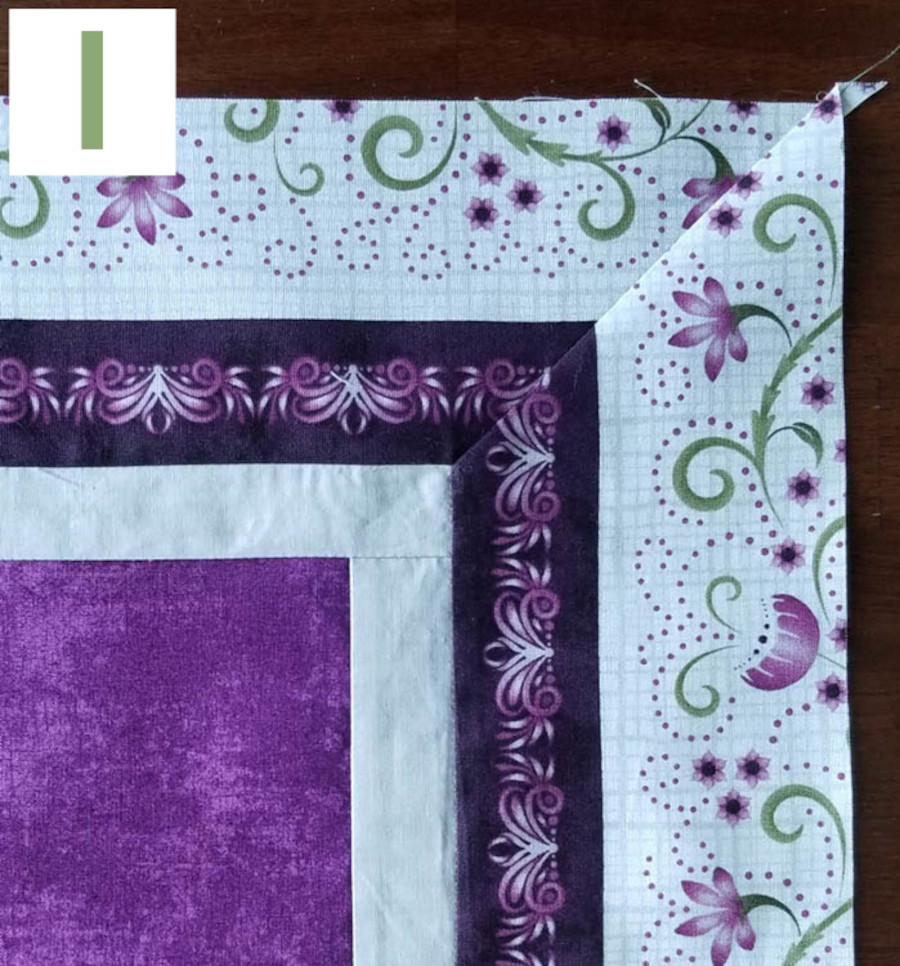
- Remove fusible paper backing; reposition border strip and fuse. Open fused border to the wrong side; beginning at the inner edge and backstitching at both ends of seam, sew together along the crease (Photo F). The fusible tape reinforces the biased edges and helps to prevent stretched seams and distorted border edges.
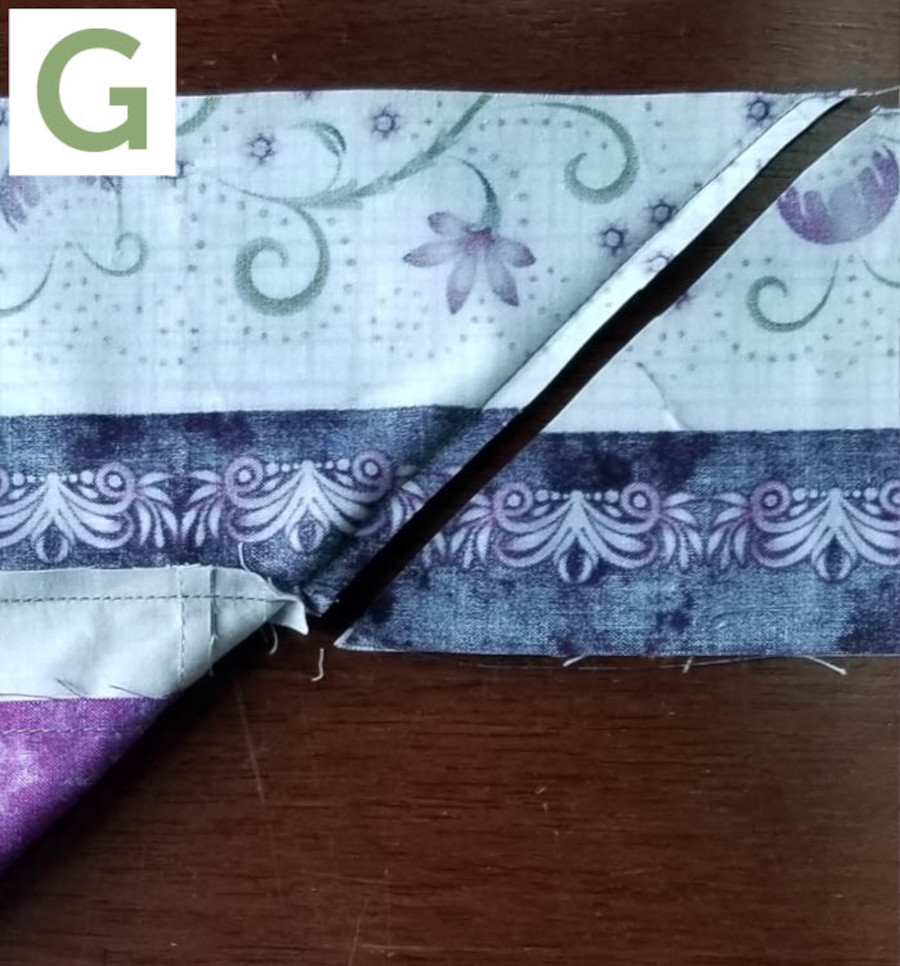
- Trim excess fabric, leaving ¼” seam allowances. (Photo G). Open seam and press seam open or in one direction (Photos H and I).
- Repeat steps with the remaining corners to complete the quilt top.