Machine binding a quilt
Here’s a question to ponder – if a quilt gets quilted but the binding’s still not complete, is does it still go in the “PhD” pile – that is, “Project Half Done?” Technically, it’s closer to 3/4 done, don’t you think? I think I’ll add a new professional acronym to my pile of quilts. I’ll call it a “BSN” pile – Binding Still Needed. 🙂
I know the moment my BSN pile was born … it was the first time I made a quilt just because. The quilt wasn’t for a new baby, wedding, anniversary, or any other deadline like a magazine article or a show. I made it just because I liked it! But without any deadline for the quilt, binding it fell into that deep abyss called “when I have time.”
Part of my hang-up is that I actually enjoy hand-sewing the binding down on a quilt. Since my hands guide a longarm during the quilting process, I don’t get to fondle the fabric like a hand-quilter. Hand stitching the binding lets me cuddle the quilt on my lap like a cozy, loving cat while I work around the edges.
But as the stack of BSN quilts grows, I realize that “when I have time” may mean “never” if I don’t do some serious self-intervention, and soon. I think machine binding may be the cure. It’s time to give them the title of “A.D.” – All Done!
This post will walk you through the process I use to bind my quilts with a domestic sewing machine. If you’re interested in how to do it on a longarm, click here.
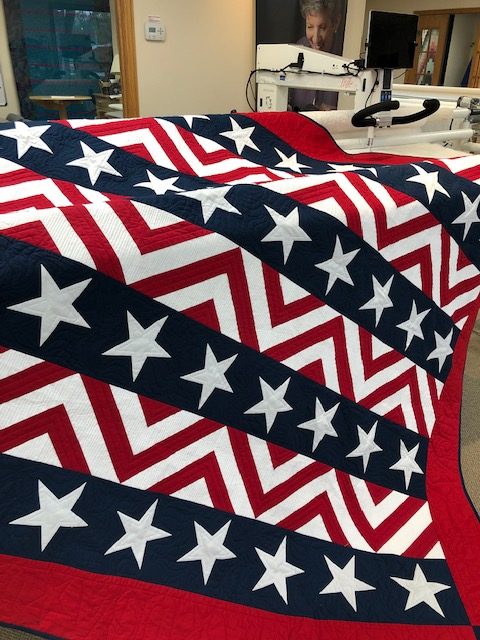
The quilt I’m binding for this post is one I designed as a free pattern for APQS almost 2 years ago. Yep, it got sucked into the “when I have time” black hole!

Some quilters have the patience and talent to sew the binding strip on the front of the quilt, flip it to the back, and then stitch next to the folded-over binding on front to neatly catch it on the back. I’m in awe of their skill (and completely green with jealousy). I’ve tried this method before, but invariably end up missing sections of the binding on the back that I’d have to go back and stitch again.
I tried cutting my binding strips wider to have a better shot at catching the entire edge on the back. That just made a wide flap on the back that was unstitched and would catch on everything.
If the quilt will compete in a show, I still hand-stitch the binding. But if I’m ever going to truly enjoy my “just because” quilts, I’ve learned that “just because” I like hand binding doesn’t mean every quilt needs to be done that way.
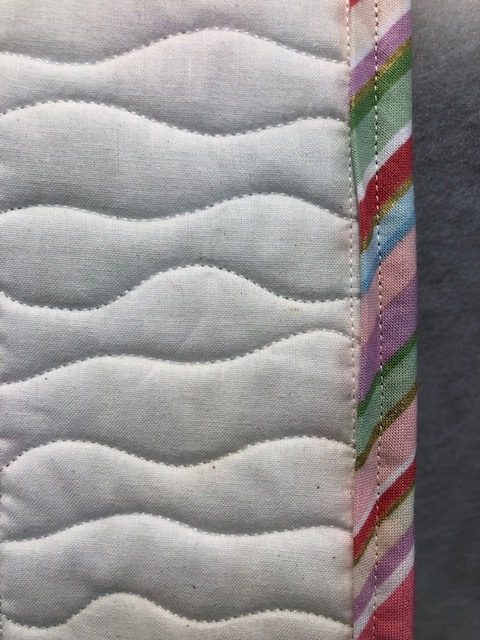
Now I sew my binding to the back of the quilt and bring it around to the front! I have a LOT more control this way and I can keep the front edge neat and tidy. Since the quilt top is the star and the back is, well…the back…I’ve come to terms with the extra stitching line that travels along the binding on the back, especially for my everyday quilts.

Follow these steps to machine binding – move your BSN quilts to the A.D. pile!
Step 1: Prepare the Binding
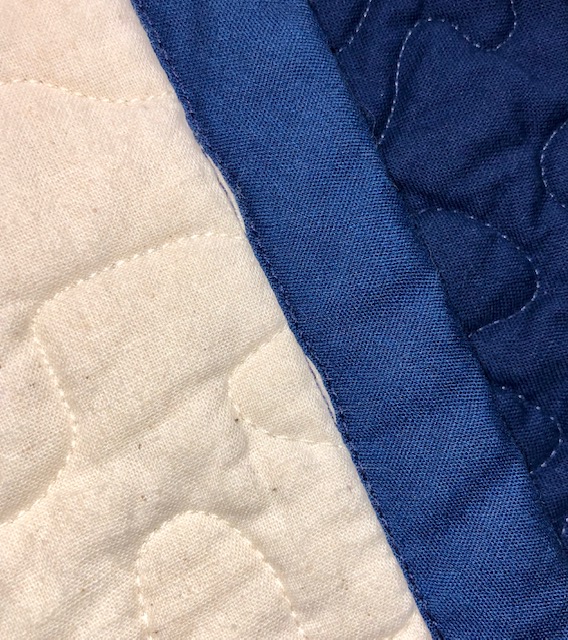
I cut my binding strips 2-1/2 inches wide. This means the straight sewing line visible on the quilt back will be a little farther out than the folded binding edge, but at least I won’t accidentally stitch on top of the back binding. This makes the binding finish at about 1/4-inch wide. (If your quilt batting is particularly fluffy or you want a wider finished binding, you’ll need to cut wider strips and trim your quilt accordingly.)
Cut enough strips to equal the measurement around your quilt’s perimeter, plus about 12 more inches to allow for mitered corners and sewing the opening closed.
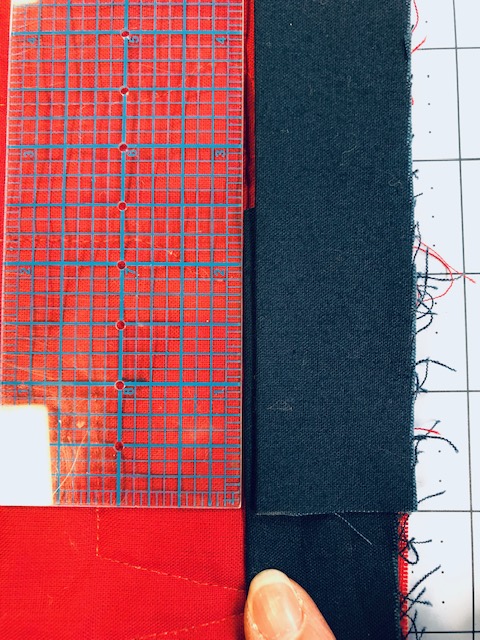
Join the strips with a 45-degree seam, right sides together. You can mark the stitching line if you like, or check out my “painter’s tape” hint below to speed things up. I use smaller stitches for this step and matching thread so that it won’t show, but I’m using white thread this time for the photos.
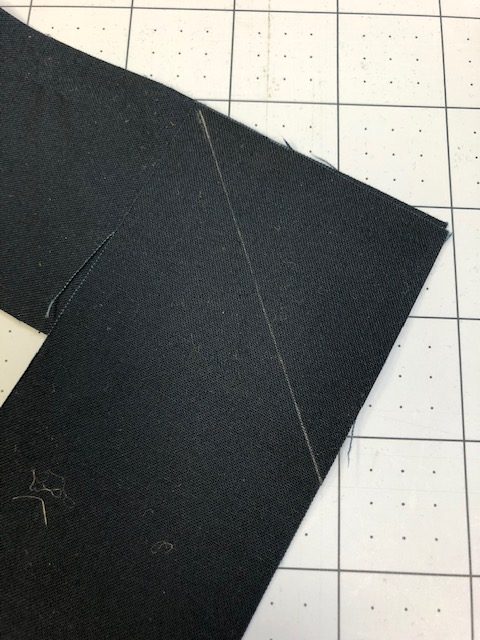
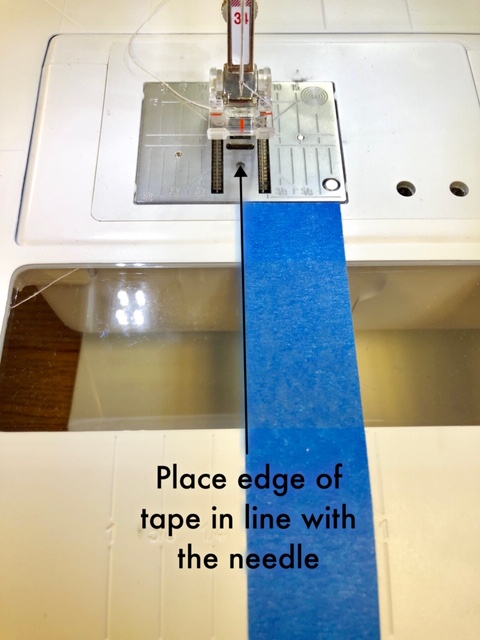
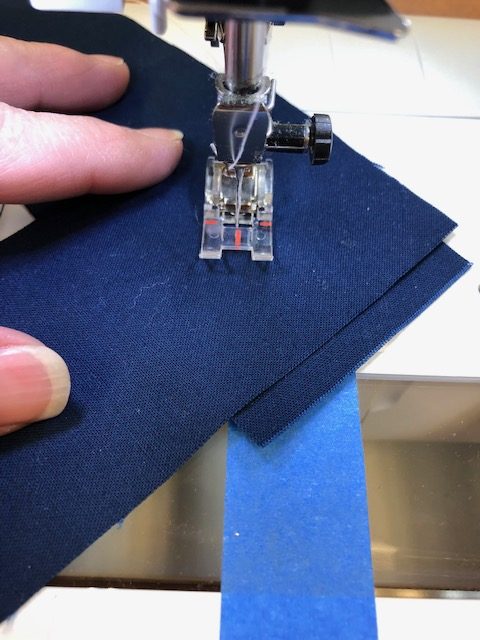
(HINT: Place painter’s tape on your machine so its edge is in line with the needle. Overlap the binding strips slightly as shown. Start sewing in the upper corner. As you sew, keep the lower corner in line with the painter’s tape and guide it to the needle. No marking!
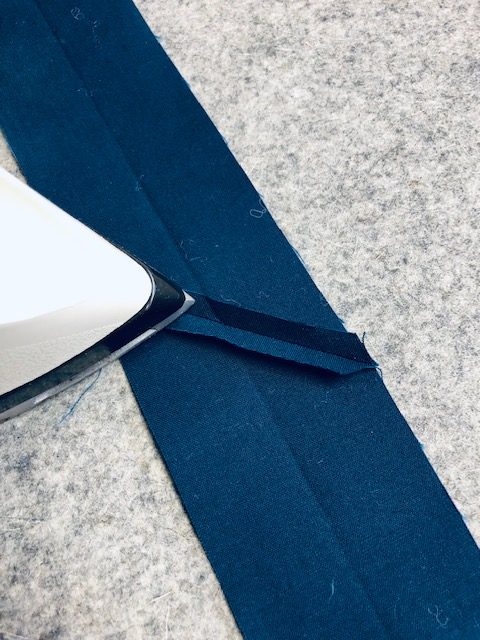
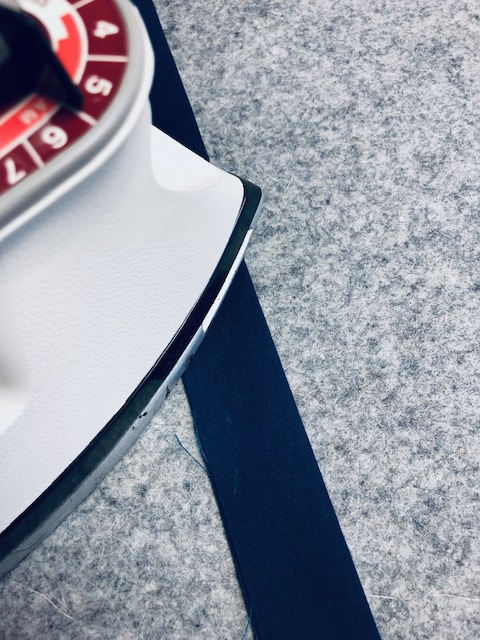
Trim the seam to ¼-inch and press open. Fold the binding in half with wrong sides together and press.
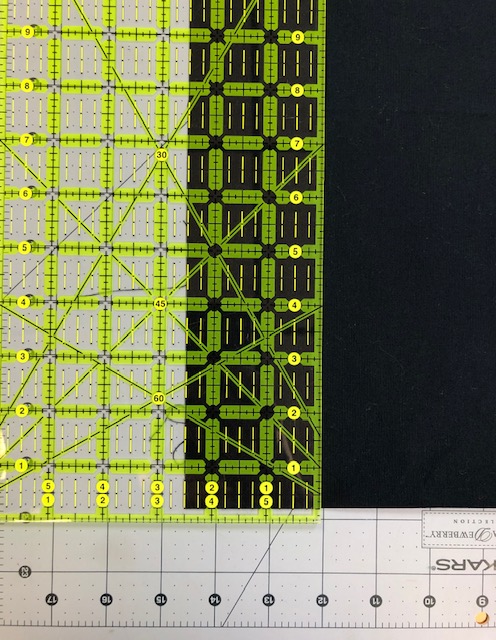
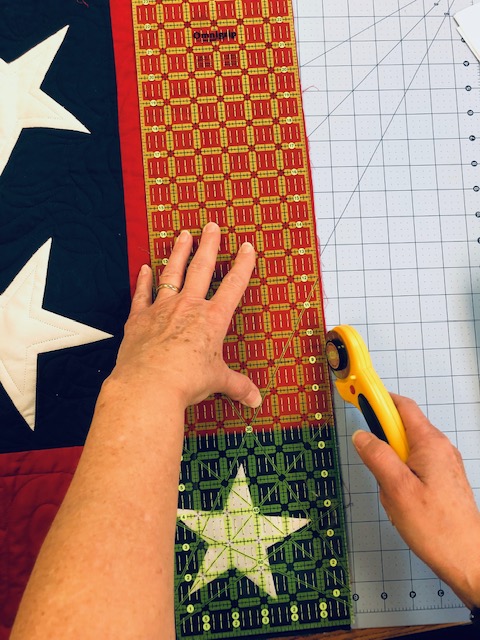
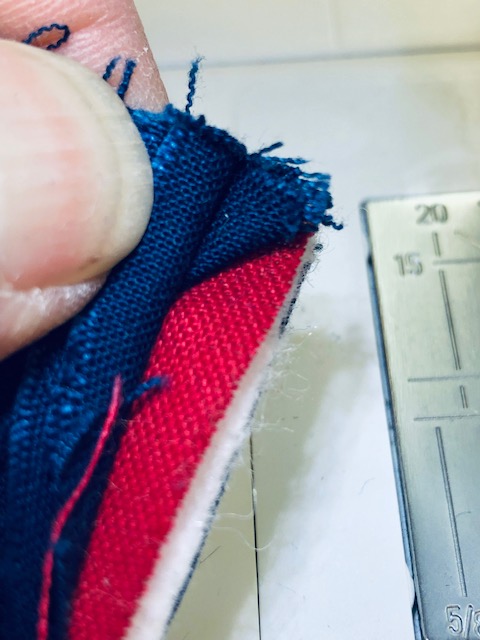
Step 2: Trim and Square the Quilt
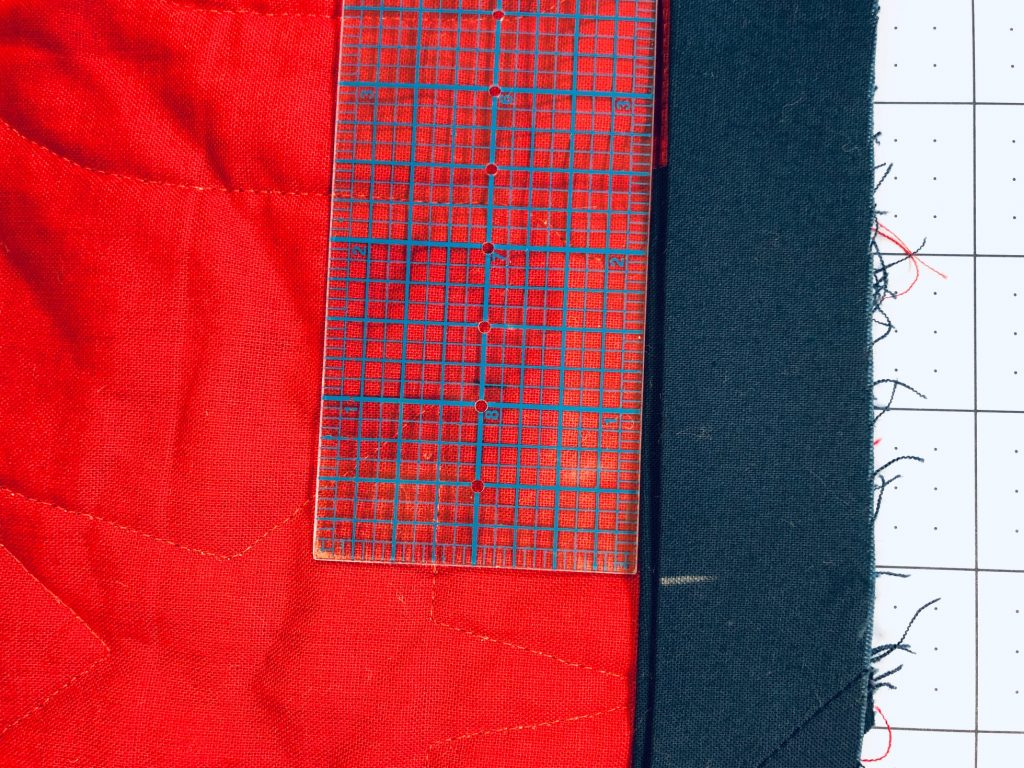
Use a rotary cutter and ruler to trim the batting and backing even with the quilt’s raw edge.
Step 3: Sew the Binding to the BACK of the Quilt
Audition the binding around the quilt’s edge so that you don’t end up with a seam right at the corner.
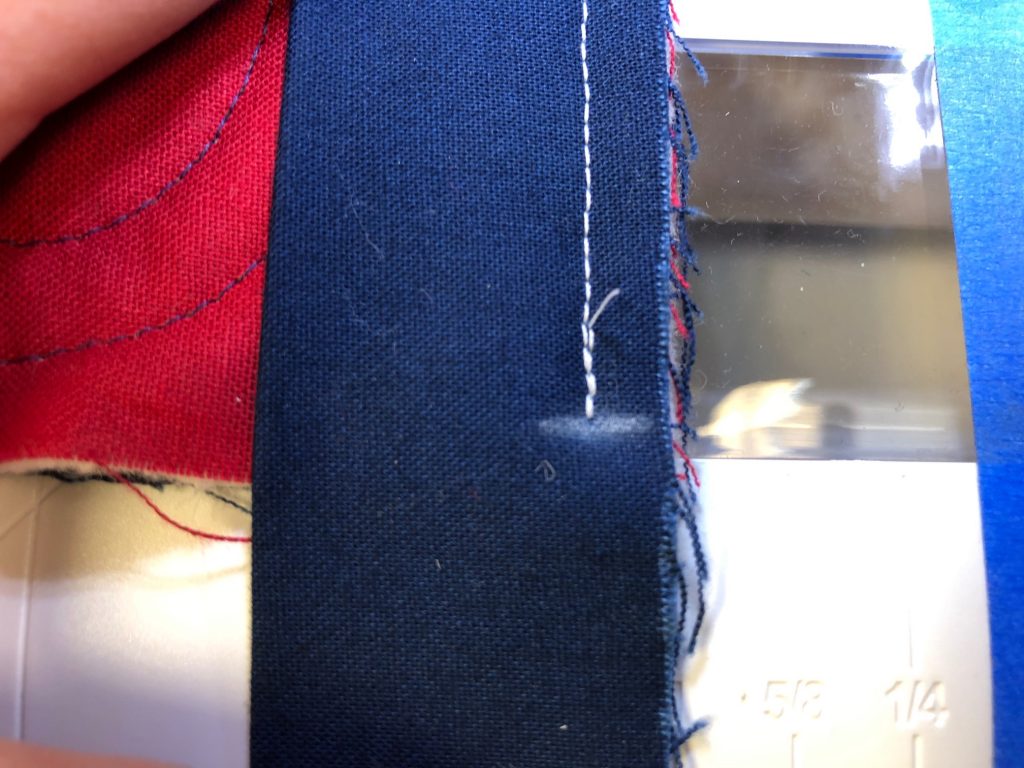
Align the binding raw edge with the quilt’s raw edge and use pins or clips to keep it in place if you feel better doing so. What can I say? I’m a risk-taker. 🙂 Leave a tail about 8-10 inches long at the starting point. Remember that the quilting process “shrinks” the quilt—don’t pull on the quilt edge OR the binding edge as you sew them together or you’ll have a wavy quilt edge. Use a 1/4-inch seam and stitch the binding to the quilt. Stop about 3 inches from the corner.
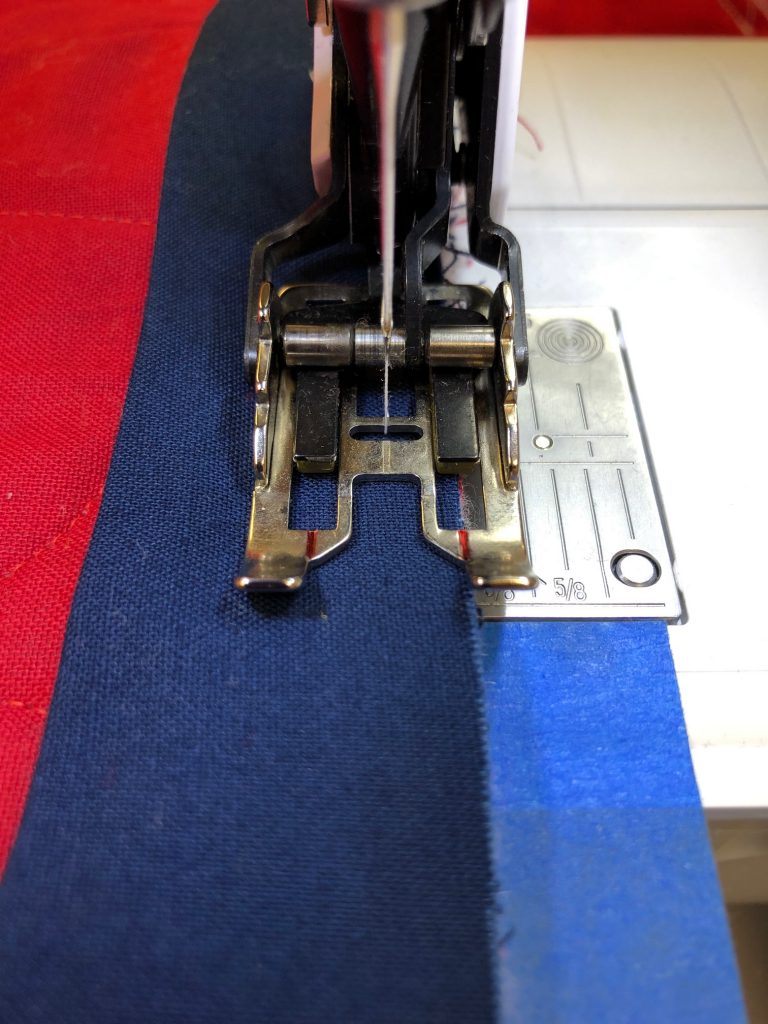
(Hint: A walking foot helps keep the quilt layers from shifting. You can also machine or hand baste the quilt’s edge just inside the 1/4-inch seam before adding the binding. If you serge or straight-stitch the edge—be cautious because it can sometimes cause wavy edges instead of preventing them.)
Step 4: Miter the Corners
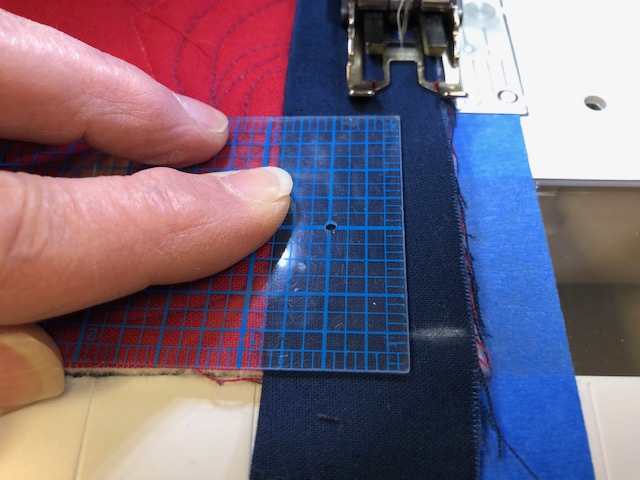
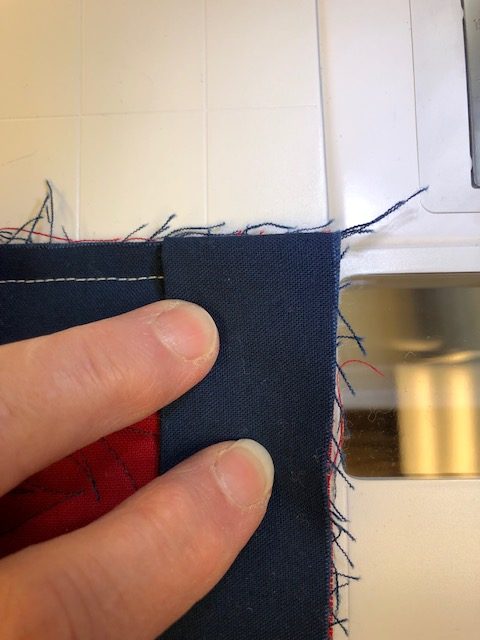
Mark the binding 1/4-inch in from the corner you’re approaching as shown. When you reach the mark, backstitch a few stitches and then remove the quilt from the machine.
Fold the binding up so that its raw edge is parallel with the quilt’s next side as shown. This creates a 45-degree fold in the binding. Finger press the fold.
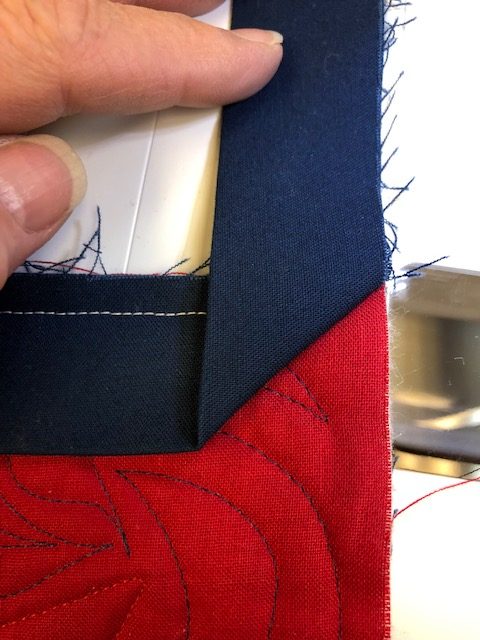
Now bring the binding strip down along the next side the quilt. Align the folded section of the binding with the quilt edge you just completed. The raw edge will align with the next edge of the quilt. Pin if necessary to hold the fold in place and preserve a nice miter.
Sew down the next side until you reach the next corner. Miter each corner as before. Stop sewing when you’re about 15 inches from the starting point. Backstitch and remove the quilt from the machine.
Step 5: Join the Ends
Quilters tackle this step in several different ways. If you have a favorite, jump ahead to Step 6. This is my go-to method that’s worked for me for years, so I’m slow to change.
Overlap the ending strip on top of the starting tail. Their raw edges should align with the quilt’s edge. Keep both strips flat and smooth.
Measure 2-1/2 inches (which is the width of your binding before it was pressed in half) from the beginning edge of the starting binding strip, and place a mark.
Trim the ENDING tail so that it aligns with the 2-1/2-inch mark made on the starting tail. These two strips should overlap now for 2-1/2 inches. (Hint: If you cut your binding wider, then mark your first strip with that same measurement. For example, if you cut your binding 3 inches wide, mark the overlap at 3 inches.)
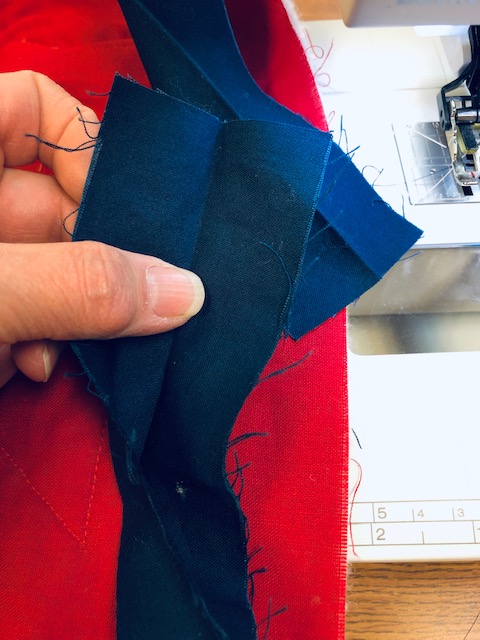
Now open up the two binding sections and twist them around so that right sides are together and they form a right angle.
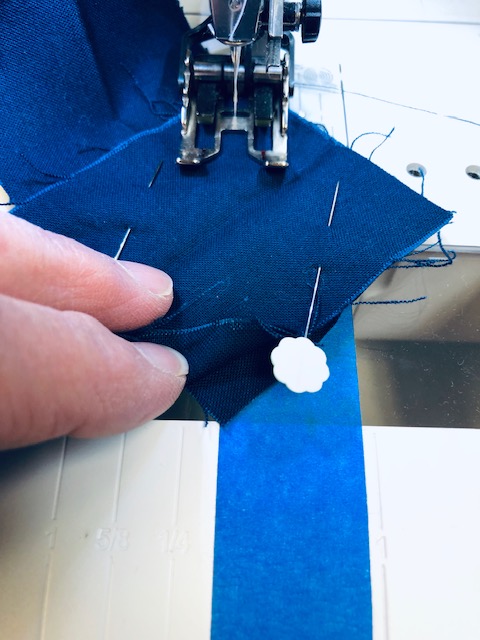
Pin the two strips together. If necessary, draw a stitching line across the diagonal and then stitch. Or use the painter’s tape method and guide the pinned strips to the needle as shown. Stitch the seam.

Before trimming the seam allowance, realign the strip on the quilt edge and check the fit. Adjust if necessary. Press the joining seam open, and then stitch the remaining section to the quilt.
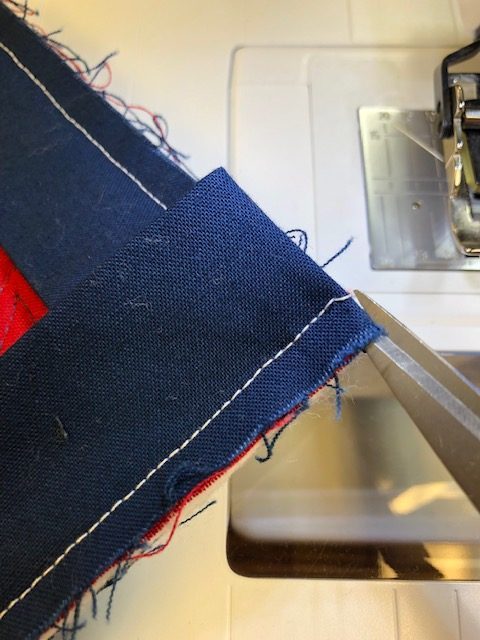
Trim the extra little triangle of binding fabric from the folded corners as shown to help the corners lay flat.

Step 6: Press the Binding Around to the Quilt FRONT
I use Mary Ellen’s Best Press to help set the binding folds and corners. I often just “go for it” and stitch without pins or clips, but again—do what makes you feel comfortable. Press the binding up away from the quilt BACK all the way around. Next flip the top over, and press the binding to the FRONT of the quilt going counterclockwise around the quilt. This lets you press the bulk in the corners to opposite sides, making a nice, crisp corner (see next photos.)
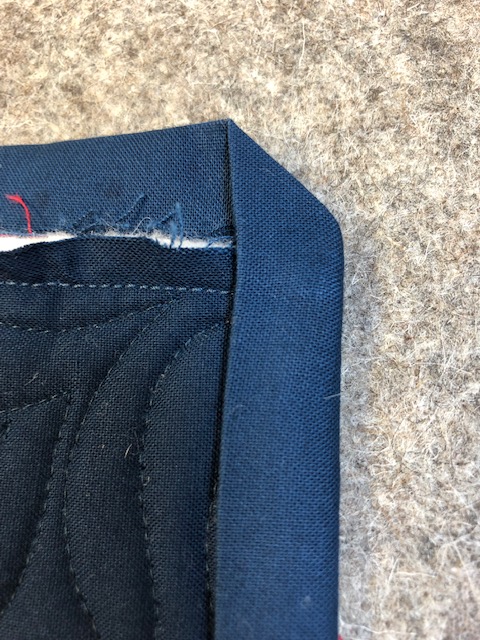
Press the binding along the right edge so it forms a miter as shown.
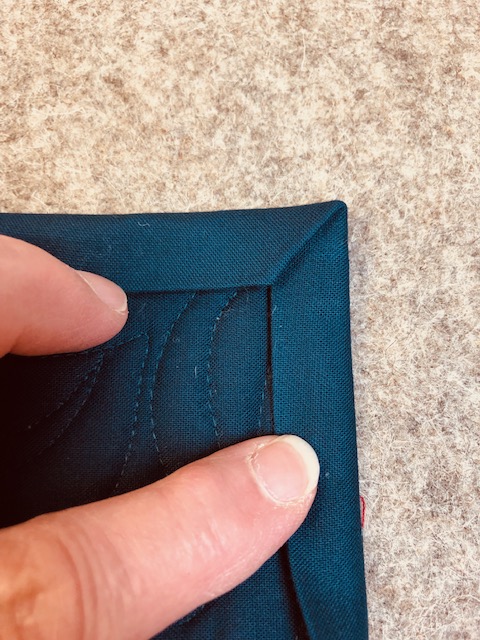
Fold the top binding section down over the quilt’s edge, forming a neat miter in the corner. Press in place.
Step 7: Stitch the Binding on the Front.
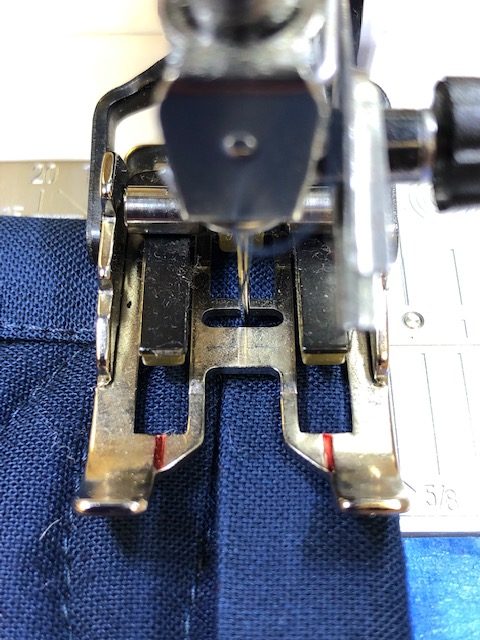
Use a walking foot if you find that the binding is scooting as you sew. Stitch the binding to the front of the quilt, just inside the folded edge.
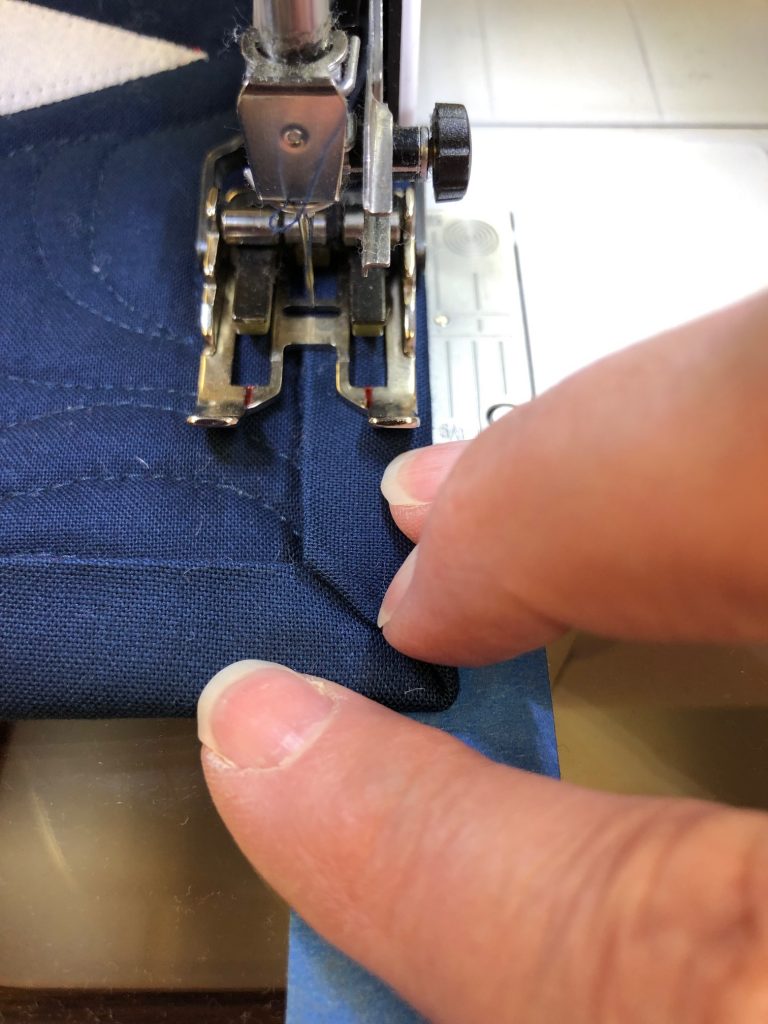
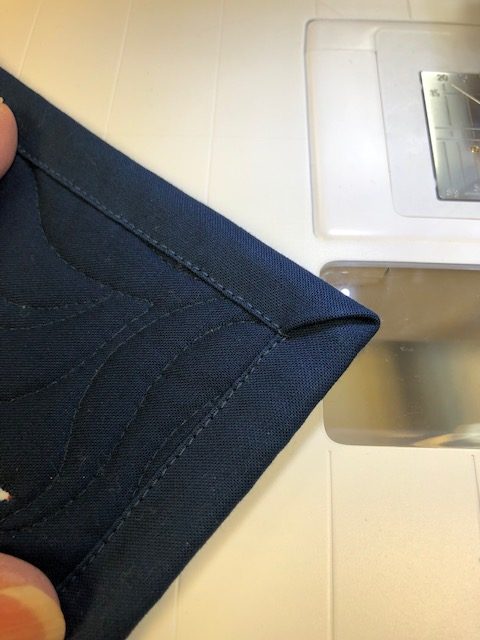
When you approach the corner, stop with your needle down in the fabric, just after you’ve crossed over on to the strip going down the next side of the quilt.
Lift the presser foot with the needle still in the corner. Spin the quilt and then continue stitching the remaining sides and corners the same way.
(For a professional touch, hand-stitch the front and back mitered binding corner folds closed. )
Last, pull the quilt out, trim threads, and pat yourself on the back for getting another quilt “all done!”