How to Trapunto using your quilting machine
I remember the first time I mustered up the courage to quilt feathers on a quilt. Even though I’d been practicing, my confidence level was still low. This was before stitch regulators were invented, so not only did you have to practice where you wanted to go, you also had to practice how fast to move to keep your stitches consistent.
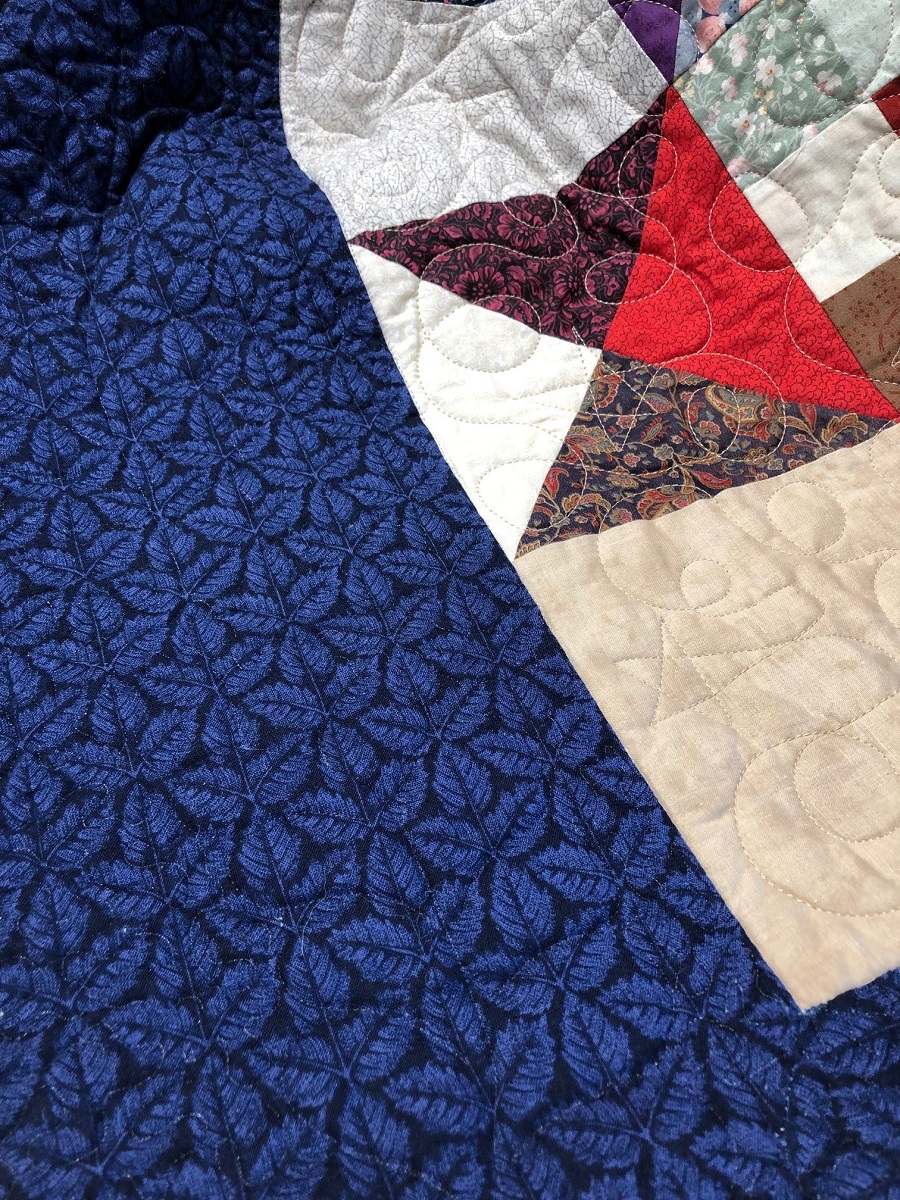
So, I decided to use invisible thread and flat batting to camouflage any wobbles, long stitches, or boo-boos. It sure worked! Can you see any feathers in that navy blue border? Nope, not until you flip the quilt over and look at the back side!
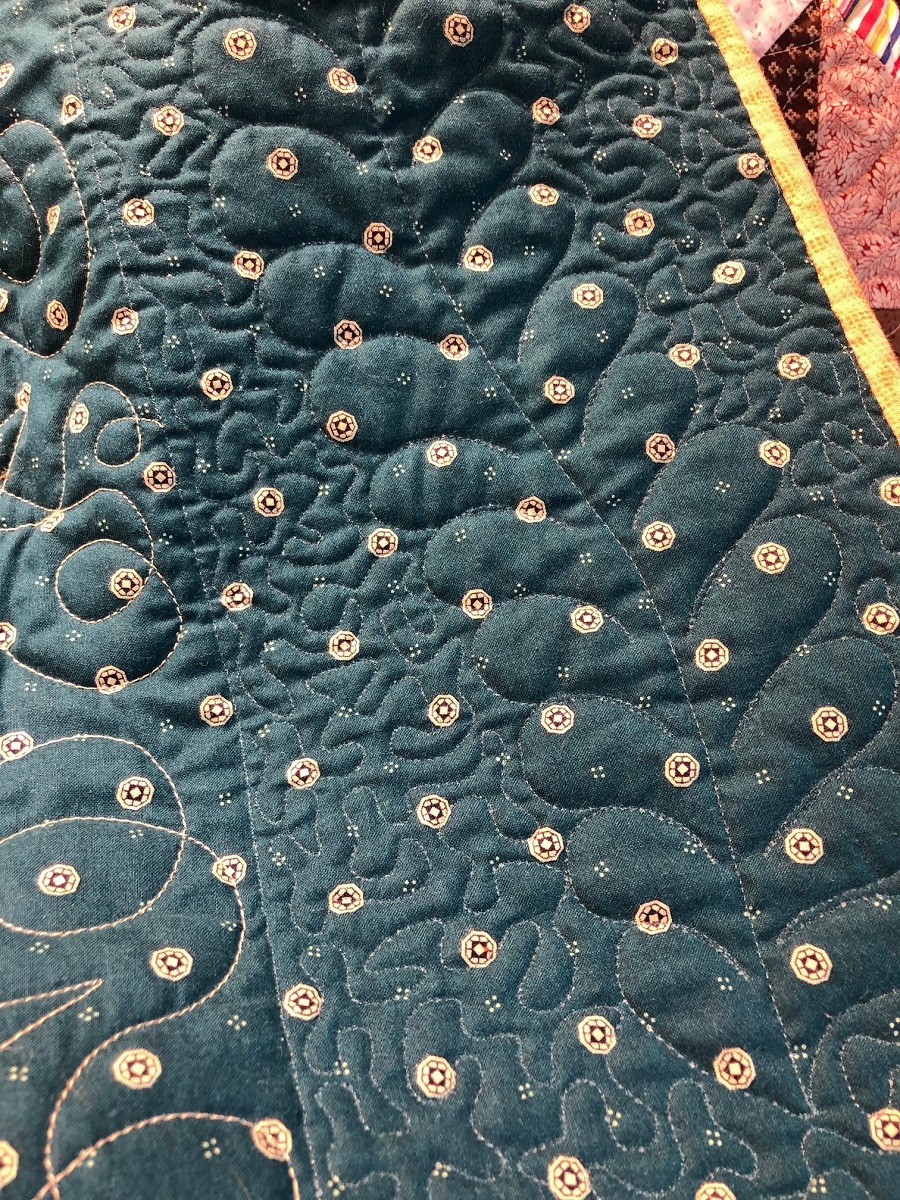
Eventually I gained enough experience to want the feathers to pop out and be noticed. That’s when I discovered trapunto. This technique emphasizes parts of a design using a double layer of batting under in certain areas and a single layer elsewhere. Dense quilting around the trapunto area causes the areas with double batting to pop up, creating a 3D effect.
Trapunto has been around since the 14th century when it a popular embellishment to clothing—especially in Tudor England. Done by hand, the tailor would layer two fabrics together and then use a running stitch to outline the area to be raised—often stuffing the area with batting during the stitching. Another method involved cutting small slits in the back fabric layer, adding stuffing, and then sewing the slit closed. Others didn’t cut slits at all; they used a stiletto or darning needle to force the back fabric fibers apart. Then they used the stiletto to shove batting in the space and then used its tip to scratch the fibers back together and close the hole. What a lot of work!
In 1996, quilter Hari Walner published her book “Exploring Machine Trapunto”, which brought the technique to the 20th century as she made the technique doable on home sewing machines. Longarm quilters soon adapted her techniques to work on quilting frames. What once took weeks to complete by hand was suddenly doable in a day or two by machine! You can use this technique to add some punch to your applique projects, create depth with your quilting designs, or add dimension to all that negative space on your quilts.
There’s one caveat—with this technique you’ll need to wash the quilt when it’s complete, so be cautious using fabrics that might bleed or embellishments that can’t get wet.
The process is the same whether you’re using a standard sewing machine or a longarm. In a nutshell, first you will stitch a single layer of batting to the back of your quilt using water soluble thread and following the outline of your trapunto design. Then you’ll trim away excess batting from the perimeter of your design or anywhere you do not want a trapunto effect. Finally, you’ll layer the quilt as normal with batting and backing fabric, and stitch around your design again. Once you wash the quilt, the water-soluble thread will dissolve, leaving only your quilting stitches and beautiful trapunto behind!
In addition to your regular quilting supplies, here’s what you’ll need:
- Marking tool
- Quilting design or stencil
- Water soluble thread
- Small, blunt-tip scissors
- 60 Wt. thread or thinner) for background quilting
- Thick/dense batting (polyester or wool)
- Darning or quilting foot (if using a home sewing machine)
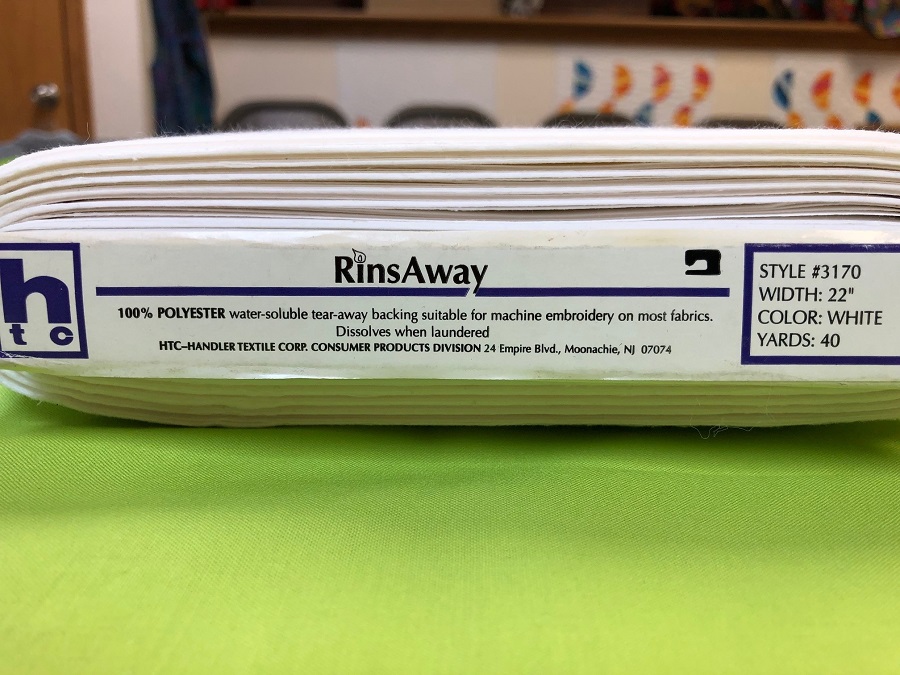
- Optional: Water soluble stabilizer
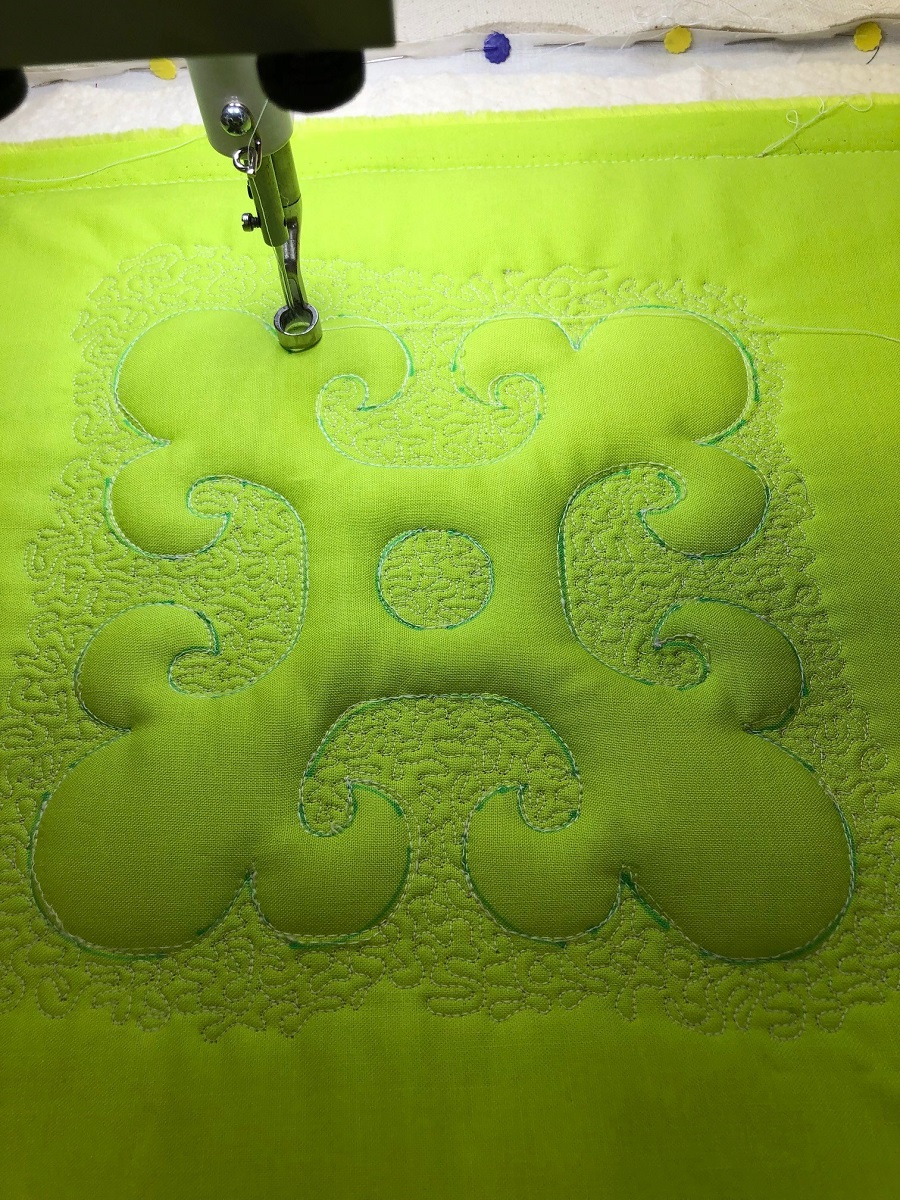
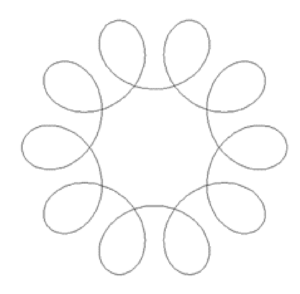
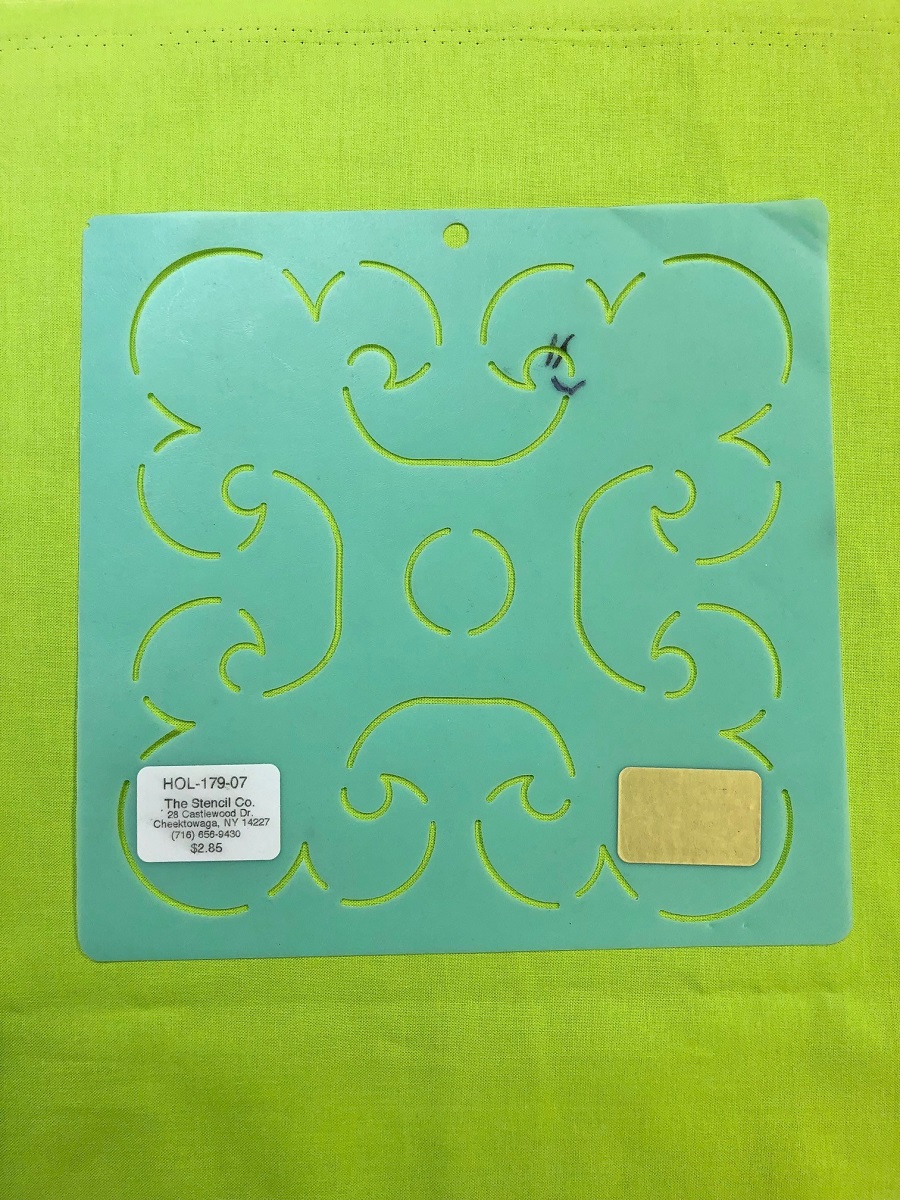
The best trapunto designs are ones that can be surrounded with background stitching without losing the design’s lines. If I stipple around the outside of this design below, when I’m done you’ll only see 10 disjointed teardrops and a big blob of unquilted center area.
This stencil illustrates a better option for trapunto. Heavy stitching around the perimeter will still make the block recognizable and stitching inside the center circle helps balance the quilting density.
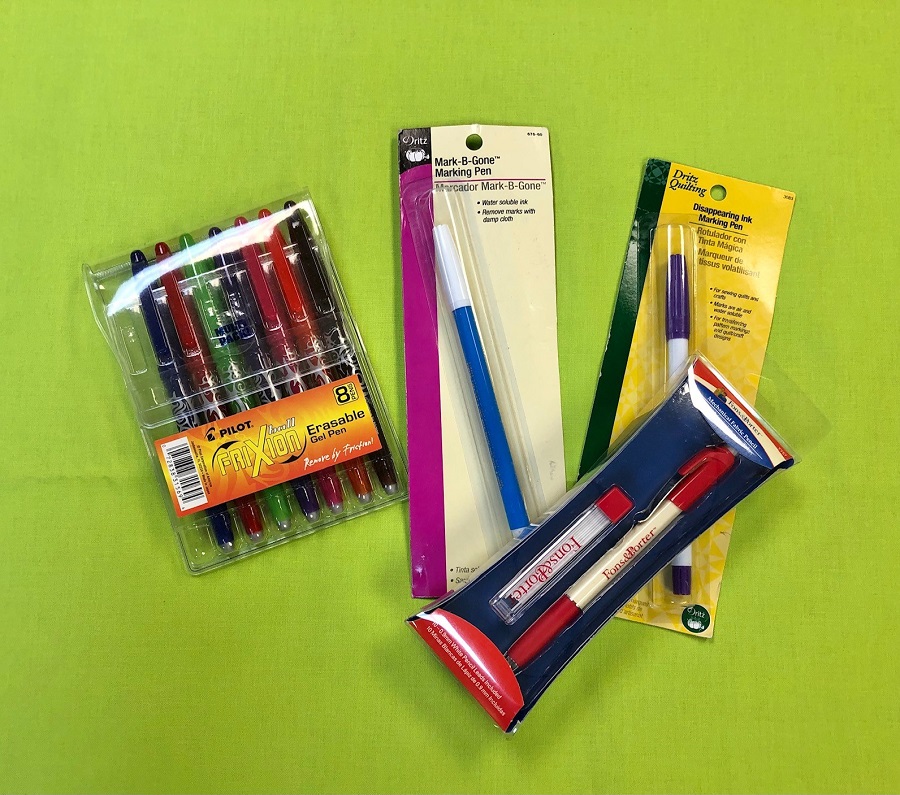
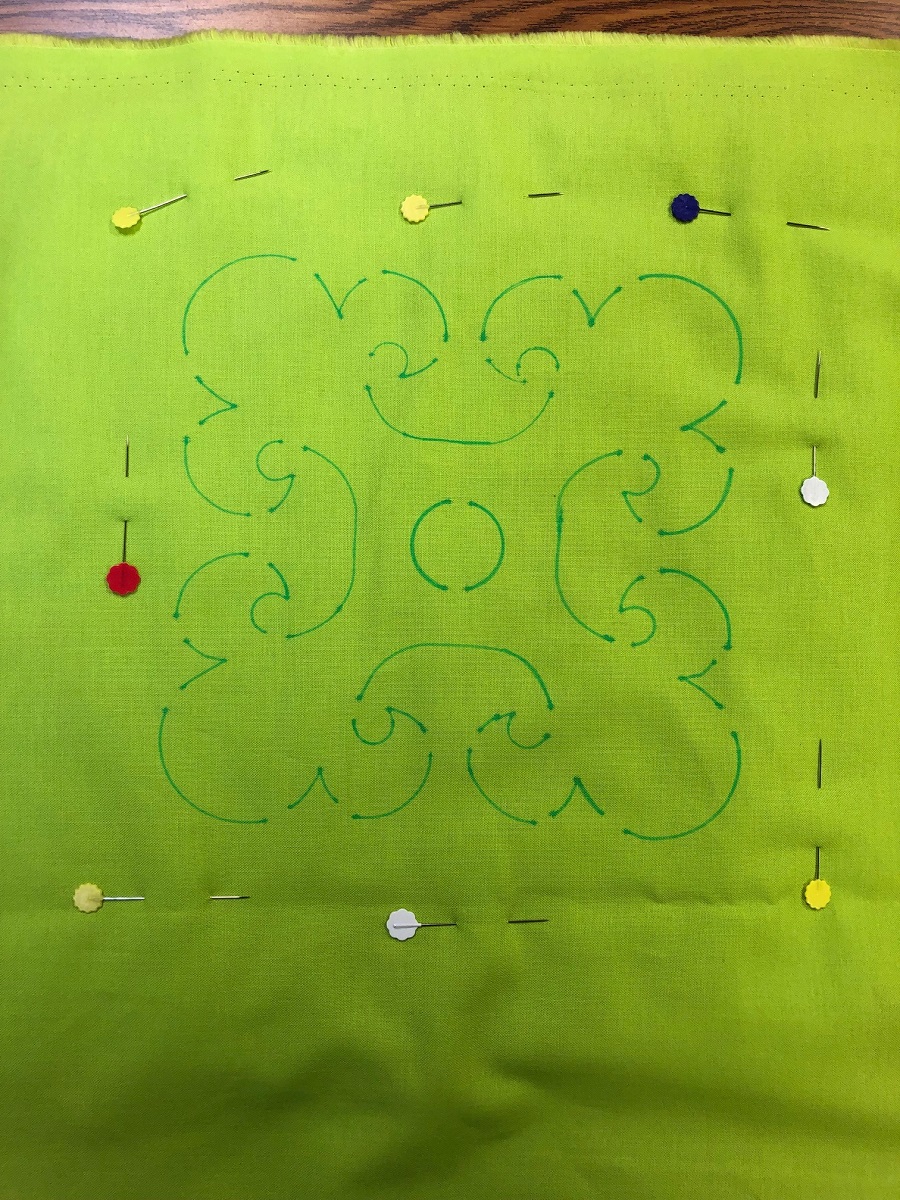
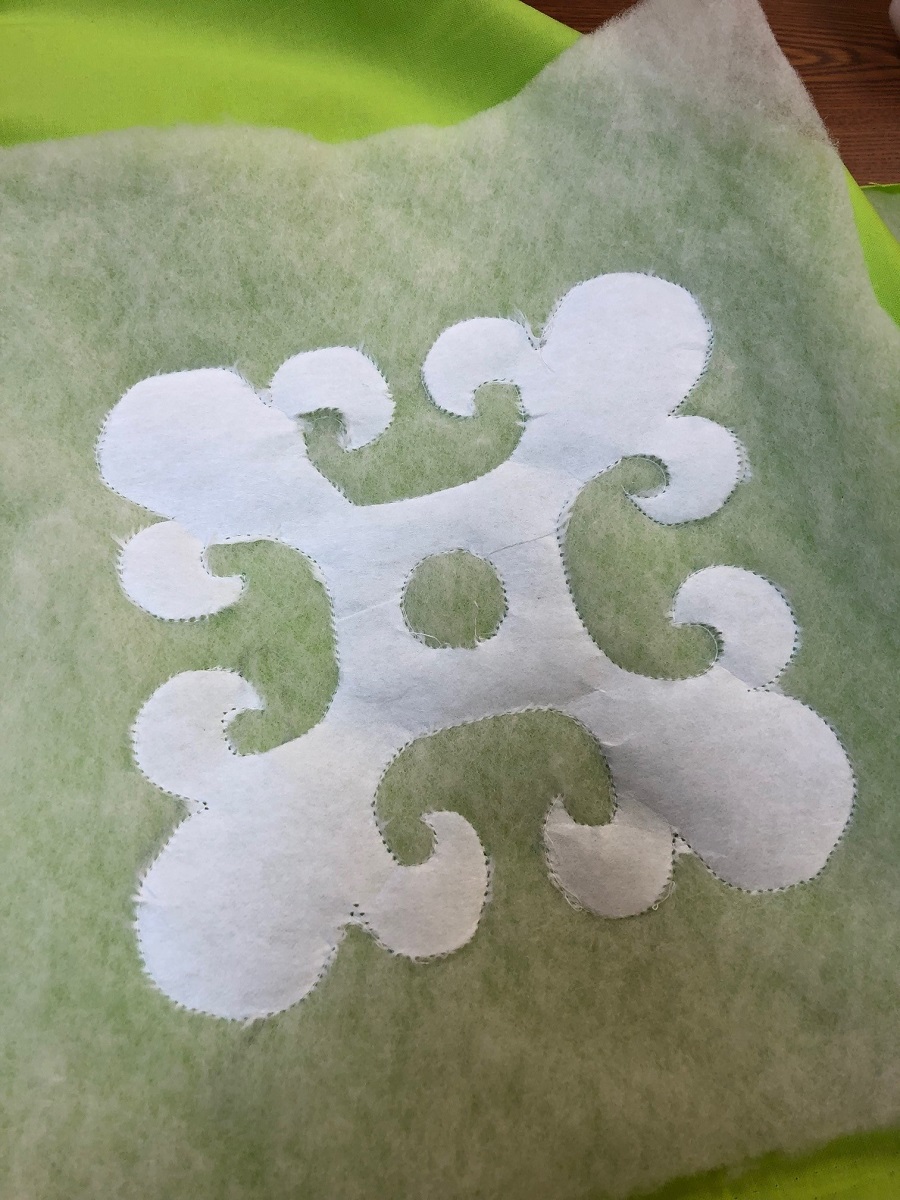
Mark your quilt top with the designs you want to trapunto. Use a marking tool that you’re confident will come out by testing it on a quilt scrap first. Though lots of options are on the market today, the most popular marking pen for this technique is still a water-soluble blue pen.
Next, pin a piece of thick polyester or wool batting to the wrong side of the fabric, directly behind the drawn trapunto design. Straight pins work for smaller projects where the batting is only in a few spots, but if you’re adding trapunto to a larger section of your quilt, safety pins will be better. For those large- scale projects, use a quilt batt that is as large as your entire quilt. Pin it in place if you’re working on a home machine. On a longarm, you can “float” the batting without pinning it to the quilt top. You’ll waste some batting where you won’t have trapunto using a full batt, but you’ll save lots of time!

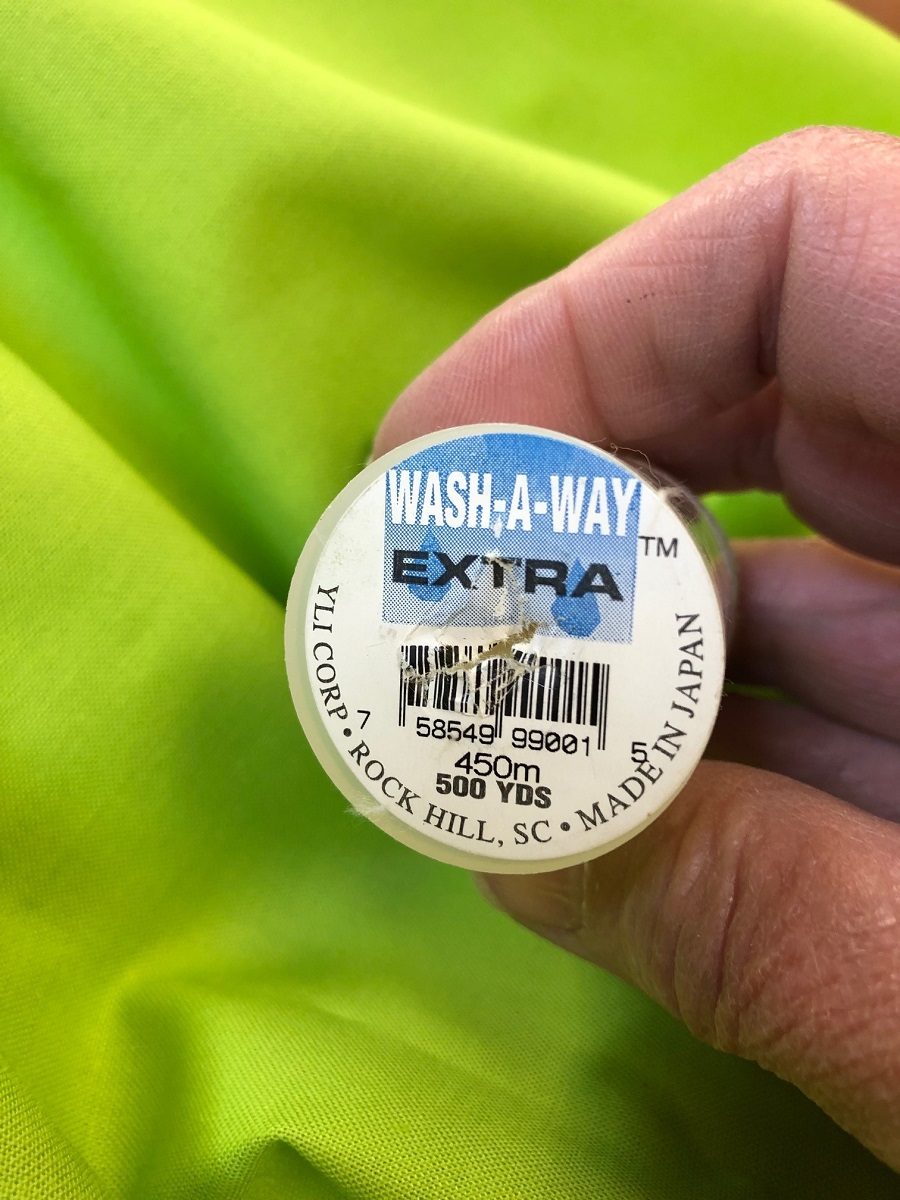
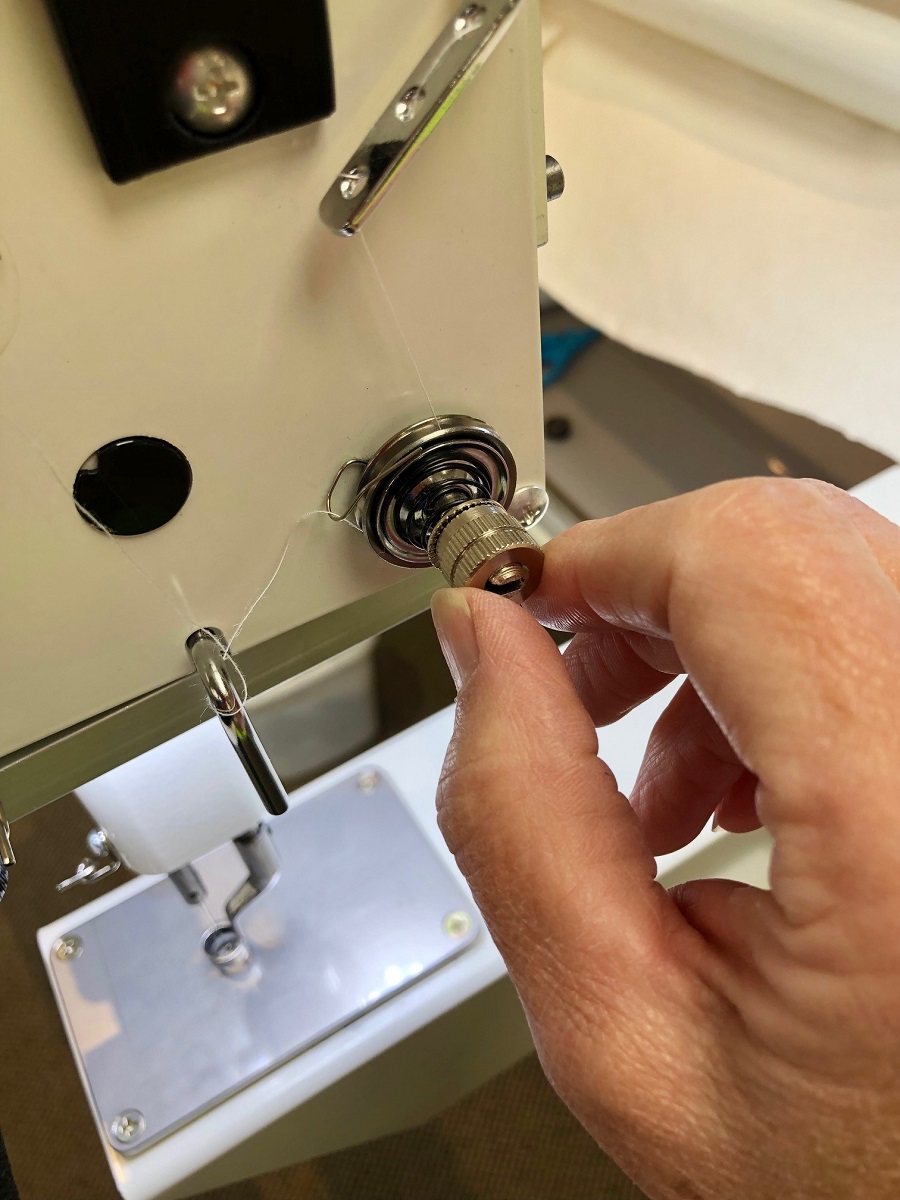
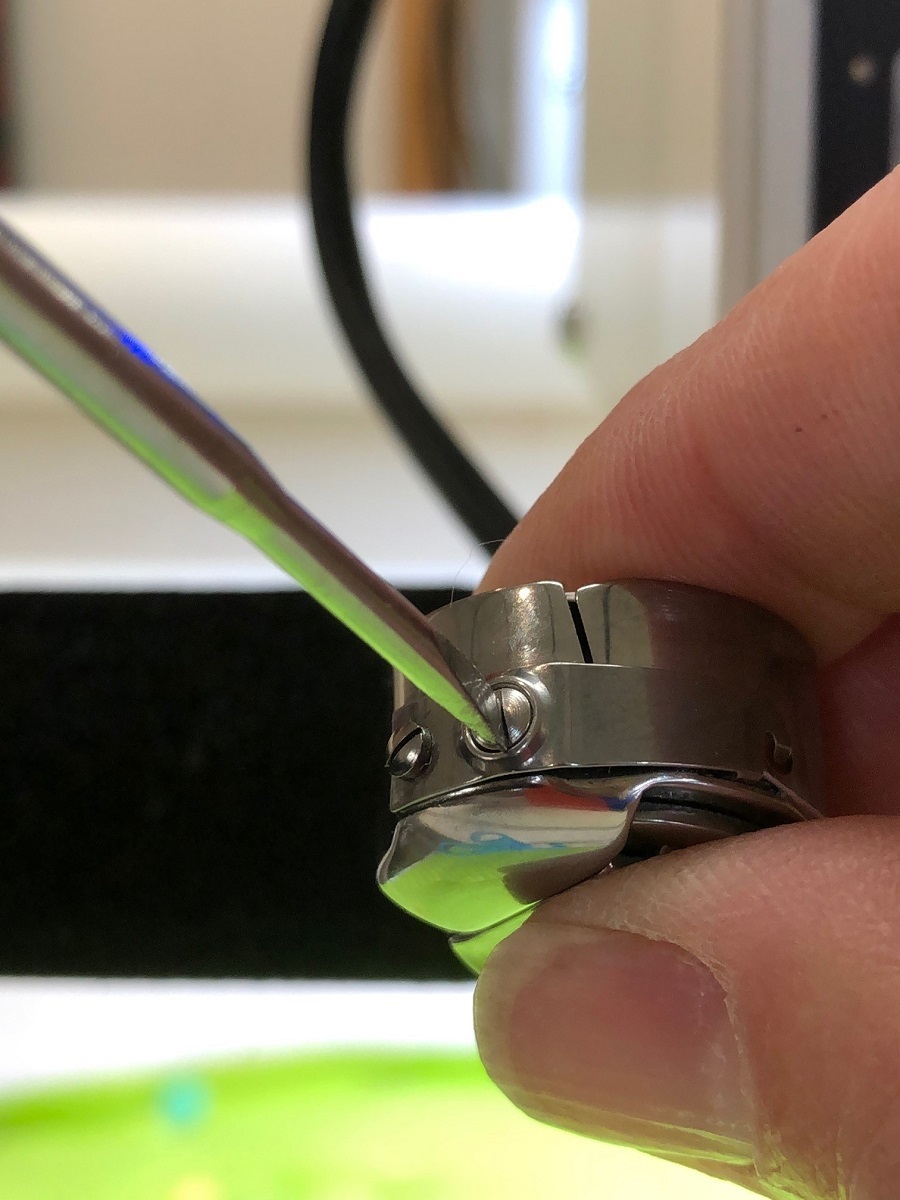
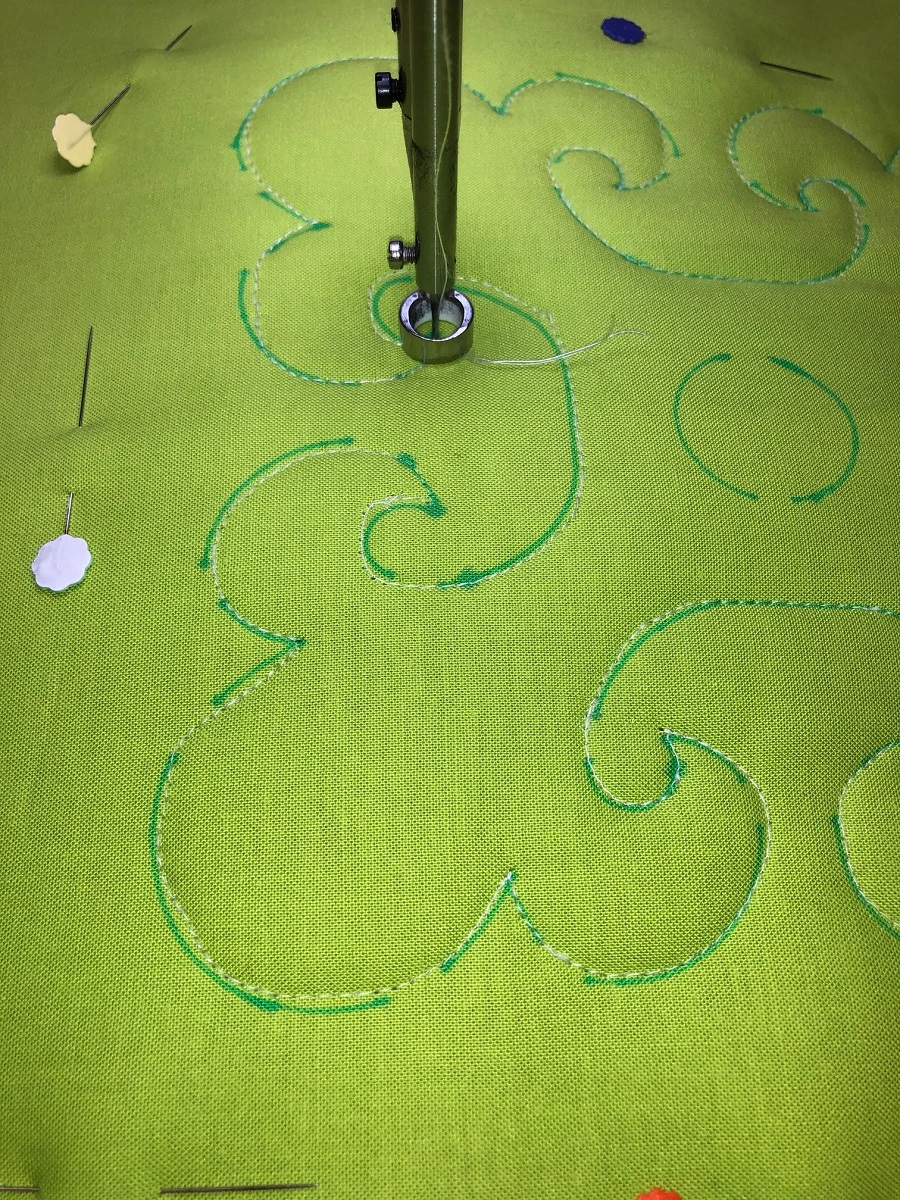
Change out your regular thread for water-soluble thread. I like Wash Away Extra by YLI and Vanish Extra by Superior Threads, but other good products are out there as well. (HINT: I also use water-soluble thread in the bobbin for this technique so that I won’t have to worry about any shadow-through when the quilt is finished. Loosen the tension on your bobbin winder if the thread breaks as you wind or slow the winding speed down if you can.)
This thread is only meant for temporary basting situations, so it’s not very strong. To keep breakage to a minimum, you may need to loosen your top tension and bobbin case tension. Don’t worry about proper tension like you normally would; since we want the thread to completely dissolve anyway, it’s okay to have sloppy stitches this time!
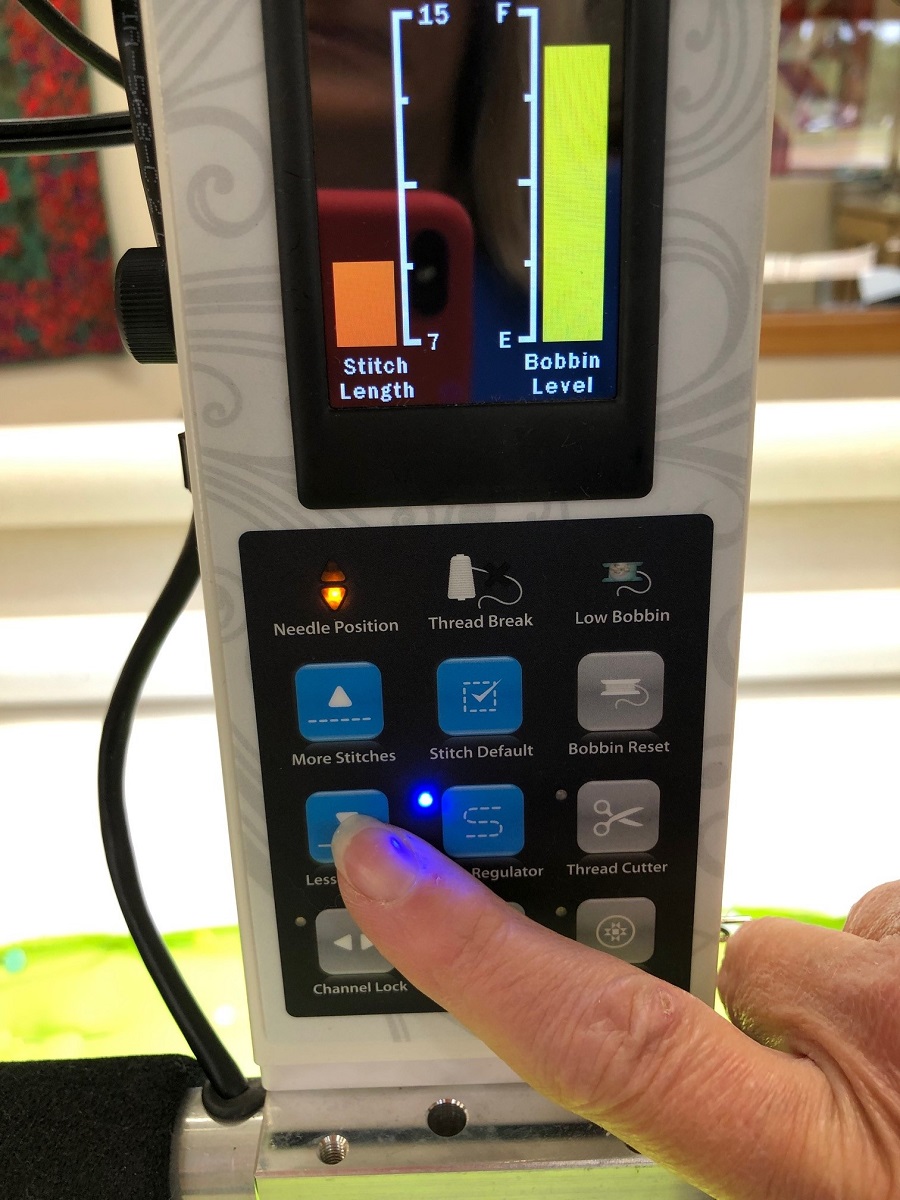
You can also lengthen your stitches since they are only used to temporarily baste the backing in place.
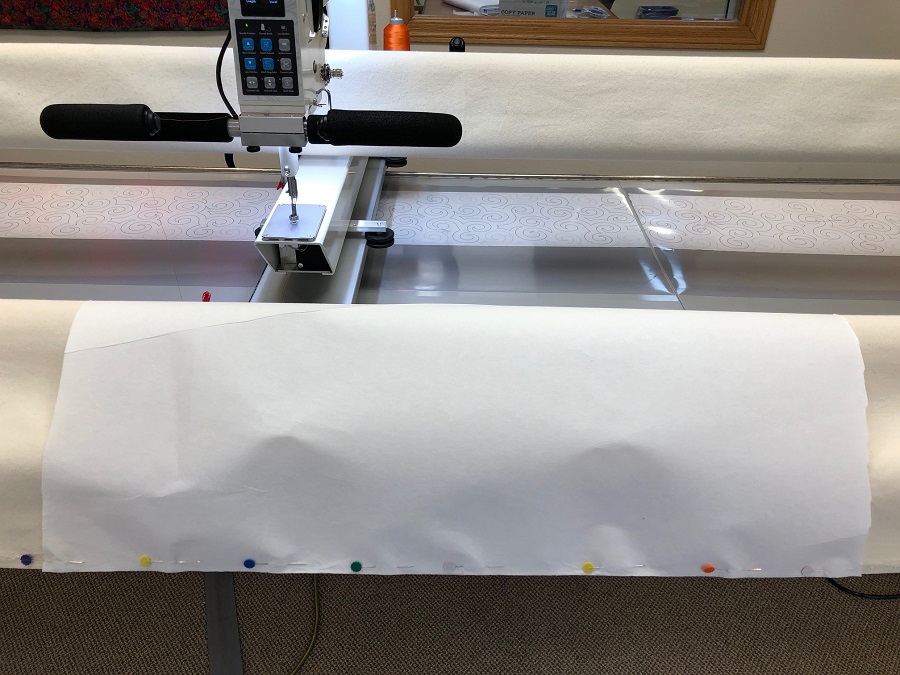
If you’re working on a longarm, now load your quilt top ONLY to your frame—no backing or regular batting. (If you’re using one large batting piece for the trapunto on a longarm, you will need to attach both the quilt top AND the top edge of your batting to your pick-up roller for this first step. That’s because you won’t have any backing on the frame to keep the batting in place.)
OPTIONAL: If you find that the batting is getting caught on your machine bed or throat as you work, you can attach water-soluble stabilizer to your longarm frame as if it was the ‘backing’. It helps the machine glide across, but it also easily tears off when you’re finished. Any remnants will also dissolve when the quilt is washed. If you need larger pieces, overlap the stabilizer edges slightly and stitch it together with the water-soluble thread.
Now stitch around your design, trying to stay about 1/16” just inside your marked lines. For a home machine, drop your feed dogs and use a free motion or quilting foot for this step.
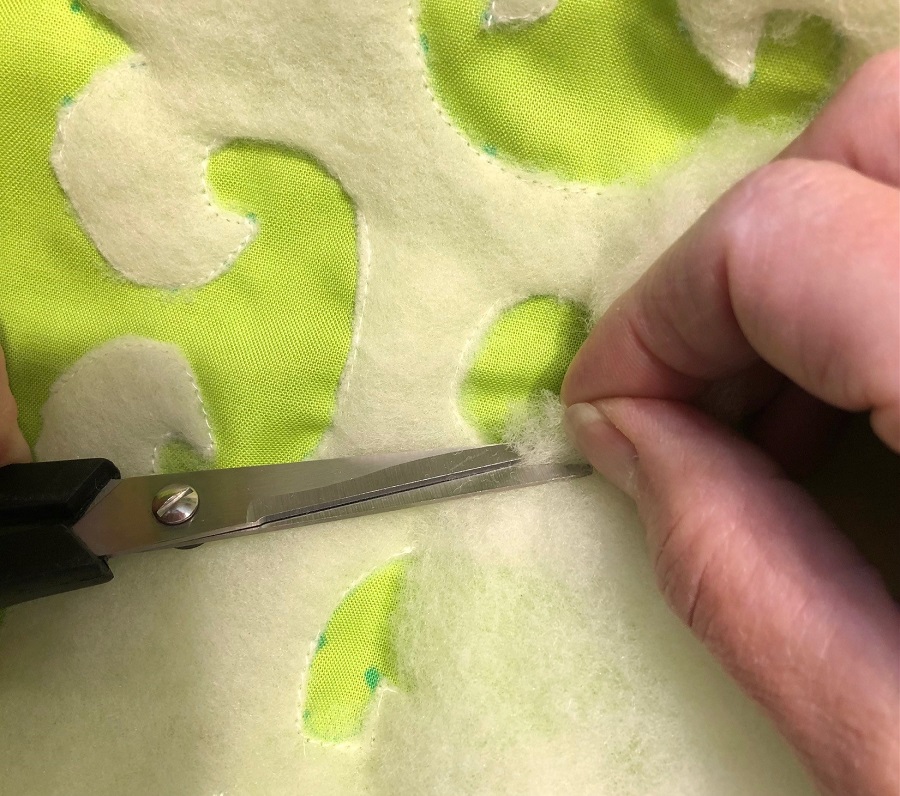
Remove the quilt top from your frame and flip it over.
If you’ve used water-soluble stabilizer on the back, remove the stabilizer along the design’s outer edge. You can leave the paper inside the design in place, or tear it off, your choice. Sometimes the paper helps distinguish where the stitching line is.
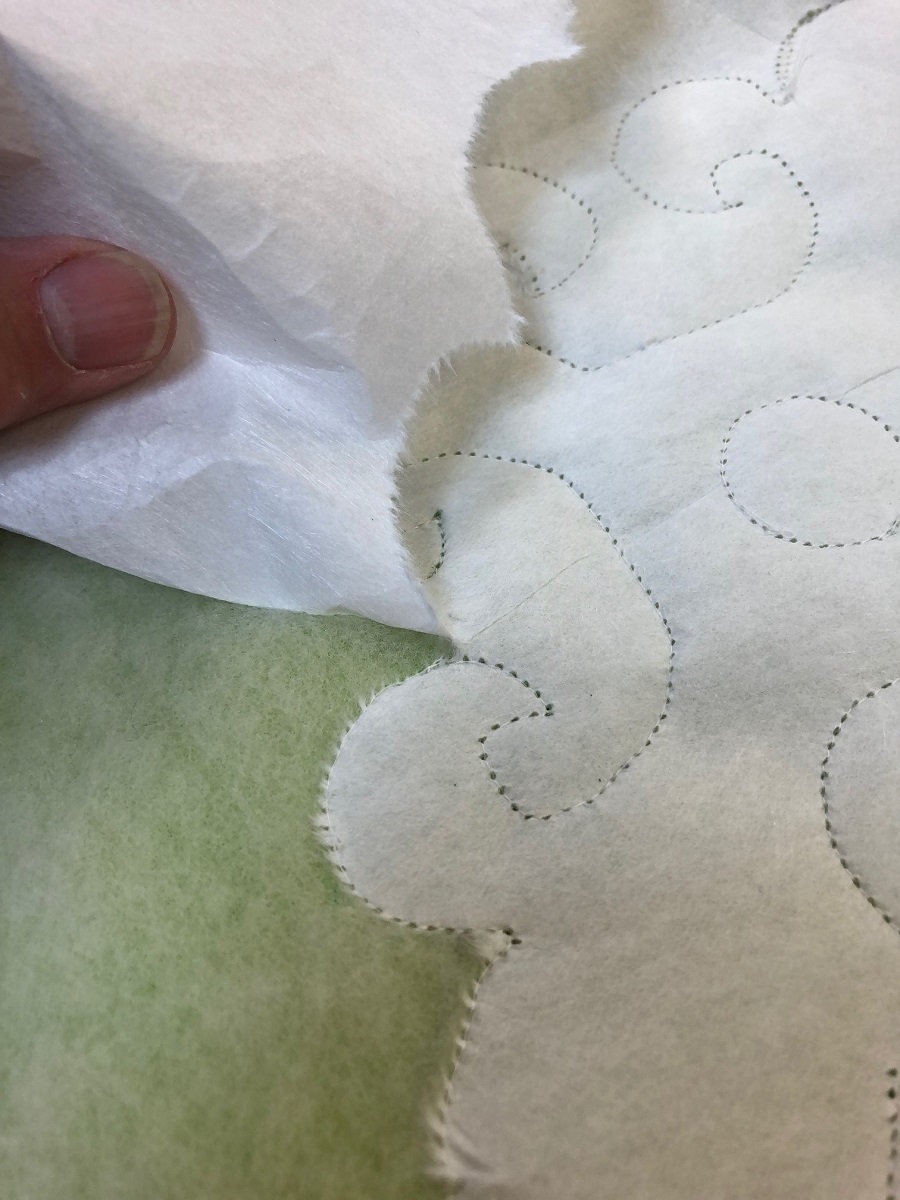
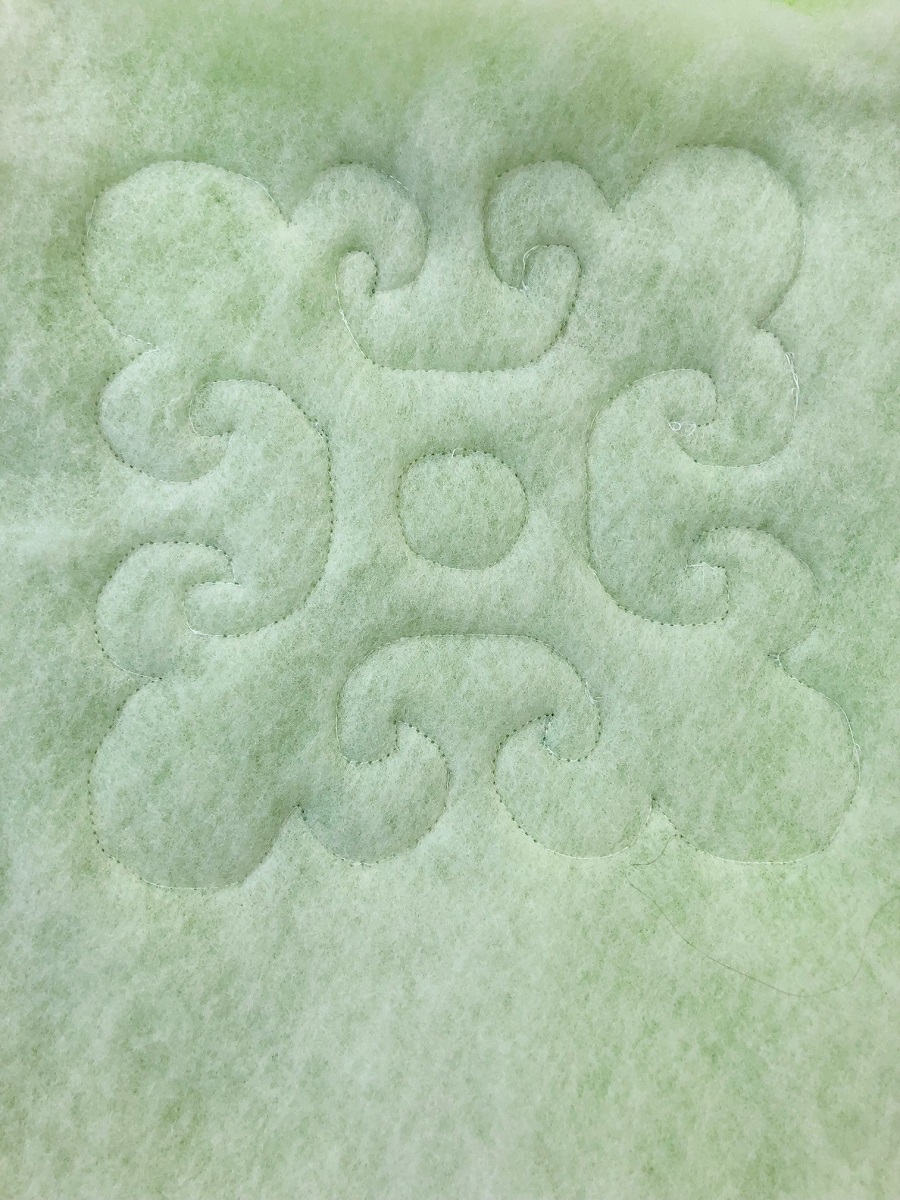
Use a blunt-edge scissors (no one wants to go to all that work and then poke a hole in the top!) and trim away the excess batting just along your stitches.

Once all the batting trimming is done, rethread your machine with regular quilting thread, put quilting thread in the bobbin, and reset all your tension and stitch length settings. Do a small test swatch to make sure everything’s back to normal.
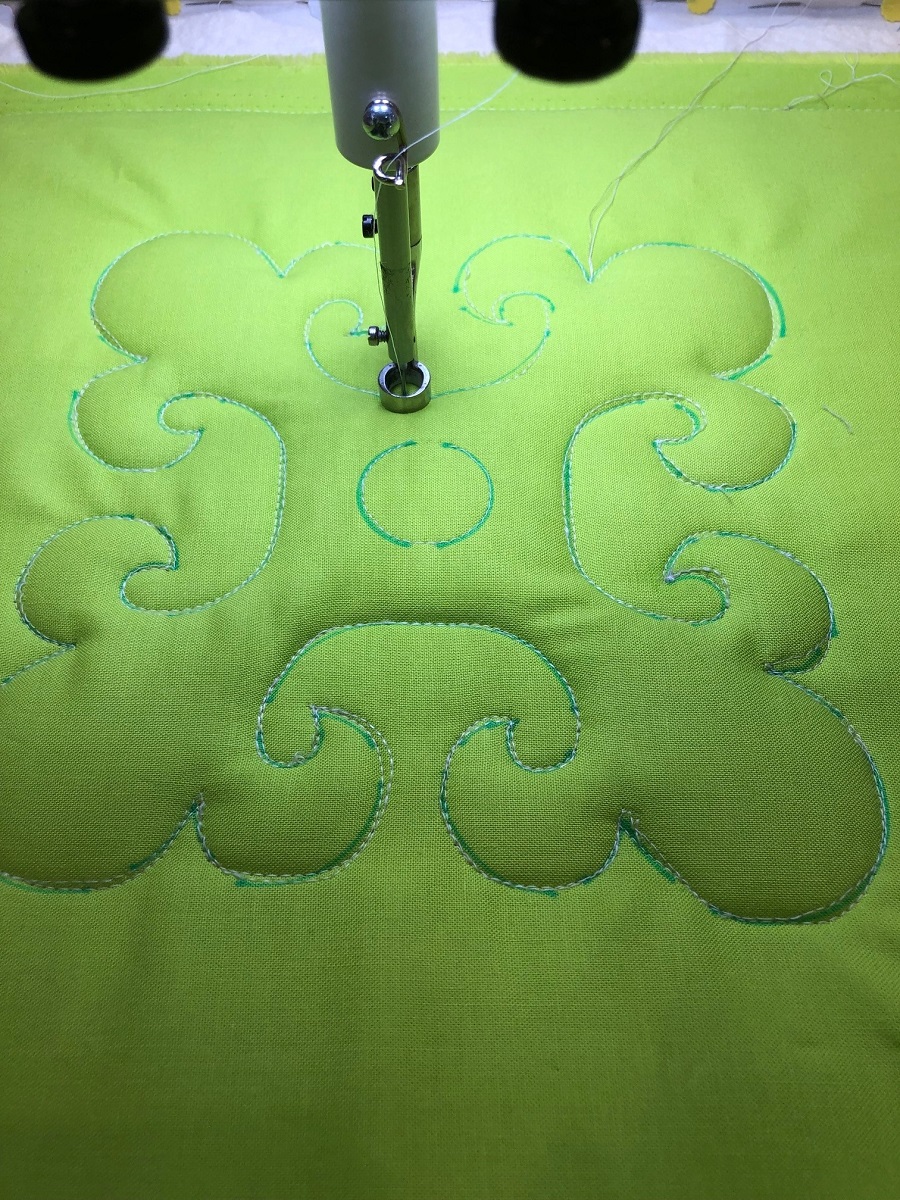
Now load the quilt on to your longarm frame as if you’re starting from scratch. Load the backing and regular batting along with the quilt top. For a home machine, layer and baste the quilt sections as you normally would for free motion quilting.
This time, stitch right on your drawn quilting lines, which should put your stitches just outside the stitches you made with water-soluble thread.
You’re nearly done! Even though you’ve now got two layers of batting under the trapunto sections of your top, you’ll need to add stitching around your design to create the contrasting texture. Switch to a 60-wt thread or finer and use a tight, dense background stitch around the design to set off the trapunto.
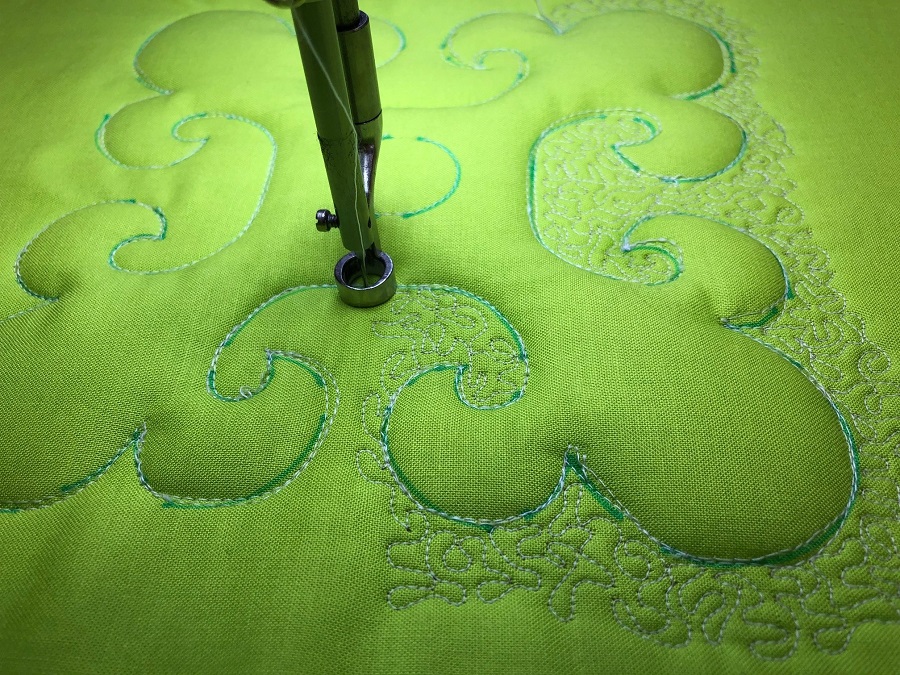
Ta Da! When you’re ready to show off your feathers and get them noticed, they’ll pop off the quilt with a little trapunto!