
Reference chart for squares on point
Sometimes just a tilt of your head is all it takes to change a boring view into something wonderful to behold! That’s how I feel about setting quilt blocks “on point”. Sure, the block layout may be okay with a straight set. But something magical often happens when that same block gets a 45-degree twist. Suddenly the blocks look like ballerinas with their arms gracefully extended, and secondary designs pop out as supporting dancers!
Check out this classic “dogtooth violet” quilt block.
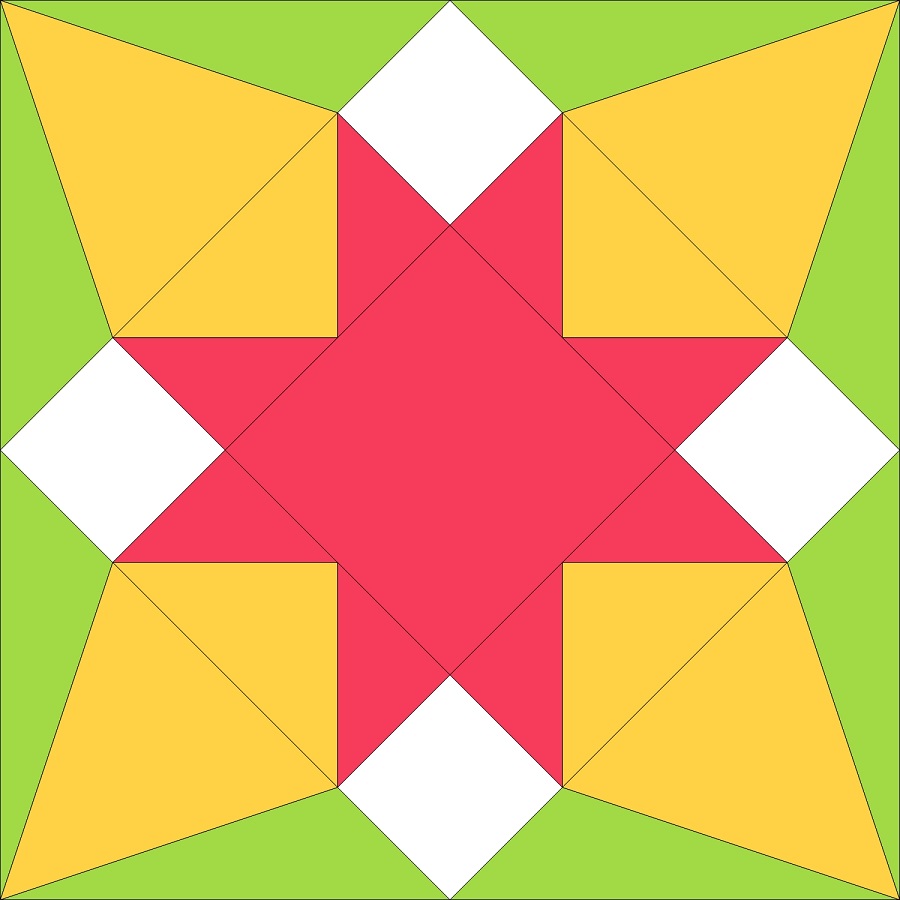
The triangles that point to the block’s corners seem like they’d naturally create an amazing secondary design. When the blocks are laid out side by side, they do create a thin diamond shape between each neighboring block. But because of the straight setting, those diamonds seem to overpower the stars, even with the stars featuring a warm violet color. In addition, the block edges get lost next to the inner green border.
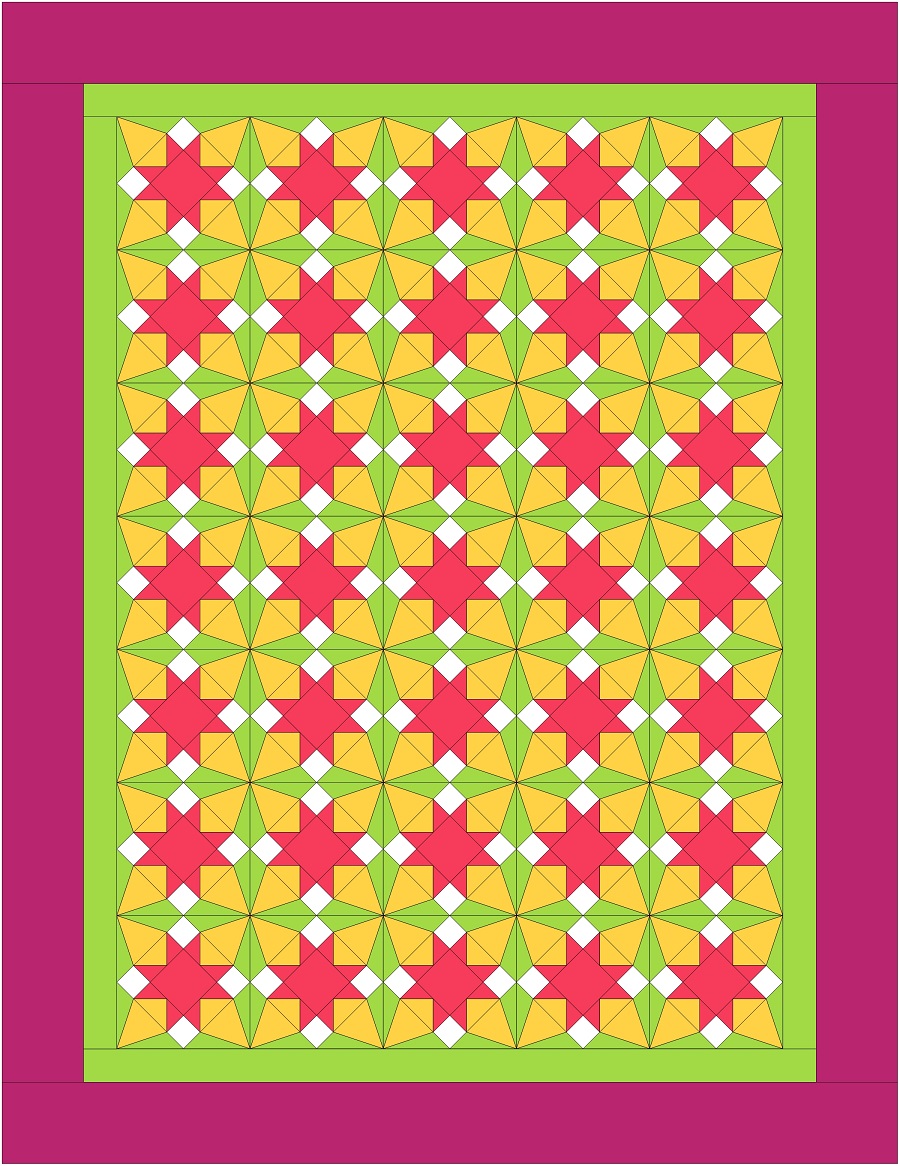
Okay, so what if we change that border to a different color, like orange? And how about sparking up the temperature a bit by adding some orange stars mixed in with the violet ones?

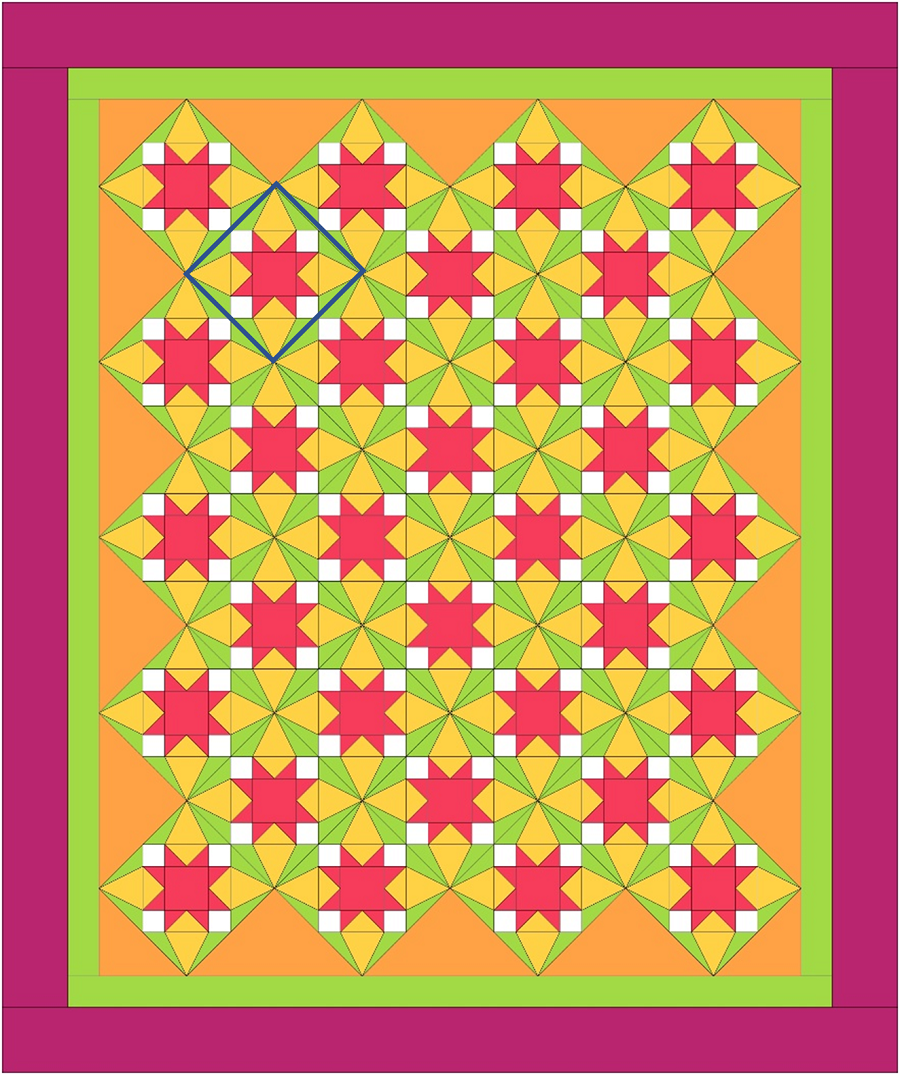
That’s an improvement, but could it look even better? Look at the same block but now set on point. What pops out now?
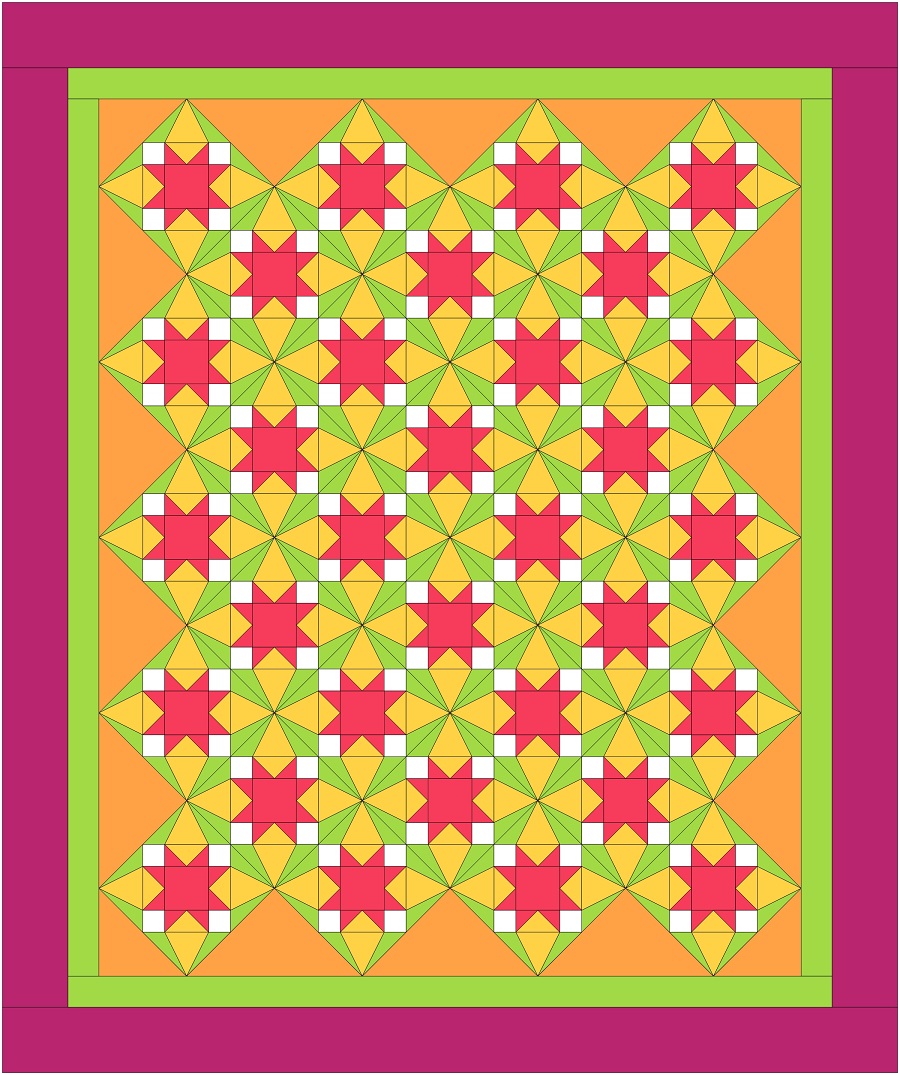
I clearly see the stars this time! And the green diamonds act like a lattice garden fence, adding just enough contrast to make the stars shine. Since the stars and the green diamonds now look like they could be separate blocks, I’ve outlined the actual block to help you find it. See, isn’t it magic?
When you turn quilt blocks on point, suddenly the quilt size changes because the diagonal measurement of the square is larger than the square’s side measurement. Fewer quilt blocks are needed to get quilts of similar size with a diagonal set. In the two examples above, the square-set quilt is 5 pieced blocks wide by 7 blocks high, for a total of 35 blocks. The on-point quilt only needs 32 blocks but ends up being about 5 inches wider, though it’s close to the same height (even with the same border widths as the first quilt.)
To help you determine how large your quilt will be when you turn blocks on point, we’ve put together a handy reference chart to tell you the diagonal measurement of different-sized squares. If you dream up a layout with square sizes that aren’t listed, to calculate the diagonal, multiply the side of the square by the square root of 2 (no square root key on your calculator? the square root of 2 is 1.414).
Here’s an example: If my quilt block finishes to 6.75 inches, multiply that by 1.414 = a diagonal of 9.545 inches. (Hint: always round fractions and decimals UP; it’s much easier to trim off a scant bit of fabric than to sew more on!) So, a quilt that is made with 4 of those blocks on point will be 38.2 inches wide (without borders).
Even though making fewer blocks saves some time, you’ll end up spending that time on making corner and side triangles to fill in around the perimeter.
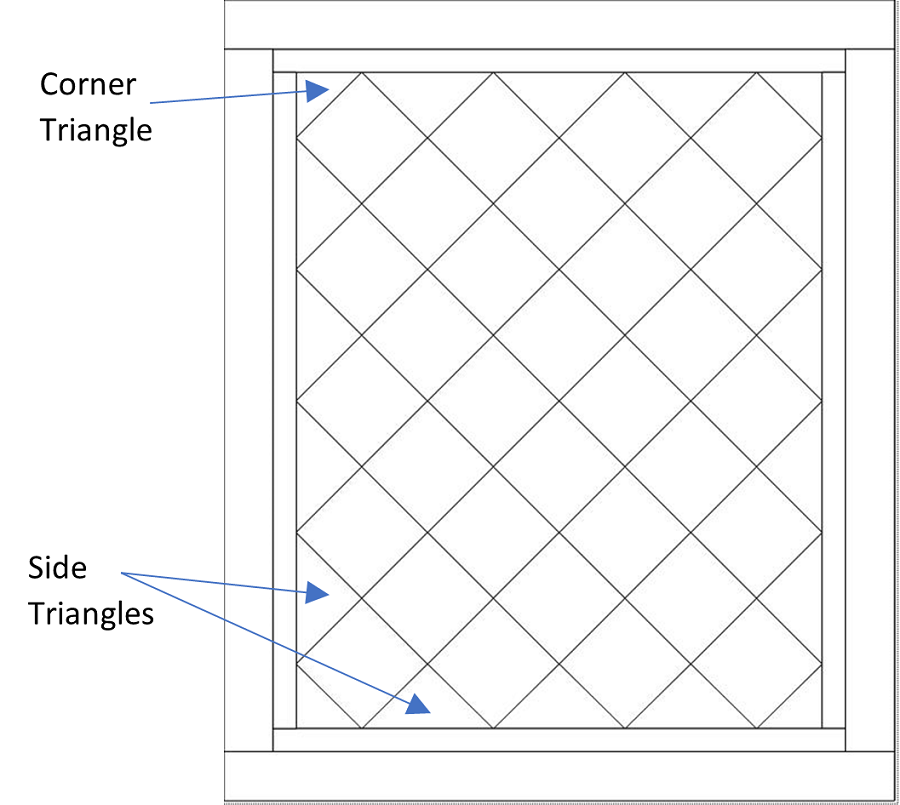
We couldn’t leave you stranded to figure out how to cut them, so we’ve also included a chart to help with that! For the side triangles, you’ll cut squares are cut in both diagonal directions so that the outer edge of the blocks won’t have bias edges, giving you 4 side triangles per square. The chart also includes the square size to cut for the smaller corner triangles you’ll need to finish the layout, which are only cut on the diagonal once (two squares will yield the four corner triangles you’ll need to finish the diagonal set.)
The next time you’re laying out your blocks on your design wall, give ‘em that 45-degree spin and see if there’s a spark of magic with that twist!


