How to quilt Twisted Feather variations
This is one of a series of articles all about quilting feathers. We have looked at traditional Amish Style Feathers. We’ve looked at spineless feathers. In the previous article we explored Garden Gate feathers too. I hope you’ve had a chance to try some. The feather we are going to look at today is loosely based on the Curled Feather Variation.
One of the two most common shapes you’ll find in freemotion machine quilting is the curl and hook. You may find a video tutorial I did helpful which explores the Anatomy of a Curl. Essentially the hook is a question mark shape that does not cross over itself.

The curl is the same path but once you tuck into the center of the question mark shape you cross over yourself as you head back to where you started.

The Twisted Ribbon Feather plume is based on the curl. First, you’ll make the question mark swirl up to the center of your feather plume.
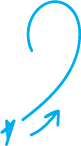
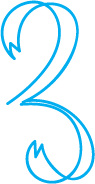
When you reach this center point quilt the letter “V”.

Finally, cross over yourself as you head back down to where you started and you’ll have made your first Twisted Ribbon Curl.

Keep in mind we are using this shape as the basis for a feather plume we will place on a spine but the twisted ribbon look can be used as a quilting motif in many other ways. In fact, you may like to see how it can be used as a border design in this video! The only difference with the curl we are making today is the little “V” we’ve placed in the head of our feather plume.
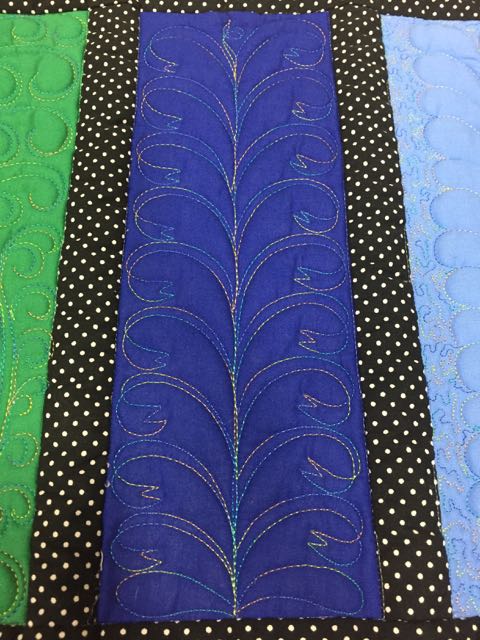
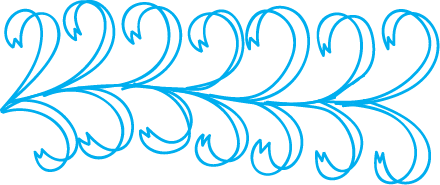
Now that you see how to make our little Twisted Ribbon feather, let’s put it on a spine!
I typically do these working back and forth up the spine as opposed to quilting one side of the spine and then starting over at the base of the spine for the opposite side but do what feels more natural to you.
Here’s our Twisted Feathers all stitched out! Super fun, right?