How to quilt embroidery on quilts
For centuries, hand embroidery embellished everything from bed linens to handkerchiefs to jacket lapels. In fact, fossilized remains of boots, clothing and a hat dating back to 30,000 BC were discovered during a recent archaeological find! Imagine what our cave man ancestors would have thought of a 10-needle embroidery machine.
Today, according to the Quilting in America ™ 2017 survey by The Quilting Company, over one-third of quilters own an embroidery machine, and about one-third also do embroidery on quilt tops. That leads to a big question—How do you quilt them?
Fear of damaging the embroidery can keep people from quilting through the embroidery motifs, especially if the embroidery is hand-stitches or if the embroidery threads are fragile. However, leaving large areas un-quilted can lead to premature wear, sagging, snagging and fiber damage. Buttons, belt buckles, and even fingers and toes can catch on the embroidery threads. Friction on the raised areas speeds up deterioration—especially if the quilt is laundered in a washing machine.
To prolong your embroidered quilt’s lifespan, keep the quilting density consistent across the entire quilt—even if that means adding stitching around in the embroidered sections. Sometimes stitching over the embroidery is the best option—especially if the fabric needs stabilization or the quilt will see heavy use (such as a baby quilt.)
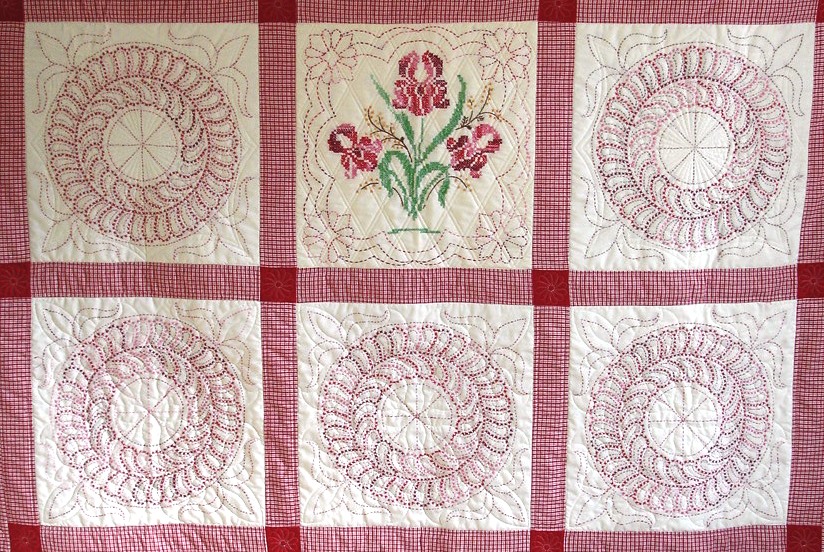
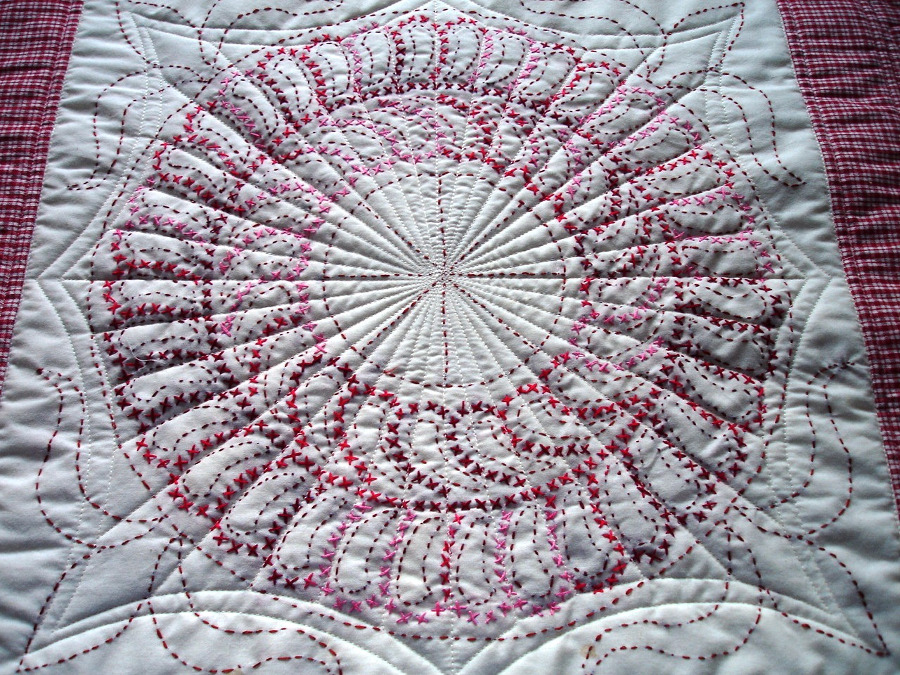
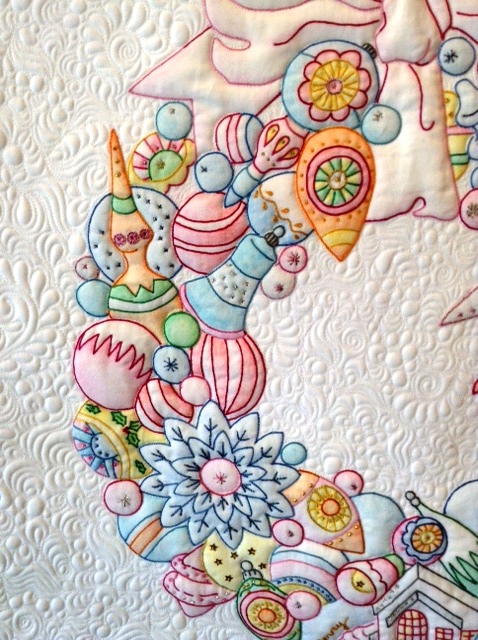
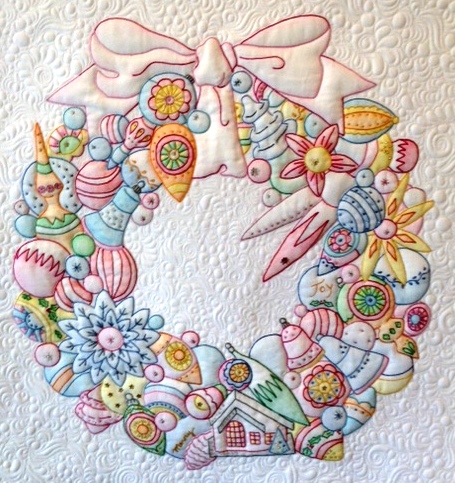
APQS Dealer, Georgene Huggett from Virginia, rescued these cross-stitch blocks from a yard sale and put them into a quilt. These block types typically have the quilting lines stamped on to the fabric along with the cross-stitching lines. However, it appears that the mystery stitcher actually embroidered the quilting lines as well! Georgene used her APQS Quilt Path to stitch a design that enhanced the feathered wreath plumes, while a diamond grid secured the single iris cross stitch block. Stitching over the blocks ensures that this older fabric will be stable for use in a quilt.

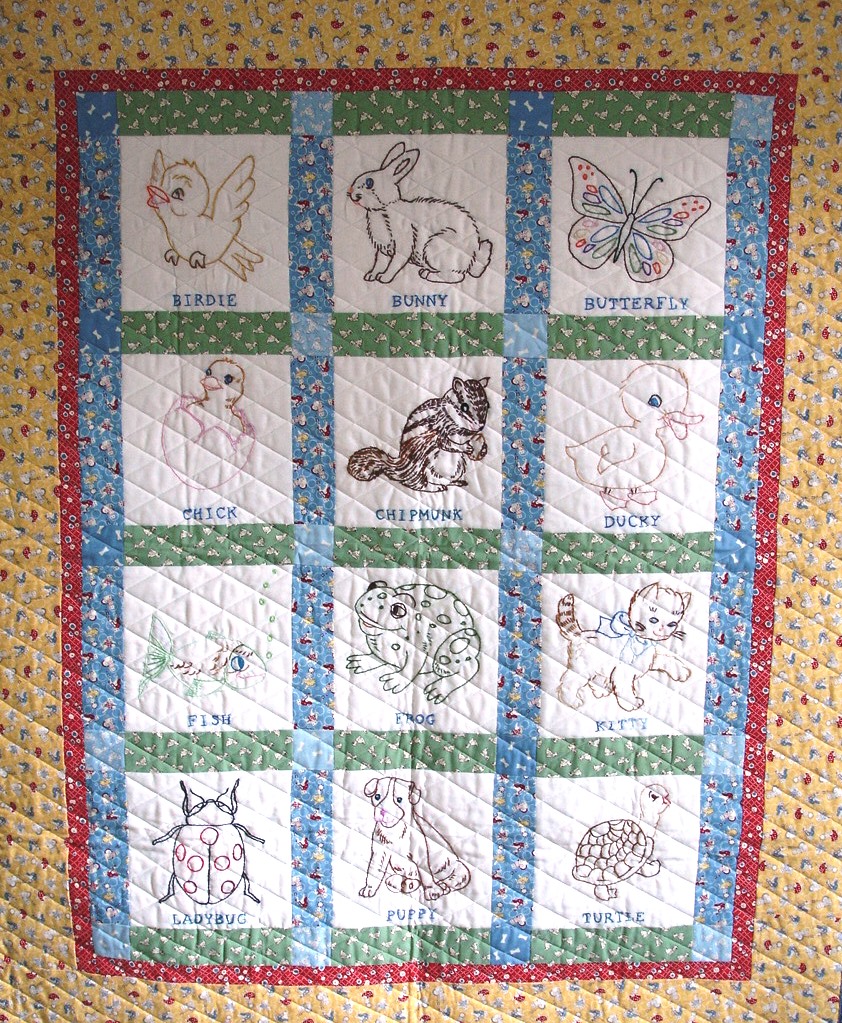
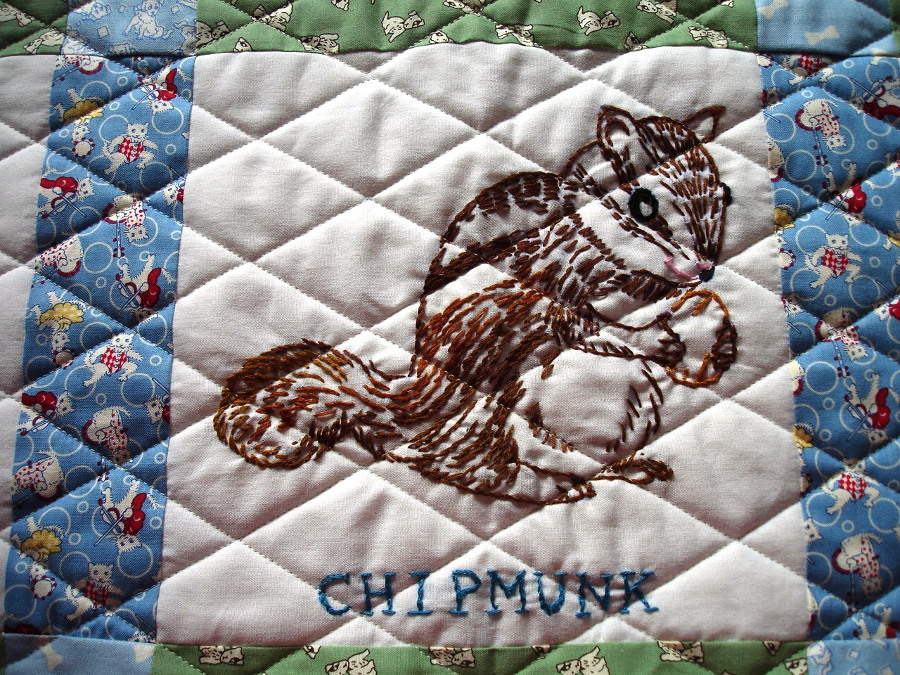
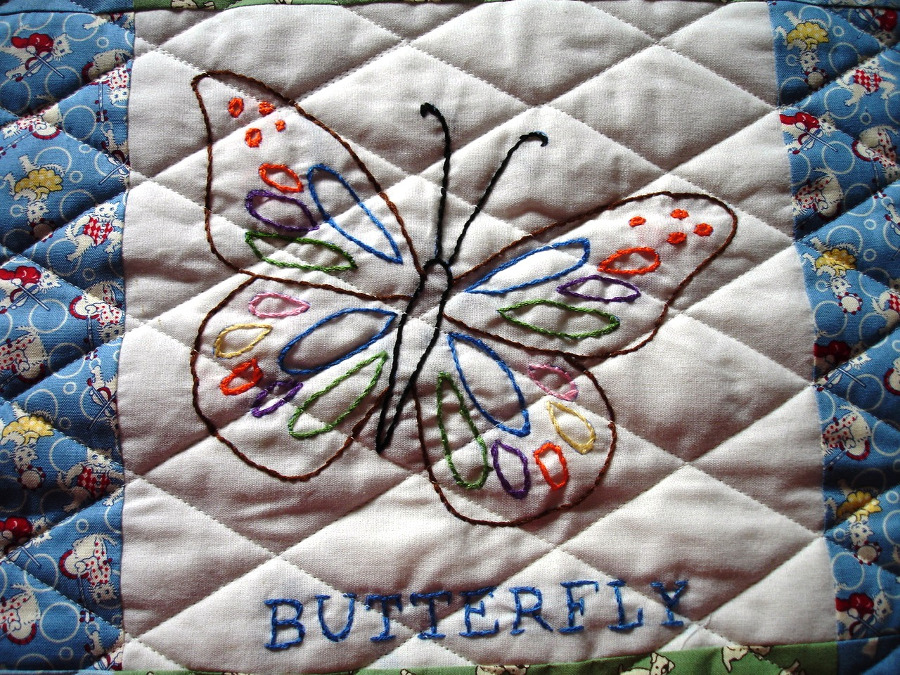
Her rescued animal blocks made a cute baby quilt. With the hundreds of washings it’s bound to get, an overall design is a good idea to help it stay together!
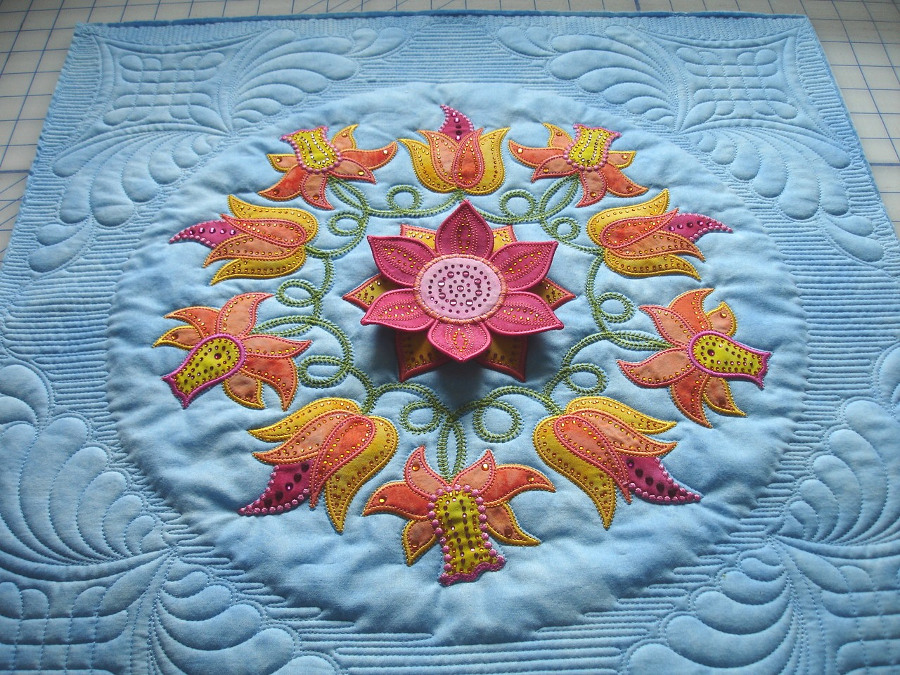
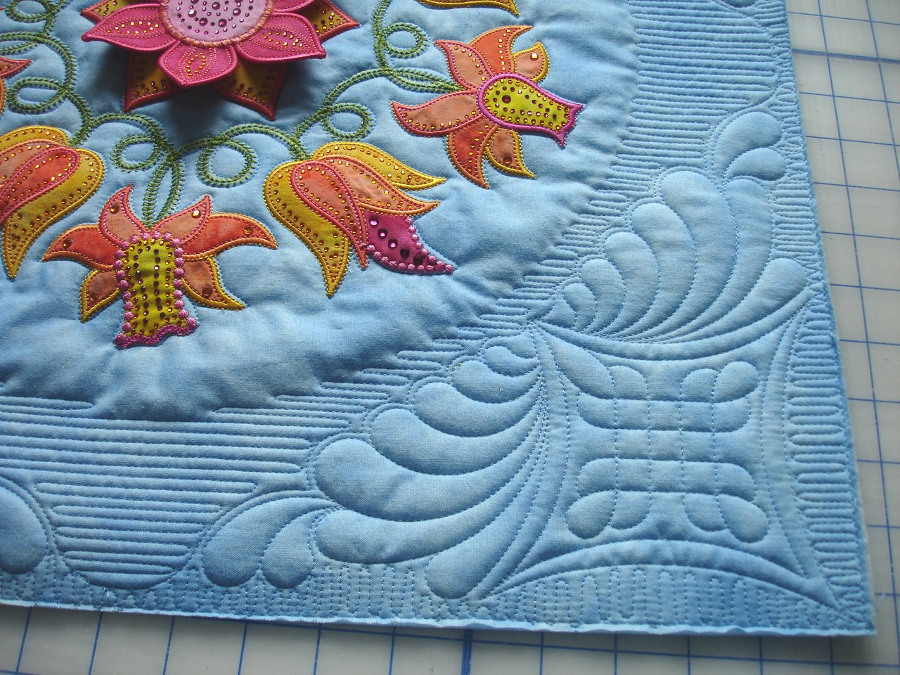
While an overall design is always an option, custom quilting embroidery quilts can really bring their elements to life. It doesn’t mean that the quilting must cover up the embroidery design. Instead, the quilting stitches follow the natural contours, shapes or color breaks in the design. Outlining the embroidery elements helps balance the quilting density, creating texture and adding realism to an otherwise flat picture. It’s like adding eyeliner to your eyes to make them pop! See how each element in Idaho APQS Dealer Jane Hair’s wreath comes to life with outline quilting?
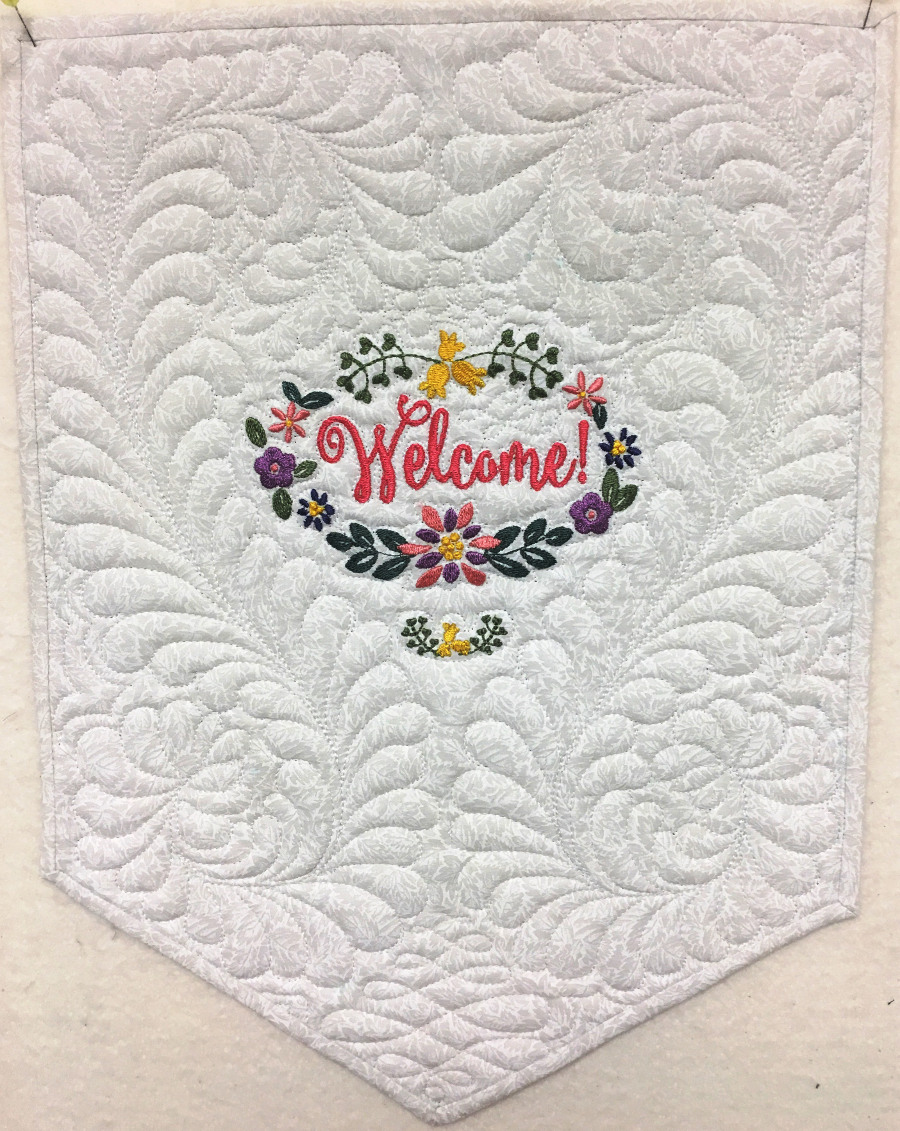
Outline quilting works best with fine thread. Anything from a 50-wt thread down to even a 100-wt thread would work. This way, the quilting stitches will be nearly invisible between the embroidery design elements—even when they are close together. APQS Dealer Joanne Flamand used thin white thread to outline each letter in her banner. Notice how nicely the word “Welcome” stands out?
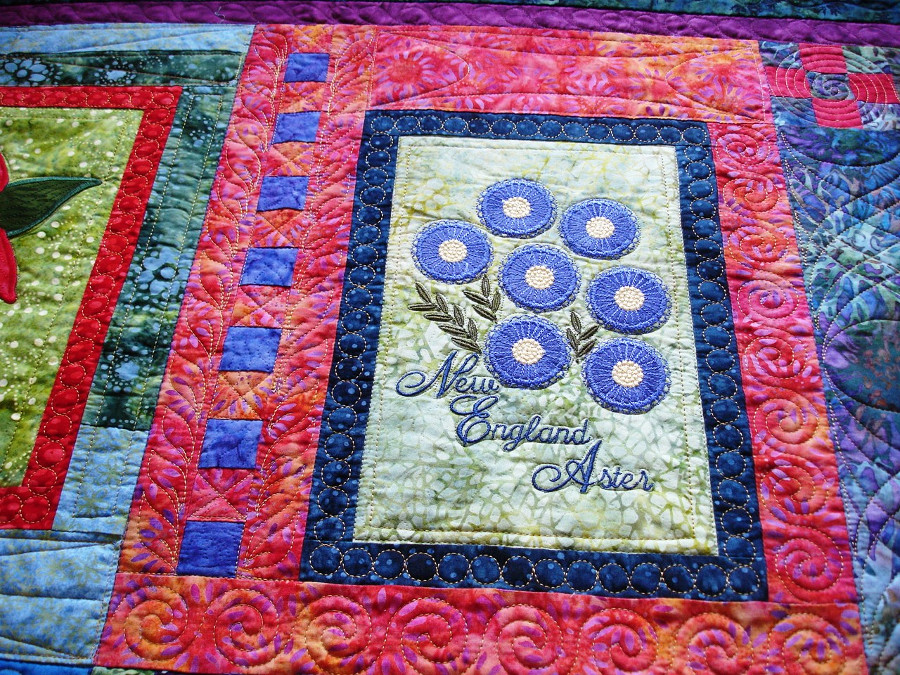
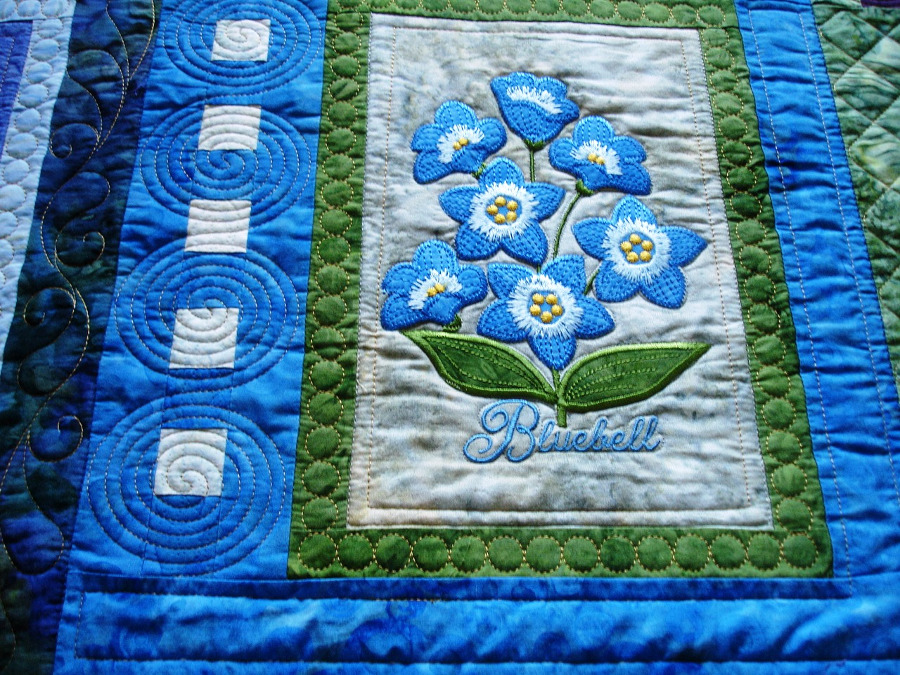
Take a look at how the outline quilting enhances the flowers in Georgene’s quilt.
Other times, stitching right on top of the embroidery (in addition to outlining it) helps with the density issue while also defining the embroidery design better. Personally, I often choose invisible thread in my needle (and sometimes in the bobbin) when the embroidery has many color changes. It adds the texture I’m after without worrying that the thread might show on top of the embroidery.
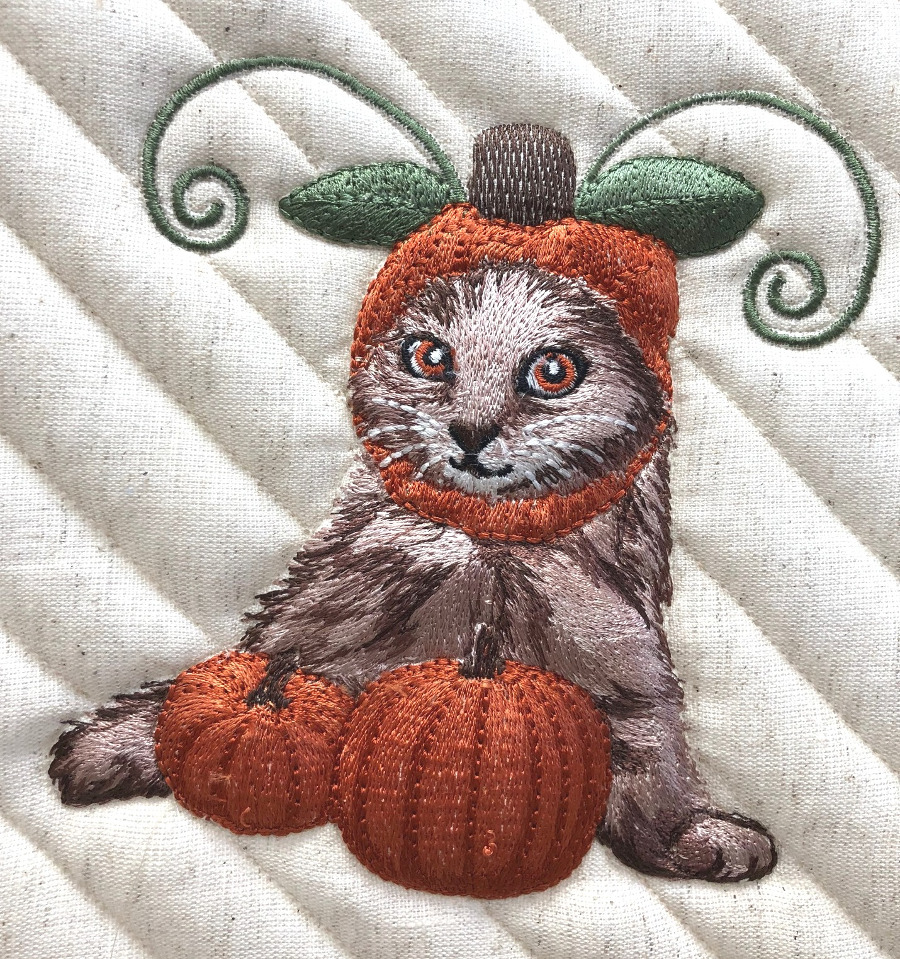
In the photo below, the embroidered cat is only outline stitched.
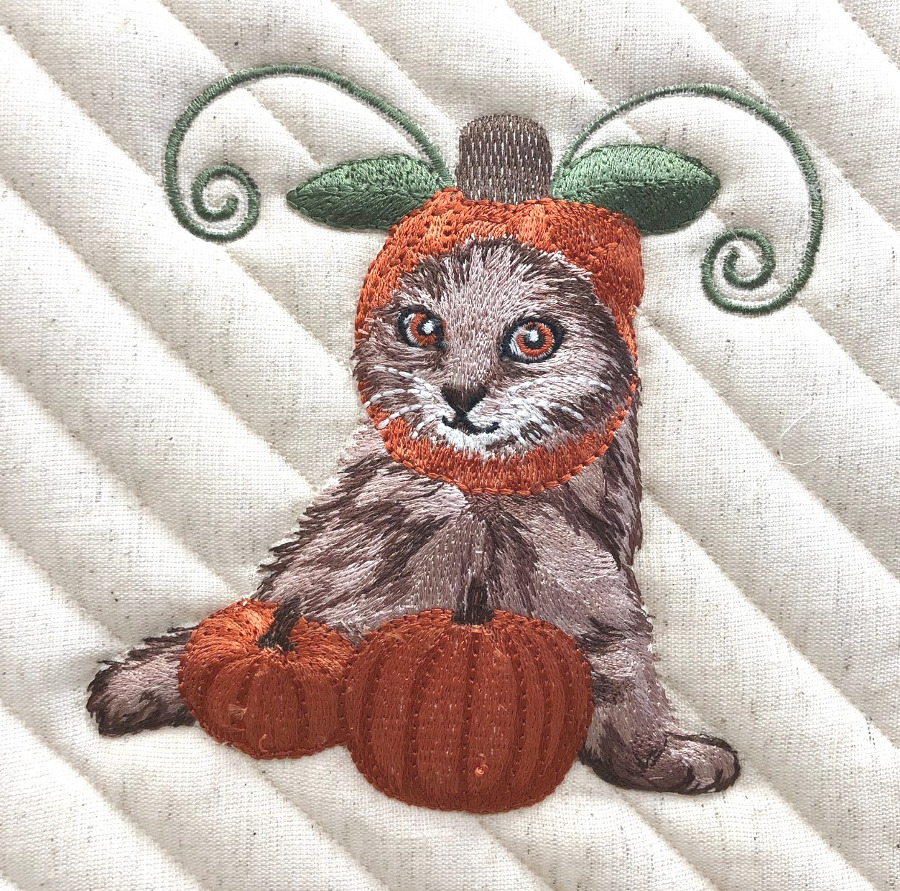
By adding a little more stitching on top of the embroidery, around the pumpkins, his face and paws, the piece has more depth and realism. You could add a bit more around the cat’s eyes, mouth, and even the leaf stems if you desired.
Of course, the final decision is up to you—after all, it’s your quilt! Do what you like, and like what you do! Here are more embroidered quilt pictures for inspiration.
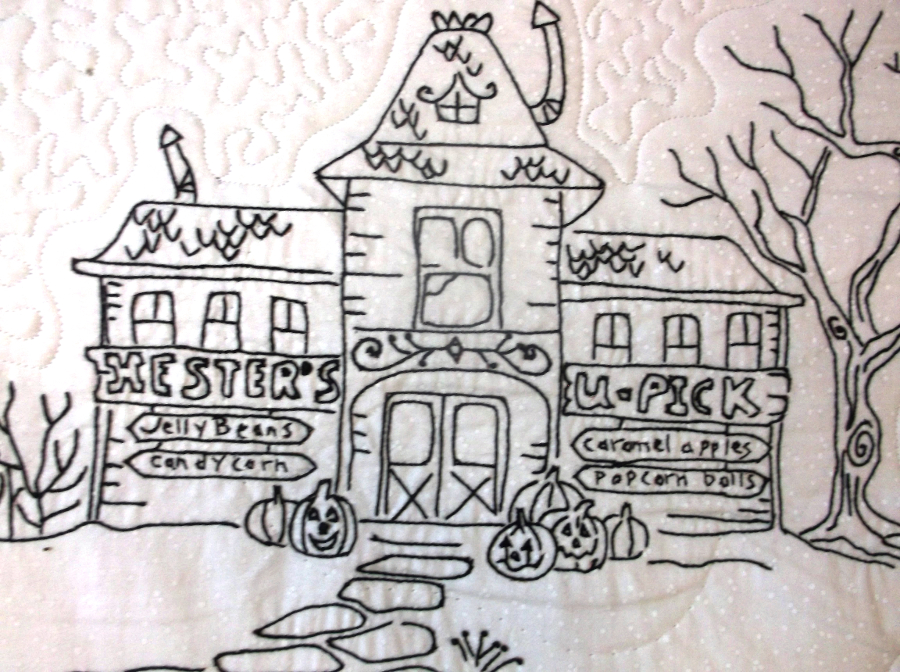
Stitcher Sharyle Kingston captured the spirit of Halloween and APQS Dealer Beth Durand of Portland, Oregon, brought her quilt to spooky life!
APQS Dealer Lyn Crump from Queensland has this embroidery beauty on her frame!
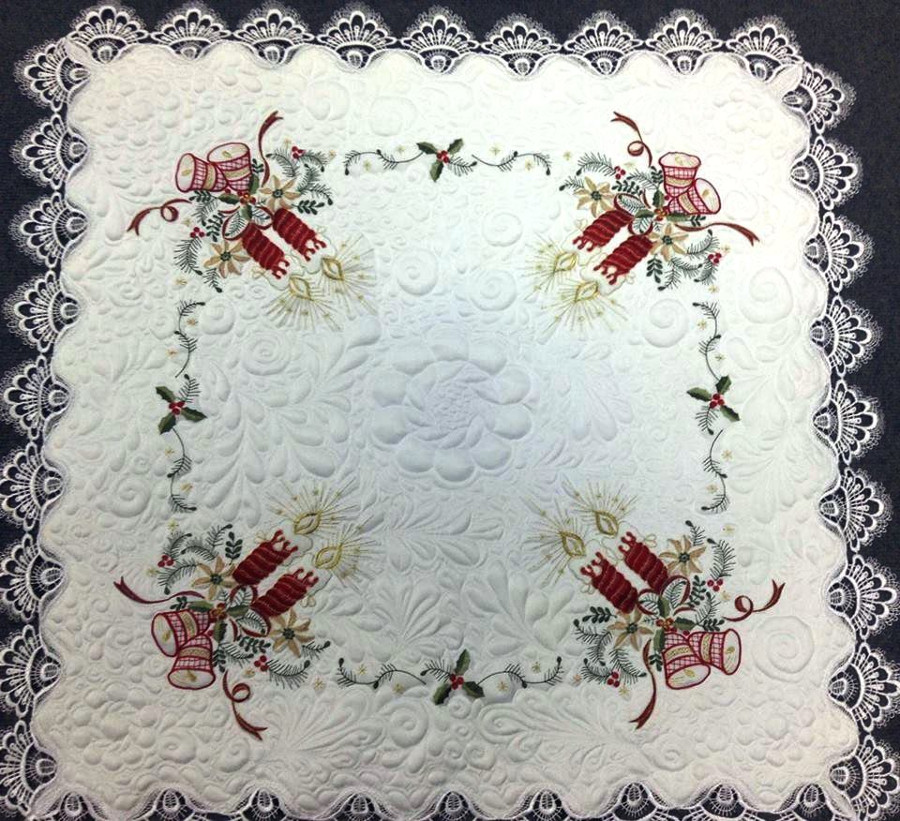
Have you got tablecloths and linens laying in your cedar chest? Here’s a way to breathe new life into them! APQS Dealer Ani Catt from the U.K. quilted this tablecloth with her Quilt Path in the center, then she doodled around the open areas freehand.
Three-dimensional embroidery is especially attractive with outline quilting. Dealer Georgene Huggett made this circle flower wreath look like a real garden!