Couching with your longarm
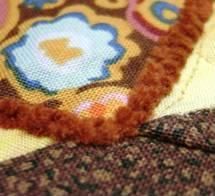
Today’s topic relates to a client’s quilt I once worked with in my studio. The piecer wanted the brightly colored fabric (shown in the photo below, left) to stand out more clearly, and wanted it to appear is if it were “floating” on top of the other fabrics. To accomplish this, I chose a technique called “couching”. This method secures fibers to the surface of the quilt that would not normally fit through the needle’s eye (see the finished block in the photo, below right). Isn’t it amazing how that little accent has such a big impact?


You’ll need a few supplies to successfully “couch” fibers such as yarn, ribbon, and lace to your quilt:
- Invisible Thread
- Extended Base
- Bobbin Case with tension loosened
- Bobbin wound one-half full with invisible thread
- Scissors
- Large-eye Needle
Detailed instructions for couching with your APQS longarm follow below. However, if you’re the type of person who learns better by watching, check out the following link where I’ve posted a YouTube video that illustrates this technique:
Couching with your APQS Longarm
Step One:
Attach your extended base to your quilting machine, and insert the bobbin with invisible thread into your bobbin case. Check the tension on the bobbin case by pulling on the thread tail and releasing the invisible thread. If the thread springs back into a corkscrew shape, the tension is too tight. Loosen until the thread no longer stretches.
Step Two:
Thread the invisible thread through your machine’s needle, and again check the tension. Pull the thread tail and release. Loosen the top tension until the thread no longer stretches and recoils into a spring-like shape.
Step Three:
Bring the bobbin thread to the quilt top and secure the thread tails with several tiny stitches. Since the thread will not show, you can use backstitches in a seam allowance.
Step Four:
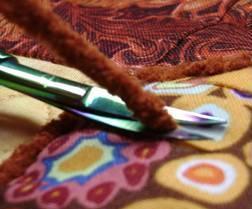
Slide the couching yarn under the foot, leaving at least a 4-inch tail loose. Set your machine to manual stitching mode, and turn your sewing motor speed down.
Step Five:
Now use one hand to guide the yarn in place, and use the other hand to move your quilting machine back and forth across the fiber slowly, creating “zigzag” stitches across the yarn with the invisible thread. It is okay if the thread pierces the yarn – you are not trying to
jump completely from one side of the fiber to the other with each stitch. Instead, you are creating a zigzag line of very tiny stitches that hold the yarn in place.
Step Six:
When you meet right angles where you want to change directions with the yarn, place several stitches at the turn to hold the fiber firmly.
Step Seven:
Once you’ve completed your shape, place several stitches over the yarn at the end of your couching. Leave another tail of yarn at least 4 inches long at the end of your stitching line.
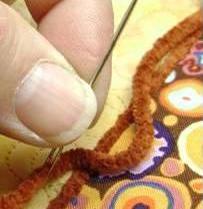
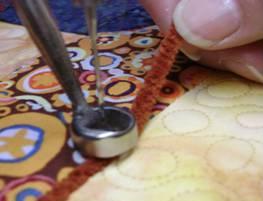
Step Eight:
Slip one of the yarn tails into the eye of the hand needle, and insert the needle’s end into the quilt sandwich next to your starting point. Be sure the needle is in the batting layer of the quilt, and has not exited the back of the quilt. Exit with the needle tip a short distance away from where you entered the quilt. Pull the thread tail into the quilt, and then cut off the excess thread. Rub your fingernail across the needle’s exit hole to close up the fibers. Repeat with the remaining thread tails. That’s it!