Ruler Your Quilt Header with Angela Huffman APQS Educator & Dealer

Adding spice with scallop and arc machine quilting templates

We hope you enjoyed seeing all the design possibilities that come with a scallop or arc machine quilting template from our article in the July/August edition of Quiltmaker magazine. Click here to see our article if you missed it.

Many folks don’t think of using a template for all over, edge-to-edge quilting so we hope you enjoyed seeing how beautiful and easy it can be.

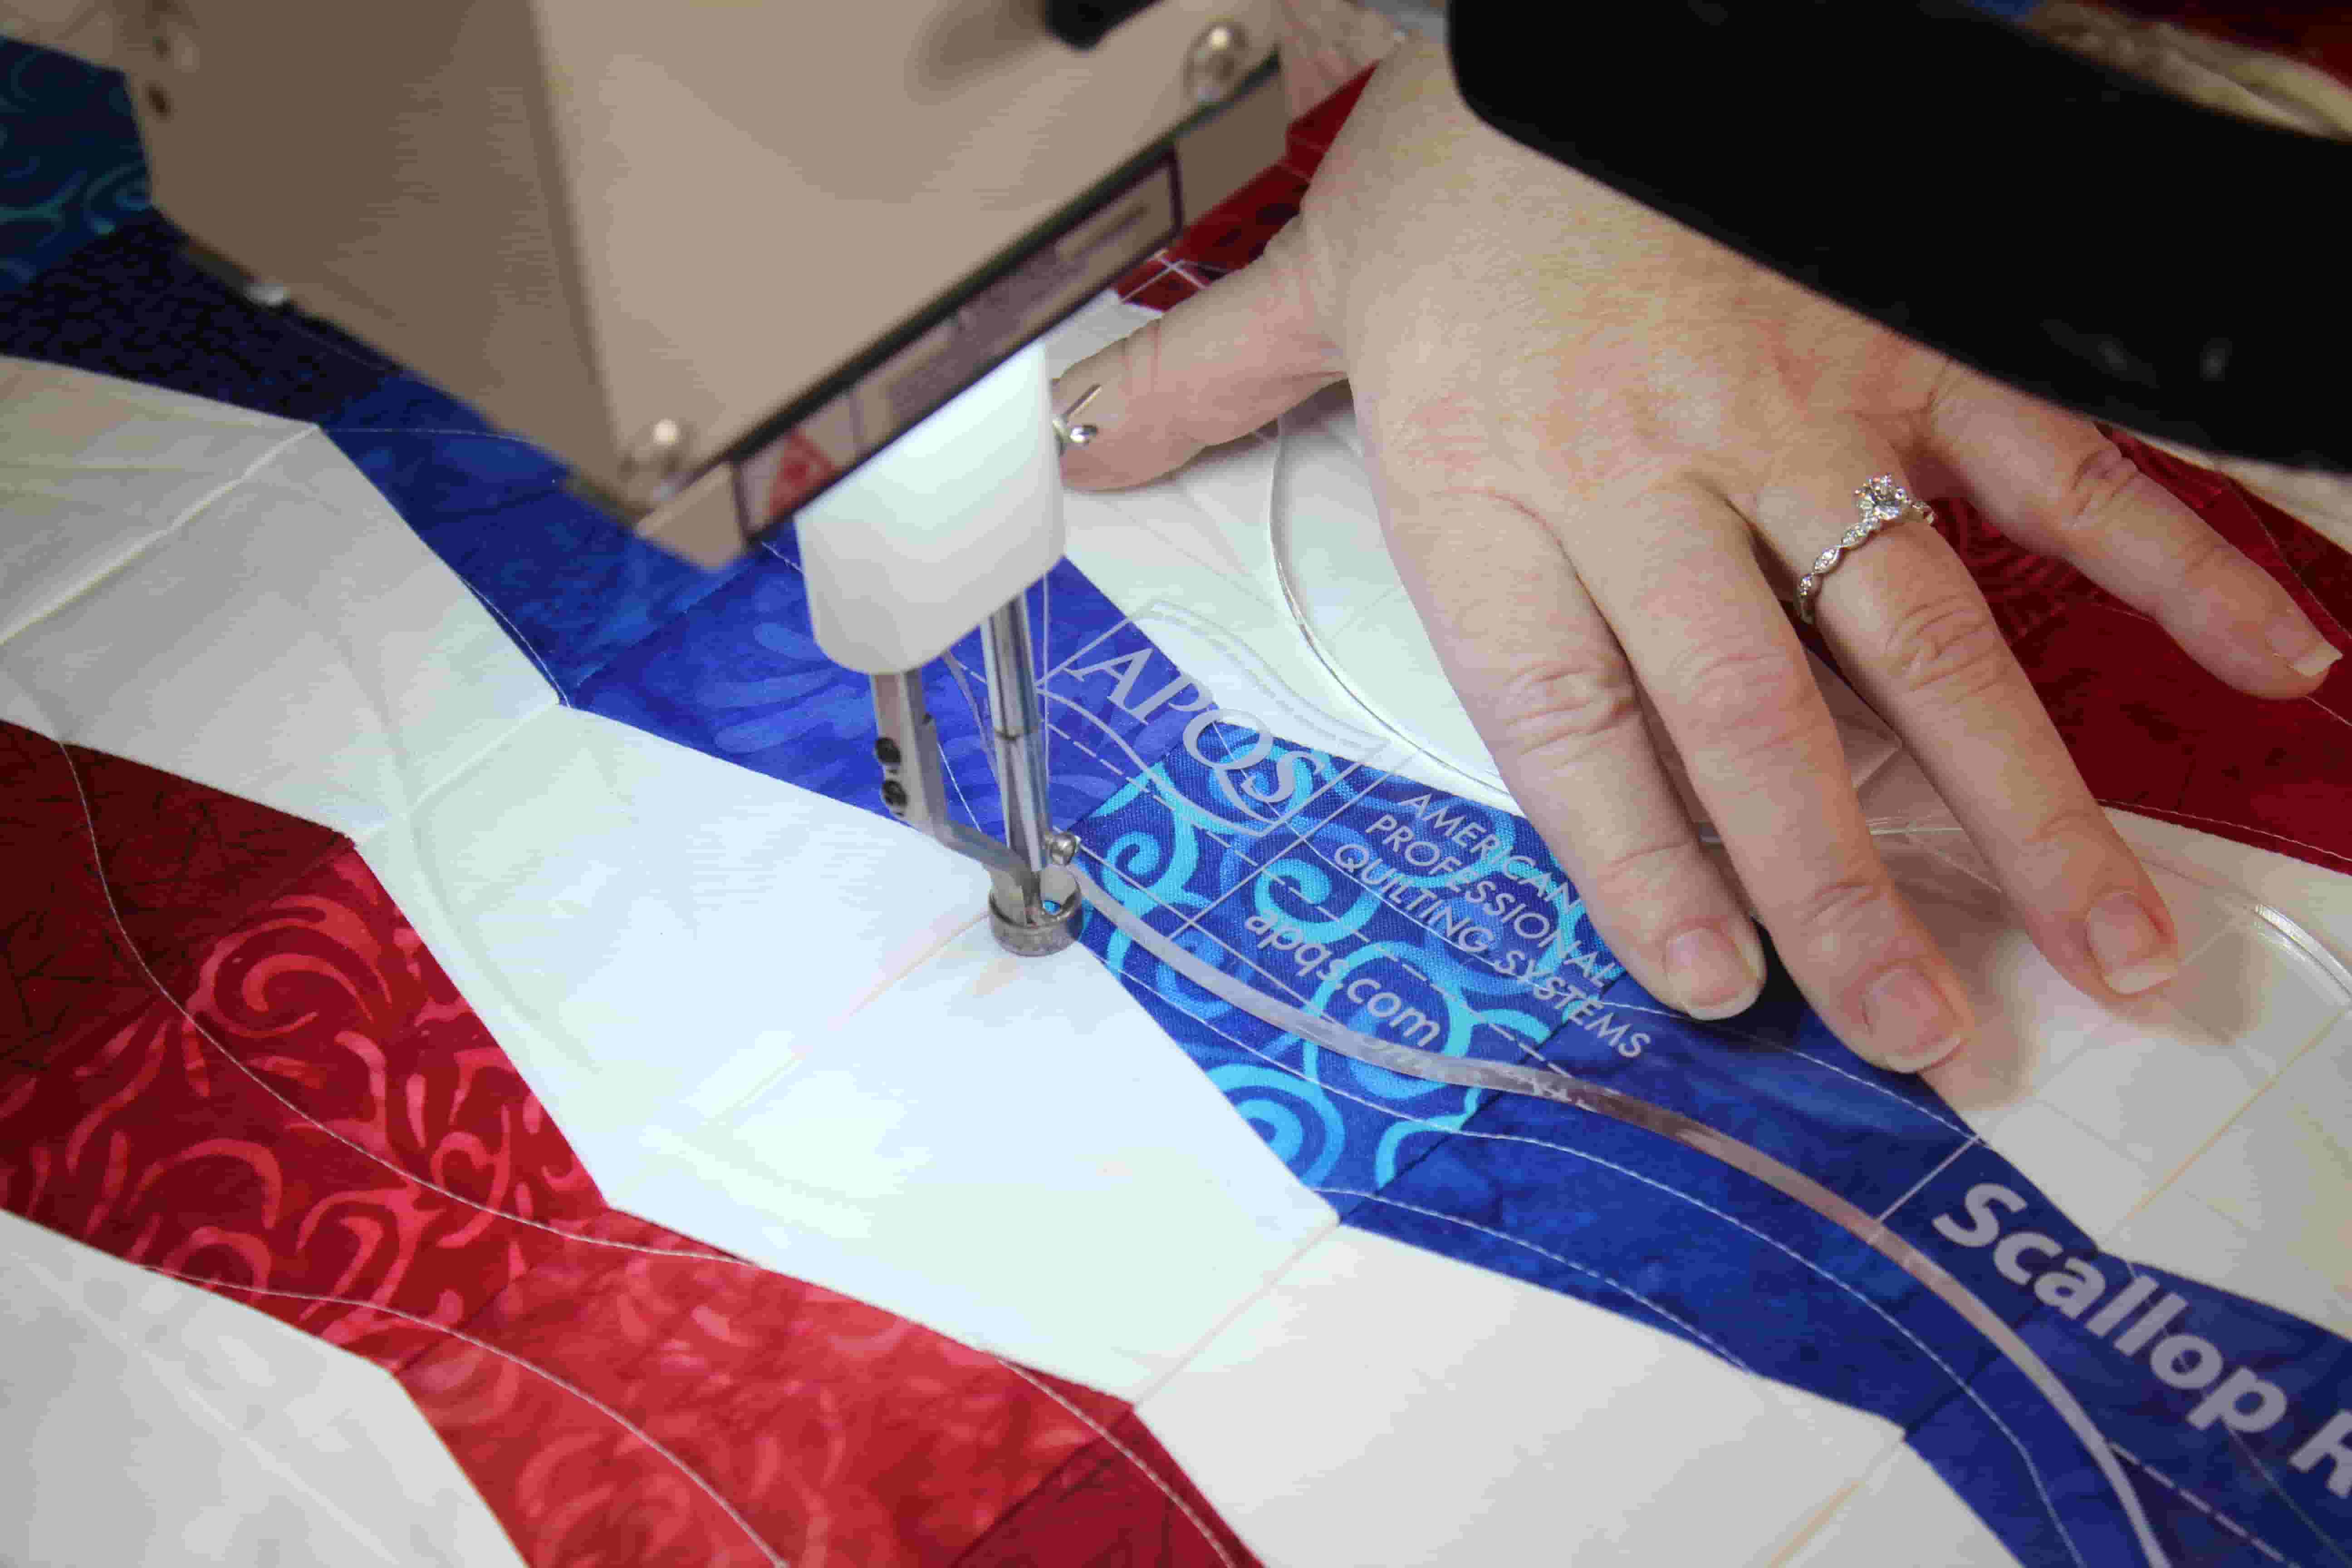
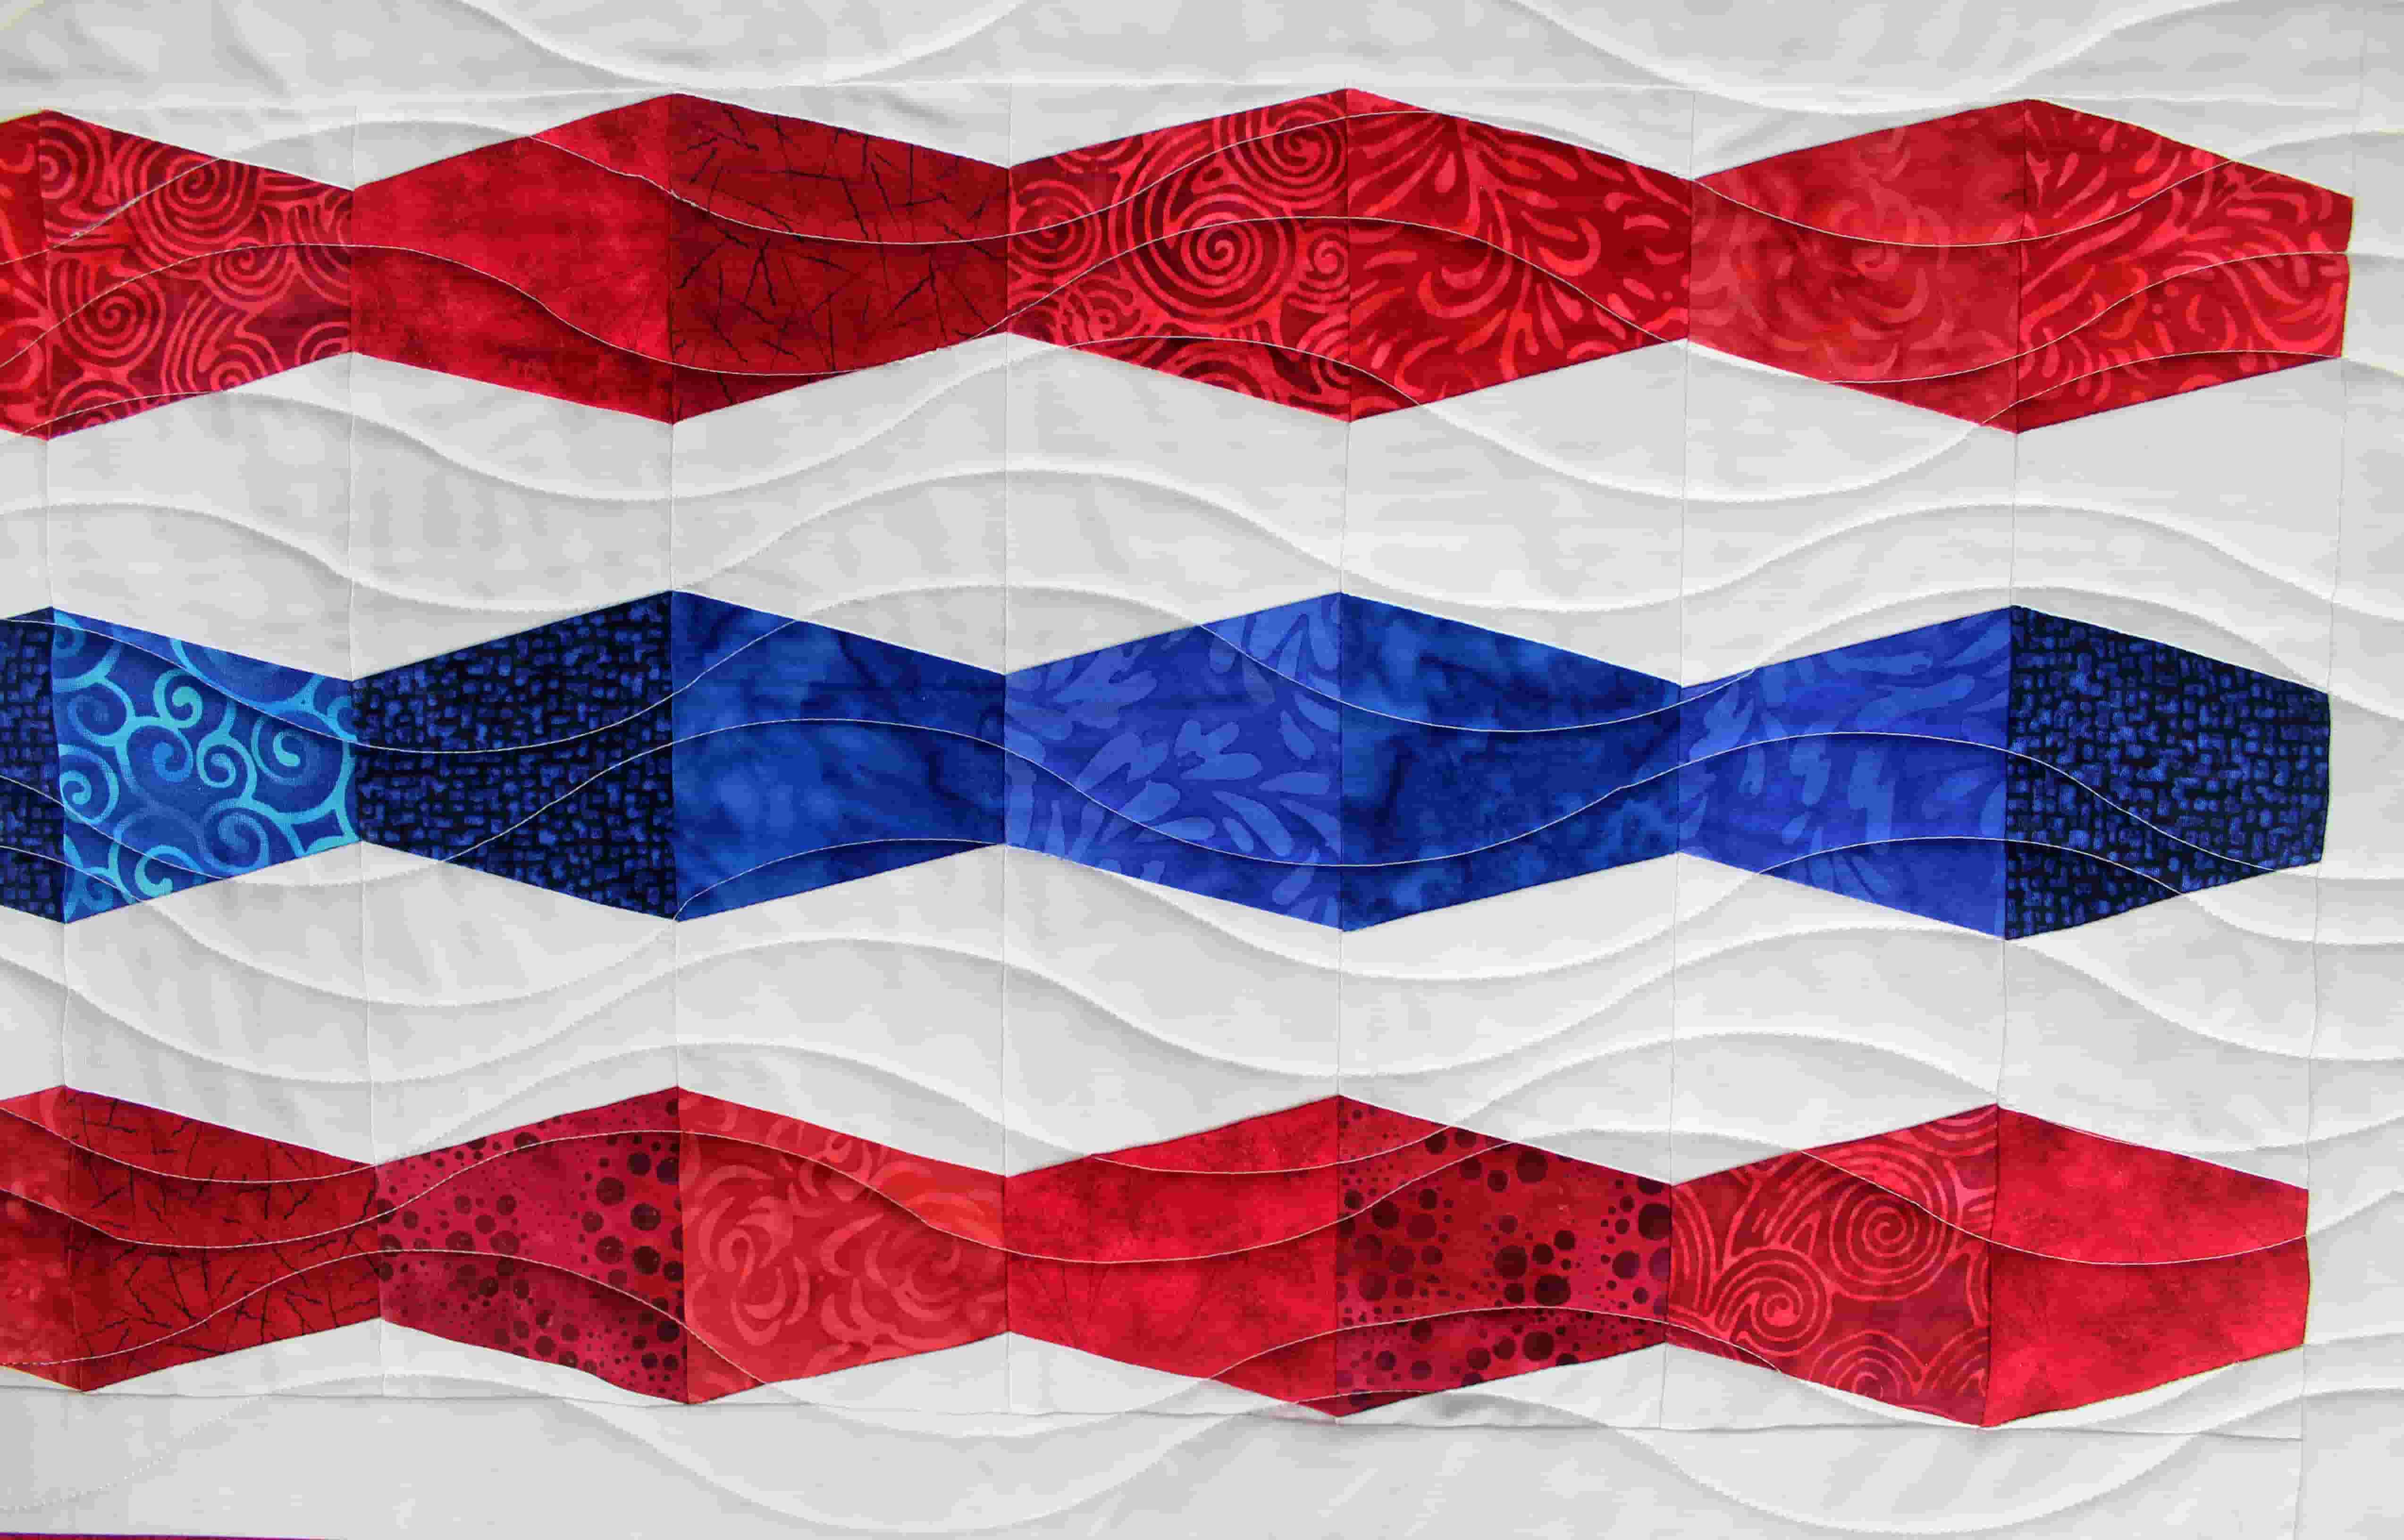
Angela used the APQS Scallop ruler for the Tumbler block table runner to give it the illusion of a flag waving in the wind. This design is incredibly easy to do as she didn’t have to worry about spacing or lining up the ruler at all. She was consistently inconsistent, which takes off all the pressure.

APQS Scallop Template on Lucey Quilting Machine

Ruler basics

Don’t forget that you must use a ruler base on your longarm quilting machine when using rulers of any kind so the ruler remains stable.

If you are using a domestic sewing machine, you’ll need a designated ruler foot for your particular machine and place your machine into free motion quilting mode. Always use rulers that are specifically made for machine quilting as they are thicker than a piecing ruler, which allows the machine’s foot to safely bump up against it.

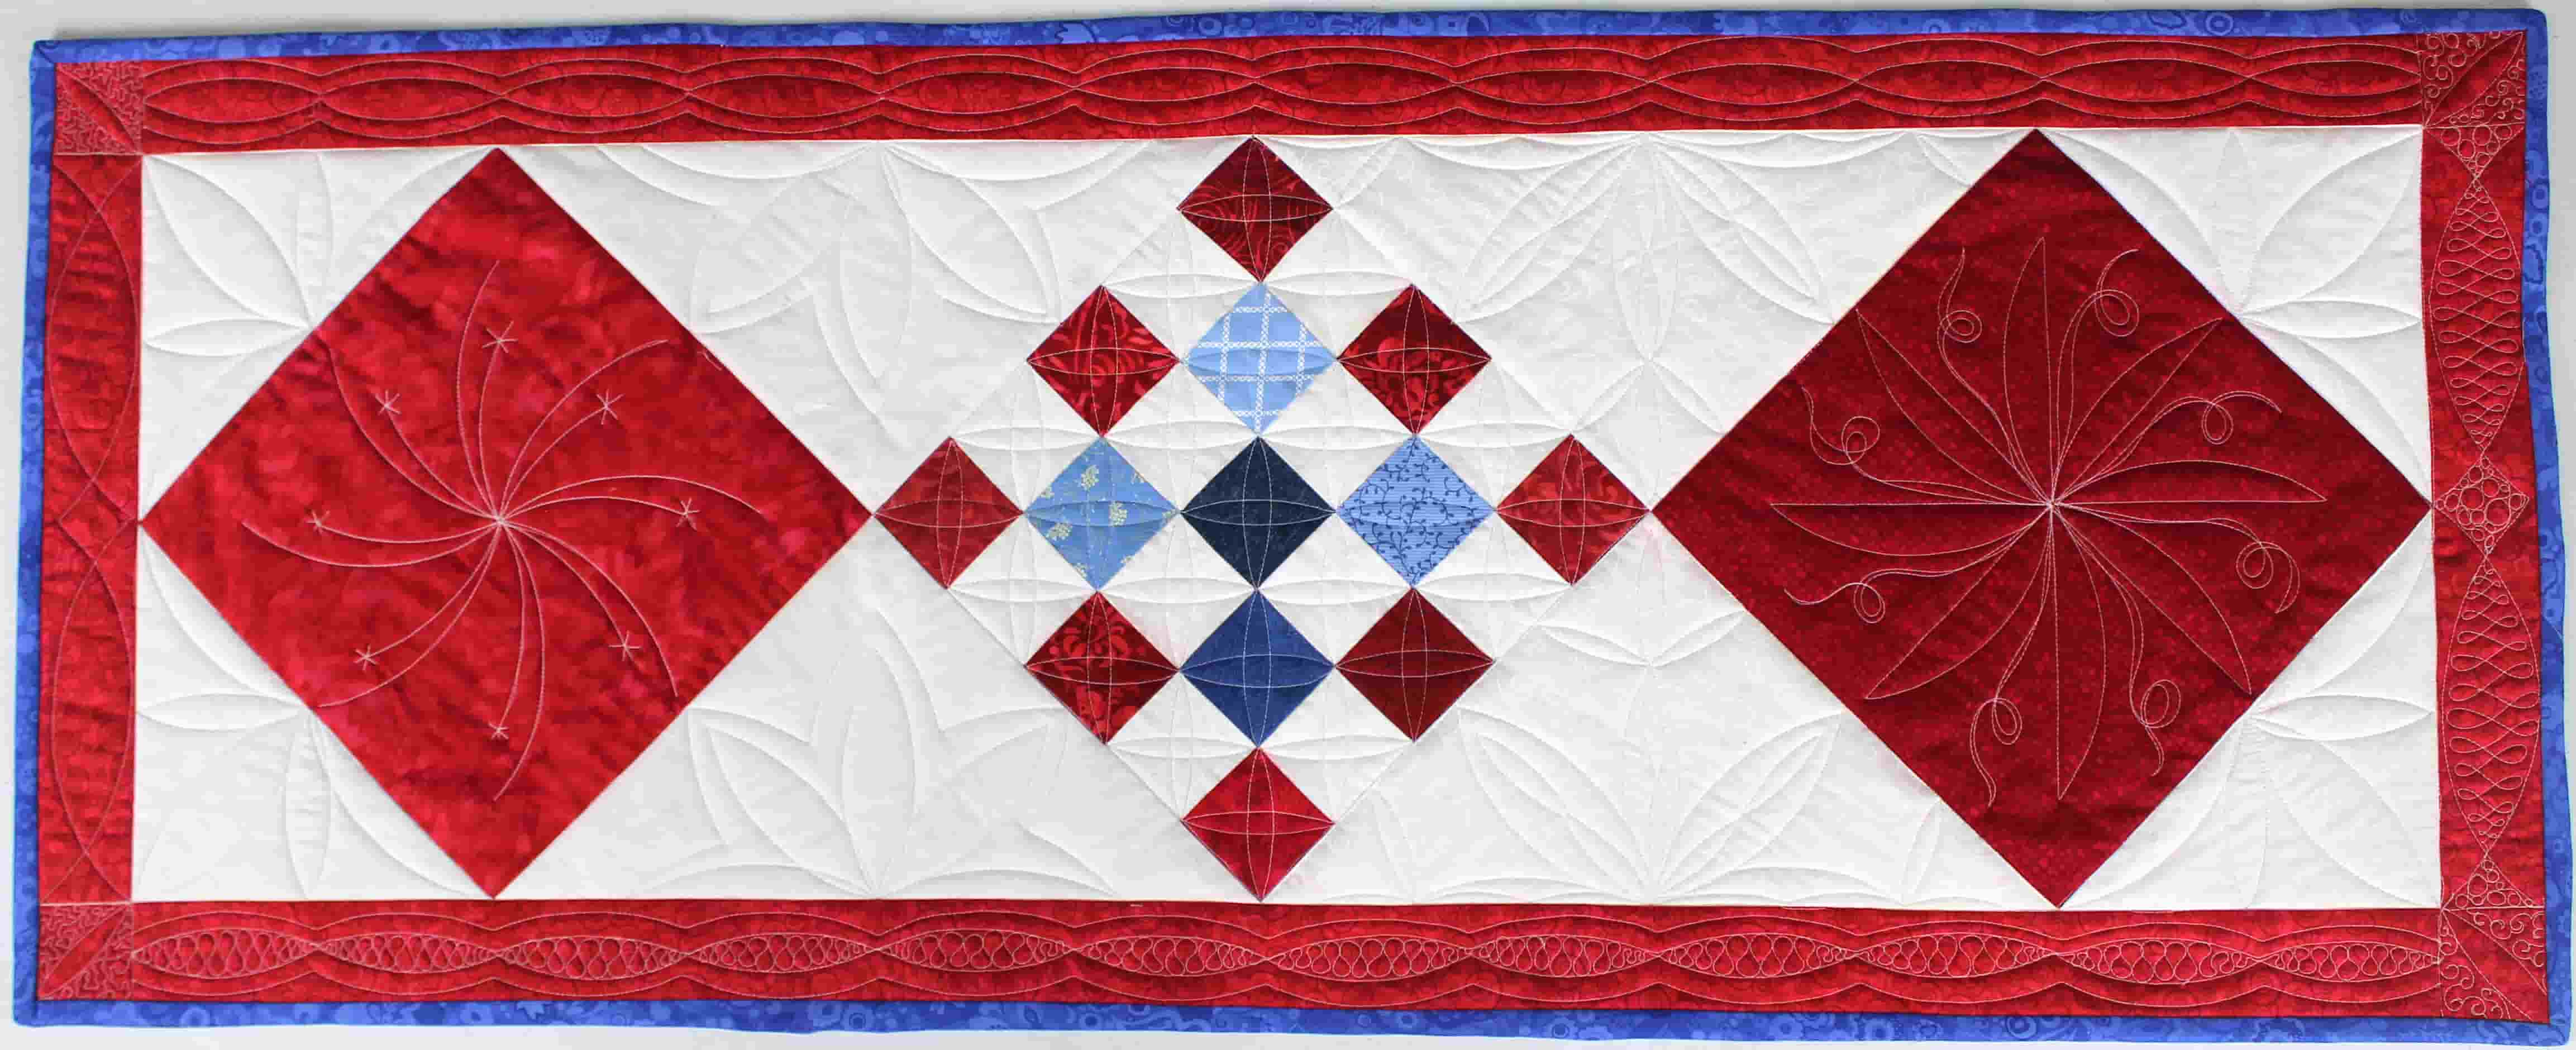
Table Runner
Checkerboard Runner

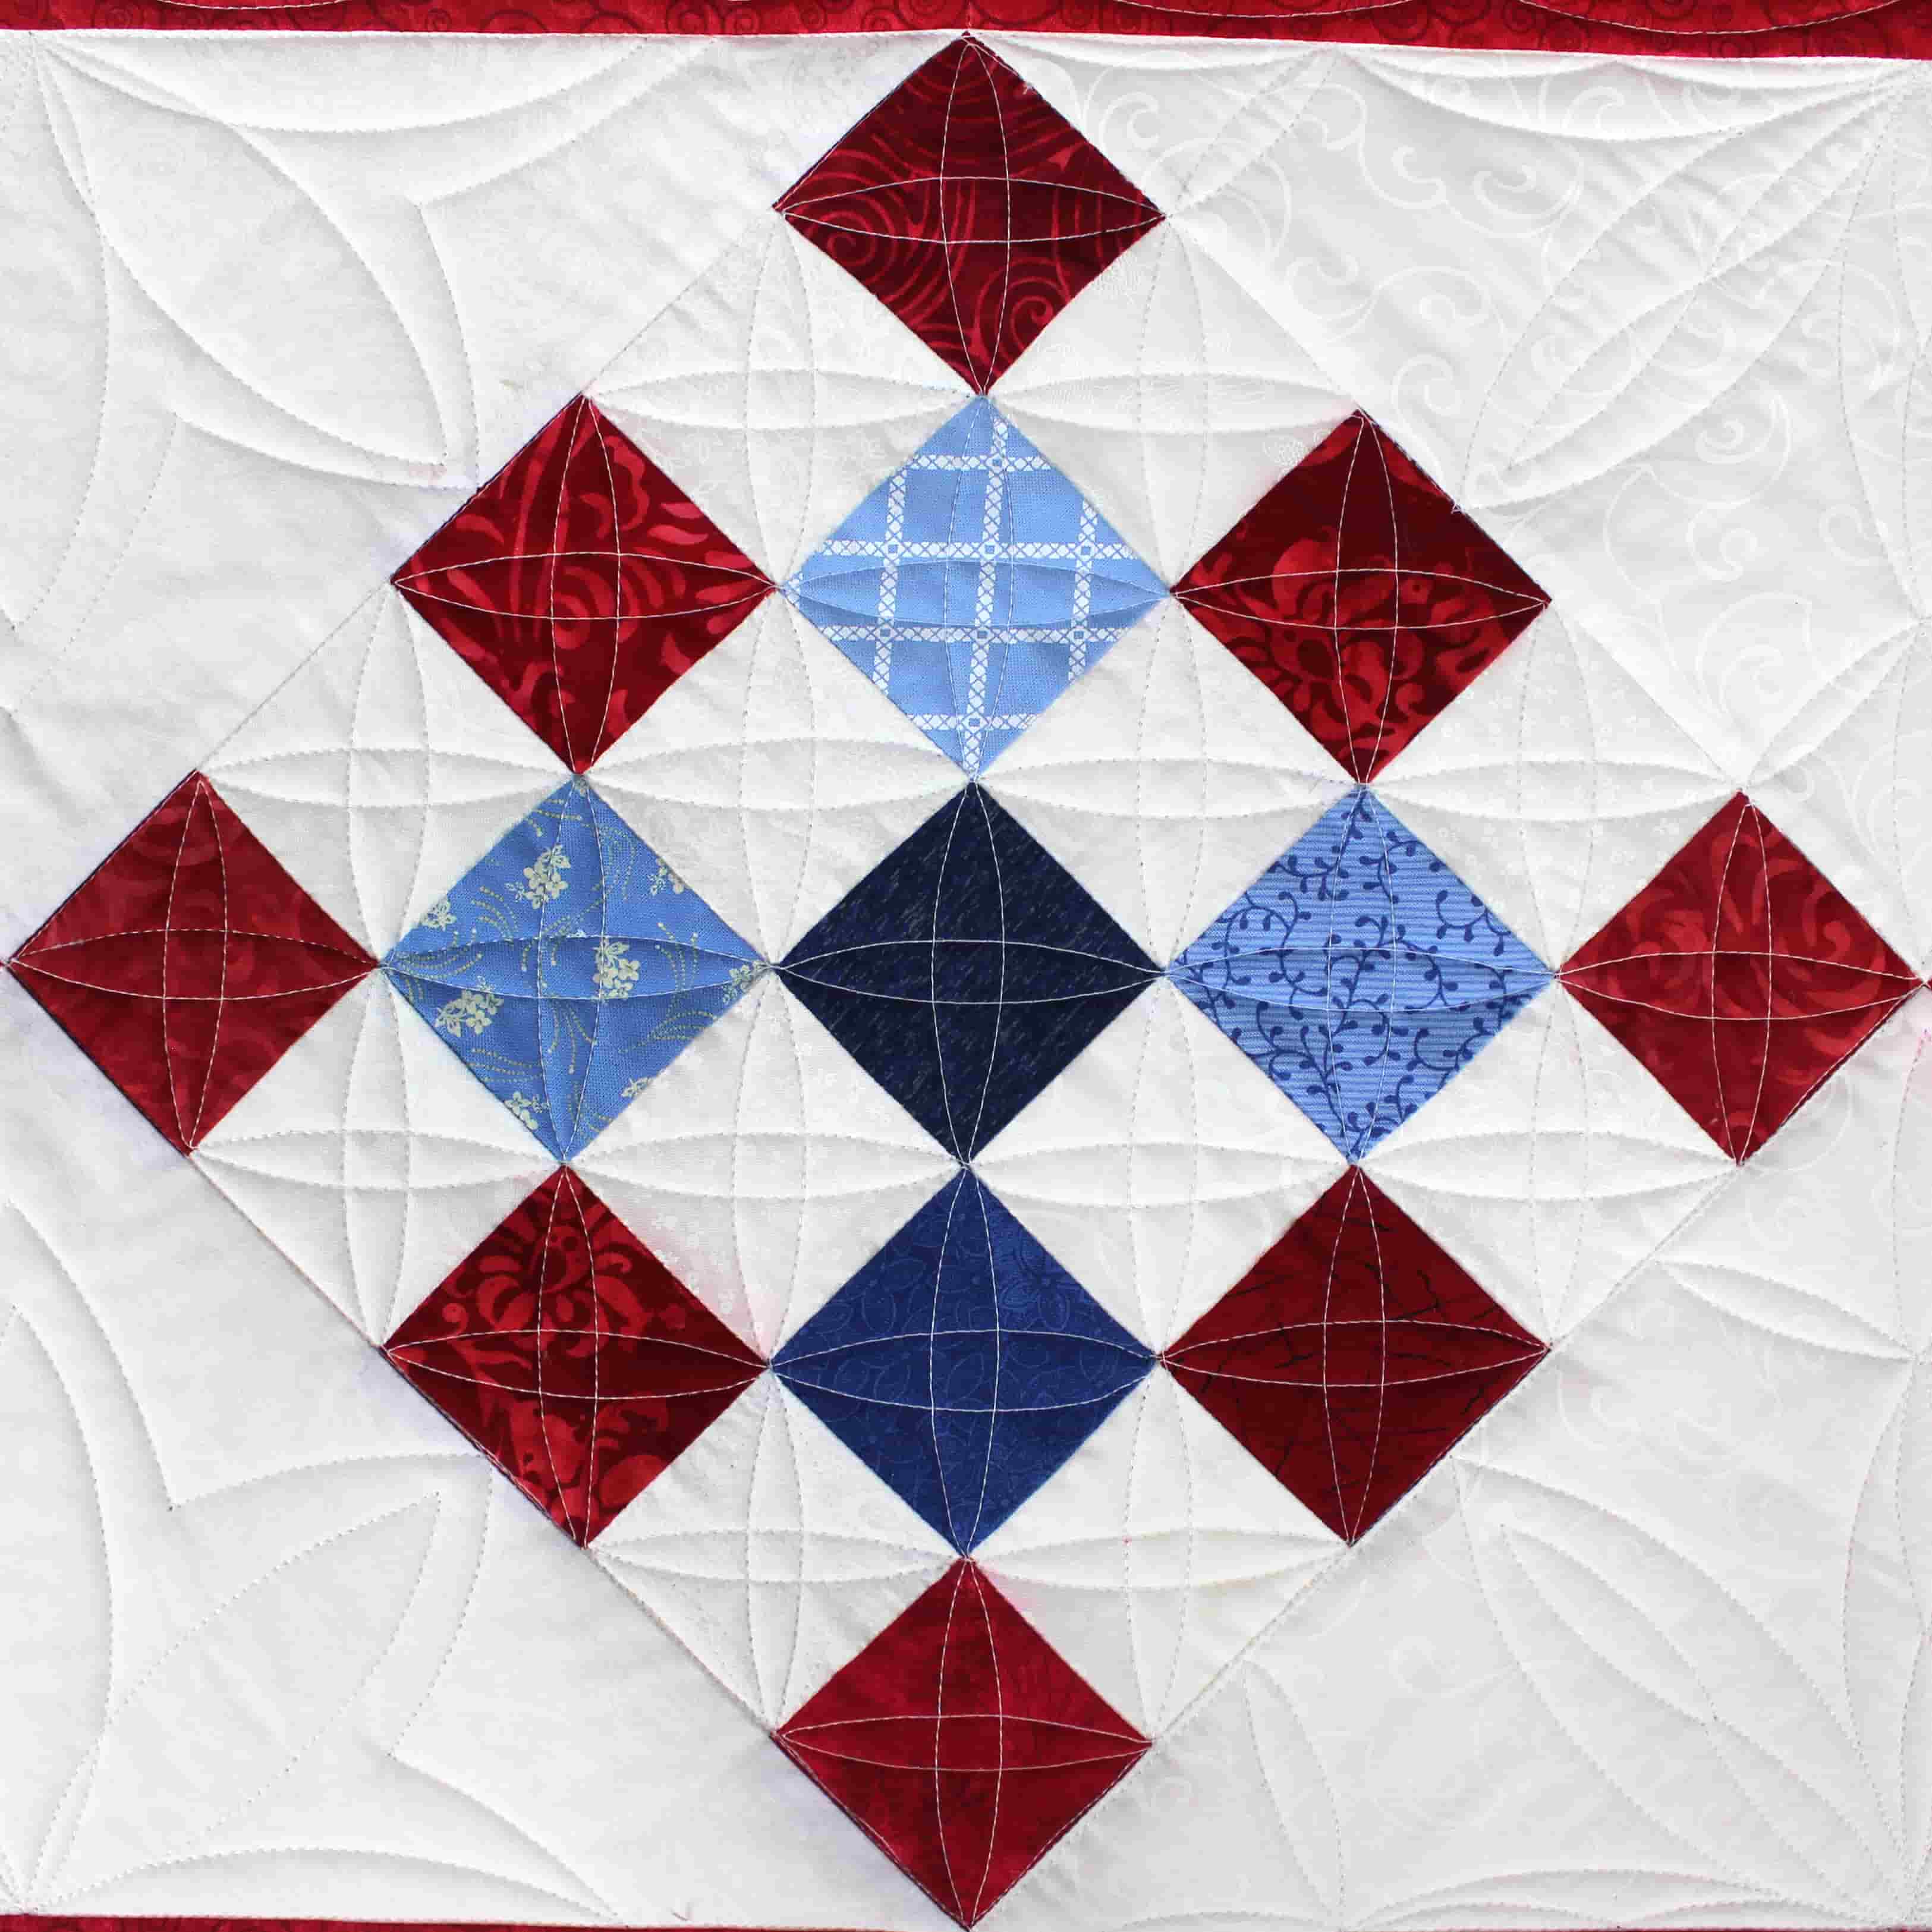
Checkerboard block

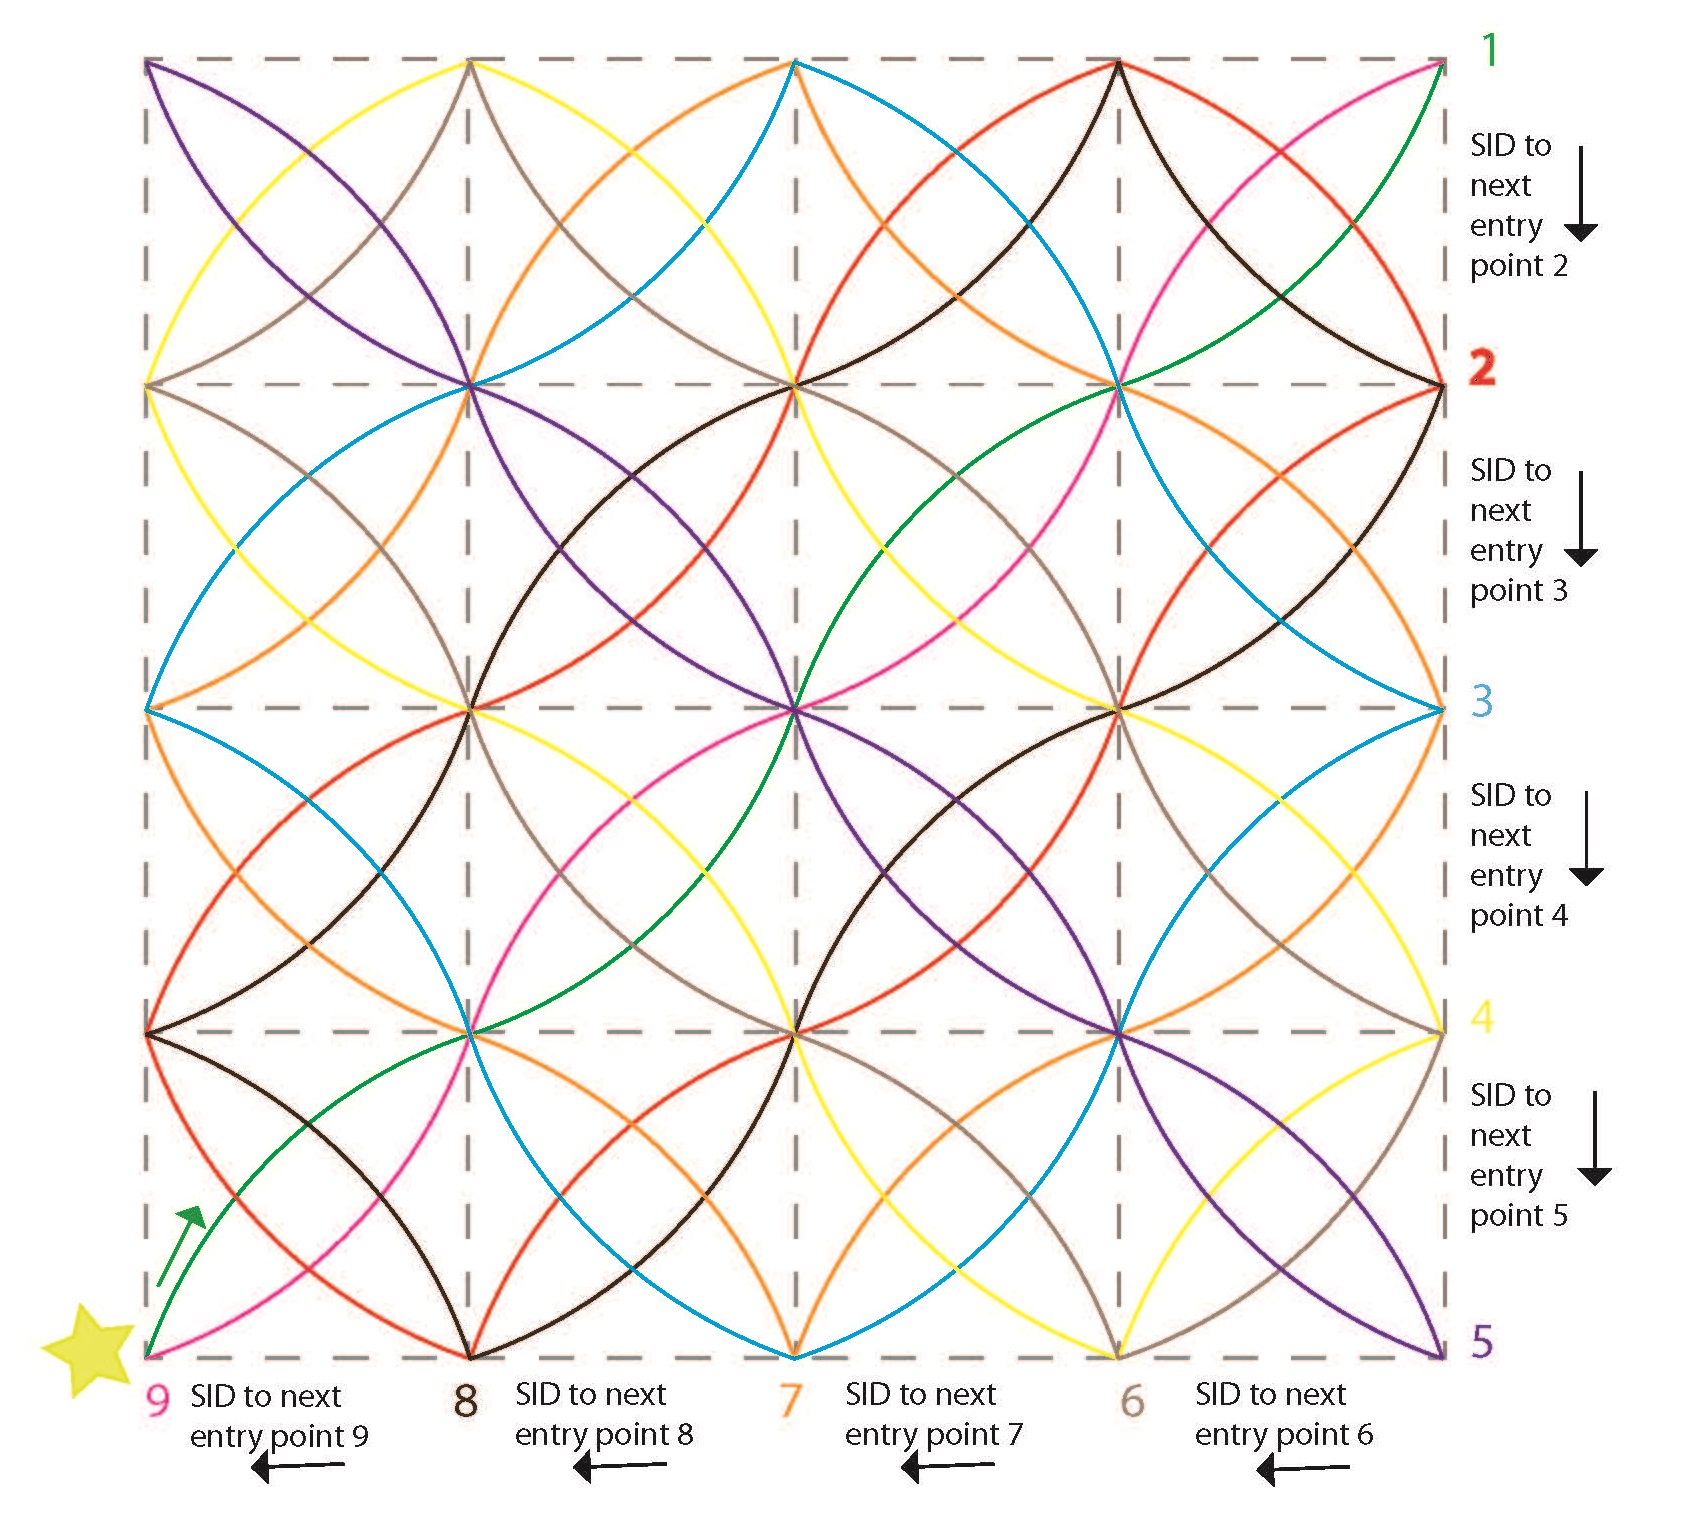
In the article, you saw a star grid design Angela did in the sixteen patch checkerboard block, found in the center of her patriotic table runner (see image above).

She did this using an arc ruler. It is done all in one continuous line of stitching (see checkerboard block to the right).

The path for it only looks complicated because she had to use so many different colors to make things stand out but, if you notice, all she was doing is building wavy boxes upon wavy boxes as she traveled around the grid twice.

Checkerboard Block

Sixteen patch grid

Take a look at the graphic and trace it with your finger to see the path (see illustration of the sixteen patch grid to the right).

Be sure to stitch in the ditch around the block first before stitching all those wavy diagonals with the arc template. Stitching in the ditch will stabilize everything so your block stays square.

The path we are using is exactly like the path you’d take to make a traditional crosshatch except we travel along the path twice using the arc line.


Sixteen patch star grid

APQS 16 Patch Star Grid Example

Marking your quilt

Using an arc template for block quilting designs gives some wonderful gently curved motifs. The most important step is to mark out some registration lines on your block.

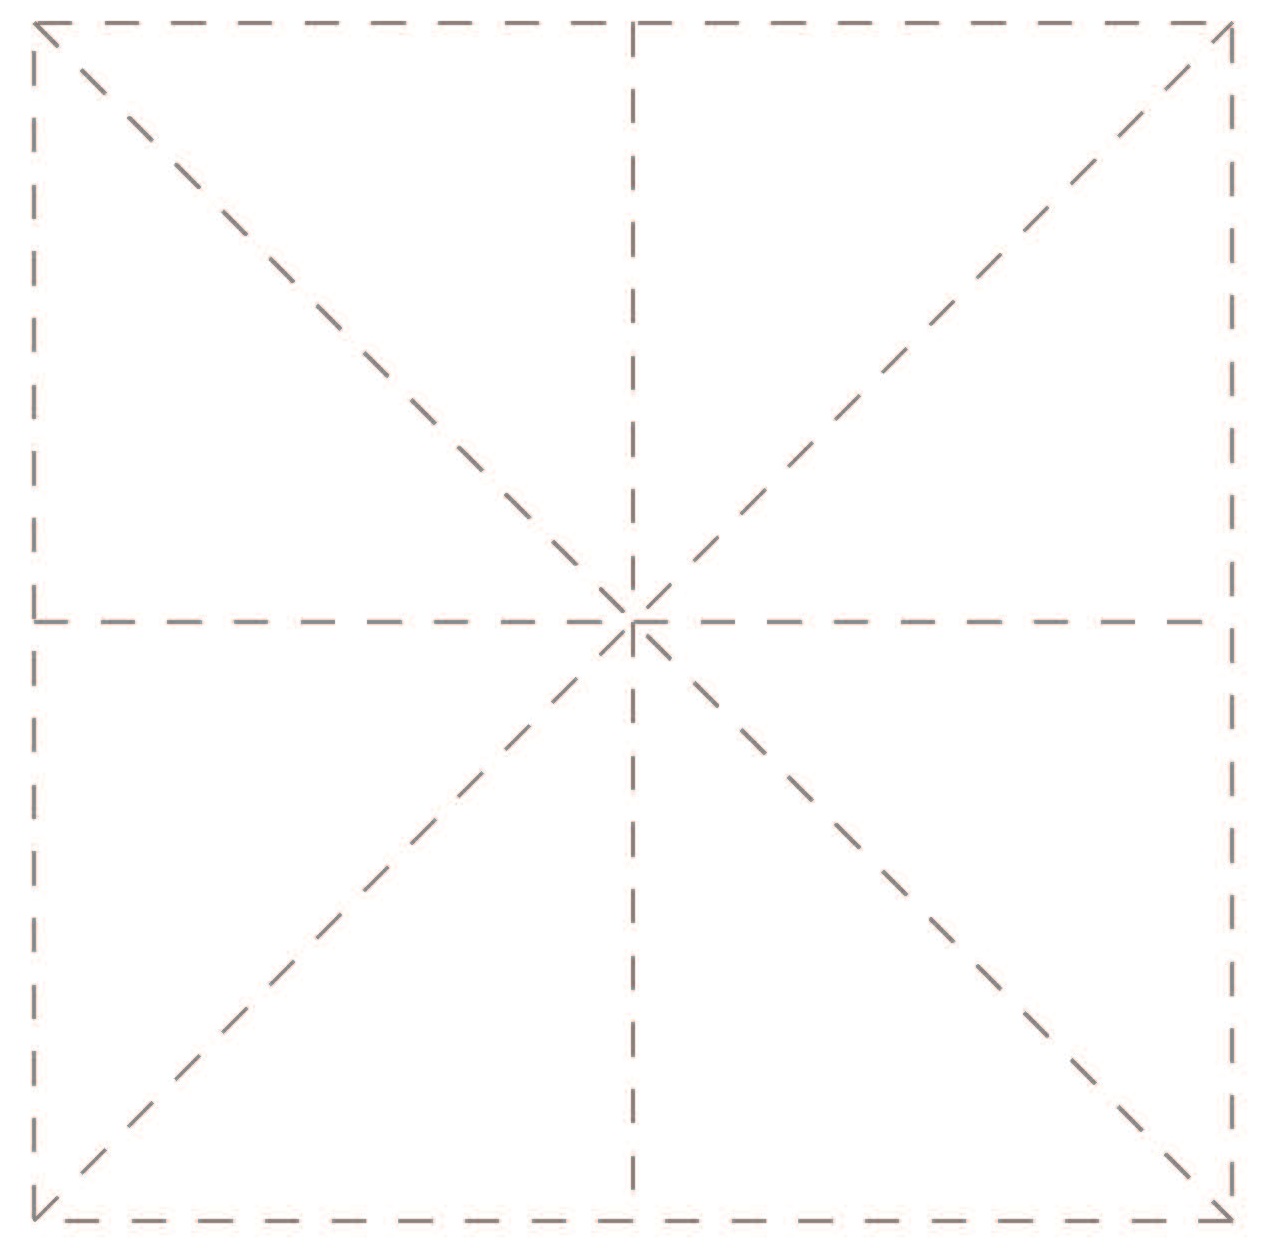
You need bisecting lines through the center as well as diagonal lines from corner to corner to break your block down into 8 pie-shaped segments. We’ve included a practice sheet with these marked lines you can download to practice upon (see example to right).

For ideas and information on how to mark your quilt, be sure to check out this article from our blog.


Block registration worksheet

APQS Block Registration Worksheet

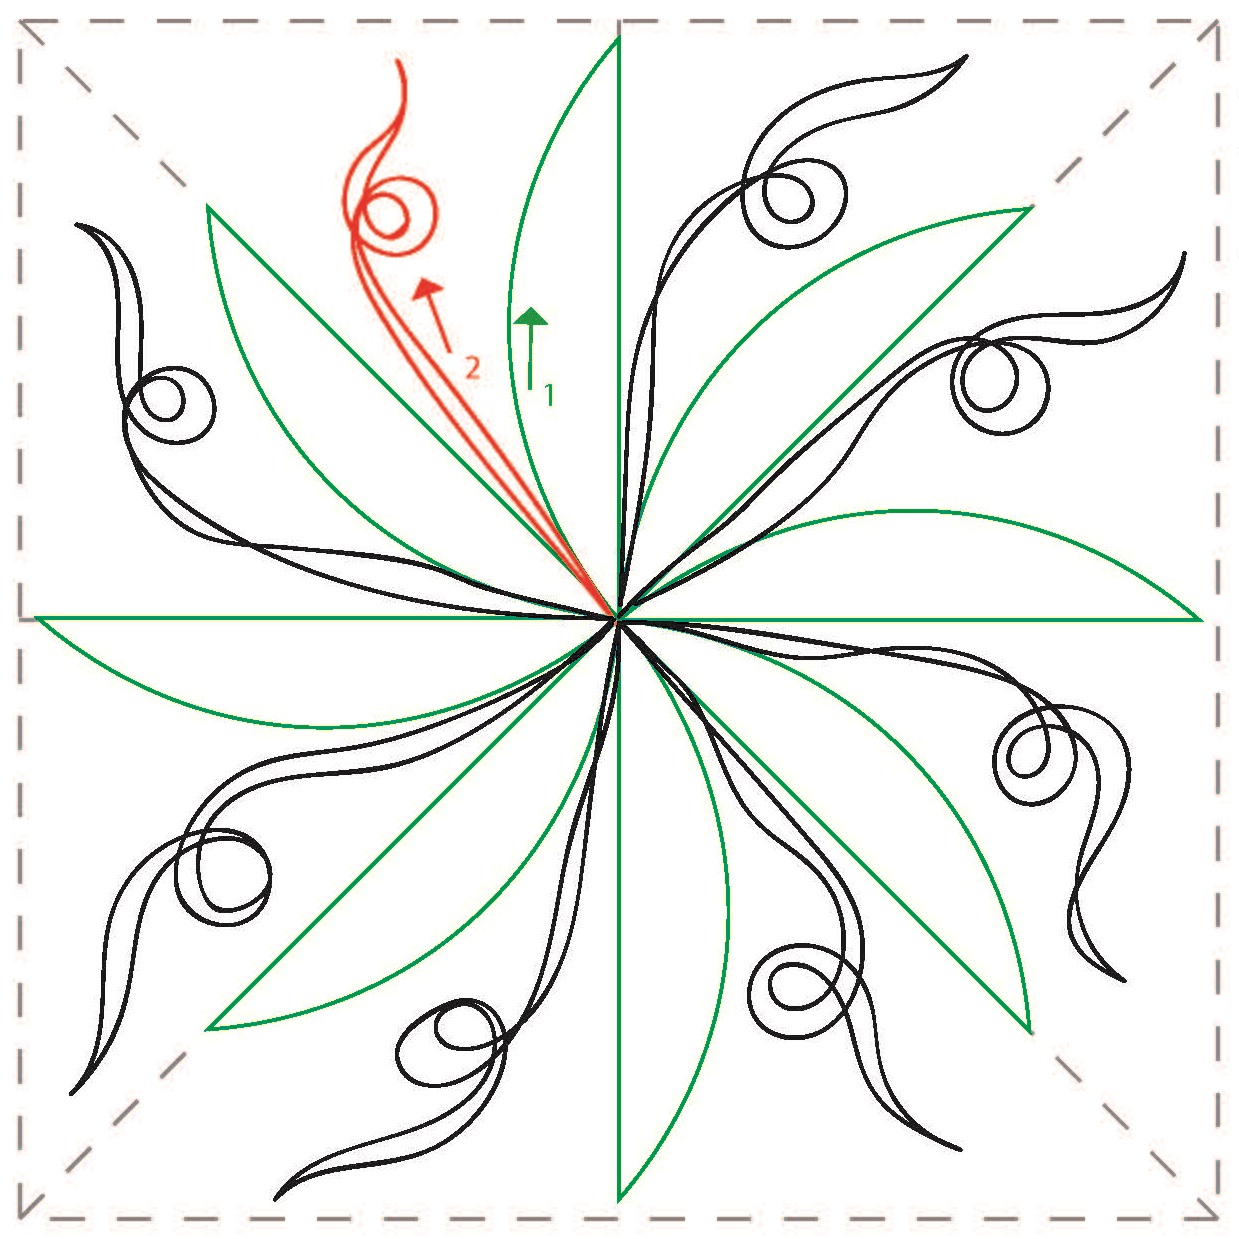
Bladed block

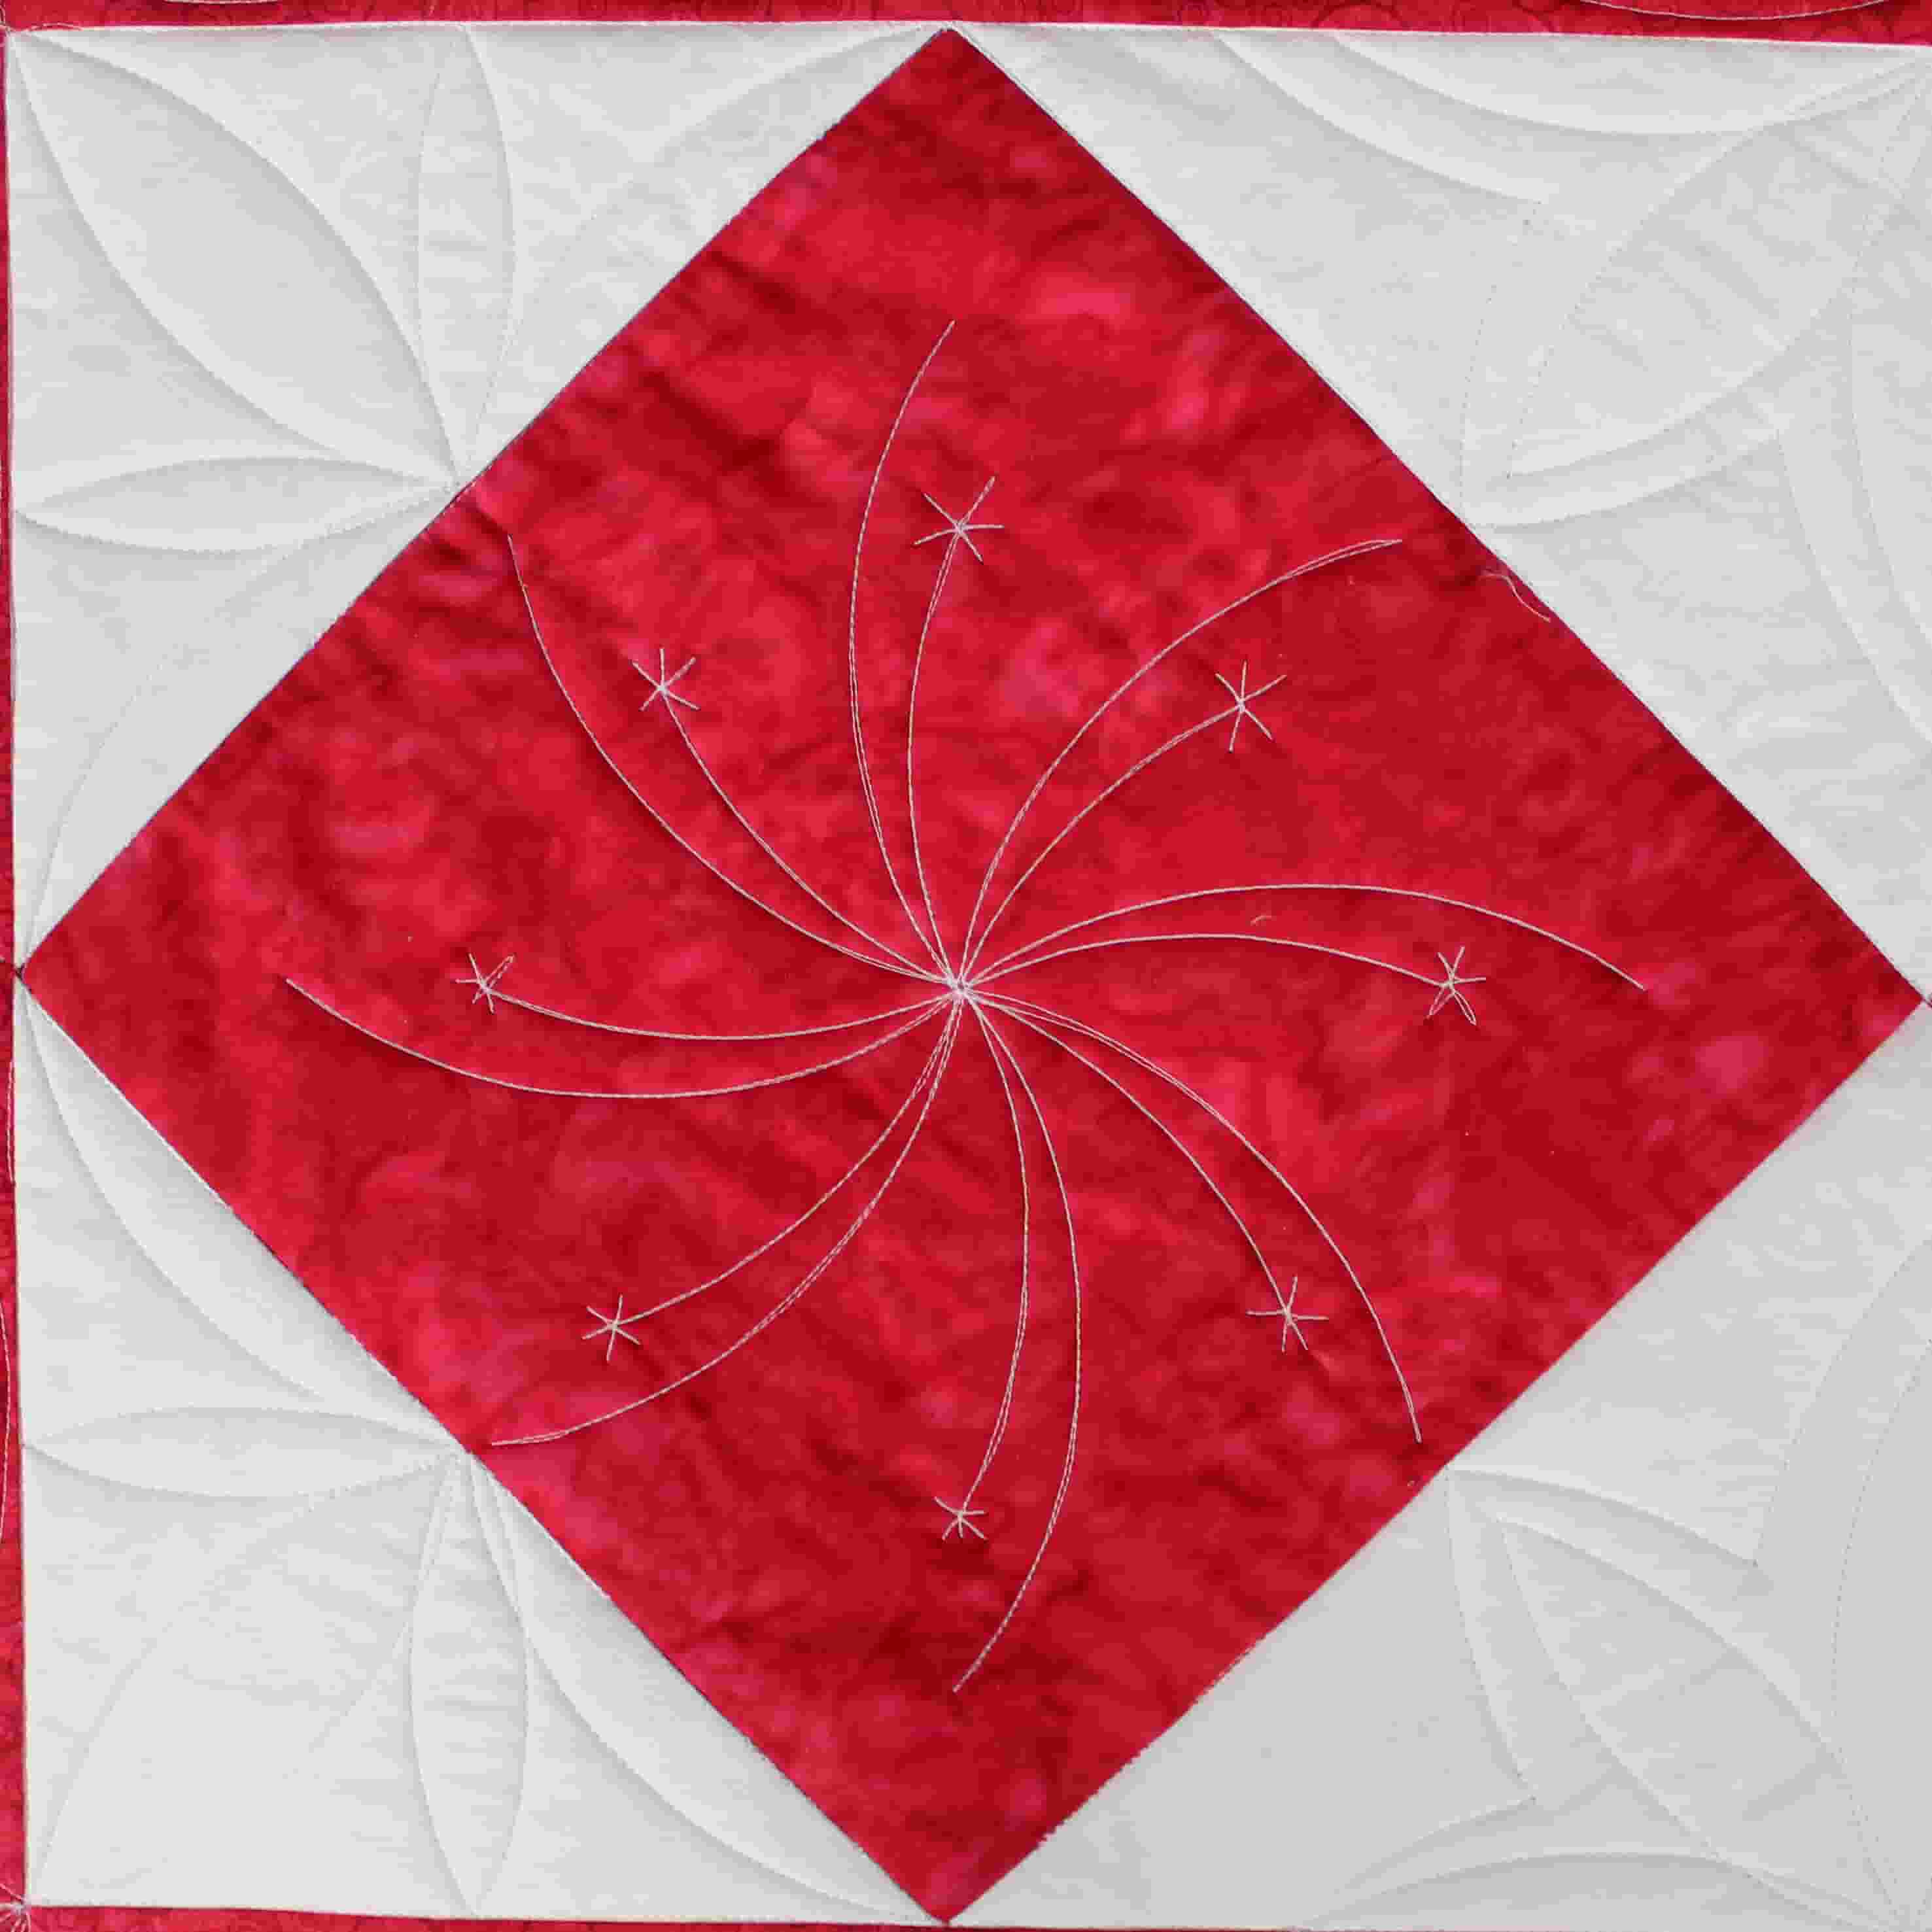
The first alternate block starts out in a very similar way to the firework block design shown in the Quiltmaker article (see image on the right).

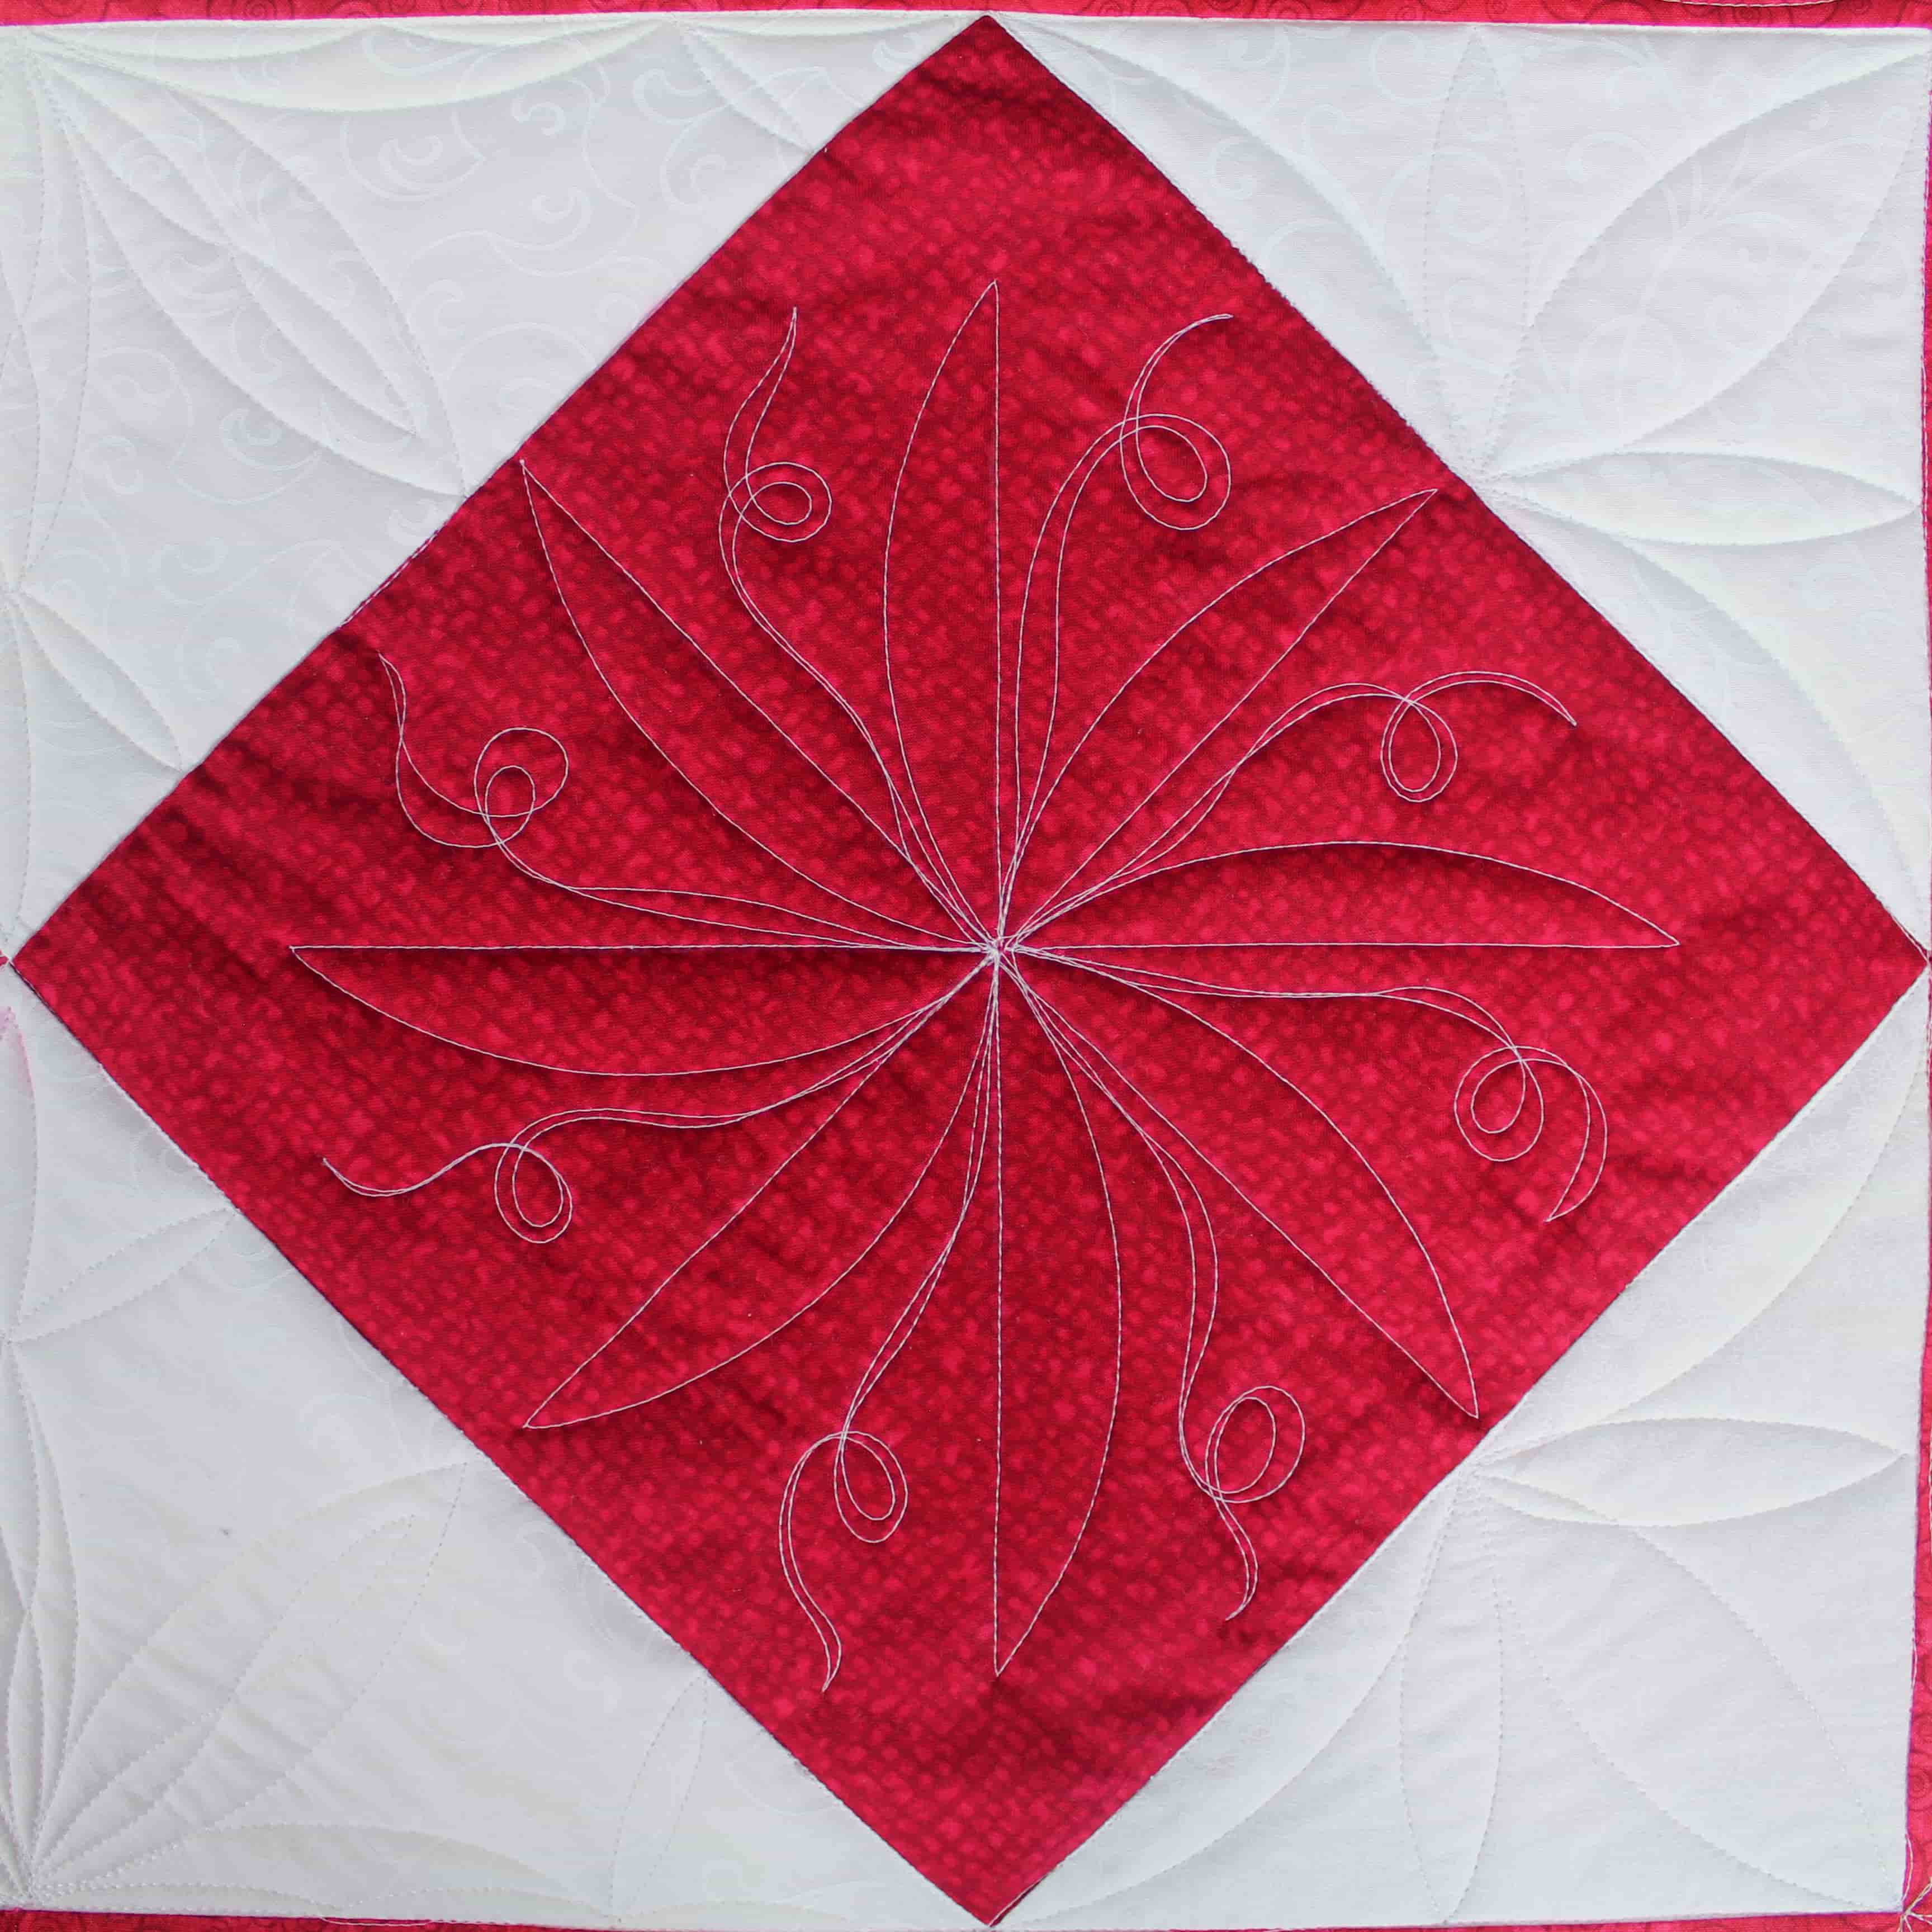
Using your favorite arc template travel from the center up one of the registration lines you’ve marked (see image below).

Once you reach the registration line, travel in a straight line back down to the center. Repeat on each of the radiating registration lines.

After you’ve gone all the way around the block, consider adding a little free-motion swirl as shown between the blades for some visual interest (see illustration below).


Bladed block worksheet

Firework Block
Bladed Block
APQS-Bladed Block Worksheet

Don’t miss our next article on using machine quilting rulers in the upcoming edition of QuiltMaker magazine.

.