Rule your Quilt: Round and Round with Circle Designs
There is something about curves and circles in quilting that makes my heart sing. The eye is drawn to the symmetry and medallion quilts are especially well suited to quilted circle motifs. Medallions typically have borders framing out the center block giving a wonderful place to play with machine quilting rulers.
From interlocking circles, and overlapping half circles, you’ll love the variety of designs you can get from a set of circle rulers.
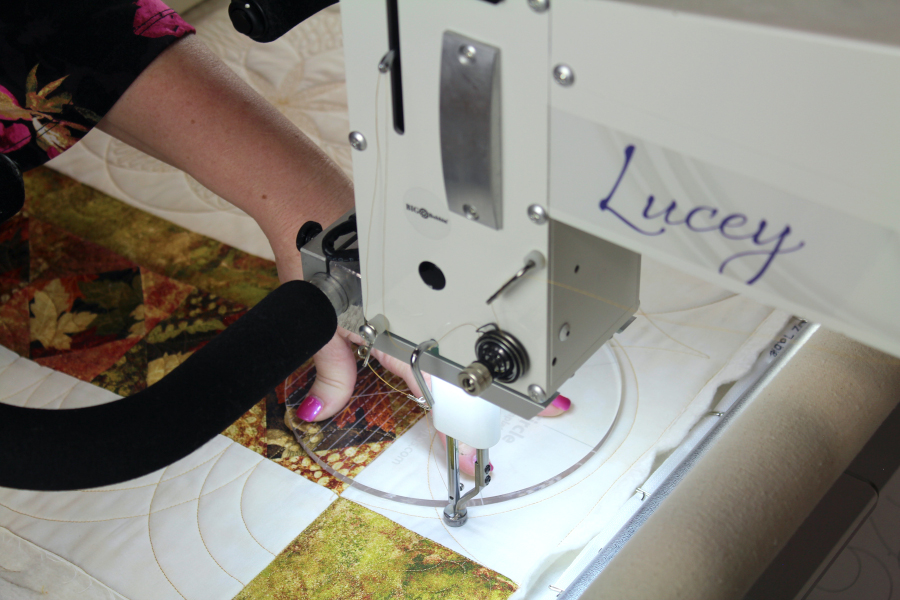
Remember: When using rulers you must use a ruler foot on your machine. Use rulers made for machine quilting as they are thicker than piecing rulers so your foot can butt up safely next to the ruler. Longarm machines will also need a ruler base for ruler work.
Circle rulers are usually sold in sets so as to give you a wide range of sizes to increase your design opportunities. I find a solid circle ruler is easiest to hold in 3” sizes or bigger. For smaller circles I prefer rulers that allow you to place the hopping foot inside the ruler.
So, for the larger circles you’ll be slightly pulling the machine’s foot towards the center of the circle with your non dominant hand as you guide it around the edge of the circle with your dominant hand. For the smaller circles you’ll be slightly pushing the machine’s foot away from the center of the circle with your dominant hand along the edge of the circle cutout held by your non dominant hand.

When holding a circle ruler splay your hands out like a spider to give as much stability as possible to the ruler. You’ll find that when stitching a complete circle you’ll need to adjust your hand position as you go. However, we will only be using half circles in the following border designs which makes them easier to stitch.
I did include a spectacular central bock design in the downloadable student packet linked to below which uses the entirety of the circle. You may want to put some sort of stabilizing tape or sticky grips on the back of your rulers especially if you are using them on a sit down machine.
Tip: Stitch in the ditch first to anchor your space to keep it square and stable.
If you are using a longarm machine you will use gentle downward pressure to hold the circle ruler in place while your stitch regulator keeps all of your stitches perfectly even and beautiful. If you are using a domestic sewing machine you’ll move the ruler and quilt sandwich in unison under your needle at a steady pace to keep your stitches even.
When choosing the size ruler you need for your space keep in mind that your ruler foot will add a total of a half inch to the size of the ruler. This is because the edge of the foot is a quarter of an inch away from the needle. To determine the size circle ruler you need for any of the borders below, measure the width of the border/sashing and choose a circle with a diameter that is about 1-1/4 to 1-1/2 times bigger.
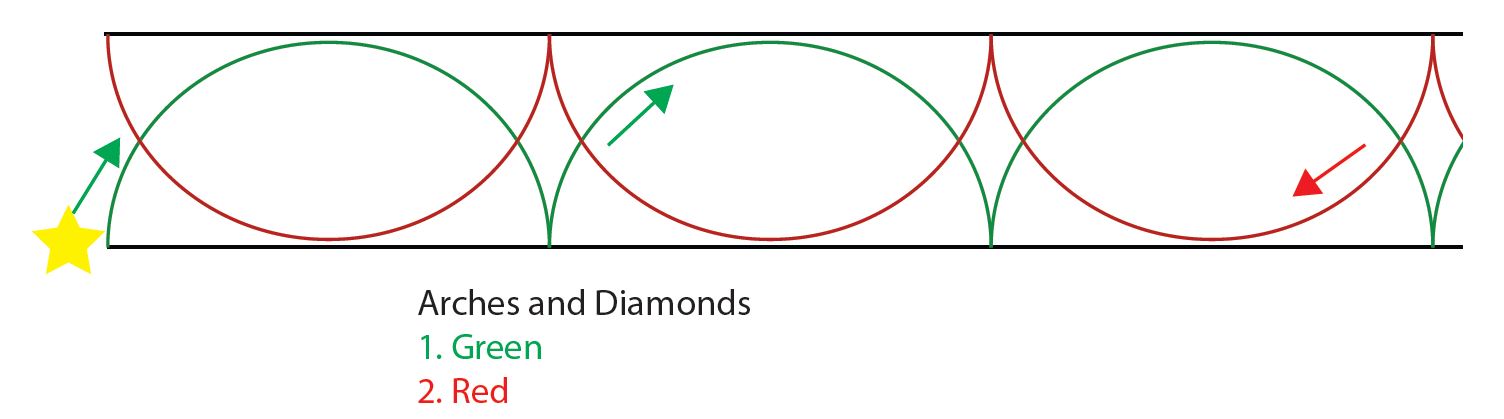
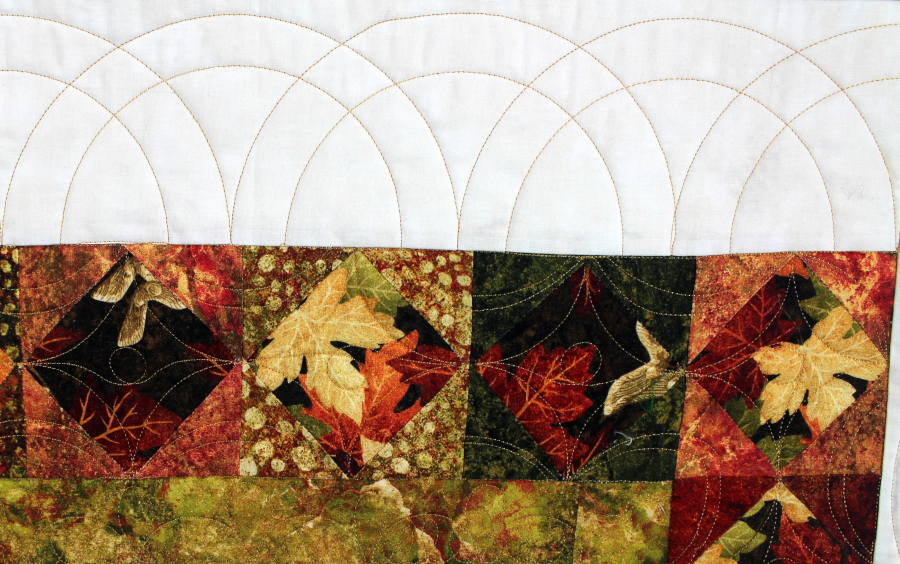
Arches and Diamonds
Starting in the middle of your border, make small tick marks the same distance apart as your chosen circle ruler’s finished diameter. Make a second set of identical marks on the opposite side of the border.
These marks will help you with placement and help you determine if you need to adjust spacing of the circles to fit in your given space. Start with the star on the green line first and head back on the red line second. This motif is a great place to play with free motion fillers too!

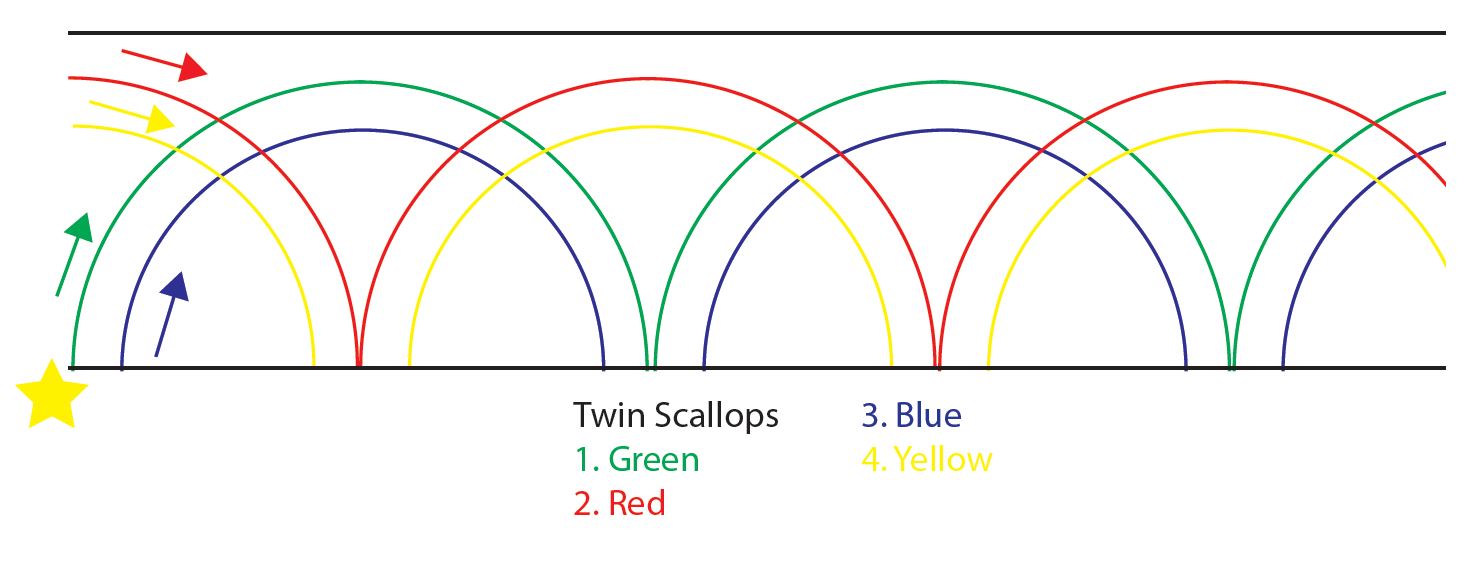
Twin Scallops
Mark the edge of your border as before and align the center line mark on your circle ruler along the seam of your border and stitch as shown in green. The second pass of half circles will bisect the first row as shown in red creating a standard scallop design.
Follow the same path to create the twins but use a ruler that is 2” smaller than the first ruler aligning the smaller ruler with the center of each arch traveling down the seam’s ditch as needed to travel. I’ve also shown how to make this into quad scallops in the downloadable student packet linked to at the end of this article.
Moon Crescent
This border uses three sizes of circle rulers and is created in two passes. I used 2”, 4” and 8” circles. I suggest you mark out this design your first time. Most rulers have horizontal lines etched into them for measuring. I used the 1/2” etched line on my 4” ruler so as to get a very shallow curve. I marked the small first crescent shown in red which heads into the corner.
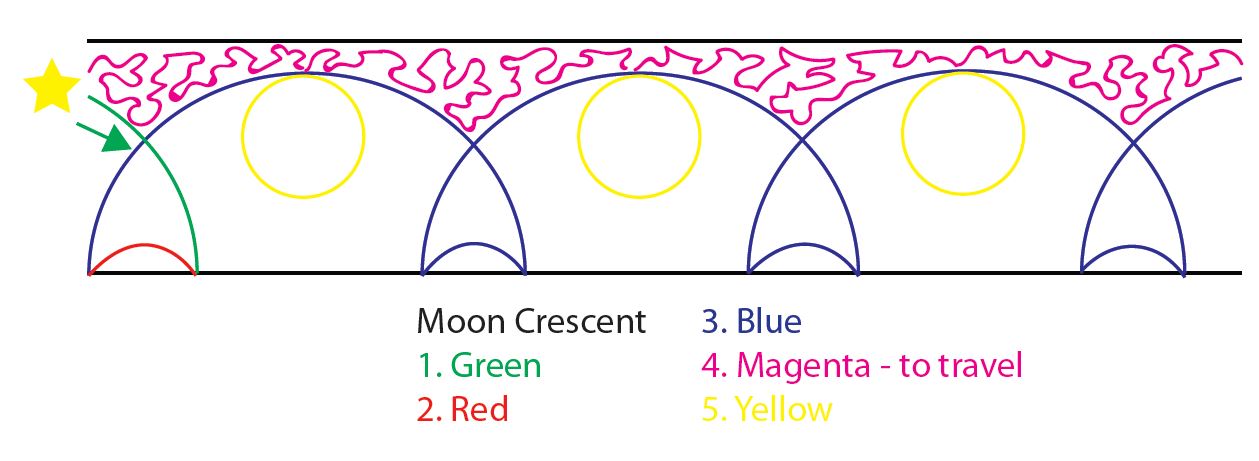
To stitch, I used the 8” circle lining up the center line of the circle with the border’s seam and stitched down to the start of the pre-marked crescent as shown in green. Next I stitched the previously marked crescent using the 4” ruler shown in red before switching back to the larger 8” ruler for the hop forward in blue followed by the next crescent hop back. Repeating this as I move along the border.
Finally, I used a small micro stipple to fill and travel along the outside until I could reach the center of each of the large half circles where I used a 2” circle to place a lovely round full circle accent. There are so many ways to fill this one with free motion which would make a stunning border!
I hope I’ve given you some ideas on how diverse circle rulers can be. To see recommendations on rulers, companion corner designs, a fabulous block motif with circles and downloadable worksheets so you can practice first on paper, take a look at our free downloadable student packet.
Consider how you can incorporate circle motifs on your next medallion quilt. I have a feeling you’ll find many, many more projects on which you’ll find circles look at home.