Quilting with templates

When quilters hear the word “template” we usually think about a thin piece of cardboard or clear plastic which we trace around to create a patchwork shape for our quilt. However, if you own a longarm quilting machine, a template means something entirely different. Longarm quilting templates are made from Plexiglas and are typically ¼-inch thick. This is double the thickness of rotary cutting rulers. The extra thickness prevents the longarm’s hopping foot from jumping on top of the ruler, which could damage the quilting machine or even your quilt.
You’ll find all sorts of template shapes available, and hundreds of different sizes as well. Templates are available in clear form or in colors. Colored templates can sometimes help with light reflection. However, they can also create shadows that make it hard to align marks on the template. Try them both to see what works best for your eyes and your studio light. Before you invest in dozens of shapes, also consider how often you’ll use each one, since template prices range anywhere from $10 to over $50 per set! Plus, you’ll be pleasantly surprised by what you can do with a simple straight edge template. By placing your hand strategically on the straight ruler, you can still quilt curves by sliding and turning the ruler as you go.
Safety should always be your top priority when using templates. The hopping foot on your APQS machine allows you to hold the template on any side of the hopping foot. However, you’ll have the most control and stability (not to mention accuracy) if you practice holding the template on the front of the foot or on its left or right sides. A good template size to begin with is one that is about 8 inches long and about 3 inches wide. This size allows you to stabilize the ruler by resting your ring finger or pinky off the template’s edge. Those fingers act like a brake and hold the template steady while you guide the hopping foot along the template edge. Place your remaining fingers on top of the template and gently press down to hold it in place.
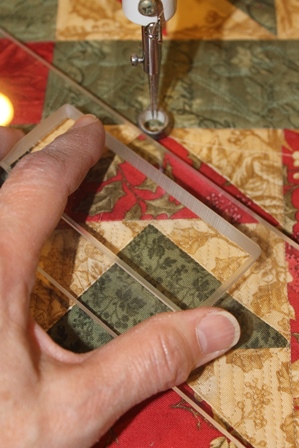
You can hold your template with either hand, depending on the direction you wish to quilt. For the best possible control and safety, hold the ruler with the hand that allows you to aim your thumb and forefinger toward the hopping foot on top of the ruler as shown at right. This position provides superior stability. Guide the hopping foot along the ruler’s edge. When you reach the tip of your finger or thumb, slide the ruler and reposition your hand to that the foot is once again between your fingertips.
You should always use an extra base on your machine when using templates. The base widens the throat’s width and gives you more stability for holding the template in place. The Hartley Base Expander is designed especially for APQS machines and includes a Hartley 12-inch ruler to get you started. The Hartley ruler includes a handle on top to make gripping easier, which is especially helpful for quilters whose hand dexterity is limited.
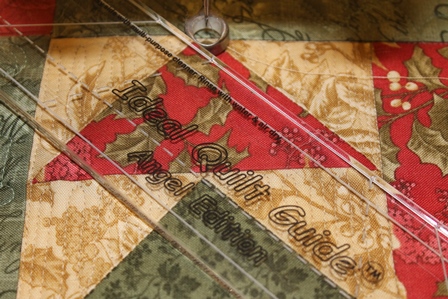
It’s a good idea to add some grip to the underside of your template to prevent it from slipping. Small adhesive sandpaper dots work well. Some rulers such as this Ideal Quilt Guide also have special adhesive on the underside that is tacky. It provides just the right amount of resistance to hold the ruler in place to prevent slippage. Its tacky feeling can be restored simply by rinsing it under water.
Using the photo at right as your guide, position the ruler about ¼-inch away from the seam you wish to stitch. Since your needle is ¼-inch away from the edge of the foot, this is necessary to keep the needle directly over the seam. With a little practice, you’ll soon easily manipulate your templates and will be very pleased with the perfect shapes they can create!


