Quilt Path 101: Attaching, starting and using pantograph on your Quilt Path
Congratulations on installing your Quilt Path on your APQS longarm. Now that you have this powerful quilting tool at your disposal, it’s time to dive into the process of attaching the Quilt Path carriage to your longarm and learning how to use it effectively.
In this blog post, we’ll walk through the steps to attach the Quilt Path, turn on the system and explore the “Pantograph Power Panto” mode for quick and beautiful edge-to-edge designs.
Attaching and detaching the Quilt Path carriage
The first step in setting up your Quilt Path system is to attach it to your longarm quilting machine. I prefer parking my Quilt Path at the left end of the frame, then gently bringing the longarm against the Quilt Path carriage. Follow these simple steps to attach it securely:
- Push the big red clamp onto the top of the white Quilt Path box.
- Engage the mid-machine clamp onto the black belt.
- Plug the red cable into the AUX port on the longarm.
To detach, reverse the process by unplugging the red cable, releasing the two clamps and moving the longarm away from the Quilt Path.
Connecting and disconnecting the Quilt Path is quick and easy, allowing you to seamlessly transition between using your computer and free motion quilting.
Powering up the system
Knowing the correct sequence to turn on your Quilt Path system is crucial. Follow these steps:
- Turn on the power to the white Quilt Path box and ensure the blue light is on.
- Confirm the red cable is plugged into the AUX port and both red clamps are engaged.
- Turn on the main power to the longarm.
- Power up the tablet, ensuring the red/green switch underneath the tablet mount is set to green.
- Double tap on the Quilt Path icon on the tablet.
Once the system is powered up, Quilt Path will perform a safety check, ensuring the belt motors are synchronized. Then, the Home Screen will appear, giving you control over the program.
Using pantograph for quick edge-to-edge designs
For a quick and efficient quilting experience, let’s explore using pantograph to quilt on Quilt Path. Follow these steps:
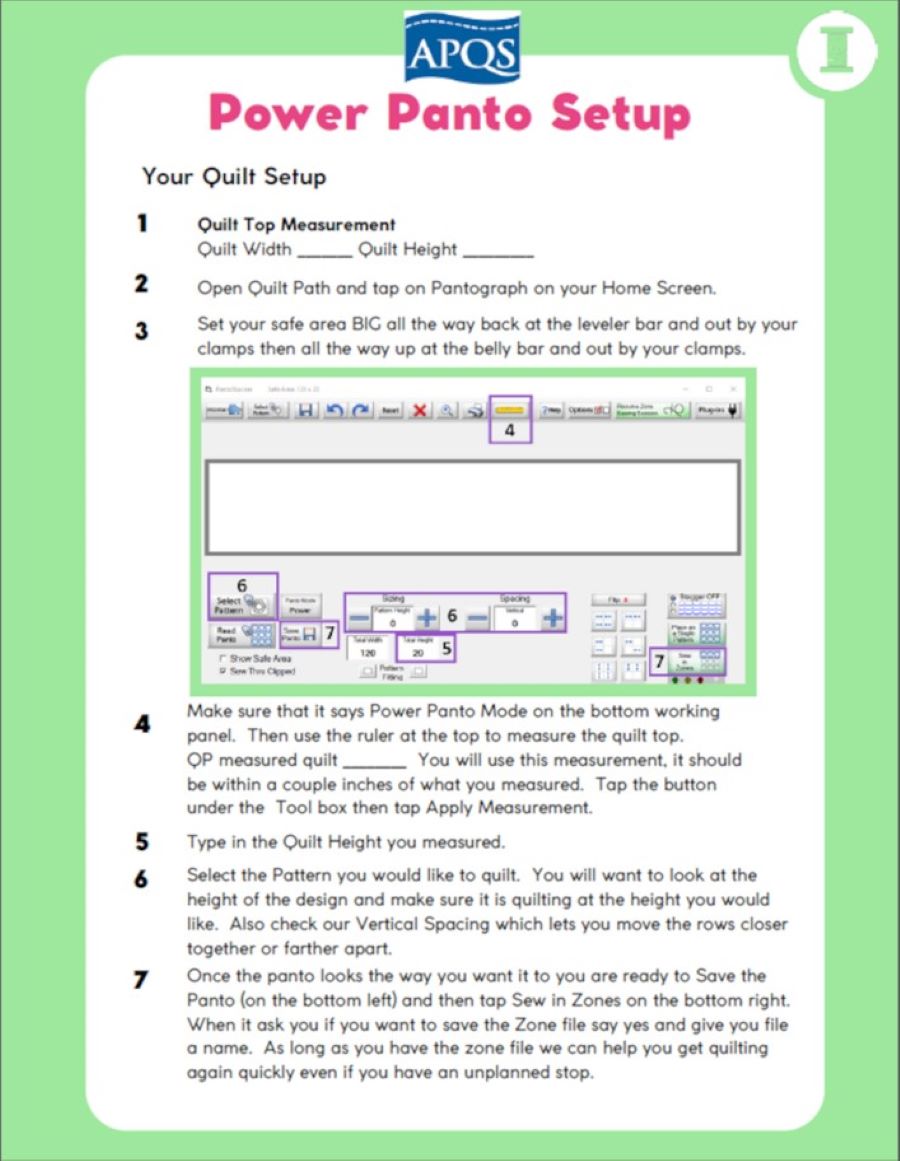
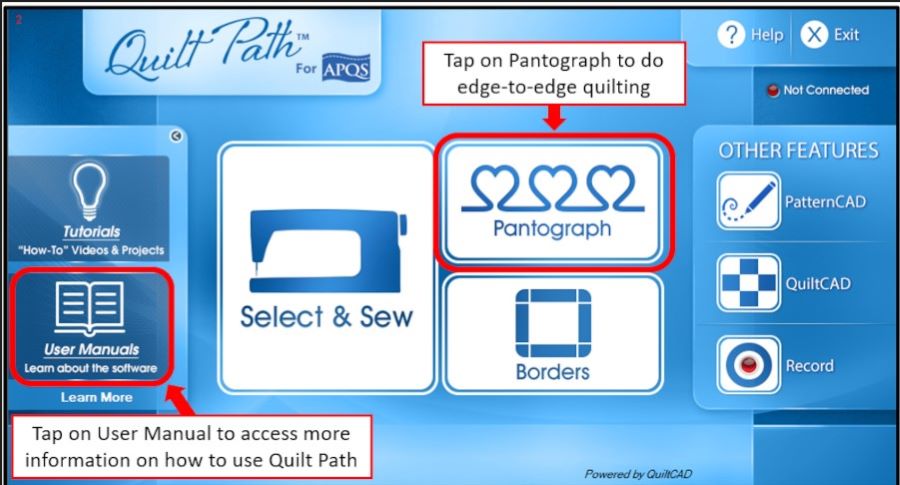
- Access the “User Manual” on the Home Screen for helpful resources, including the “Power Panto Setup Worksheet PDF,” which will walk you through setting up and quilting your first panto.
- Navigate to the pantograph icon on the Home Screen.
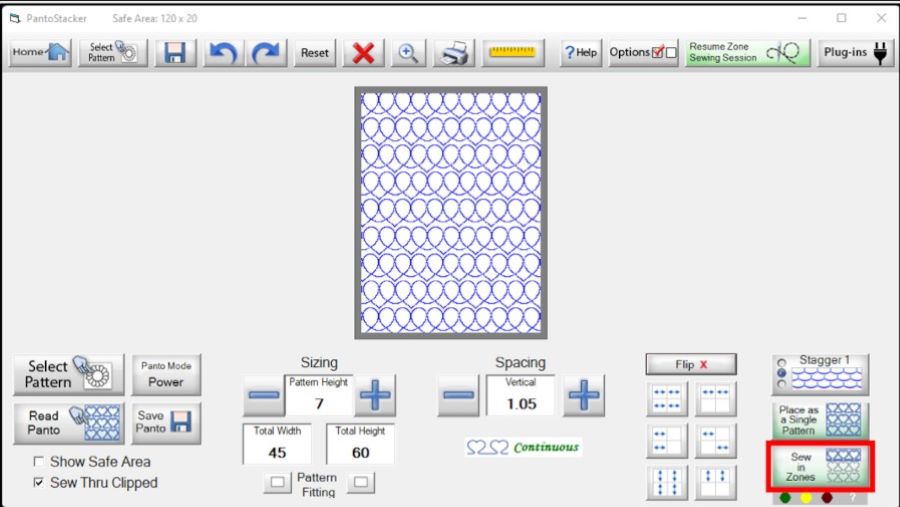
- In PantoStacker, select “Power Panto mode” for edge-to-edge quilting.
- Input quilt top height and use the ruler to measure the width of your quilt top.
- Choose your desired pattern, adjust size and spacing as needed. Check out the pattern button while you are in “Select Pattern,” there are more designs in the “Free Bonus Patterns” folder as well.
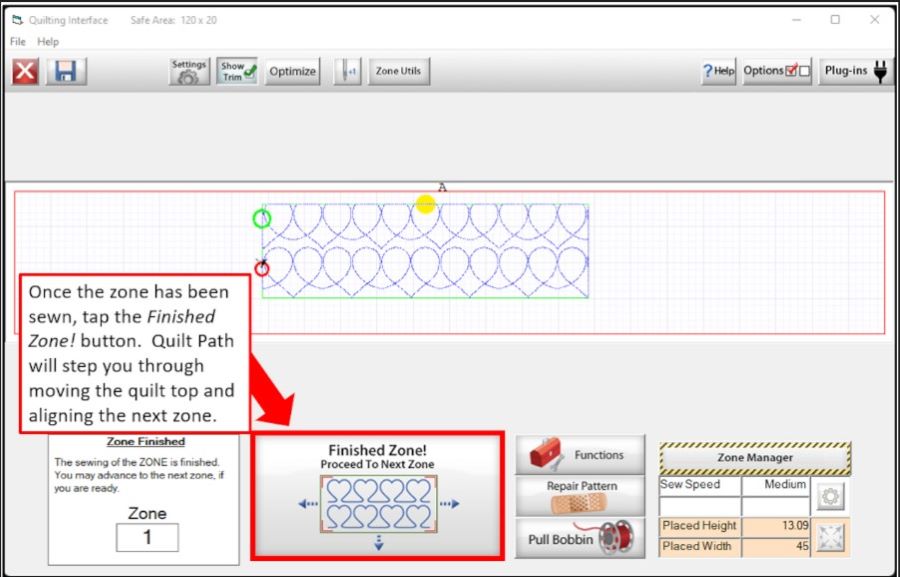
- When you tap “Sew in Zones,” it will ask you to save the zone file which is the file you will need to be able to resume quilting in case you need to stop partway through your project.
Placing the design with pantograph
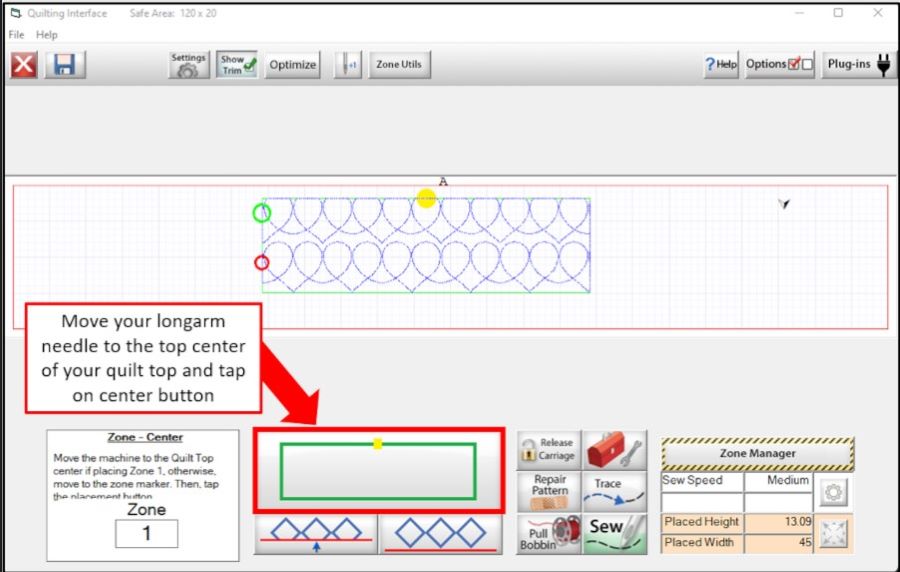
Once you’ve set up your design, it’s time to place it on your quilt using the “Quilting Interface.” Here are the steps for center placement:
- Move the longarm to the top center of your quilt top.
- Tap the center placement button located at the bottom center of the screen.
- Make sure to mark your alignment point. I do this by putting a piece of tape under the foot of my longarm and doing a “needle down/up” to punch a hole through the tape.
- Understand the green box represents the zone or design you will be quilting, and the red box is the Safe Area.
- Use the “Toolbox – Move to Start Point” button to have Quilt Path move to your start point and allow you to bring your bobbin thread to the top.
- Tap the “Sew” button and hold onto the top and bottom tail, this will prevent a knot from forming on the back of your quilt. Quilt Path will walk you through making the center alignment mark for the next zone once it has completed sewing the current one.
Have fun!
Mastering Quilt Path is an exciting journey that opens endless possibilities for quilting creativity. By following these steps for attaching, starting and using pantograph, you’ll be on your way to completing beautiful quilts with efficiency and precision. Enjoy the process and happy quilting!