Quick tops for quick quilts
Am I the only quilter who looks ahead to a quilt-giving opportunity like an upcoming baby shower thinking, “That’s months away! I’ve got plenty of time. I’m pretty sure I don’t have the right shade of “blush” fabric in my stash so I’d better go shopping (drat! 😀)”
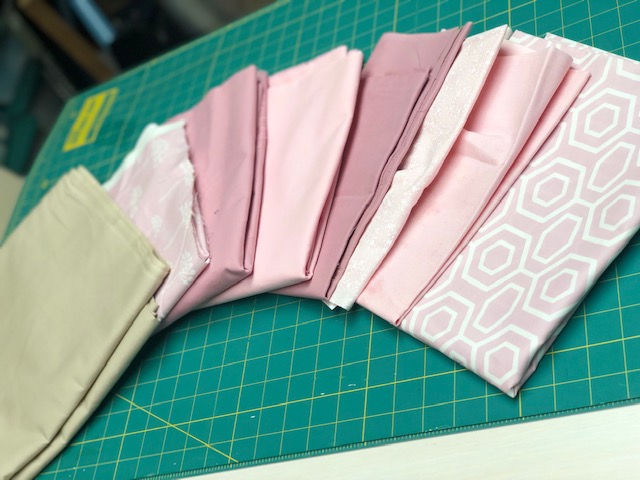
I spend the next few weeks popping into quilt shops in search of the perfect shade of “blush”—never really sure if that’s a pale pink, pink-orange, or pinky-tan color. So I buy a fat quarter here and there of every shade, and maybe even a yard or two if a bolt speaks to me. I spread my loot out on my cutting board, proud that I’ve finally got all the fabrics I need—even though I have no idea what I’m going to make!
I fondle the fabrics like stroking a newborn baby, plop the stack off to the side, and tell myself that I need to decide on a layout soon. Next thing you know, I’ve completely forgotten about that tidy pile until the official shower announcement arrives in the mail—and panic mode sets in!

Having an APQS longarm makes the actual quilting go super-fast when facing a deadline crunch, but it doesn’t help a lot of you don’t have the quilt top done in the first place! Knowing that other quilters out there just might have a memory or procrastination problem like me, or you just need a quilt in a hurry, we thought it would be fun to share some start-to-finish quilting tips over the next few weeks to help you get your quilts done even faster.
We’re starting with quick cutting and piecing methods for half-square triangles—a mainstay block in scores of quilt patterns. We’ll stitch some up, and then we’ll play with the blocks on a design wall, experimenting with different layout options. Just for fun, we’ll let YOU vote on your favorite!
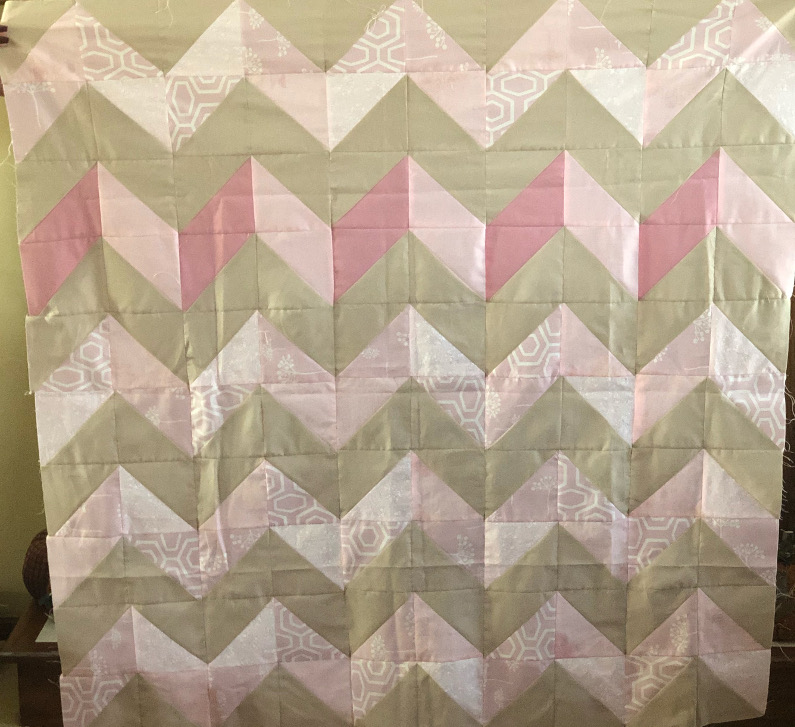
Next we’ll come up with a few different quilting design options for the winning layout, sharing the pros and cons of each option plus tips on accomplishing the designs on your machine. We might even have you vote for your favorite again.
Finally, we’ll quilt the quilt, and give it away to one lucky reader along with some swag from APQS. How awesome is that—one of you will win a ready-made quilt without having to do a smidgeon of sewing! Yee haw! Let’s go…
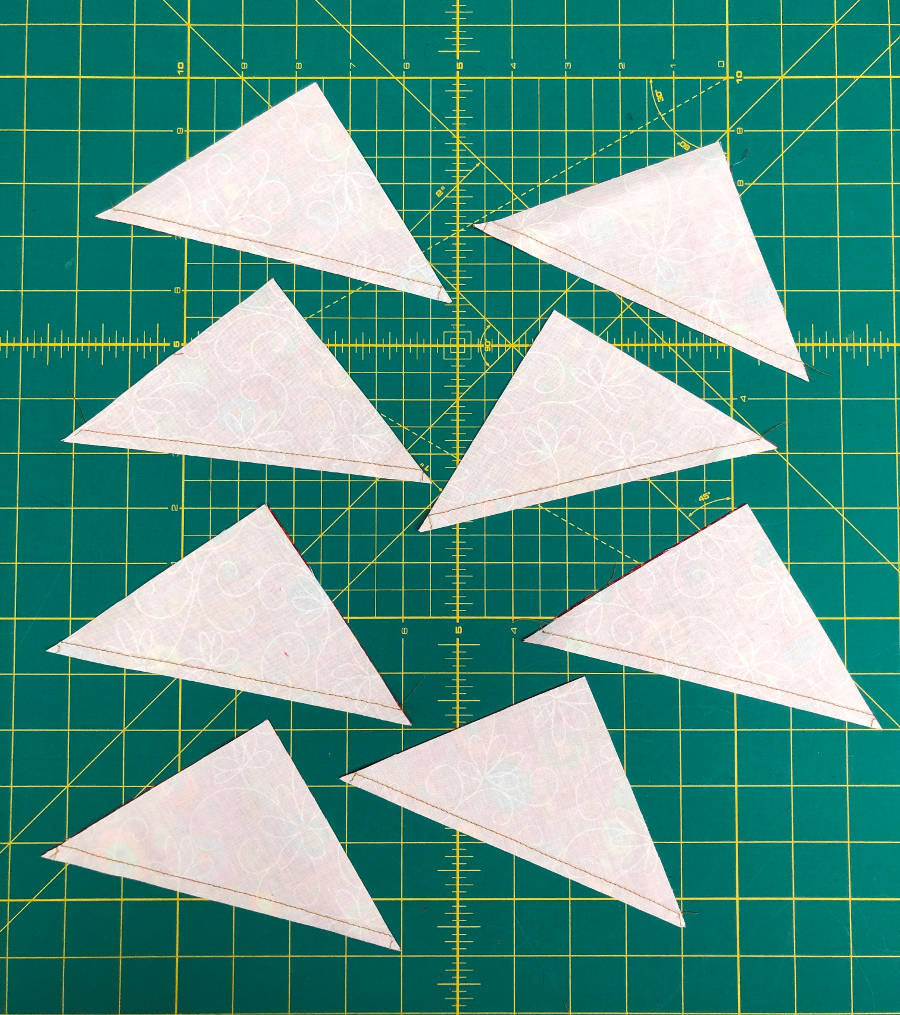
Method 1: Magic 8 Easy Half-Square Triangles
(Yield – 8 half-square triangle units)
This method is perfectly suited for precuts like layer cakes and charm packs. You can cut your own squares based on a simple formula. We’ve included the formula with this handy chart so you don’t even need to do the math for common block sizes!
Step 1: Layer two squares with right sides together.
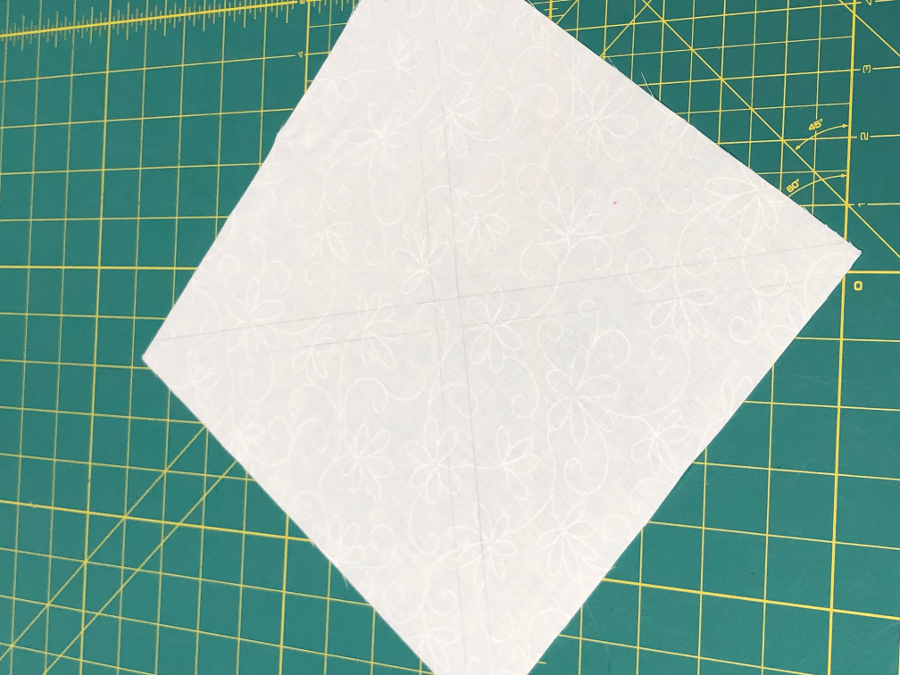
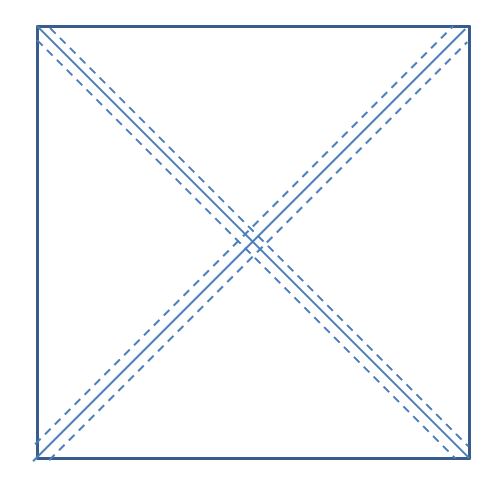
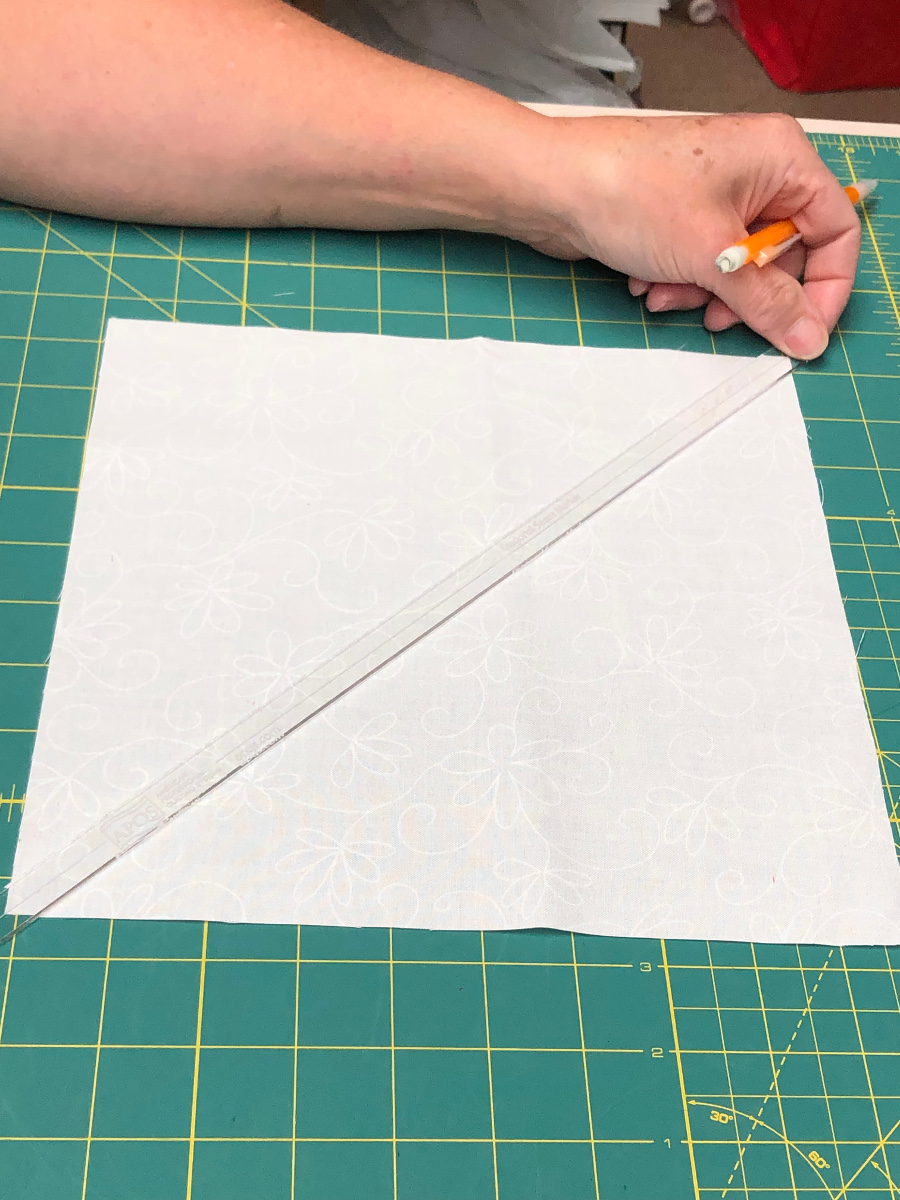
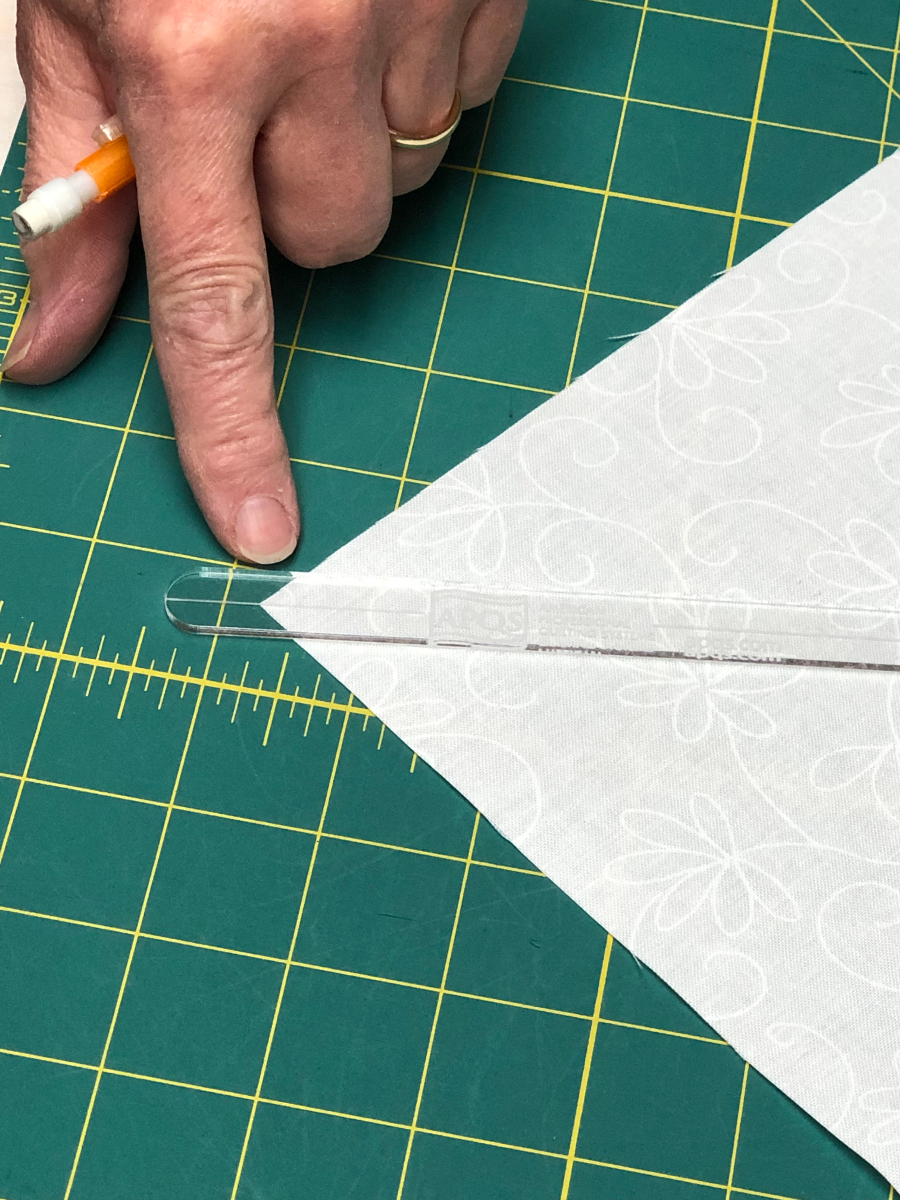
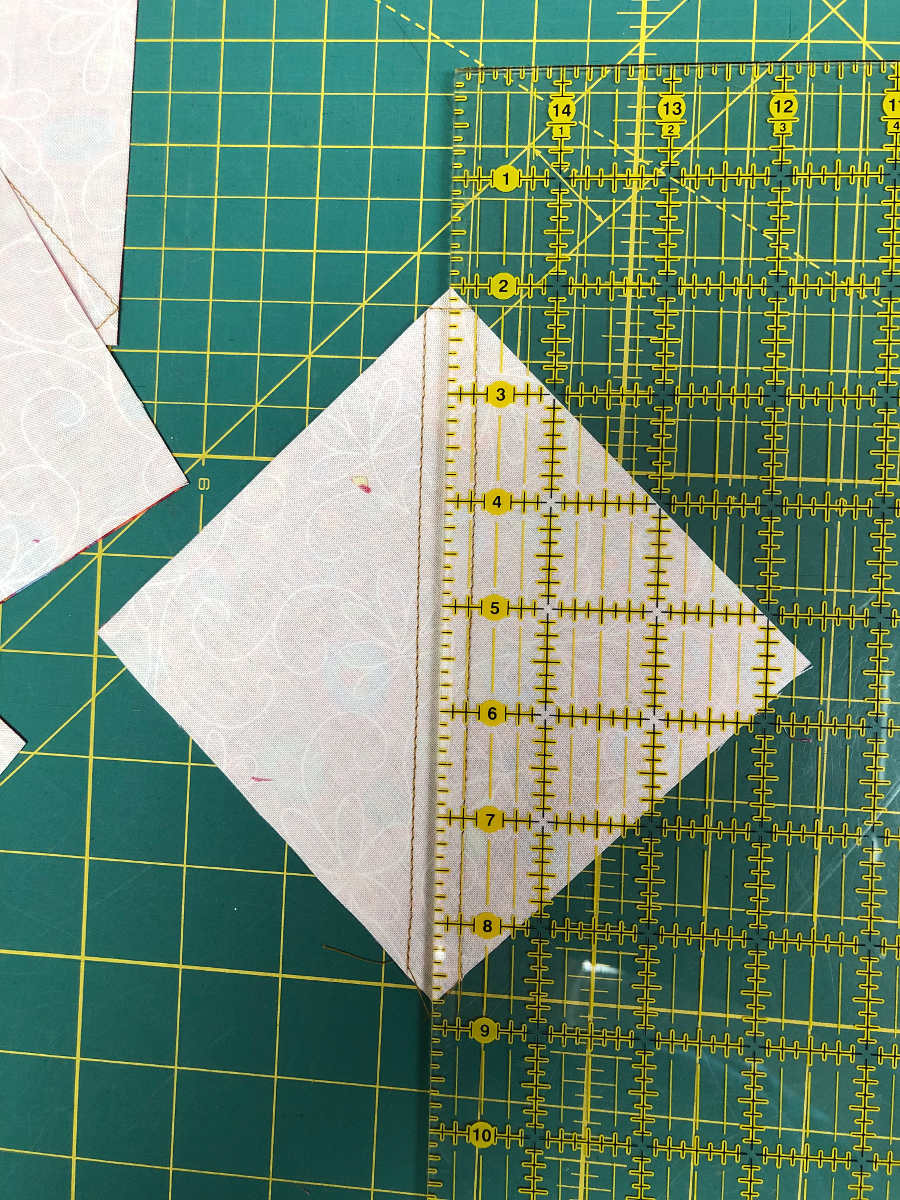
Step 2: Draw a diagonal line across the square in both directions, then add another line ¼-inch away from this line on both sides. These will be your stitching lines. HINT: Use a quarter-inch marking ruler like an APQS Diagonal Seam Marker to draw stitching lines quickly and accurately.
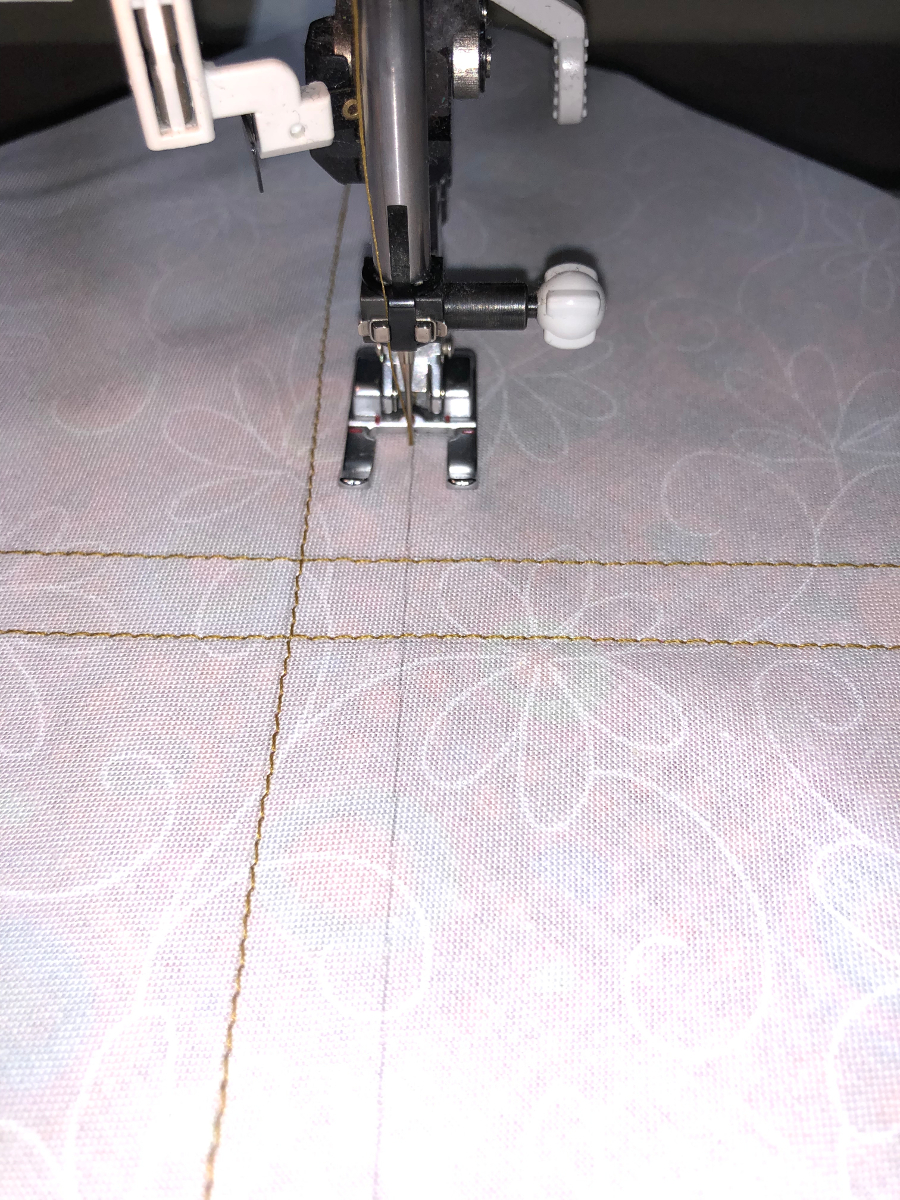
Step 3: Sew on the dotted seam lines in each direction.
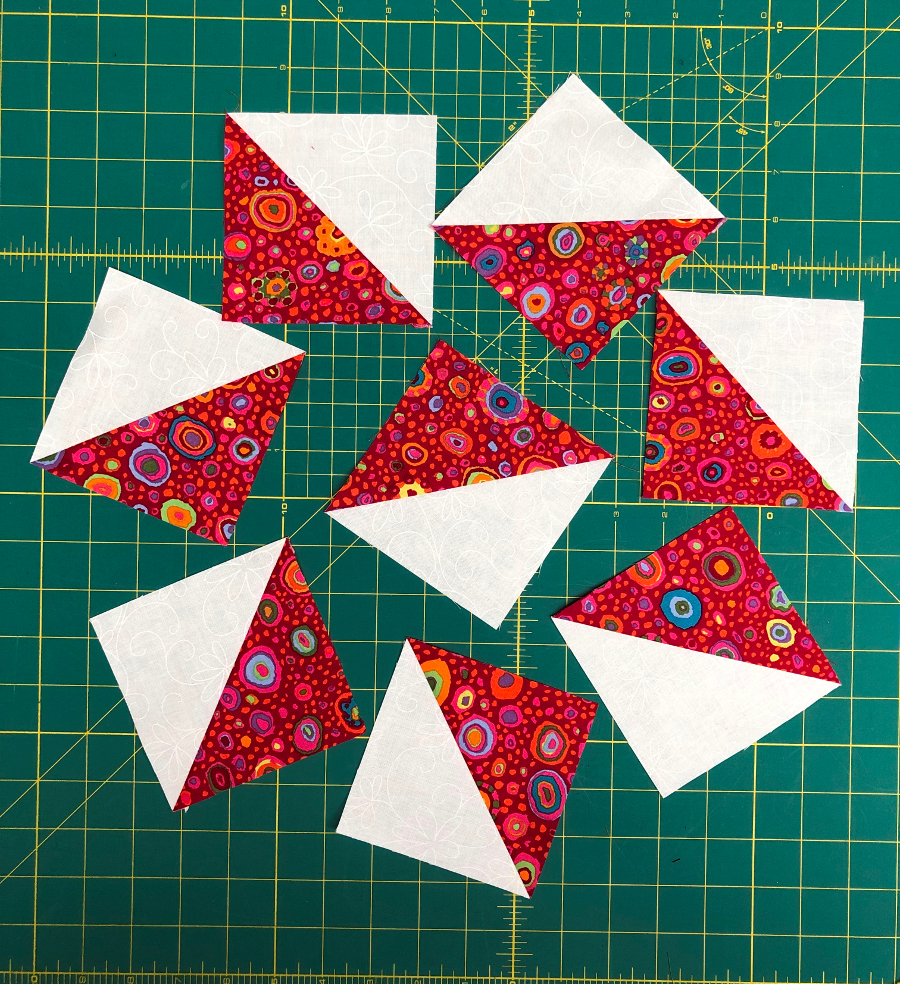
Step 4: Cut through the unit right in the center, both horizontally and vertically as shown.
Step 5: Cut between each stitching line to create the half-square triangle units. Press the seam toward the dark fabric.
Method 2 – Around the Block
(Yield: 4 half-square triangle units)
This method makes half-square triangles even faster! A 10-inch layer cake fabric will yield 4 blocks with an unfinished measurement of 7 inches.

However, it also requires a little math—but if you’re a quilter, you’re used to doing some figuring. Who’d have thought that 10th grade geometry would be so important in later life? It’s also a little less accurate since you’ll be dealing with decimal points. It’s best to “do the math” then round up when cutting your starting squares. Then you can easily trim the square to the correct size after you’ve pressed it.
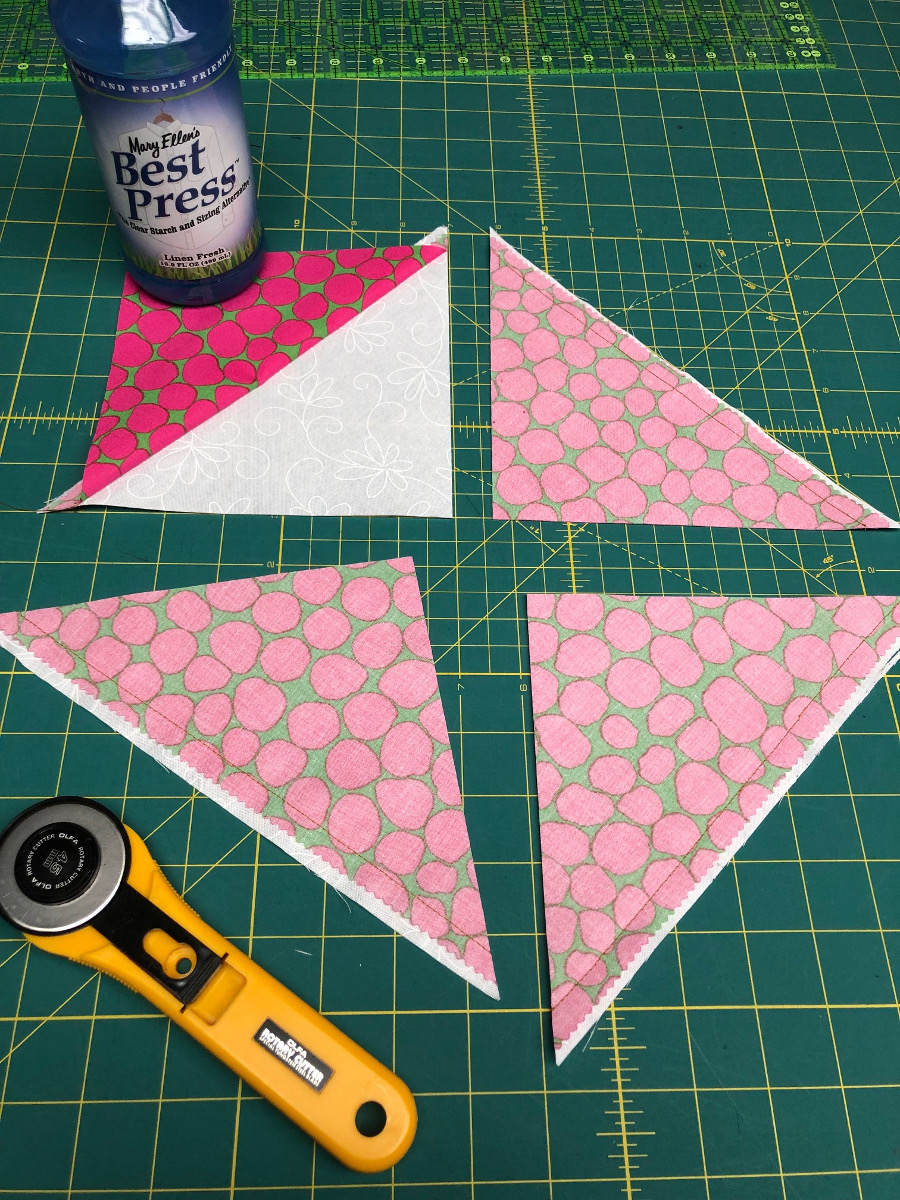
Speaking of pressing, this method also results in bias edges on the outer edge of the block instead of along the interior joining seam. Handle the units carefully, and use some spray starch or a product like Mary Ellen’s Best Press to stabilize it.
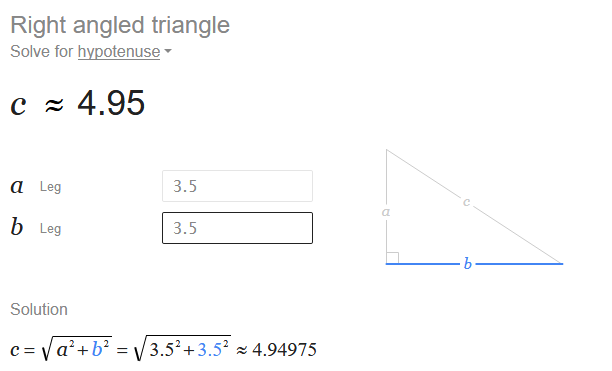
For this method, base your calculations on the UNFINISHED size of your block so you have enough to trim it down to the correct size. The formula uses the Pythagorean theorem and solves for the “hypotenuse” or long side of the triangle—which represents the size of the square we need to cut.
We’ve included some common sizes below so you don’t have to get out your calculator—but you can also punch in “right triangle hypotenuse formula” into a web browser and let your computer crunch the numbers.
In the example below, if I want 3-1/2 inch unfinished squares, I need to cut two squares that are 5 inches:

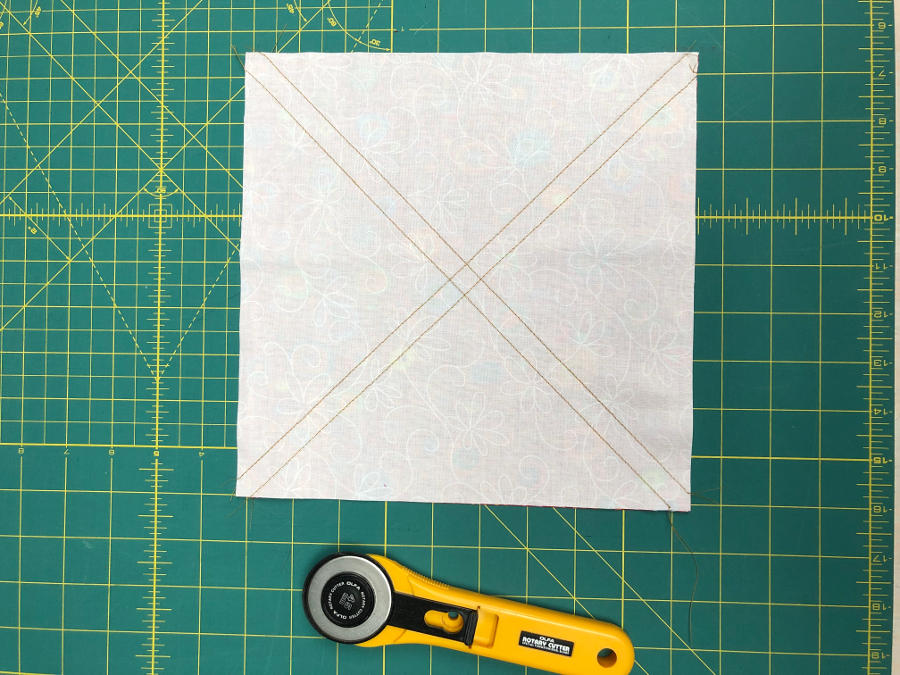
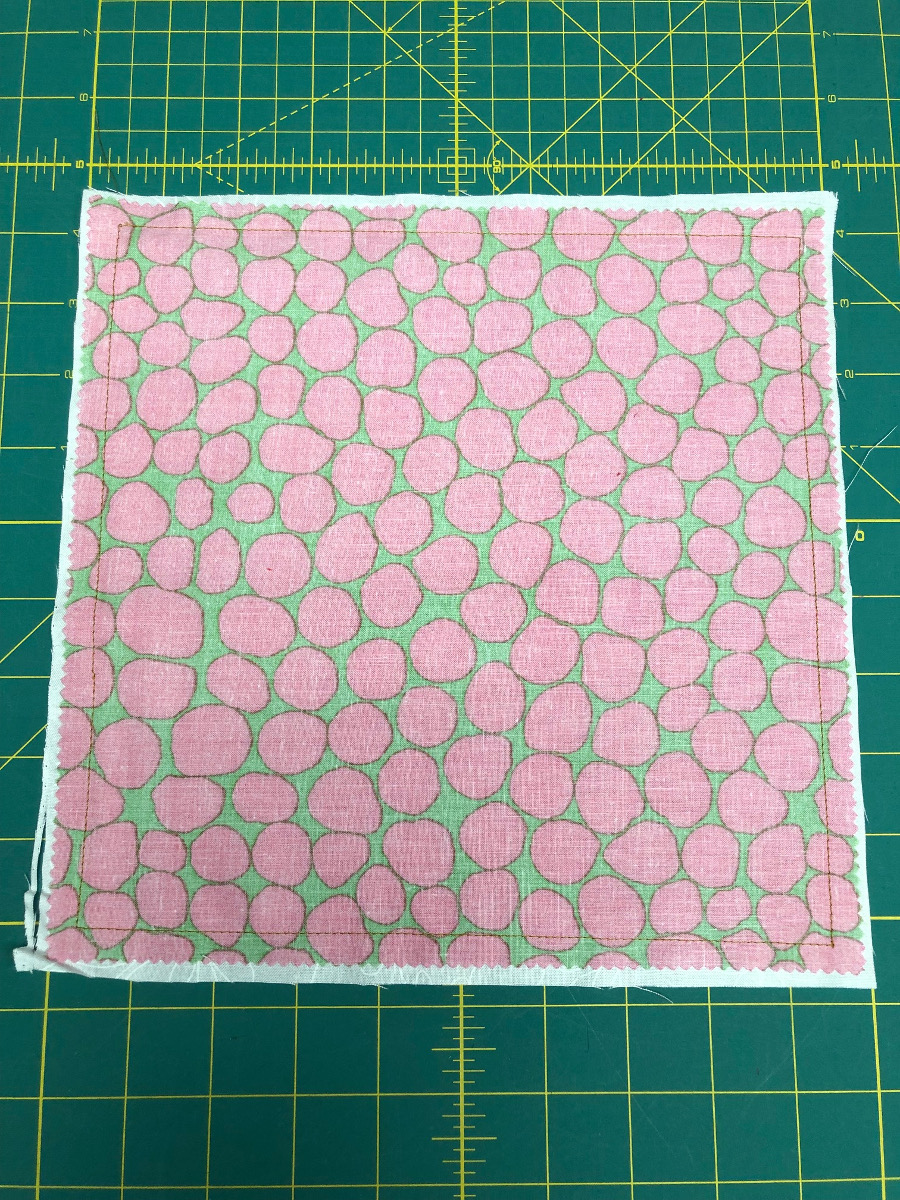
Step 1: Layer the two fabric squares right sides together. Stitch all the way around the block using a ¼-inch seam.
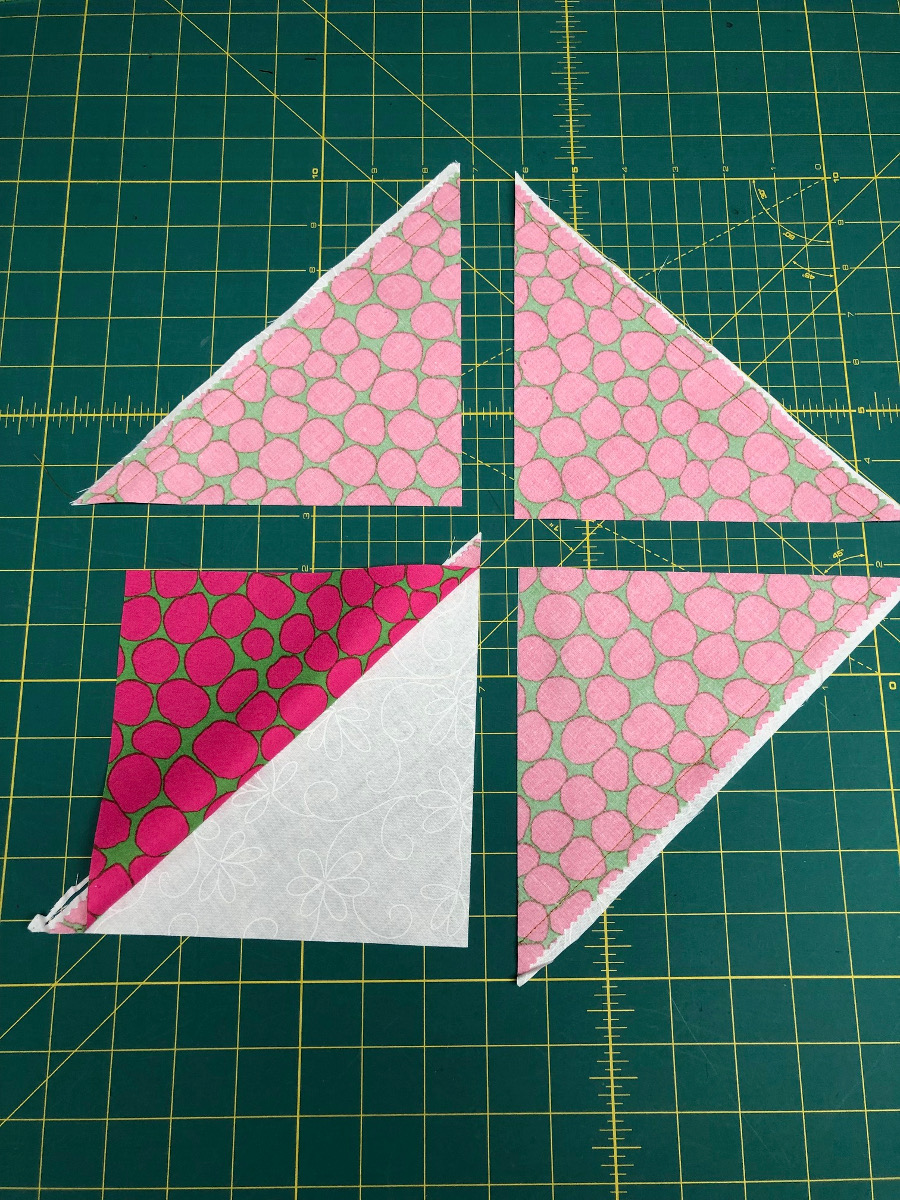
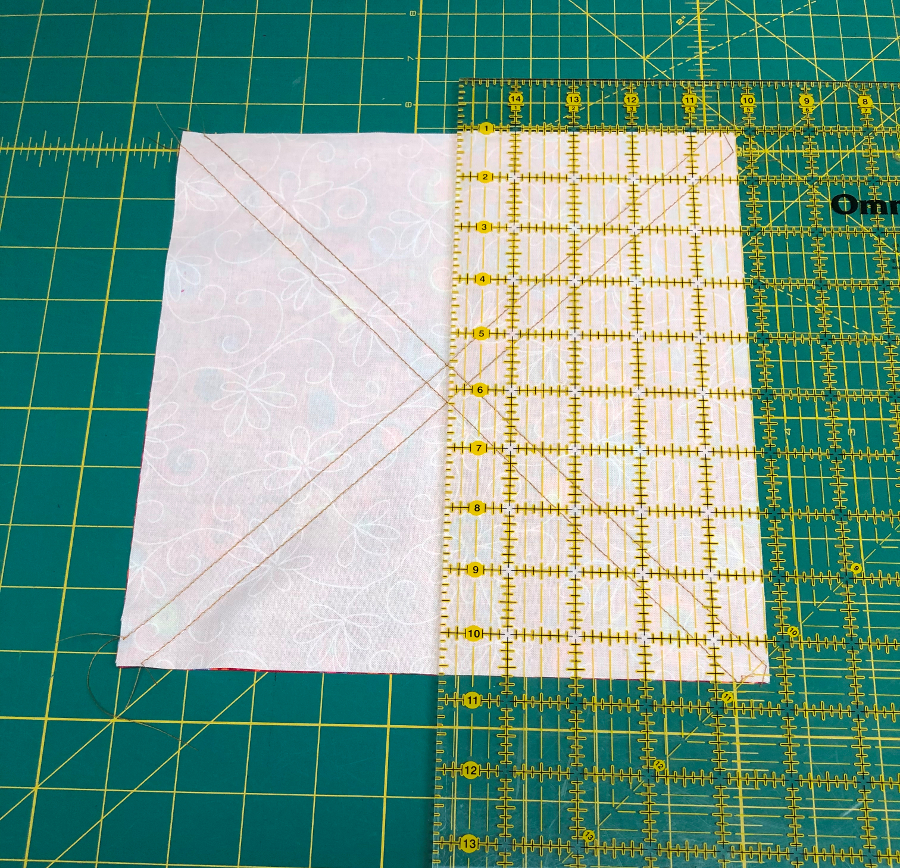
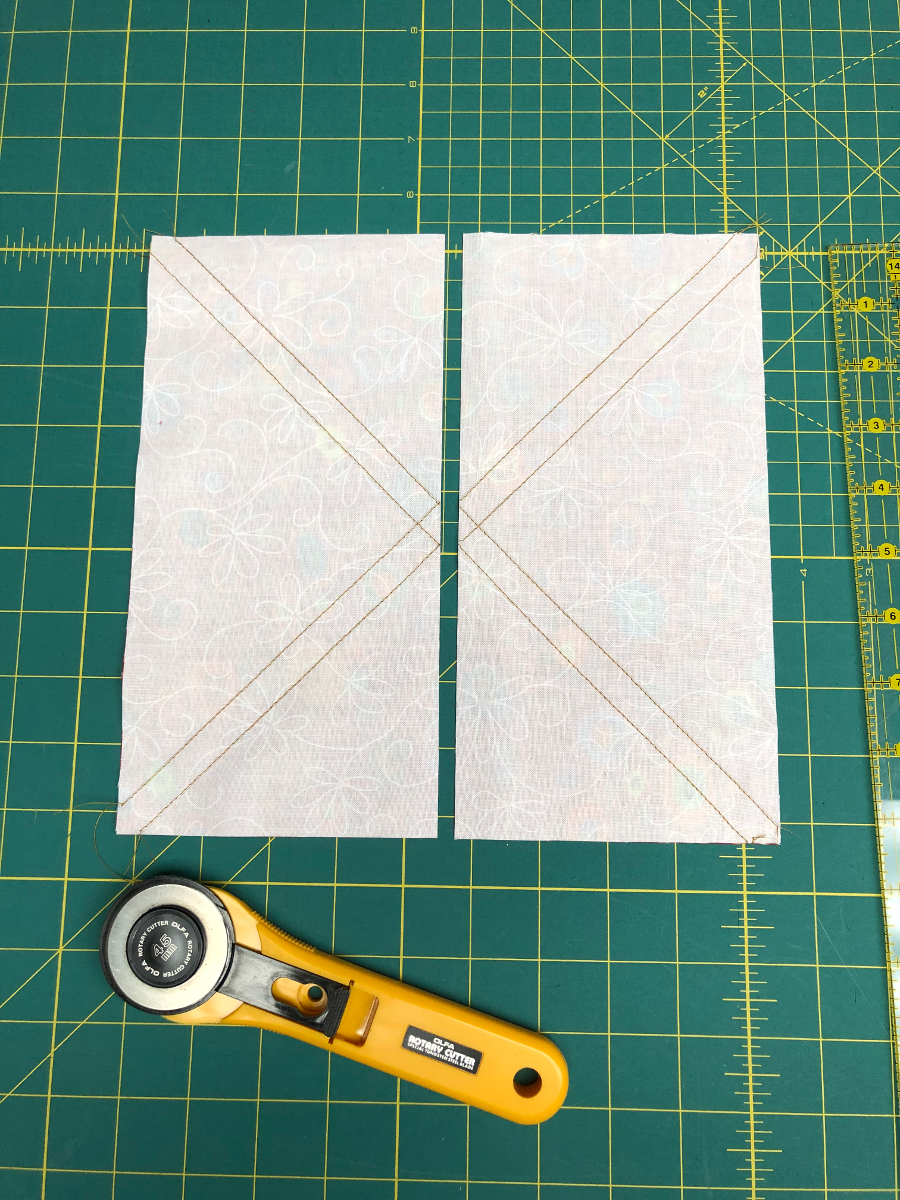
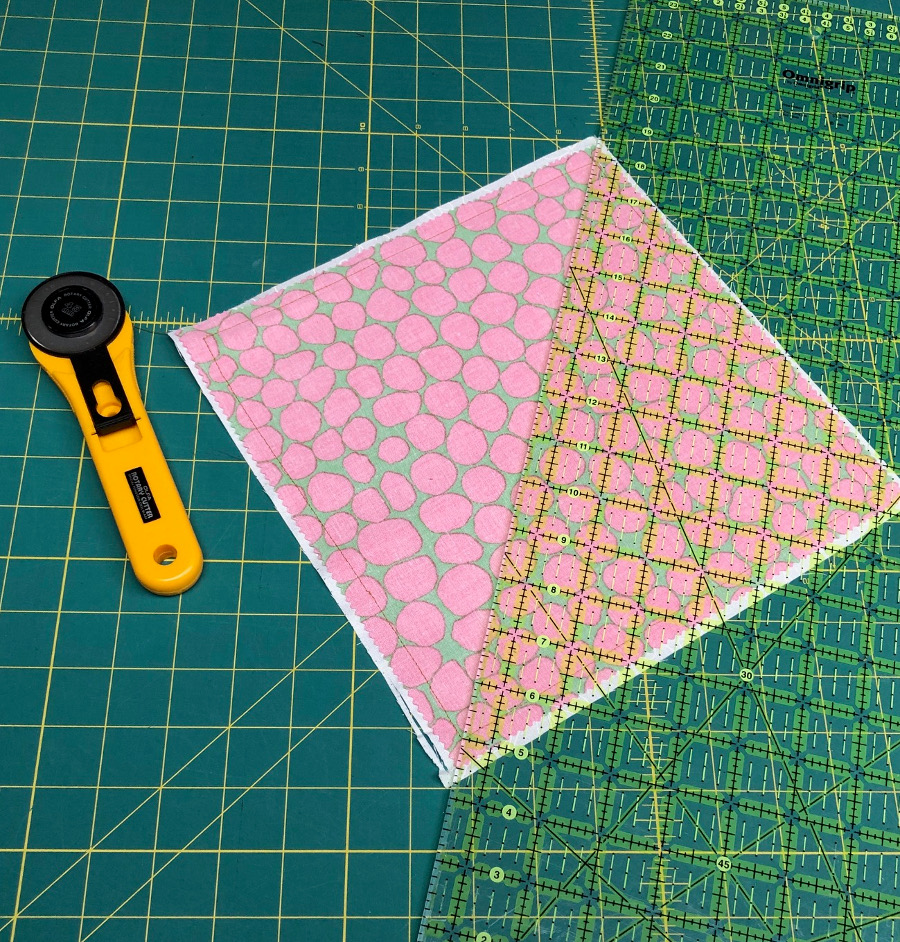
Step 2: Cut the block diagonally from corner to corner in both directions.
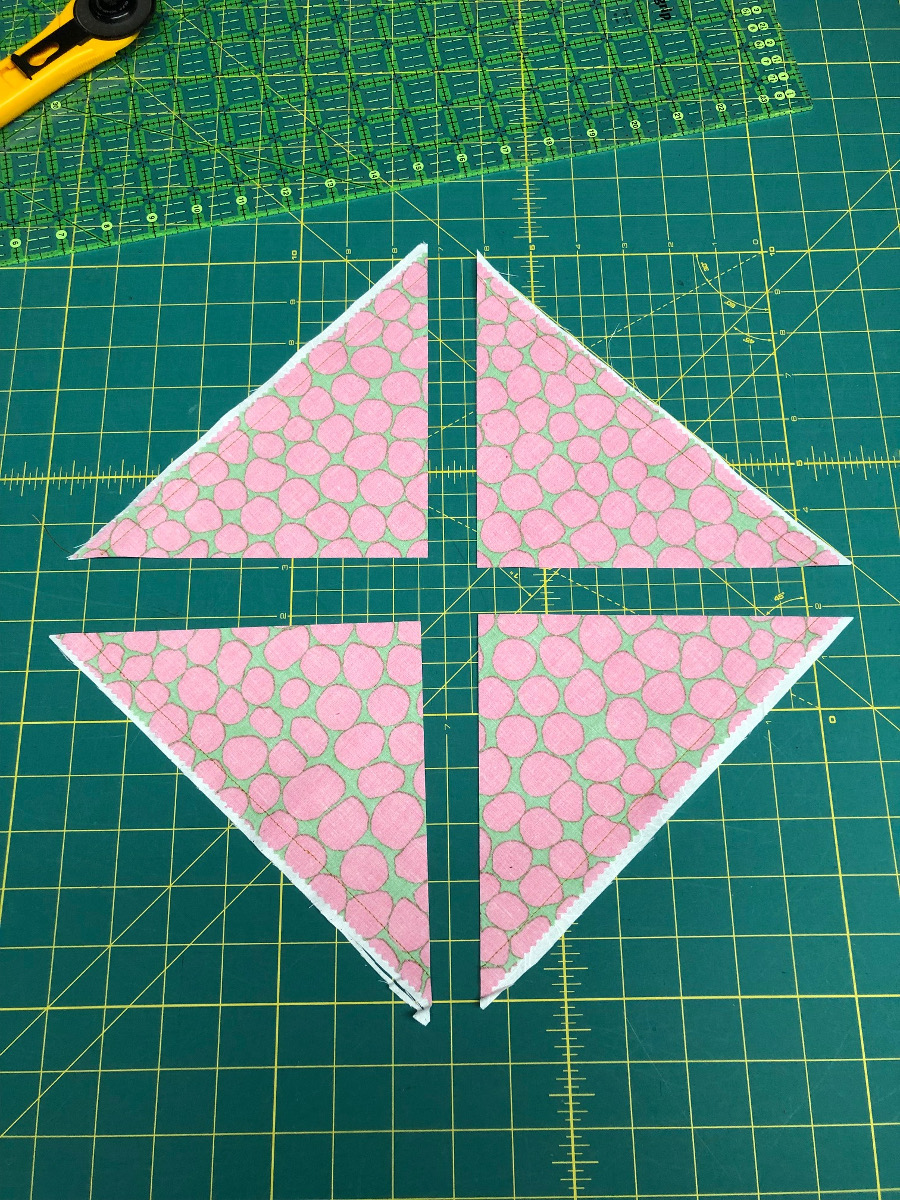
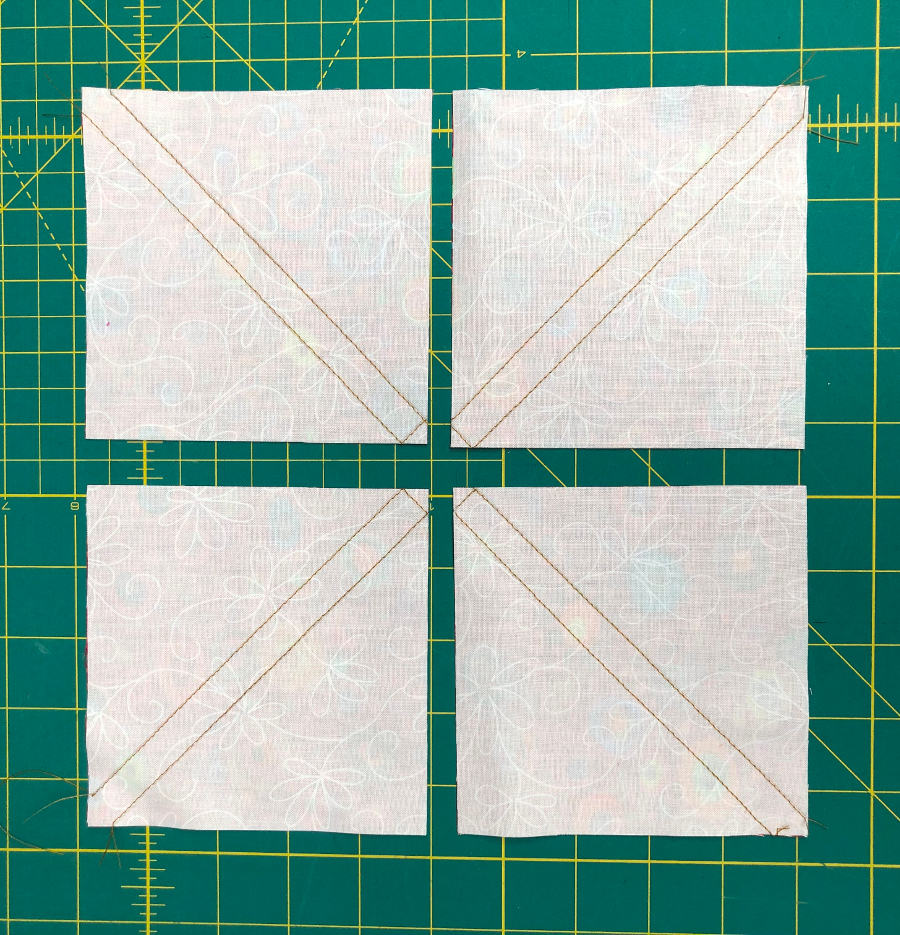
Step 3: Carefully press the fabric to the dark side; spray with starch to prevent bias from stretching. Trim to your desired UNFINISHED size.