Piecing trick to reduce bulk seams
Yikes!
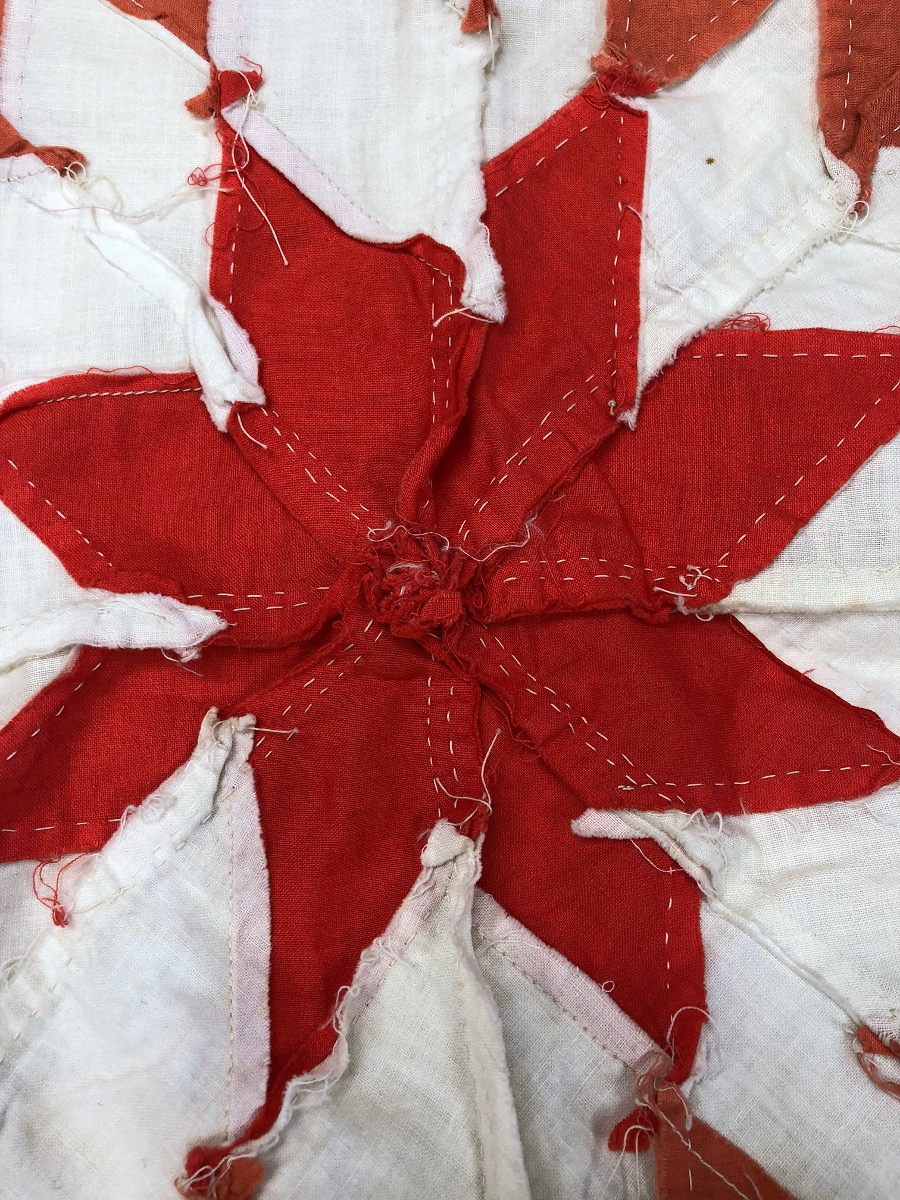
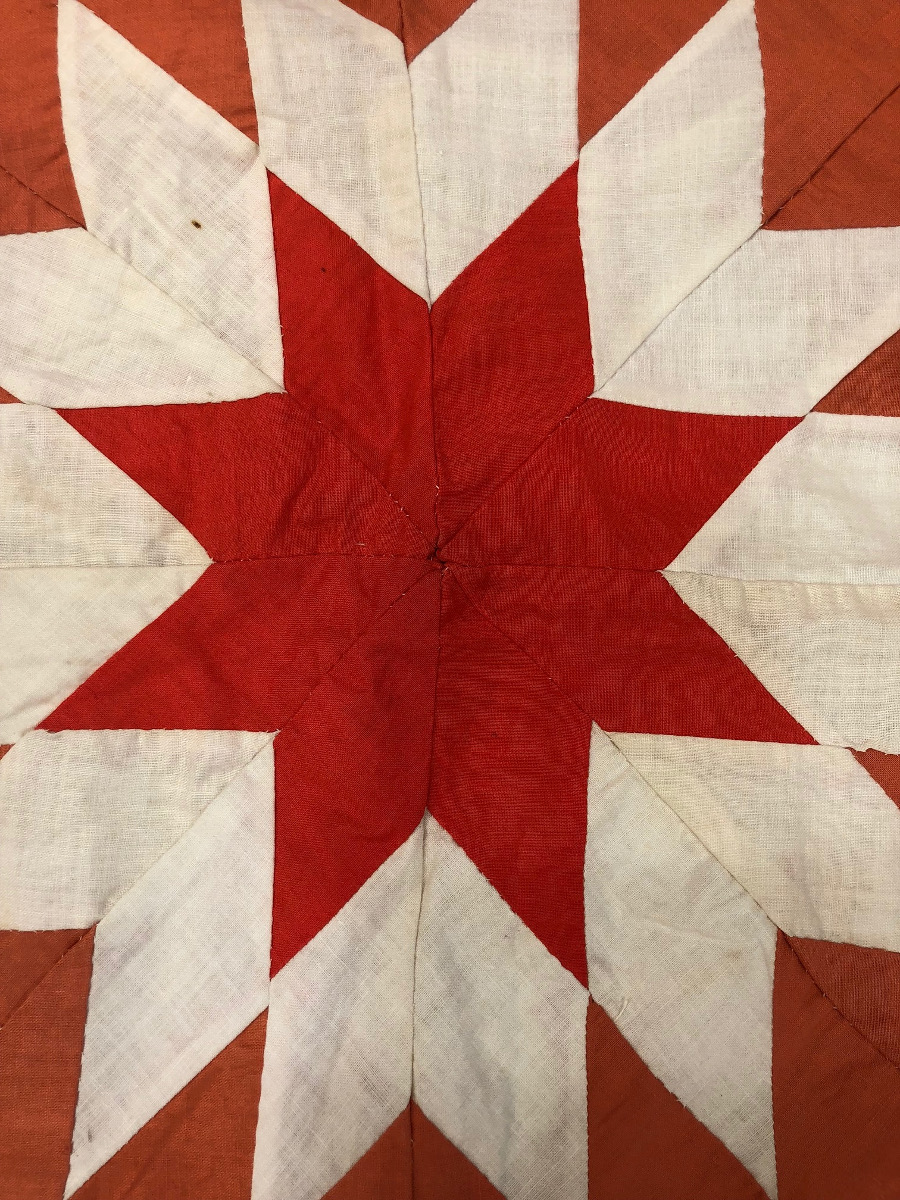
The maker of that antique quilt struggled to get a tidy center in her lone star, and I feel her pain! I hate it when my intersections don’t lay flat. Stars, compasses, Stack-n-Whack® blocks and pinwheels are challenging. If I don’t get them right, that huge lump is miserable to quilt through, let alone to look at.
But I’ve learned a piecing trick over the years that reduces that bulk and helps the block lay flat. Yay! No more “B cup” blocks! 🙂 Here’s how to do it…
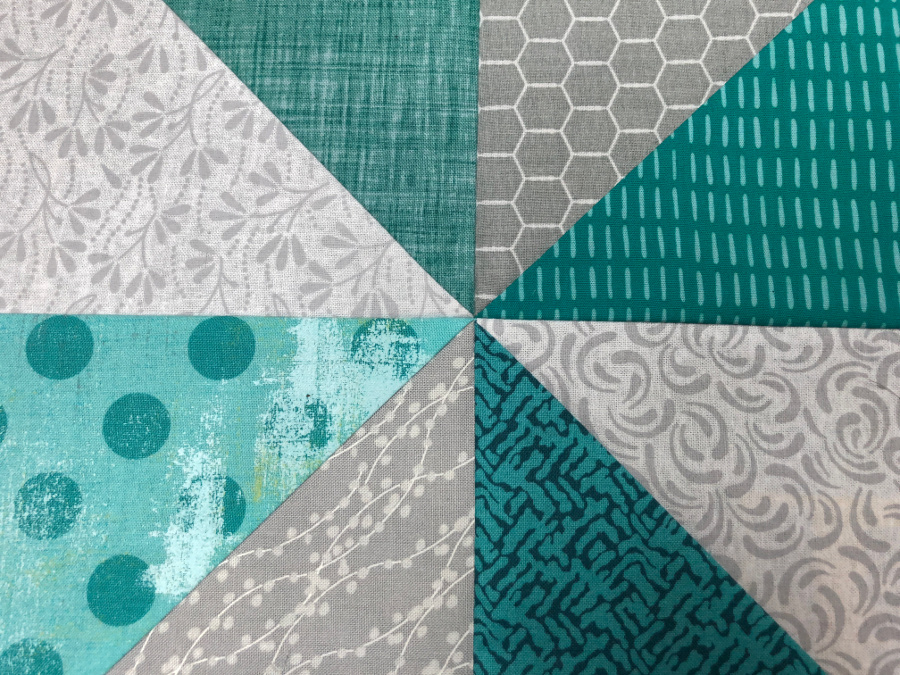
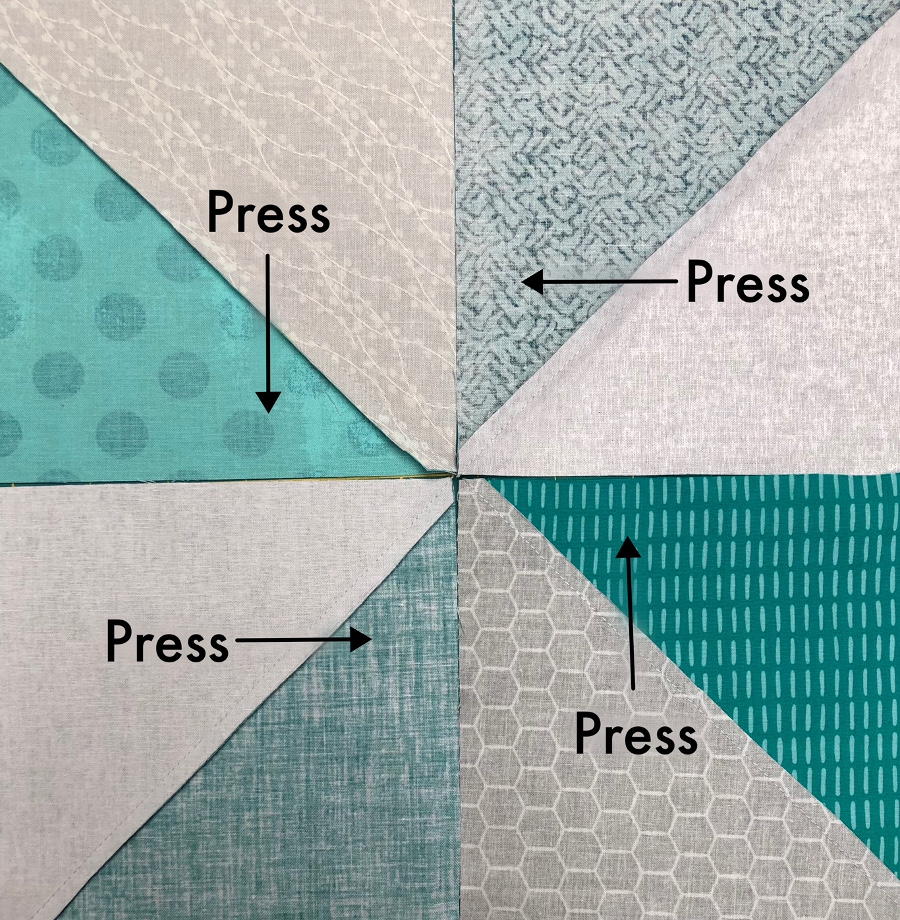
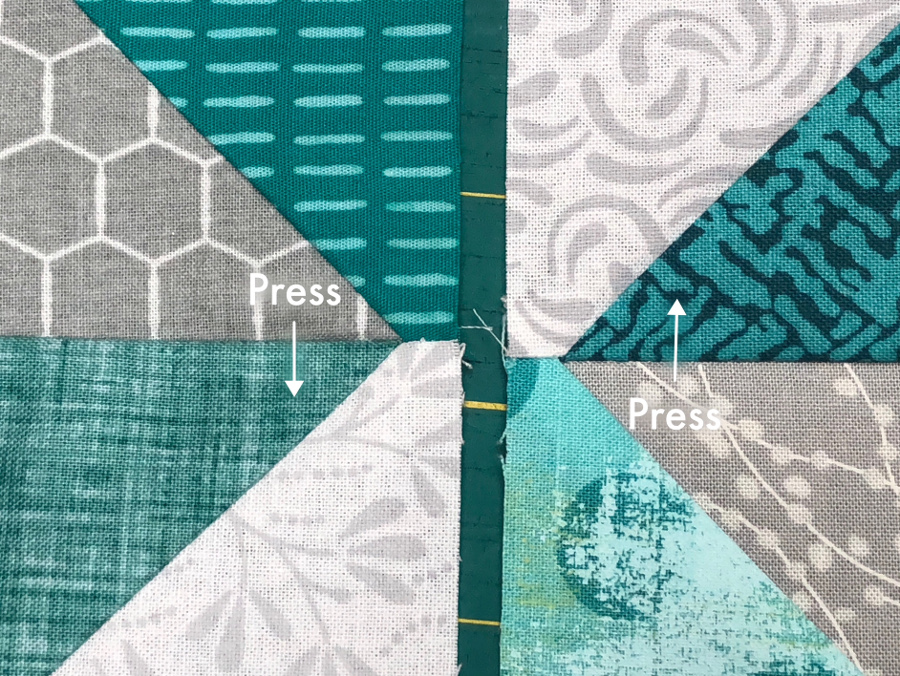
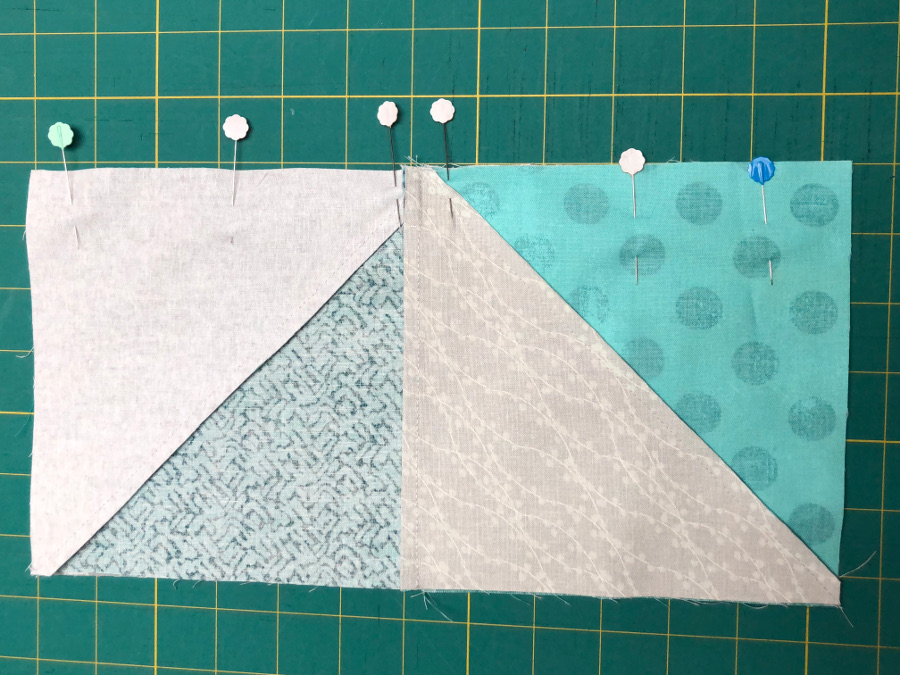
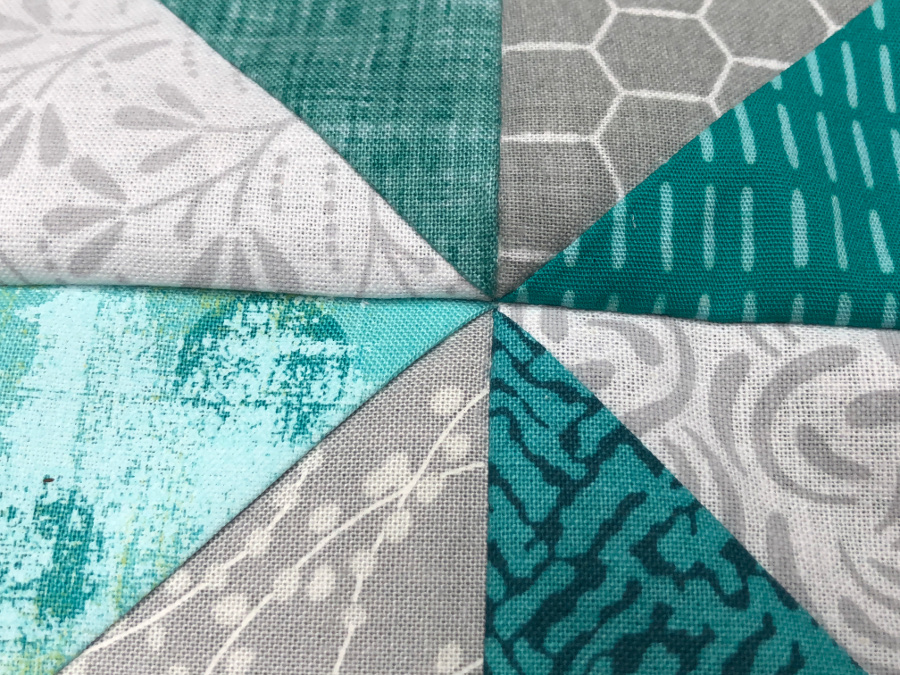
When constructing blocks with several intersecting corners, start by pressing the seam allowances for the units in the same direction to help them nestle together as you join them . In the block below, I pressed the seams toward the dark fabric on each half-square triangle, making them march counter-clockwise on the back of my block.
To help make a crisp center, start with accurate sub-units. The pressing direction in the previous step helps the two squares join together. Align the two squares and use pins to hold them in place. Sew the units together with a scant ¼-inch seam (remove the pins as you go.)
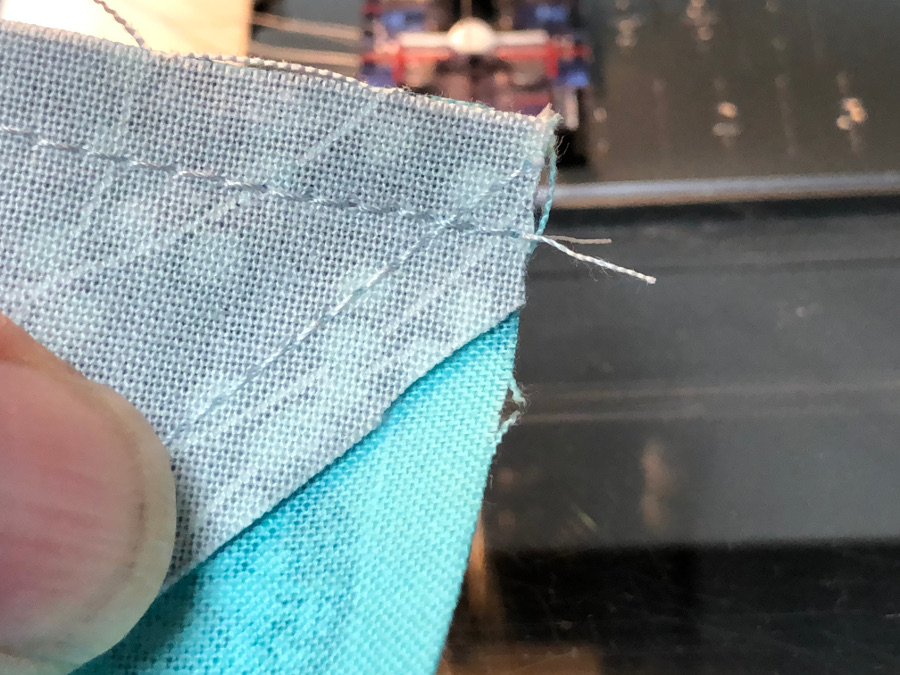
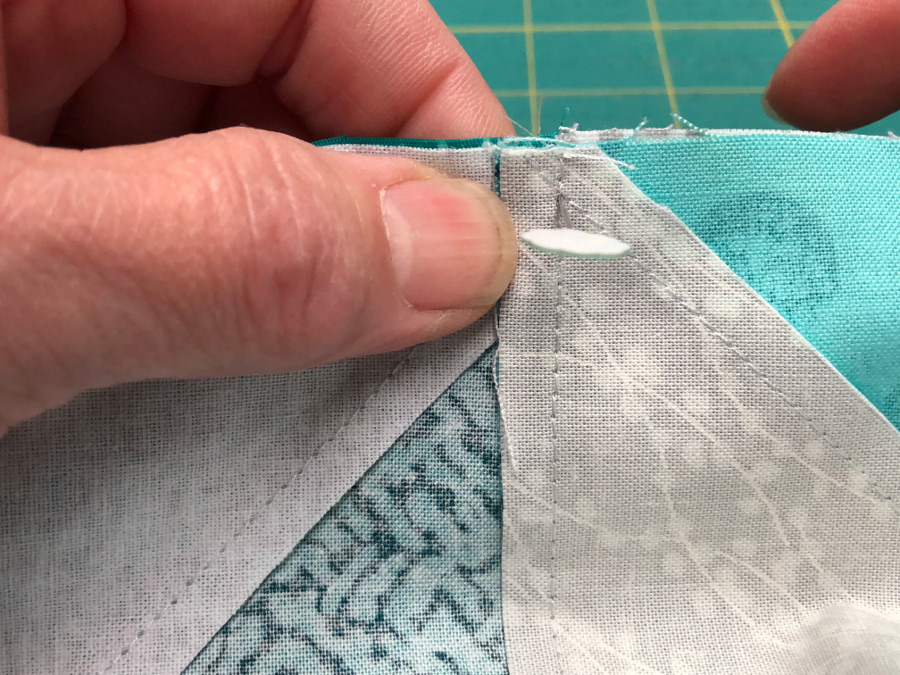
Your intersection should look like the photo below. The stitching lines will cross over each other ¼-inch away from the two raw edges of the unit.
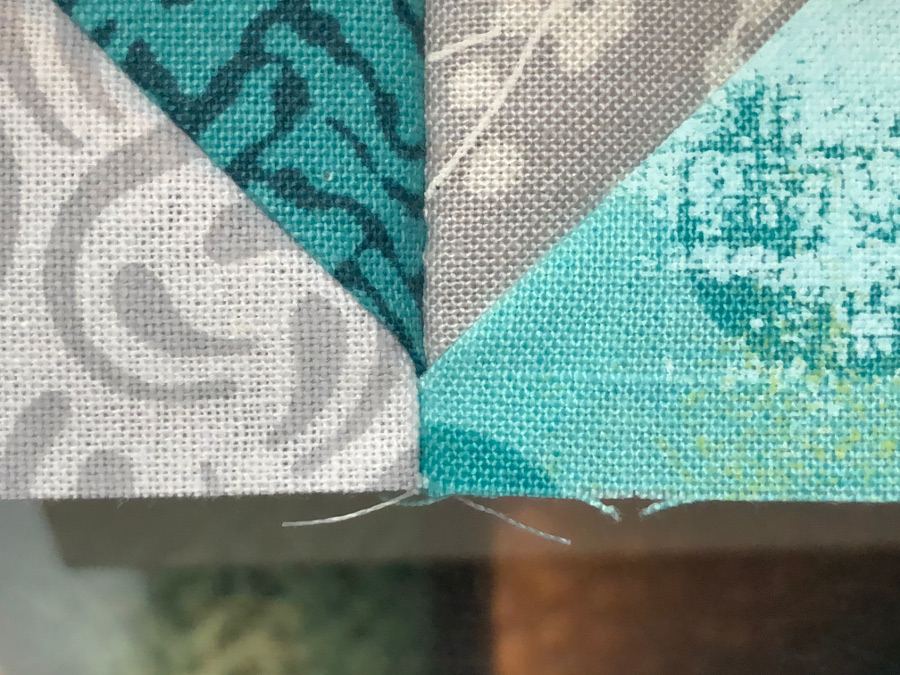
Press the seams to one side (I pressed to the darker fabric again.) Look at now nice that intersection is! Repeat the process to assemble the other half of the block; press again to the darker fabric so the joining seams go in opposite directions for each unit.
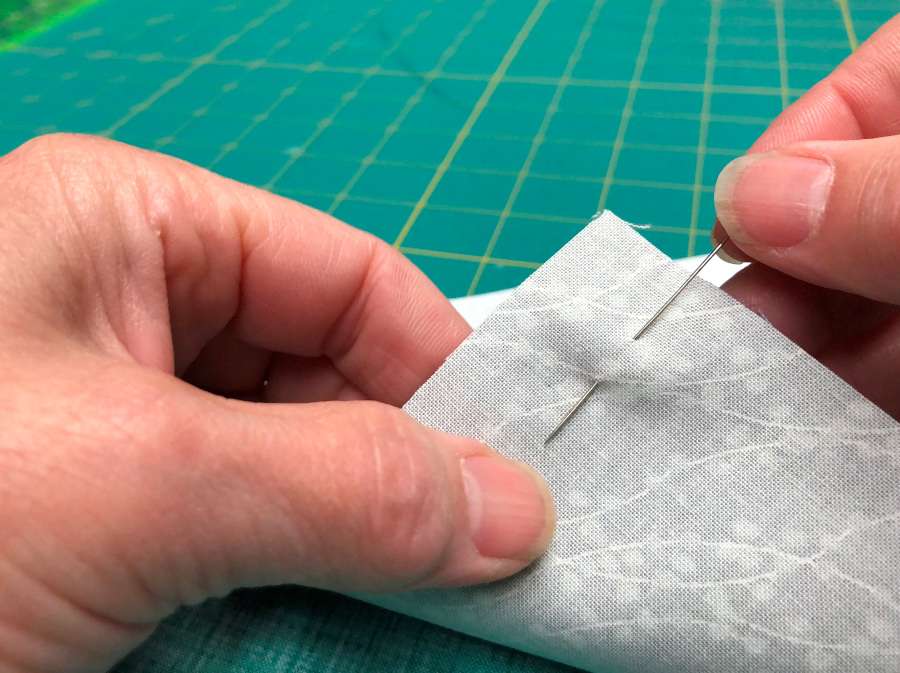
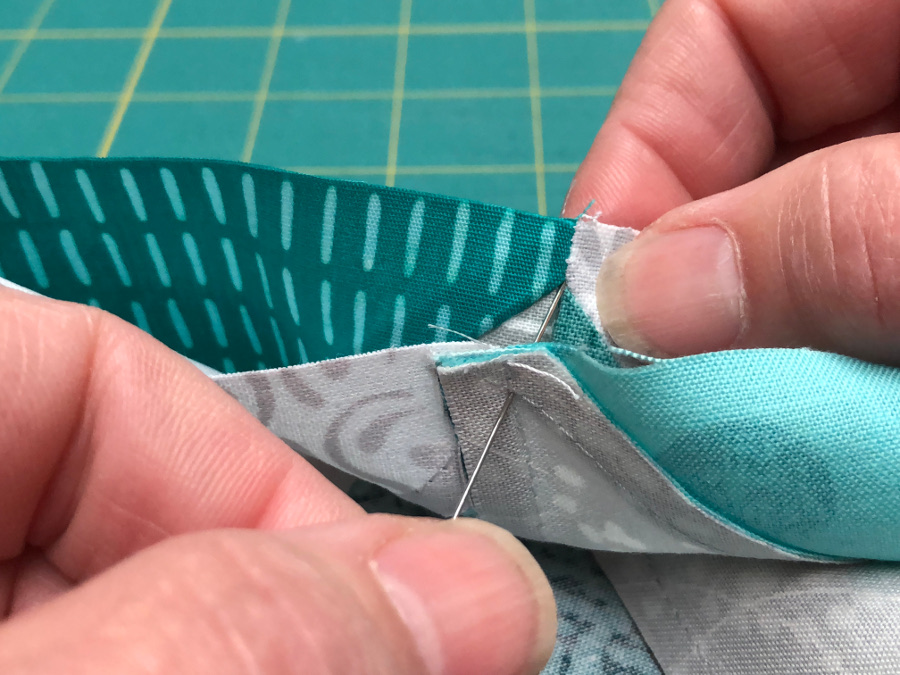
Half-way there! This next trick helps you get an accurate center. Align the two sections together. On the first unit, insert a pin right where the two stitching lines intersect.
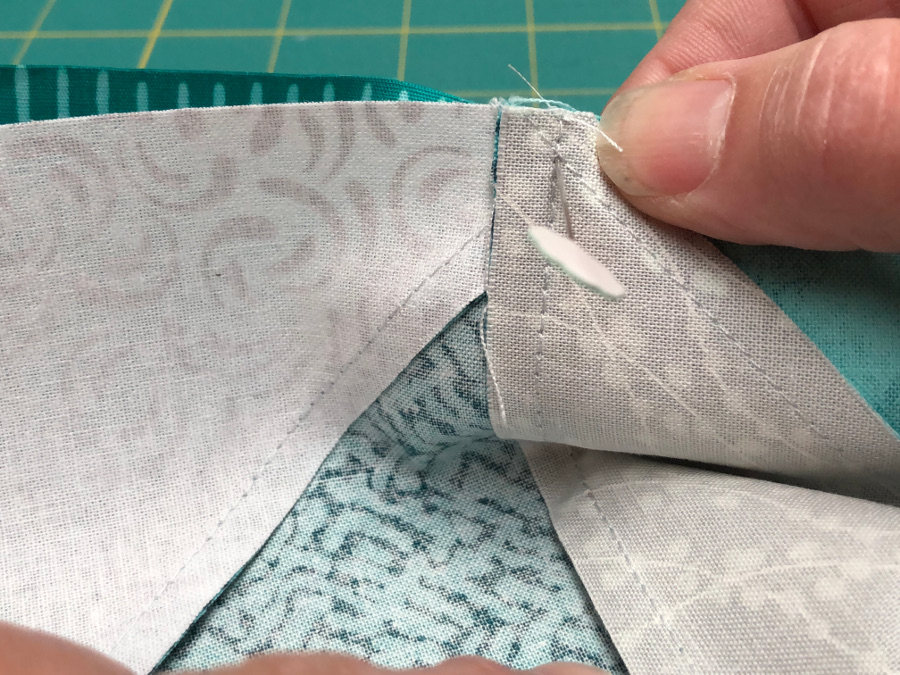
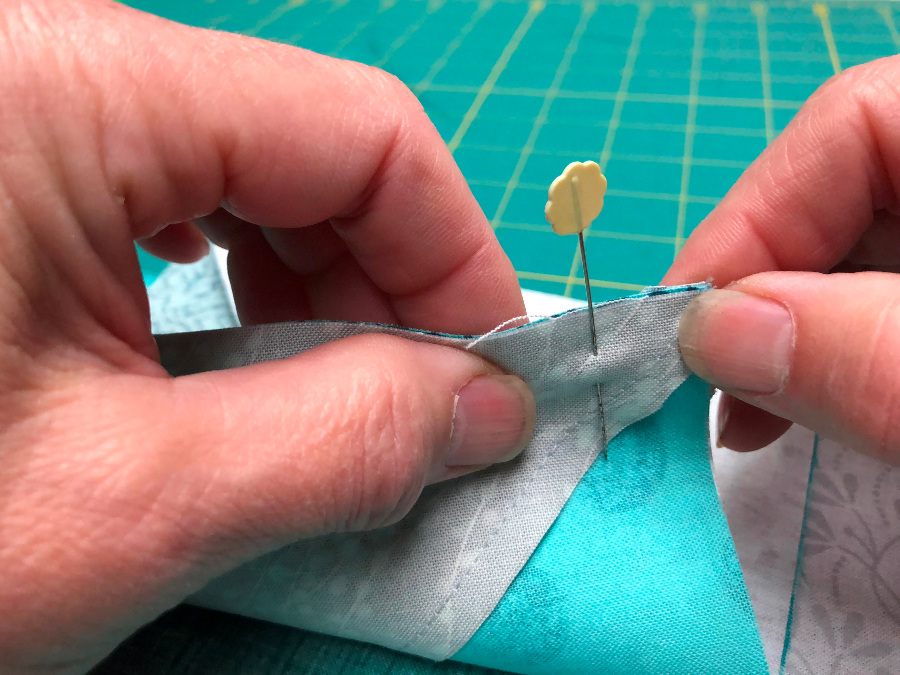
Now align the other unit behind the first, and insert the tip of the pin right in the intersection for the second unit as shown. Push the two units together on the pin, but do NOT twist the pin around and try to put the tip back into the unit. Let the pin stick straight up like a flag pole as shown below.
Now insert a pin just to the left and the right of your “flag pole” pin. If your flag pole pin leans one way or another as you insert the side pins, it means your intersection is shifting. Reposition the side pins to keep the center pin straight. Once you have the left and right pins in place, you can remove the flag pole pin. Continue pinning the remaining seam allowances together.

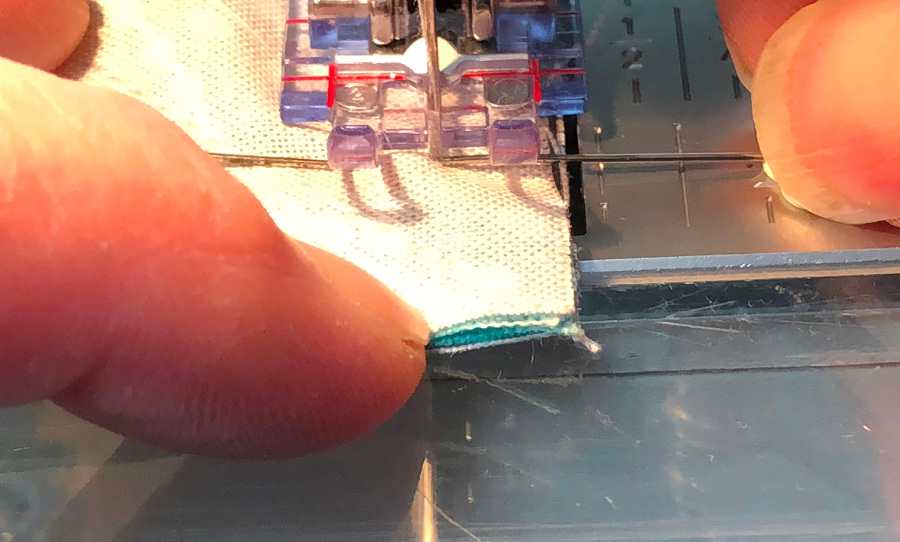
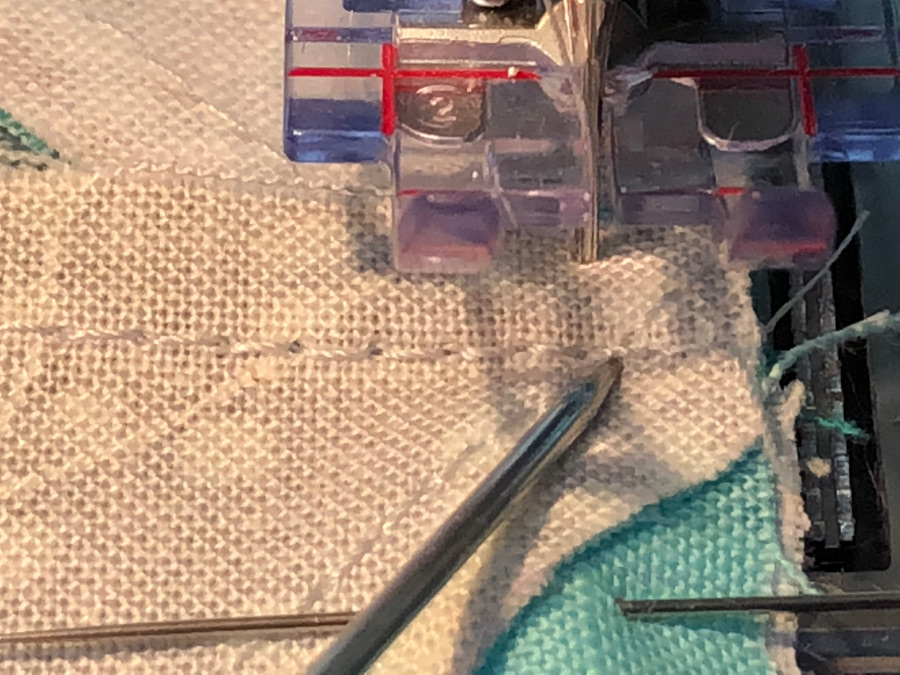
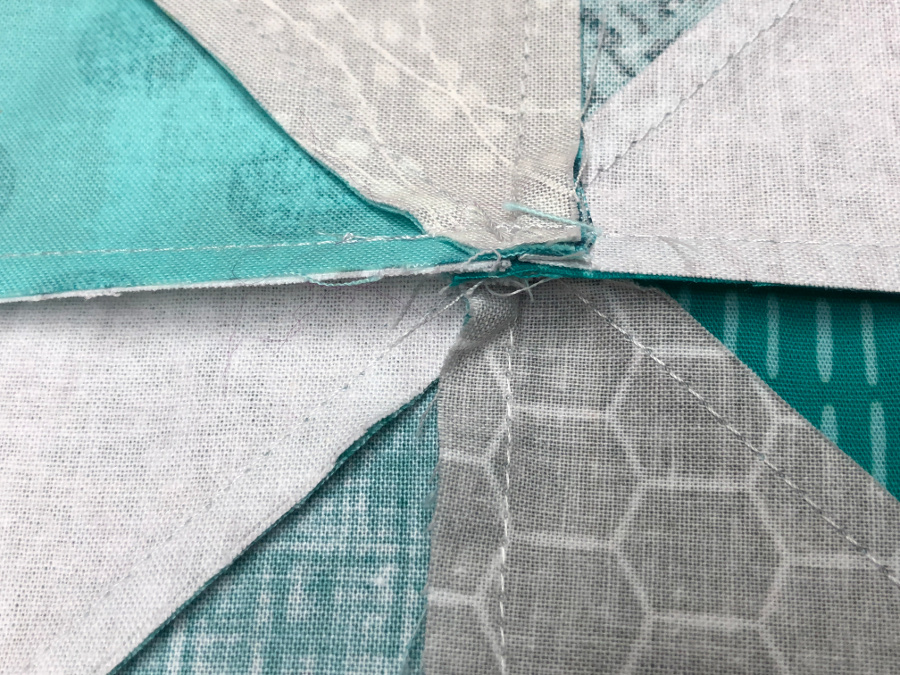
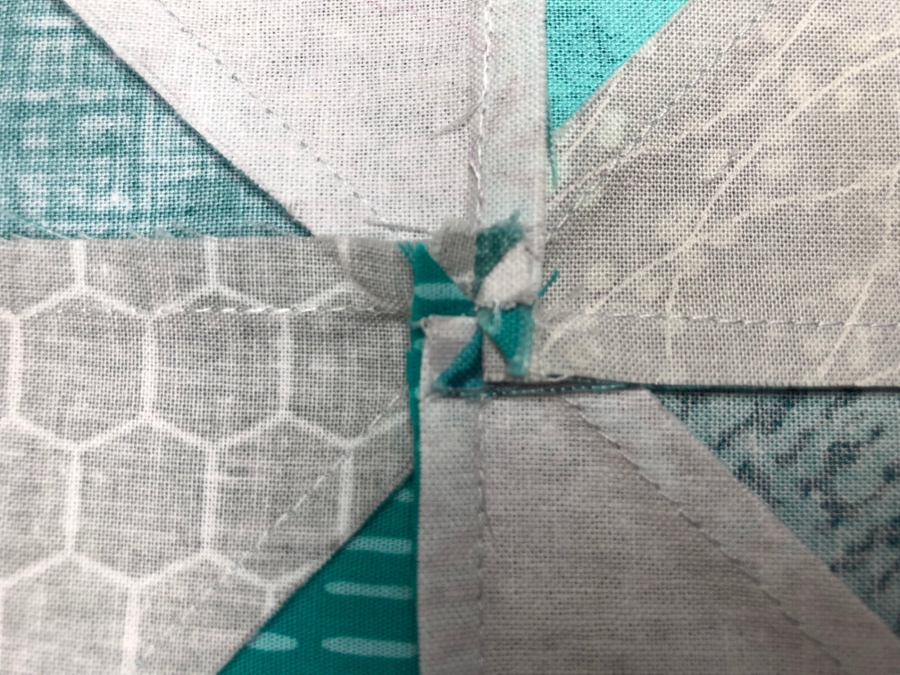
Now sew the two units together. As your needle approaches the center intersection, the stitches should cross over the previous stitching lines as shown below. If necessary, use a stylus or sewing awl to guide the seam allowance and prevent it from flipping over.
Now that the units are together, we’re done, right? Not quite—the center looks great, but there’s still a lot of bulk where all eight patches meet.
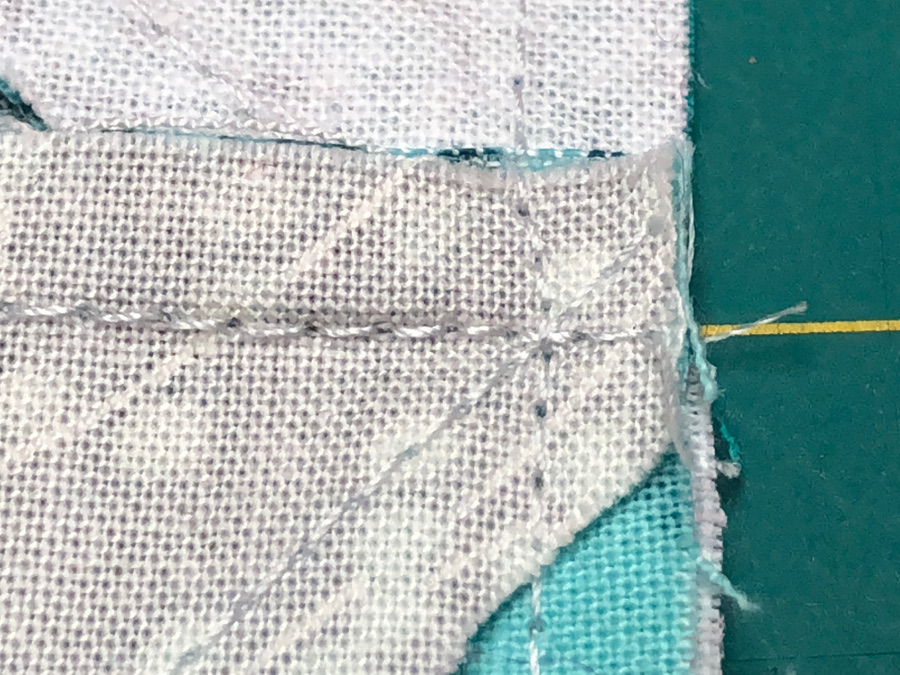
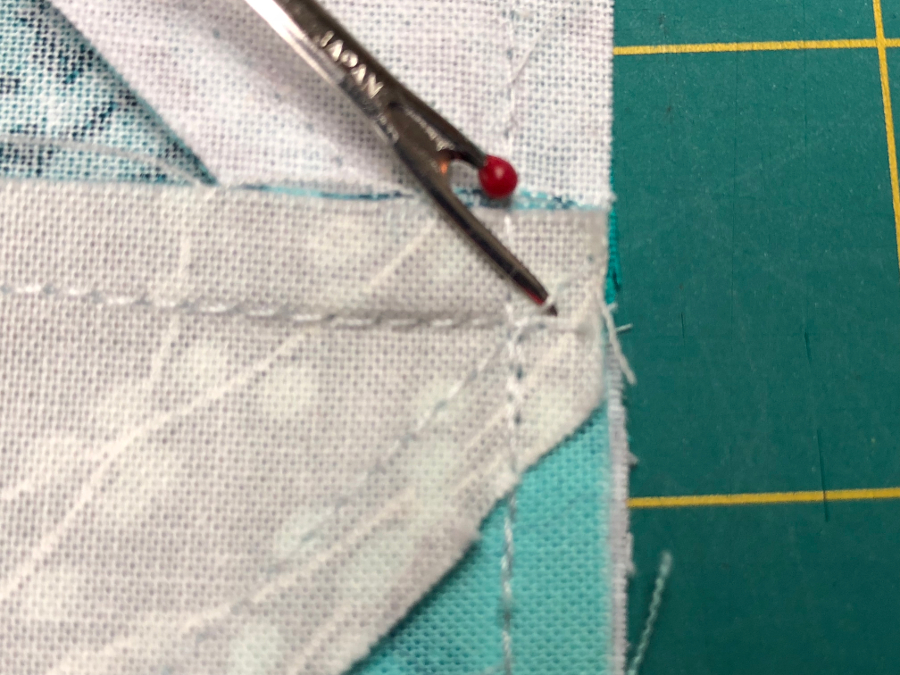
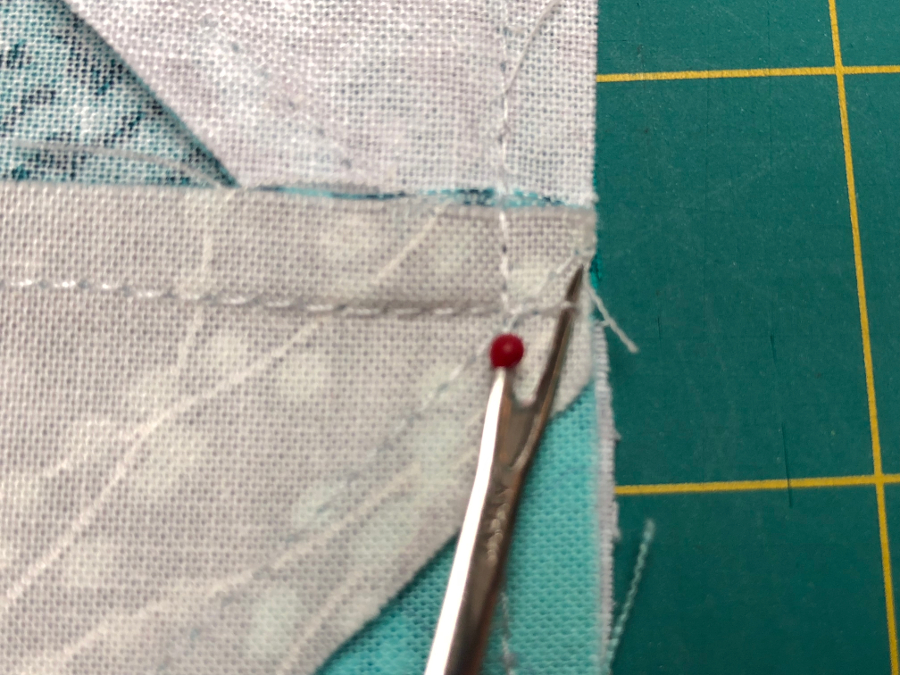
Here’s the most important step in reducing the lump in the middle! We need to carefully remove the stitches from our first two unit assembly steps, leaving only the last seam that joined the two block halves together. This will let us “spin” those seam allowances into a mini star on the back side as well, distributing all the extra bulk evenly.
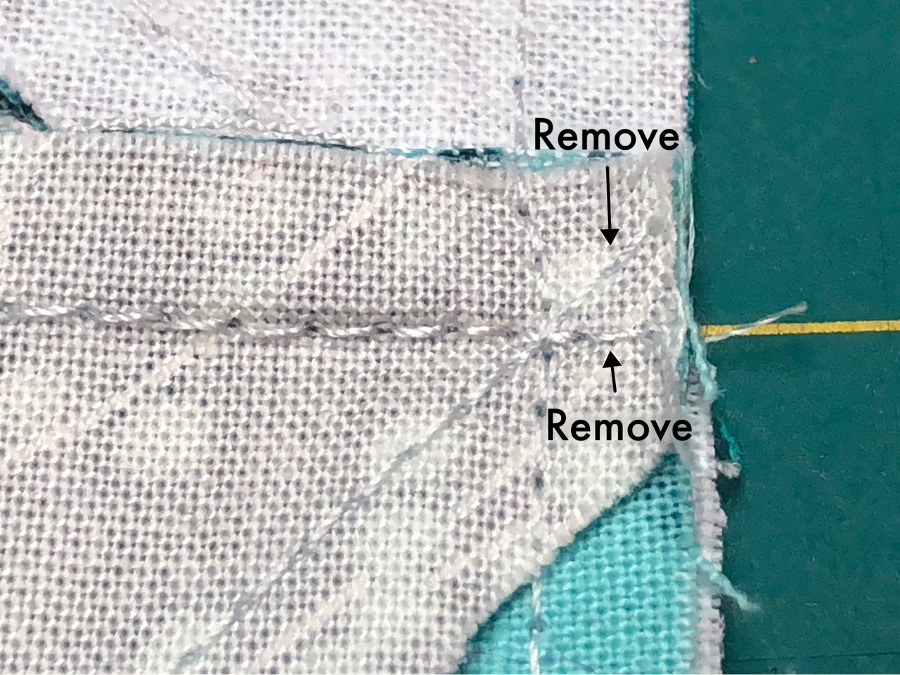
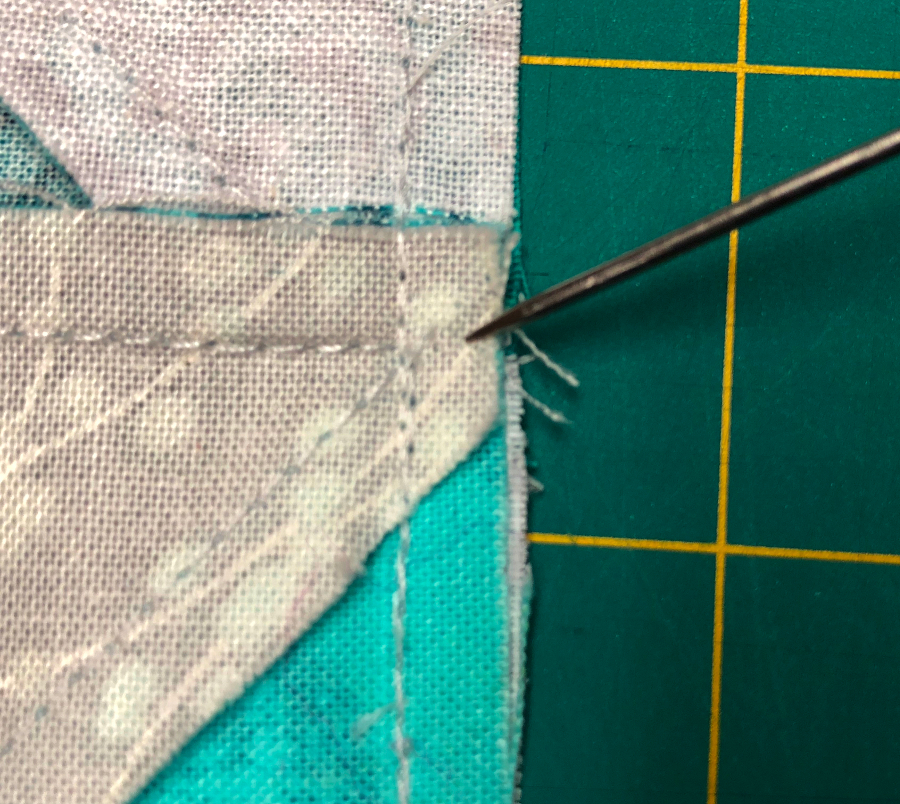
This is how your seam intersection will look with both stitching segments removed.
Now open up your block. Use your fingers to gently open up the center as shown in the photo below.
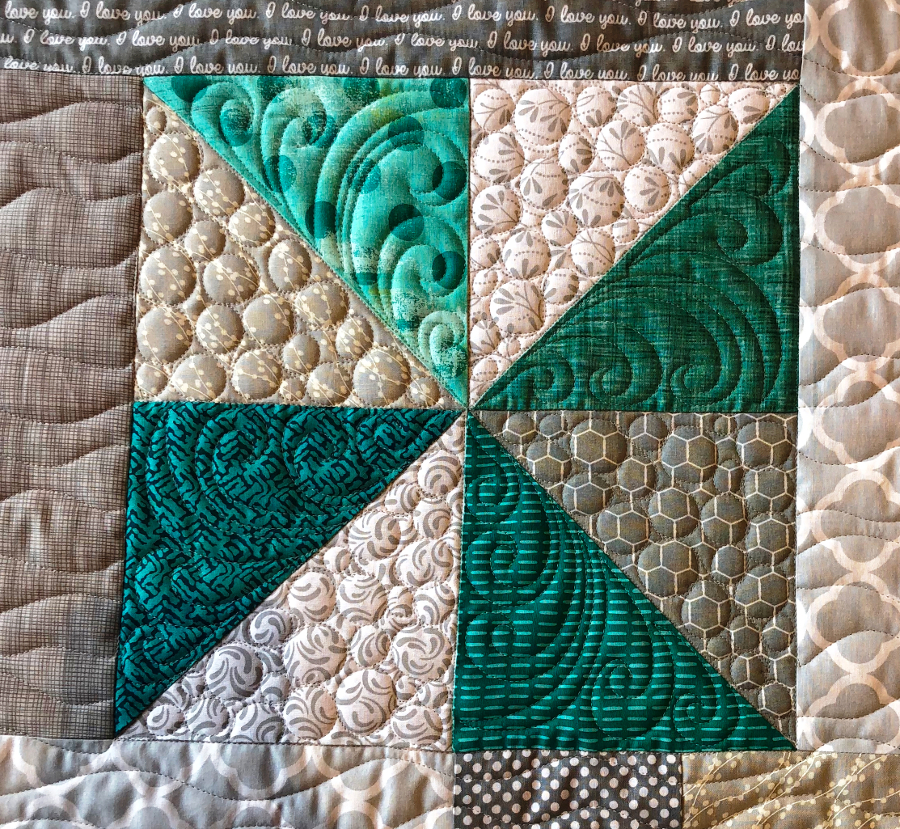
You’ll now be able to press half of the long joining seam in one direction, and the second half in the other, and the center will lay FLAT! A perfect center, and no lump to quilt over – that’s a win-win in my book!