
Needle tips for longarm quilting machines
Have you ever tried to quilt a quilt using your home sewing machine? How did that go? I managed to squeeze two lap-sized quilts and one full-size quilt through the small throat of my machine with aching shoulders before wondering if there was any better way to get them finished (short of tying them). That’s when I discovered longarm machines.
That was 27 years and thousands of quilt tops ago, before machine quilting was even acceptable. Now it’s hard to find a quilter who does hand quilting! How times have changed. 😊 Back then, I was lucky to find more than a dozen colors of thread, period. Today, there are dozens of thread manufacturers and thousands of thread colors and types. Variety is wonderful, but it can definitely lengthen the learning curve when transitioning to longarm quilting.
Besides having lots of space to finally quilt, one of the immediate differences you’ll notice between a home or domestic sewing machine and a longarm machine is the needle size. When quilting on a domestic machine, you can only move the quilt sandwich a short distance before you must stop, rearrange the quilt, and start again. It’s difficult to build up any speed or momentum—both of which are important to smooth curves and consistent designs.
Consequently, there’s not much pressure on your needle as you slide the quilt sandwich around. That’s not the case with a longarm machine. You don’t have to worry about stopping to readjust a bulky quilt every few inches. You have the freedom to glide across a huge area of your quilt with no restrictions. It gives you a rush like throwing the top down on a convertible and letting your hair blow in the wind—or if you’re me, sticking your head out of the moon roof of your mom-van! Gotta love Shapchat filters! 😊

(Photo by Wendell Fernandes on Unsplash)
Okay, maybe that’s an exaggeration, but it’s a pretty awesome feeling! With all that newfound freedom, it’s easy to steer the machine like you’re leading the pack of a NASCAR event. Faster speed and quick direction changes put a lot of pressure on the needle as it penetrates the quilt layers, which means you need a larger needle to withstand the stress. Nobody wants to poke holes in a quilt with broken needles! Here’s a side-by-side view of a home sewing machine needle on the left, and a longarm needle on the right.
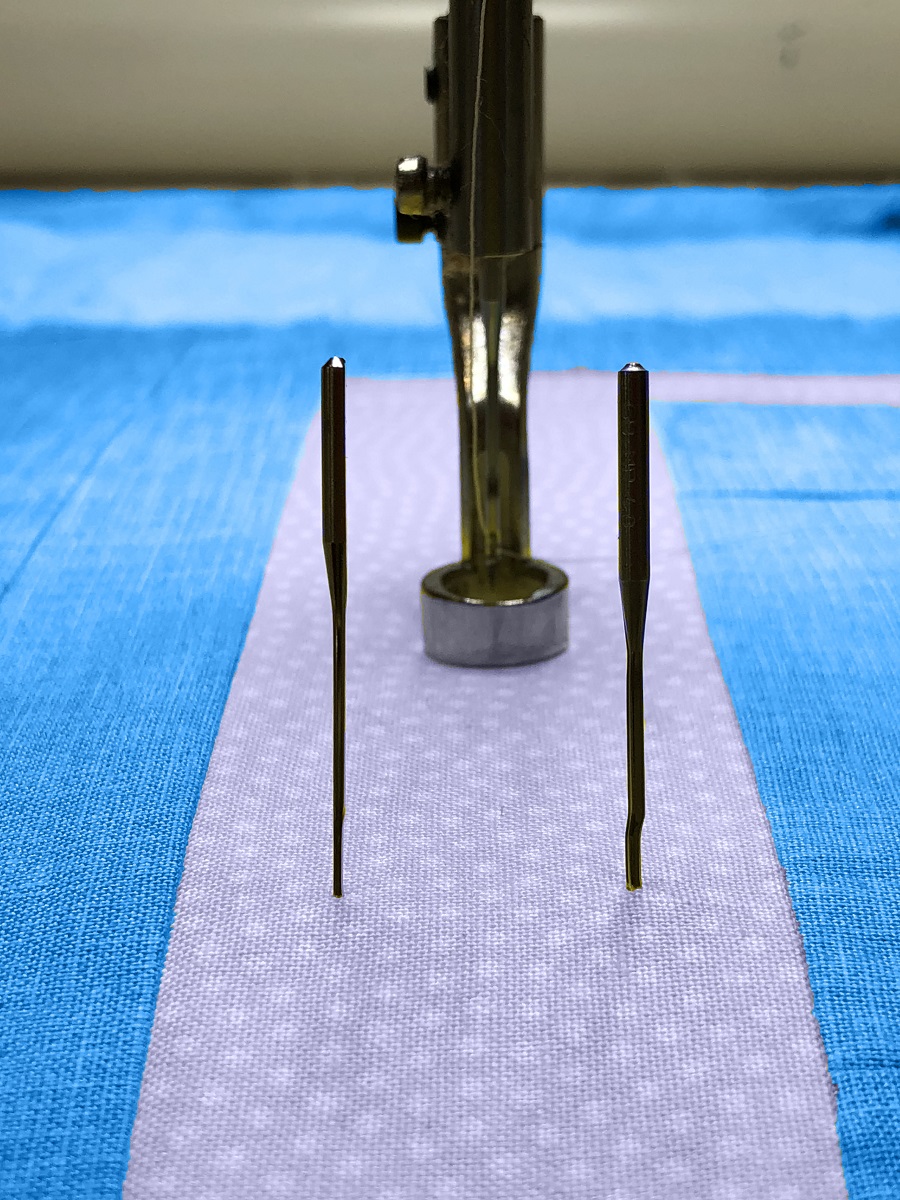
The home sewing machine needle is size 80/12—a common size for piecing quilts, while the longarm needle on the right is size 110/18—the common size used for quilting with a longarm…a jump of three sizes! That beefy needle reduces the chance of broken needles and improves the stitch quality and tension, which is a must in my book.
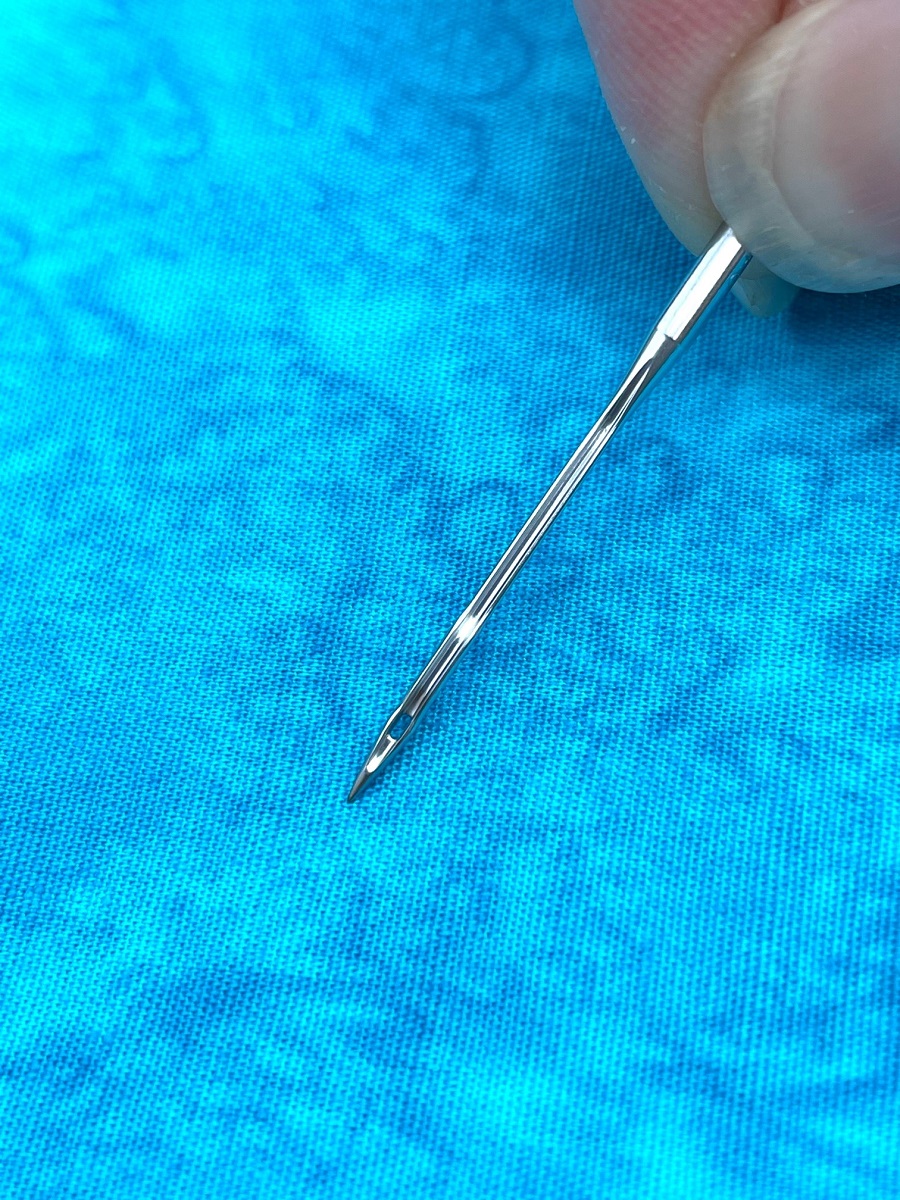
APQS machines use longarm needles specially designed to create well-formed stitches no matter which direction you move. Designated as “MR” needles (which means Multi Range), these multidirectional needles have a groove along the front edge that is uniquely designed to keep the thread in line with the needle’s eye as you quilt in all directions. Without that, the thread can enter the eye from all sorts of angles, increasing thread shredding and breakage.
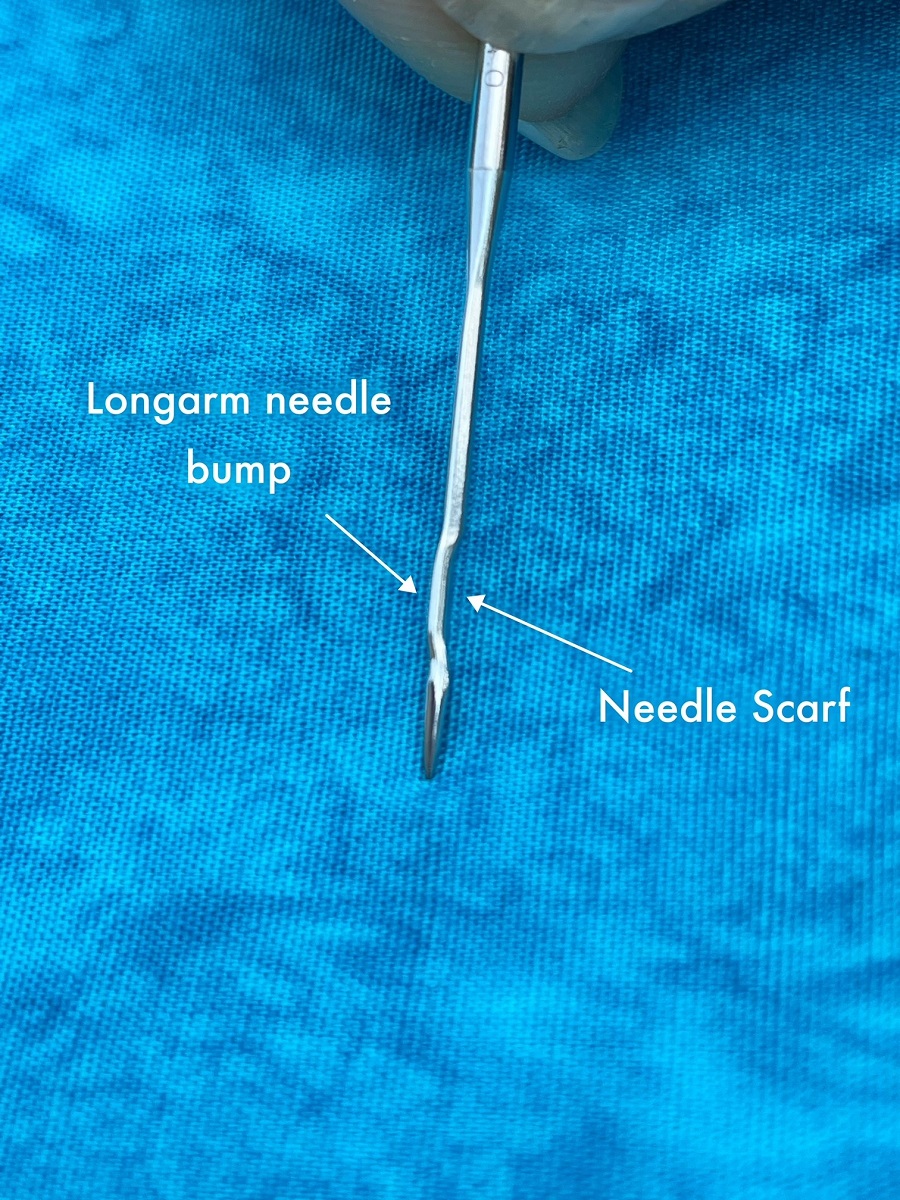
The bump on the front longarm needles provides strength and reduces flex near the tip to help form better stitches. Directly opposite of the bump is an indentation called the “scarf”. The machine’s hook travels past this indentation as it catches the top thread to form stitches. The photo below shows a side view of a longarm needle so you can see both elements.
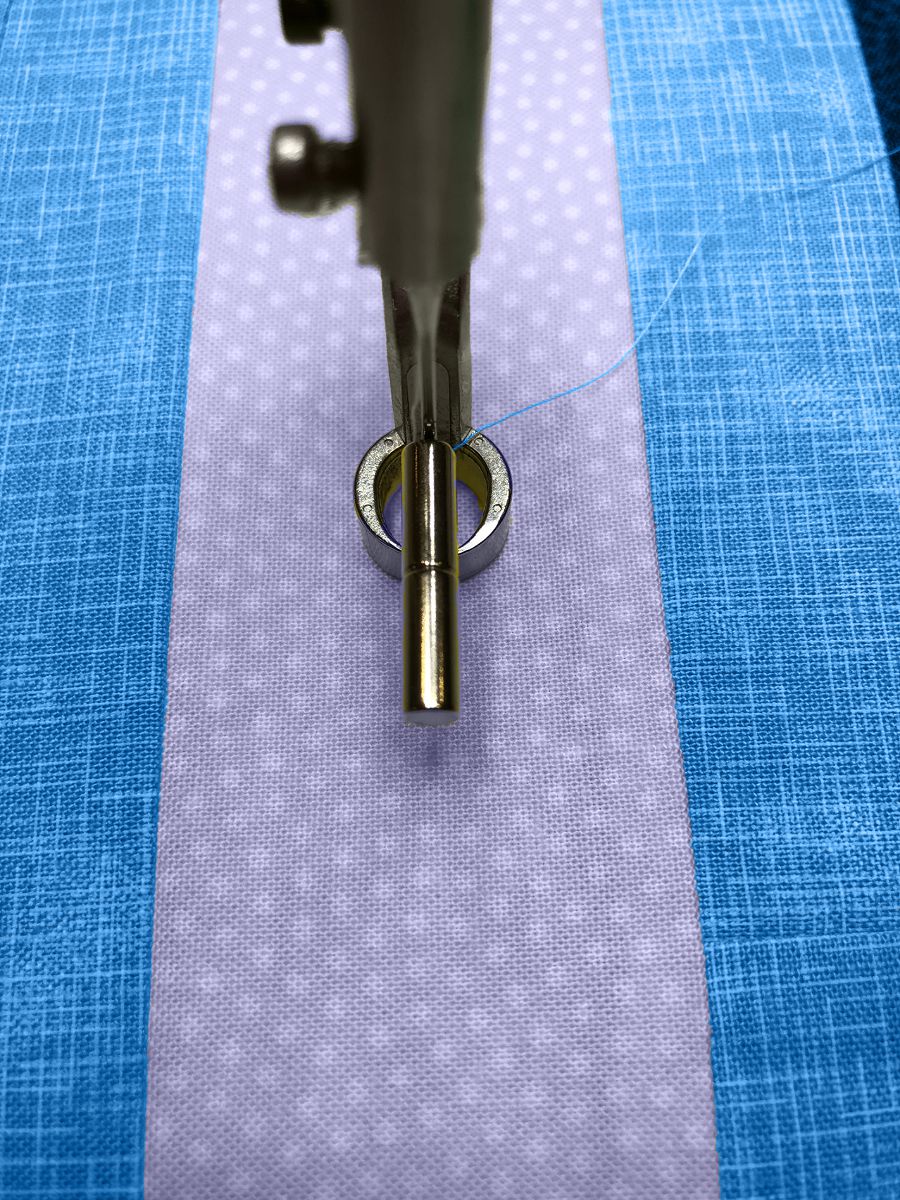
Longarm needles have another idiosyncrasy different from regular sewing machine needles that can be frustrating. The top part of the needle—the shank—doesn’t have a flat side that helps orient it correctly in the machine. ☹ It’s important to get the needle straight, so longarm quilters either insert a straight pin into the needle’s eye as a guide, or they use small magnets that grasp the front to help gauge if the needle is straight before tightening the screw.
Not only is it important to use a needle designed specifically for your longarm, it’s also important to use the right size needle for the thread you’re using. You can use ultra-fine 100-weight thread for background quilting, then jump all the way up to thick 12-weight thread to create heavy outline stitches. Though that skinny thread will fit through the eye of a large needle, you’ll also see a gigantic needle hole in the quilt that the thread didn’t fill. Matching the needle size to your thread and your project will give you much better results.
With so many thread varieties on the market, and with so many different fabrics, batting and backing options out there, it’s not possible to create a definitive needle-to-thread chart that covers all the variables of longarm quilting. But it is possible to create a reference chart that includes recommendations about where to start. We’ve put one together for download which includes many of the popular threads that longarm quilters use, along with a recommended needle size.
Note that I said the recommendations are a place to start. Several thread manufacturers also offer suggested needle sizes with their thread types, but don’t be afraid to move up a needle size if you have lots of thread breakage, shredding or directional tension issues. Try moving down a needle size if you’re using thin thread for background quilting and it’s not filling up the needle holes (just remember you’ll need to move slower with a thinner needle to avoid breakage.)
Though we could drone on about needles for days, one last tip that surprisingly gets overlooked until it’s too late—change that needle! Personally, I put in a new needle with every quilt, so I don’t drag any problems from one quilt to another. To me, it’s cheap insurance against poking batting out the quilt back with every stitch or fighting thread breaks from a dull needle. Download our needle-to-thread reference chart and keep it handy in your longarm studio!


