Fake it when you make it: faux piping
Ever feel like your finished quilt is missing that little extra spark to move it from OK to outstanding?
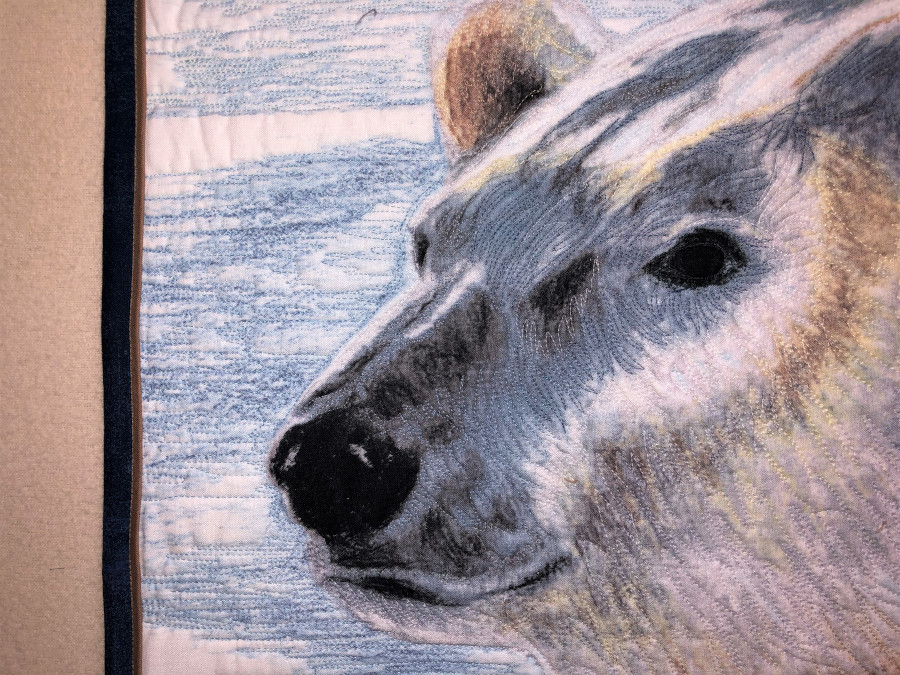
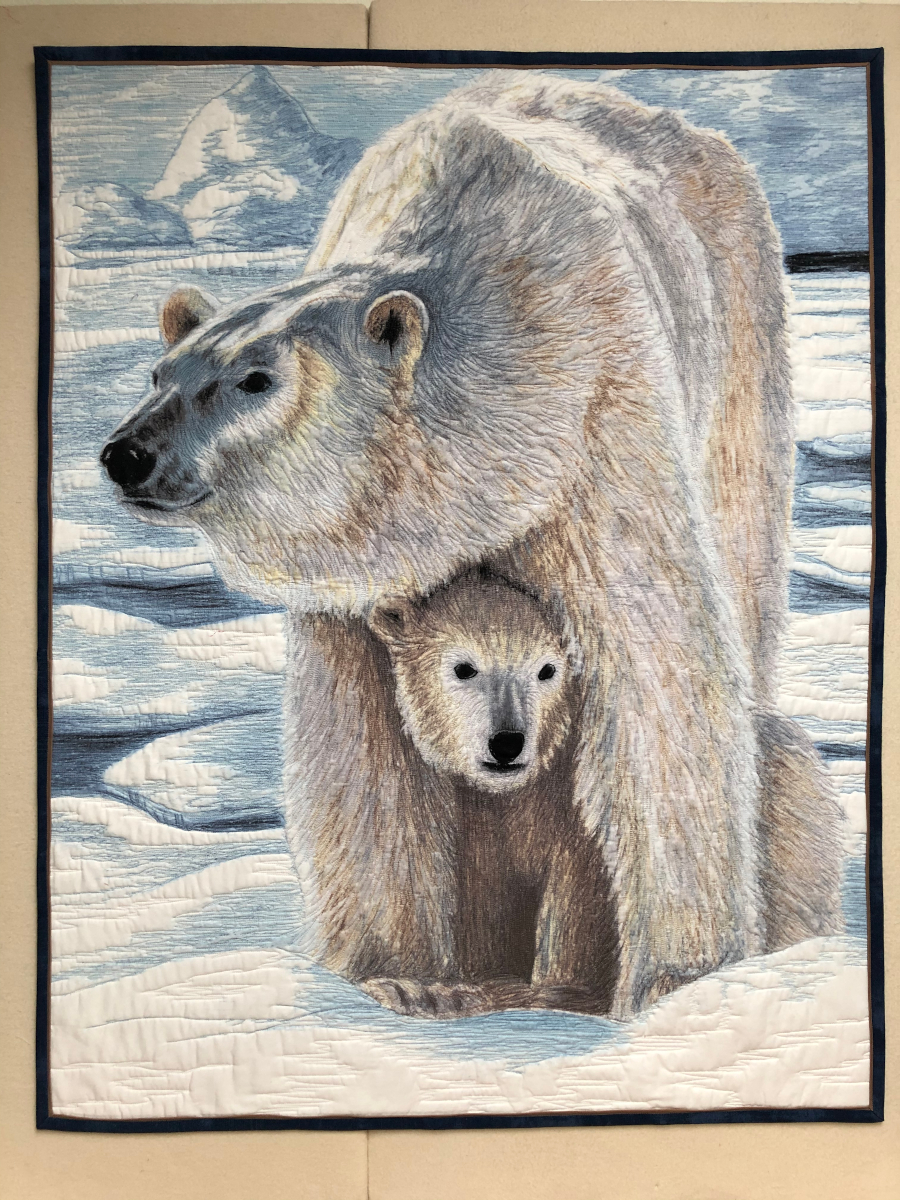
I was having that “blah” feeling after quilting three identical bear panels for a Quilting the Quilt article.
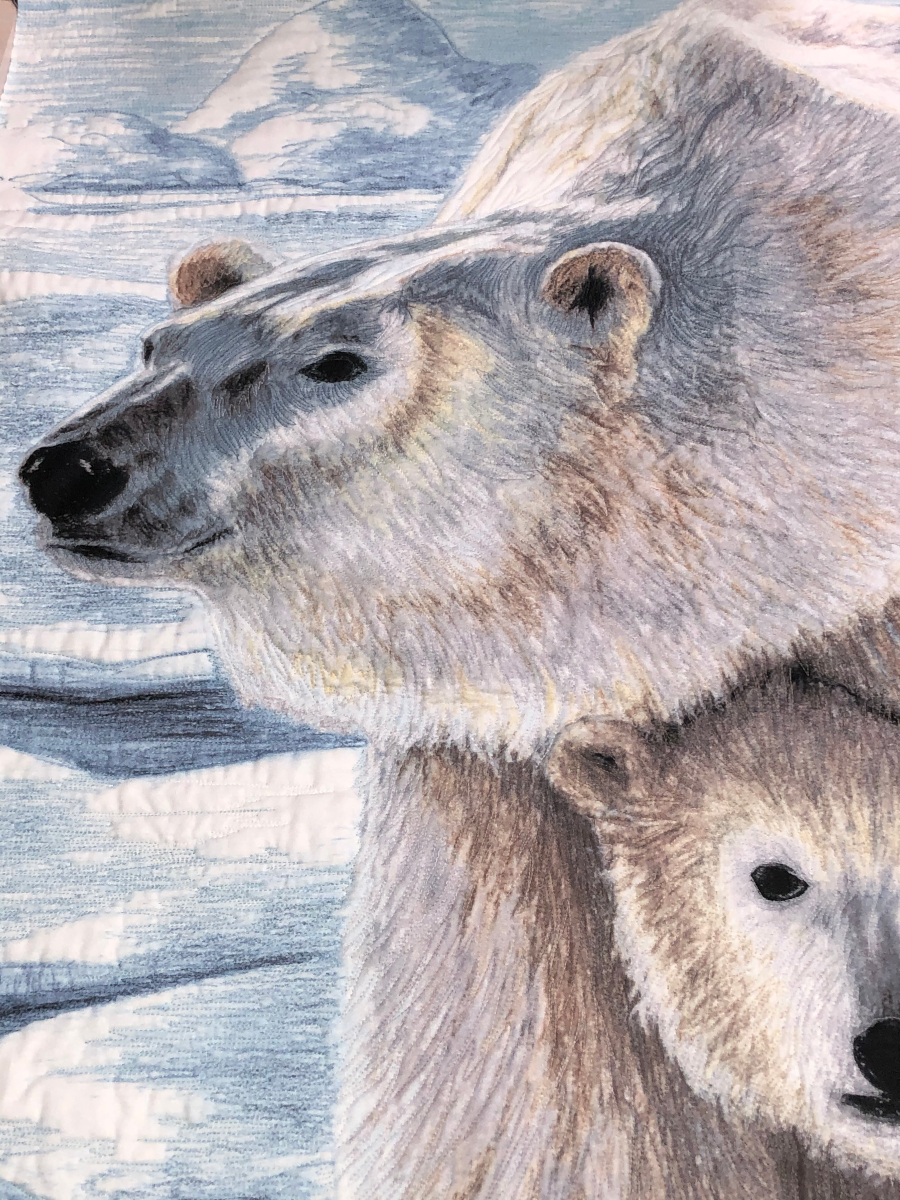
I loved how different quilting styles set them off, but when it came to adding the binding, nothing seemed right. White binding felt artificial next to the detailed bears. Any medium toned fabric seemed to wash out next to the quilt, and the dark blue fabric I auditioned was too stark.

I felt like Goldilocks looking for something that was “just right” but the bears weren’t producing. They’ve been hibernating in my UFO pile ever since, just waiting for an “aha” moment to knock me upside the head.
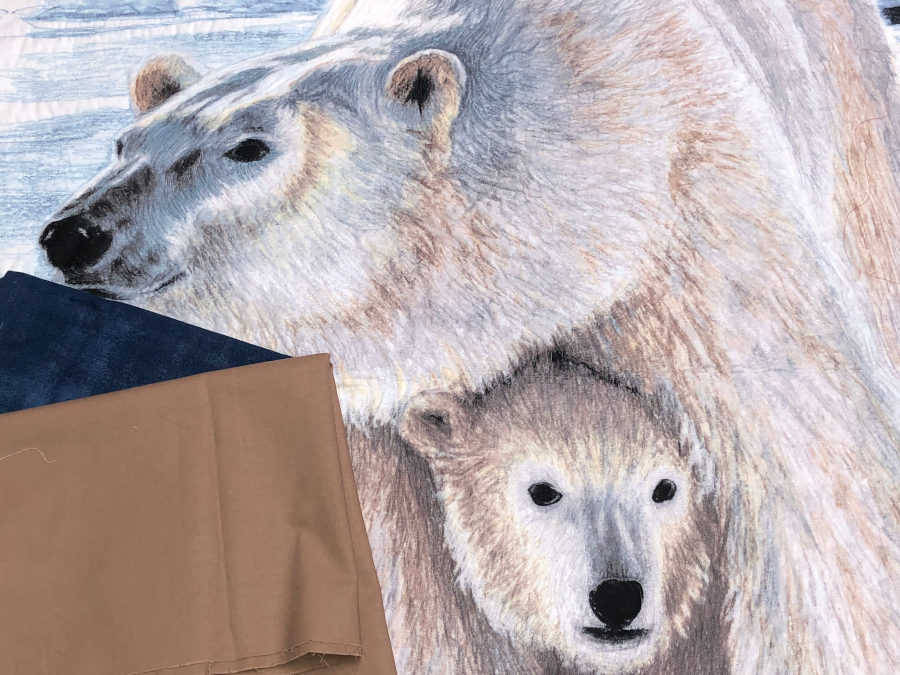
And then it finally happened. I slapped my forehead when I realized my problem. Since the quilt panel had no borders, adding binding alone seemed to cut off the portrait abruptly, like chopping a photograph down to fit a picture frame. I needed a picture “mat” that could blend some of the colors of the quilt into the binding with a gentle segue. A flange or piping strip could do the trick. I found a tan fabric that mimicked the shading in the bear fur and auditioned it with the navy binding. As Goldilocks would say, “It was just right.”
Adding piping along the binding is an art form all by itself. Quilt artist Susan K. Cleveland is the queen of the technique and has published books and produced awesome tools to help make it easier for the rest of us. I’ve used her techniques on a few of my show quilts, but I was just looking to get those bears out of my UFO pile, not into the center ring. “Faux” (fake) piping to the rescue.
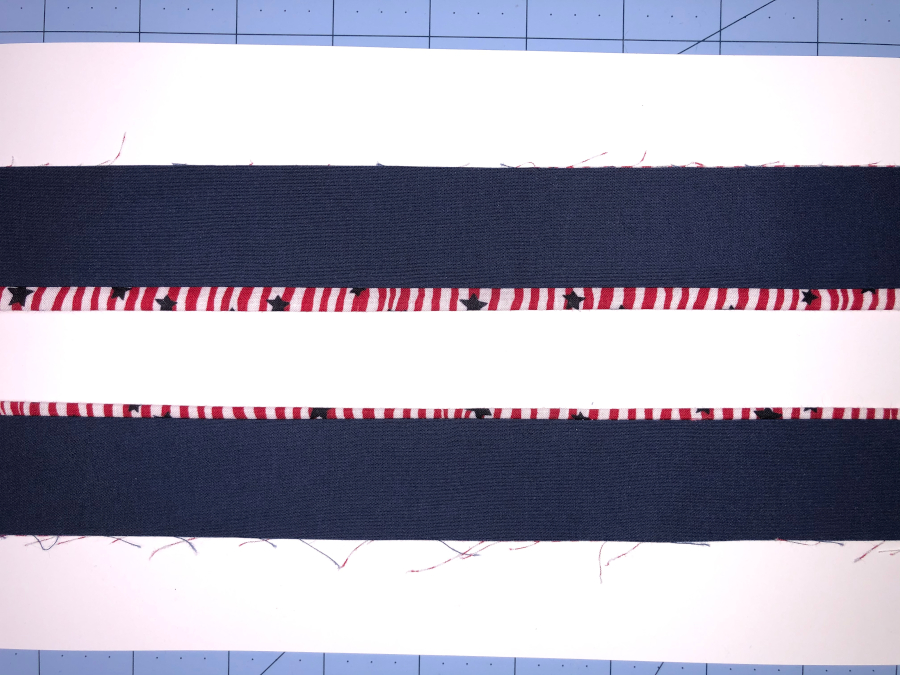
Get creative with your fabric choices, too. Just be aware that the piping or flange doesn’t get much wider than ¼-inch, so stick with small-scale designs. I chose some patriotic stripes to show you how even that little bit of color between the binding and your quilt can add pizzazz.

If you widen the piping fabric cut by even a little, you can have dramatic results. I added just a quarter-inch to the piping fabric width to create the flange strip, which shows off more of this striped fabric.
Faux piping is simple to do. This article shows you how to create the illusion of narrow, 1/8-inch-wide piping. But you can alter the cutting measurements slightly as I did for the flange shown above, or go even wider more drama.
Basically, you’ll construct two-toned binding by joining two long, single binding strips together along the long edge. The trick is that one strip is slightly wider than the other. So, when you fold it in half with right sides together as you normally would for binding, the larger strip will lap over the fold. That little peek of color becomes the piping strip.
Step 1
Measure the circumference of your quilt and cut enough strips of both the binding and piping fabric to equal that measurement, PLUS about 20 inches to allow for corners and overlap.
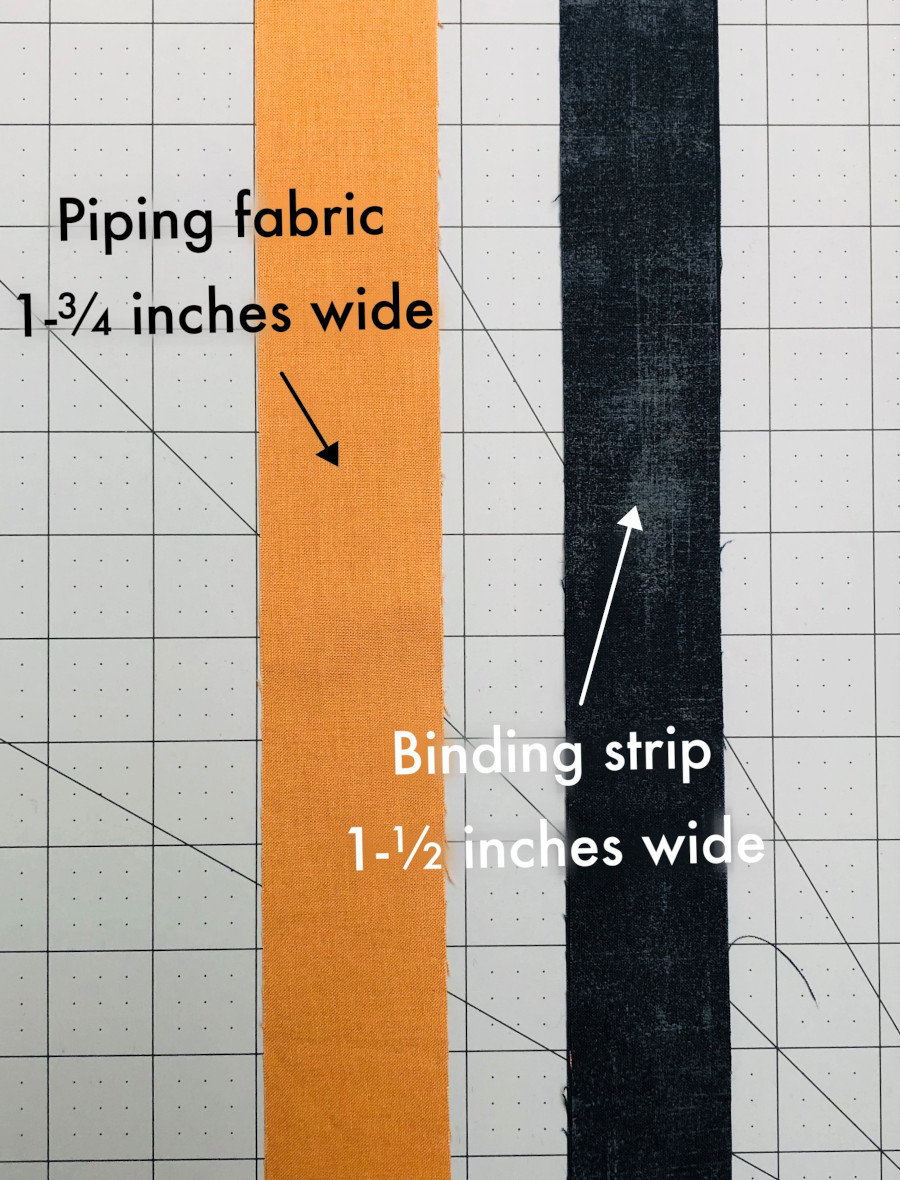
Cut the BINDING fabric strips 1-1/2” wide.
Cut the PIPING fabric strips 1-3/4” wide.
Step 2
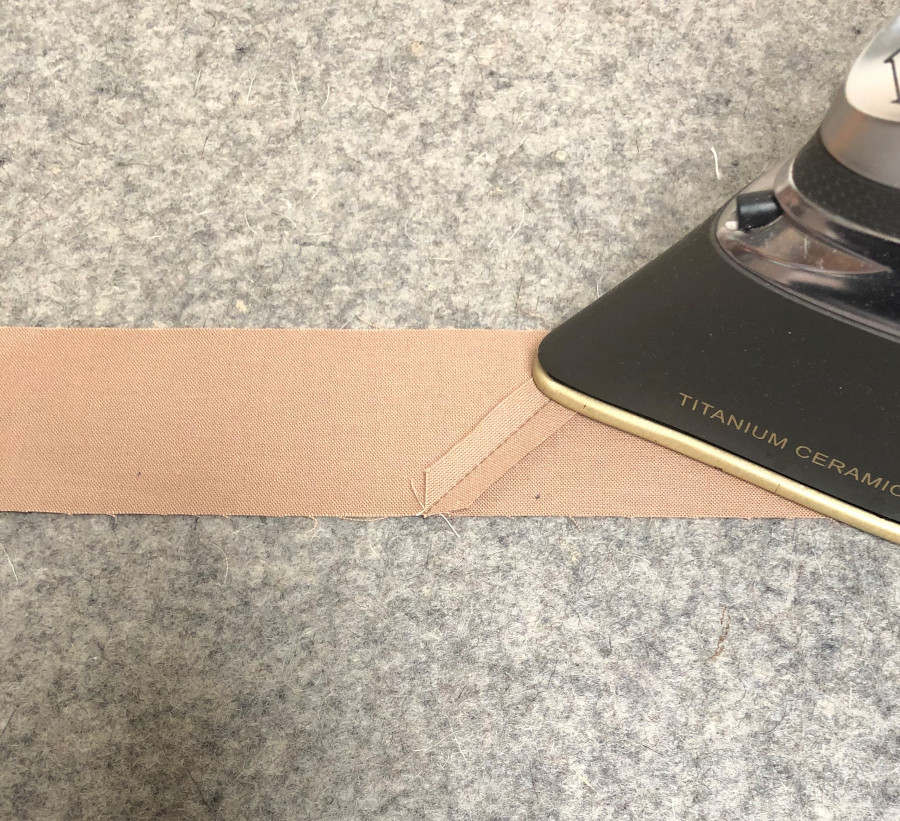
Join all the piping strips together with a mitered seam. Press the seam open.
Step 3
Join all the binding strips together with a mitered seam. Press seams open. Since the piping and binding strips will be sewn together, you’ll want to offset those seams to reduce bulk. To easily do that, sew the beginning binding strip to the ending binding strip with a mitered seam. Trim any overlap and press the seam open.
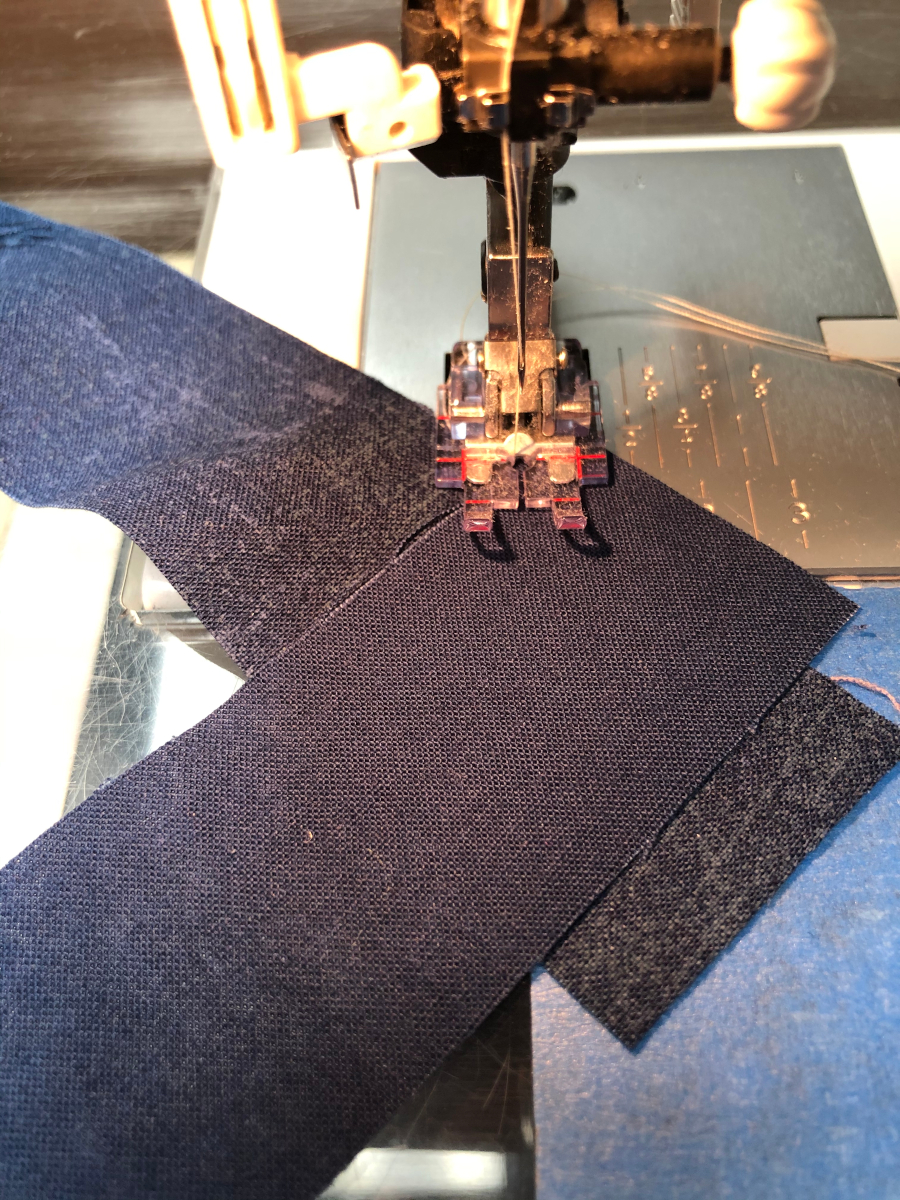
Now lay the piping strip next to the binding “loop” and rotate the loop until the seams are offset.
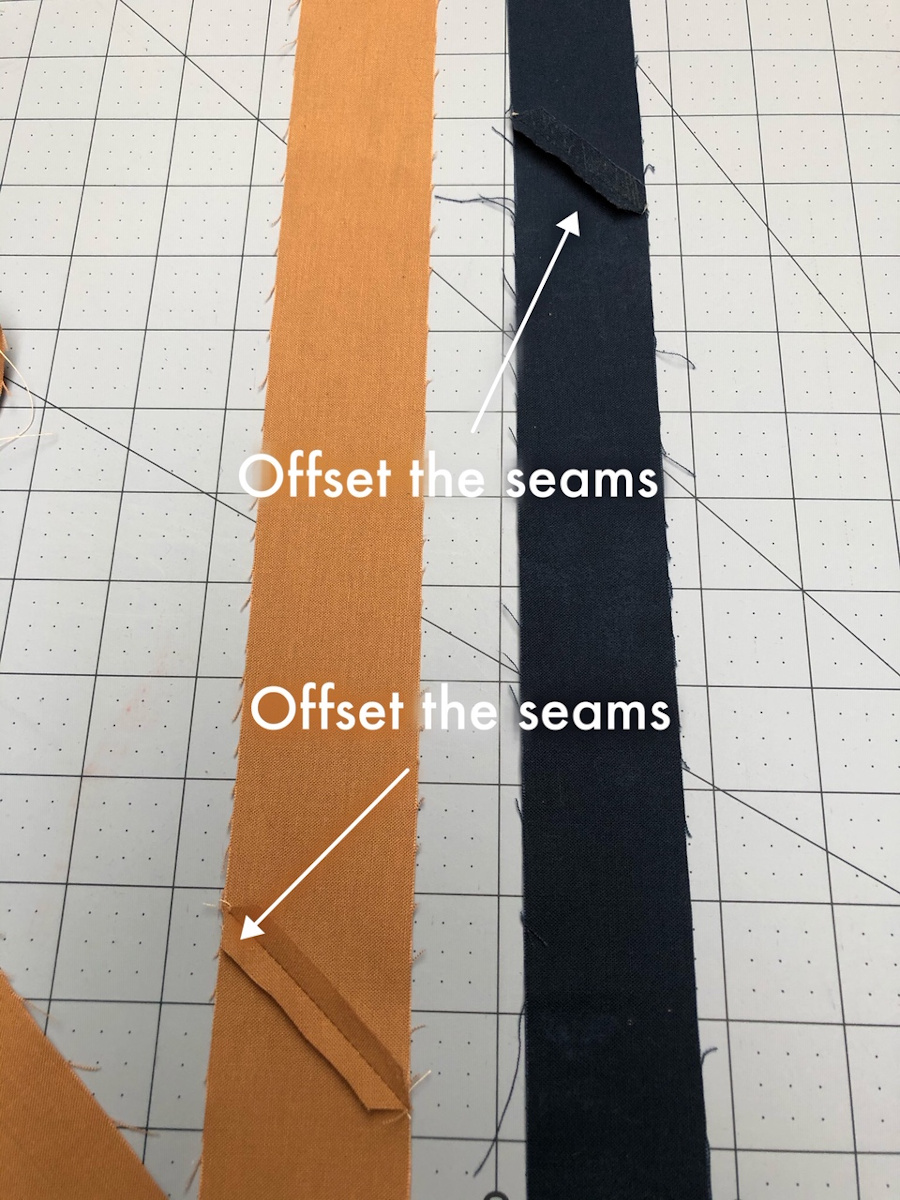
Cut the binding strip loop open again where it aligns with the beginning end of the piping strip.
Step 4
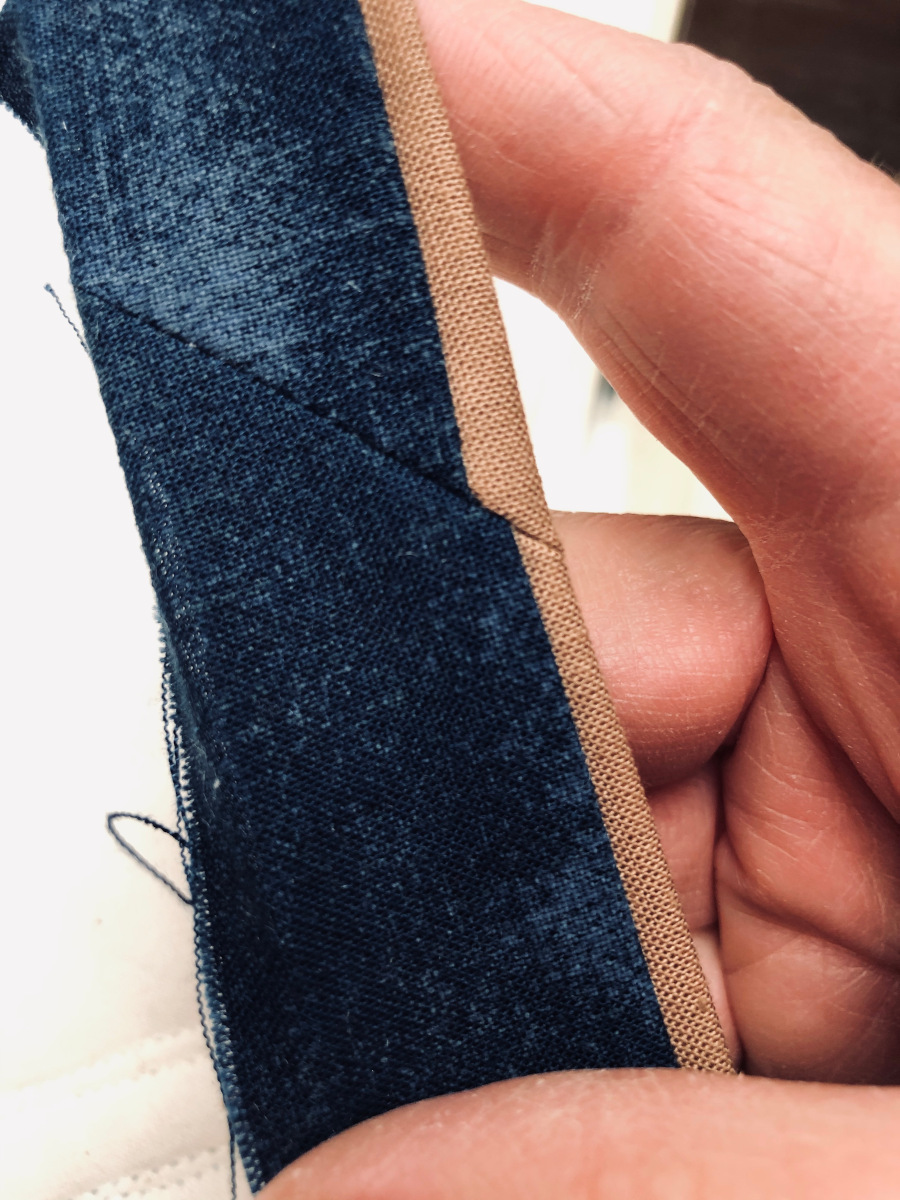
Place both strips right sides together and use a ¼-inch seam to sew along one long edge for the entire length of the strips.
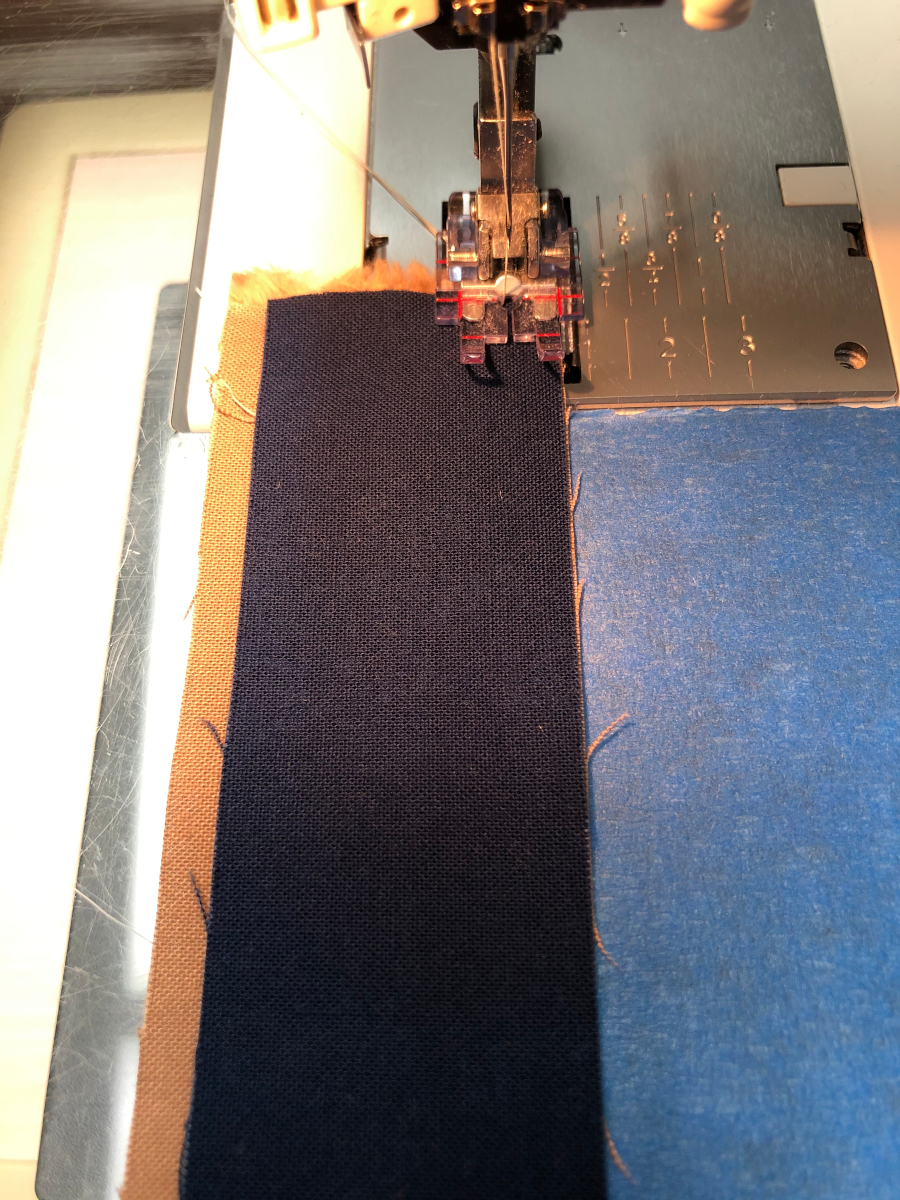
Press the seam toward the binding fabric.
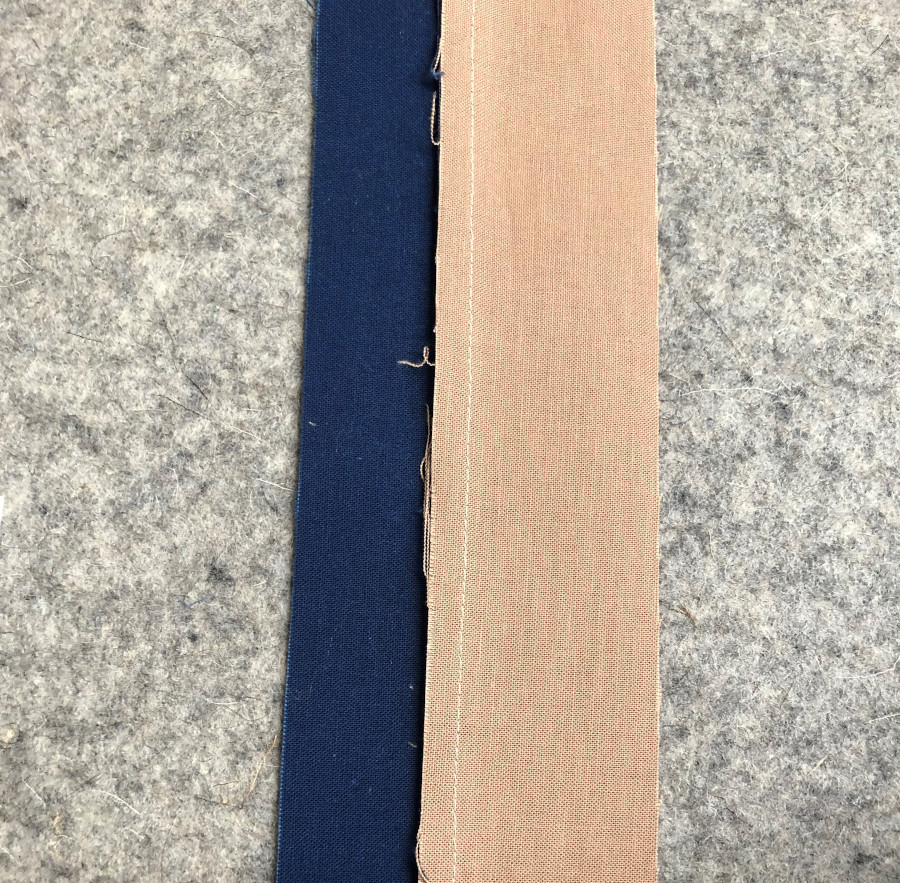
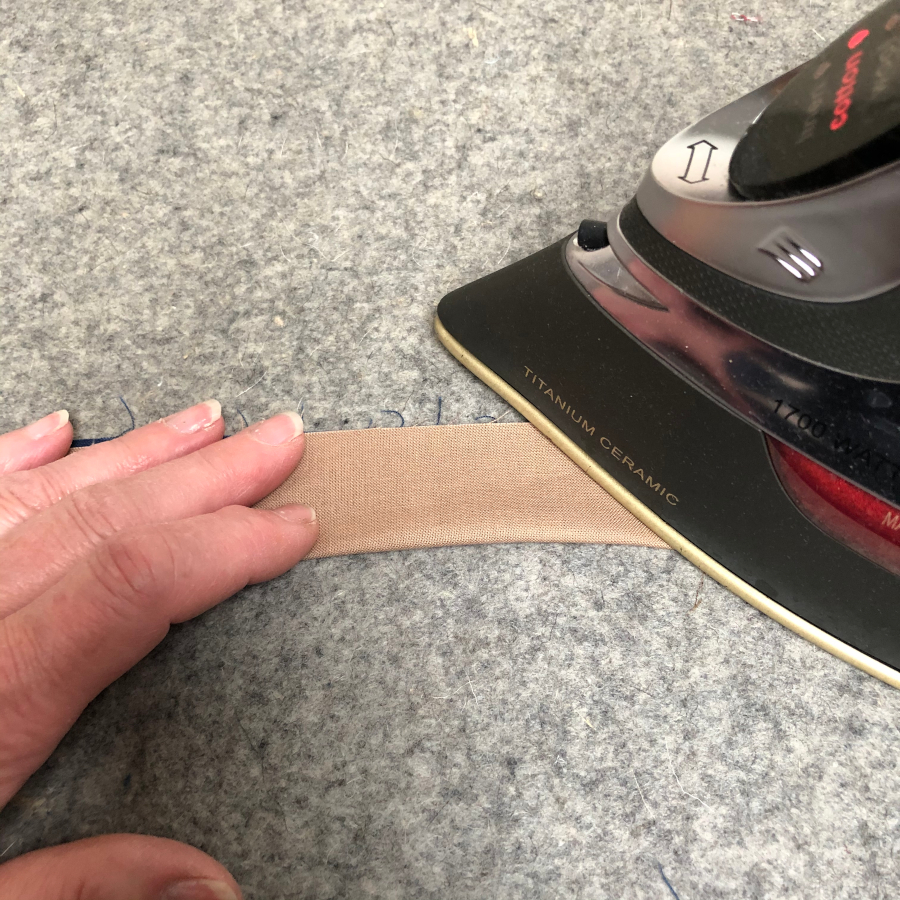
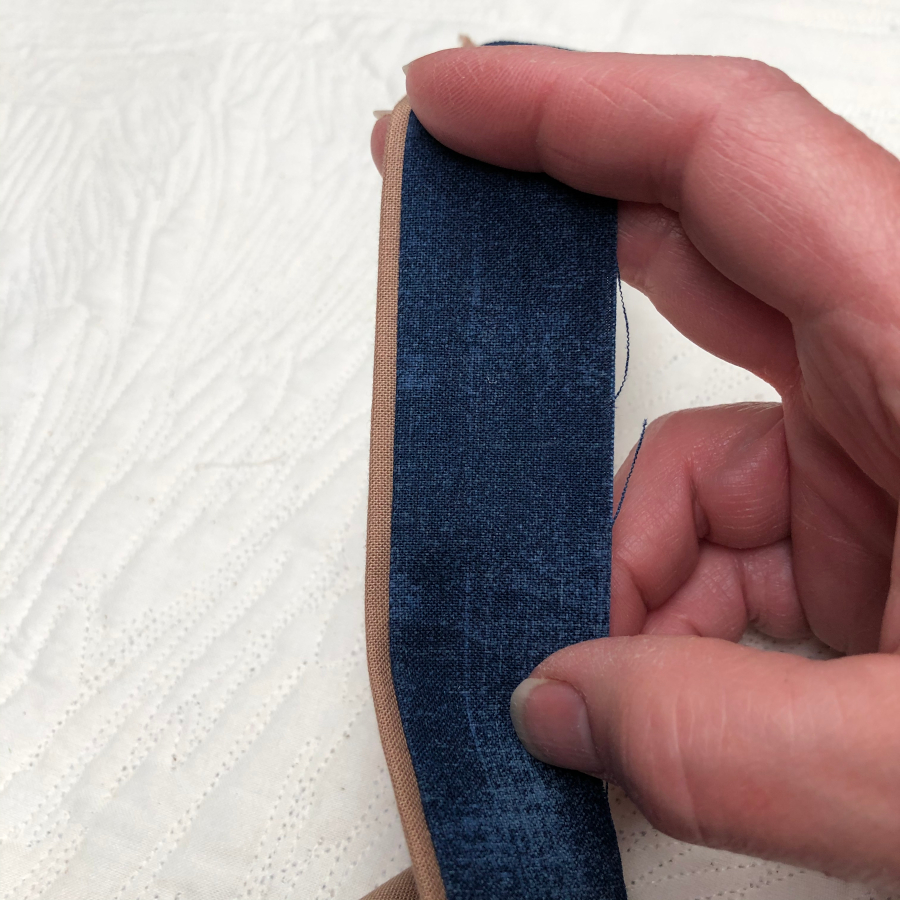
Now carefully fold the strip in half lengthwise, WRONG sides together. Take your time with this step and be accurate when aligning the wrong edges. If you wander, your piping strip will be different widths. I use Mary Ellen’s Best Press to help me keep a crisp fold.
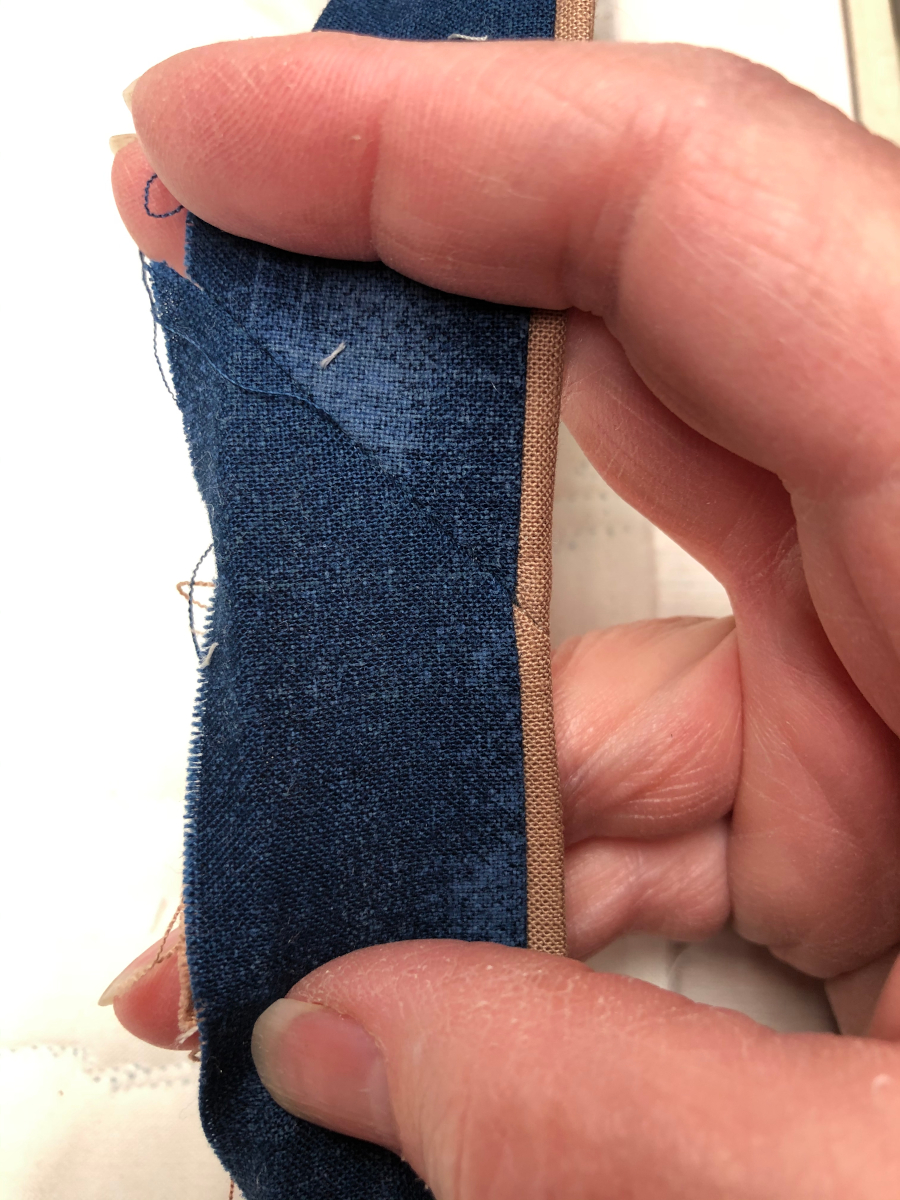
You’ll now have a two-toned binding strip.
Step 5
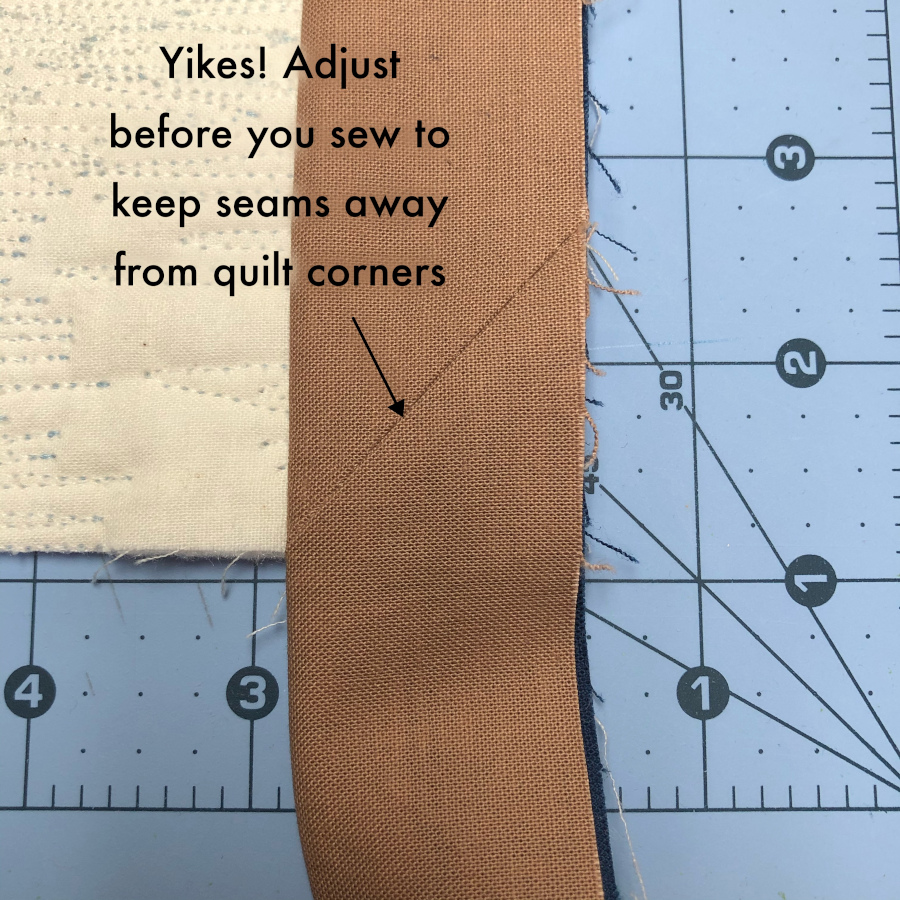
Sew the binding to the BACK of the quilt. Before you begin, take a few moments to lay the binding strip around your quilt and check where the joined intersections fall. Adjust where you start the strip so that you don’t end up with seams in the corner.
Attach the binding just as if you were sewing it on the front—miter the corners. (For more tips on mitering binding corners, click here.)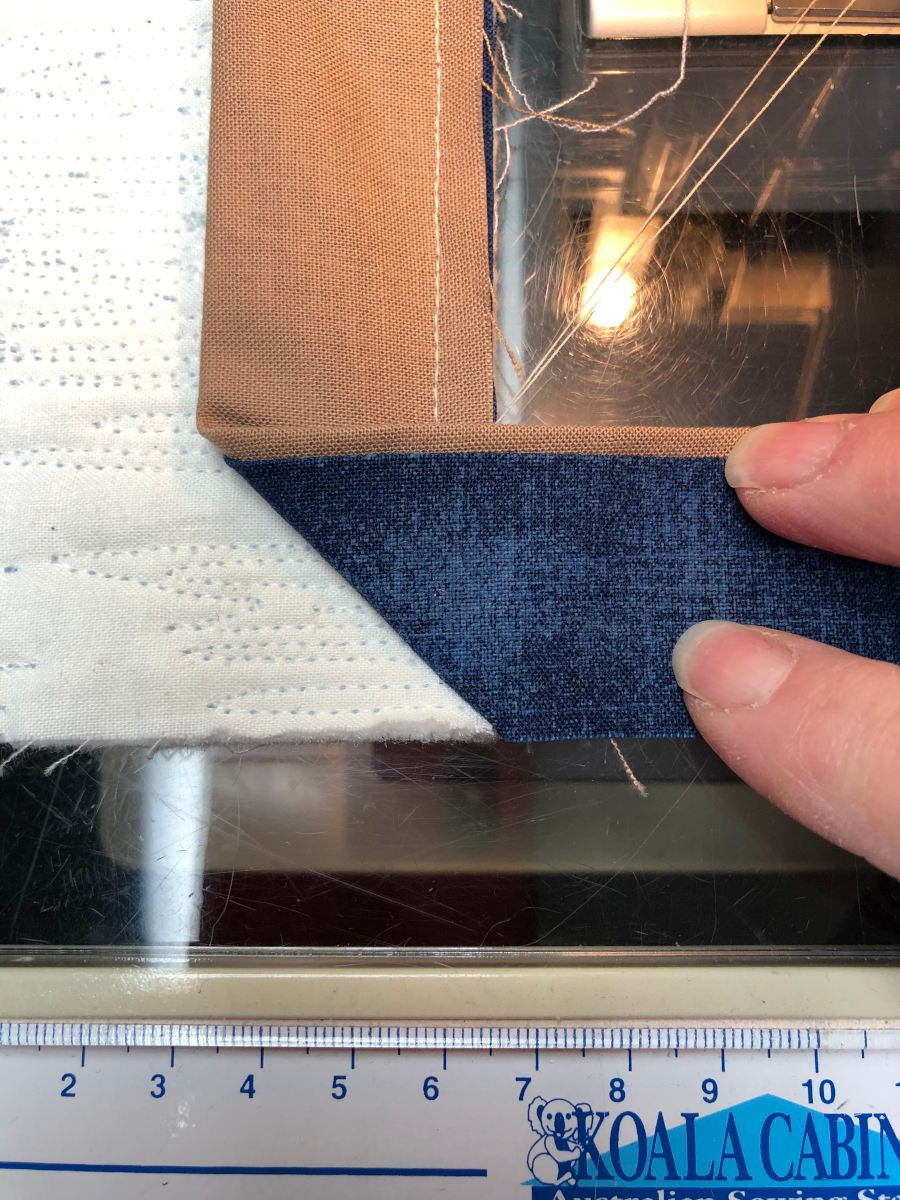
Join the beginning and ending strips with a mitered seam. If you aren’t sure how to do that, this tutorial will help. But here’s one extra step to take when making faux piping. Learn from my mistake and PIN the intersection of the two strips to match them up. I skipped that step on my first try and the results are not pretty. The second time was the charm.
Step 6
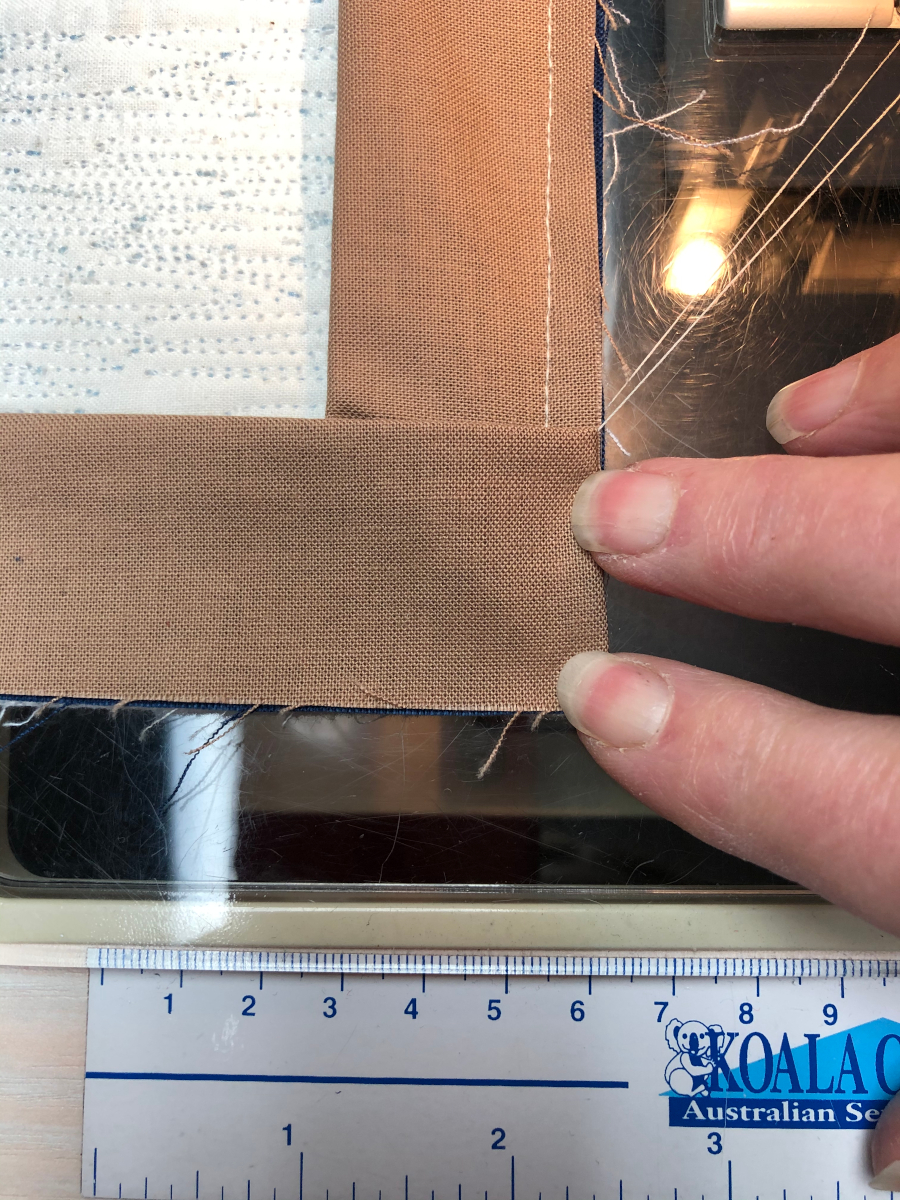
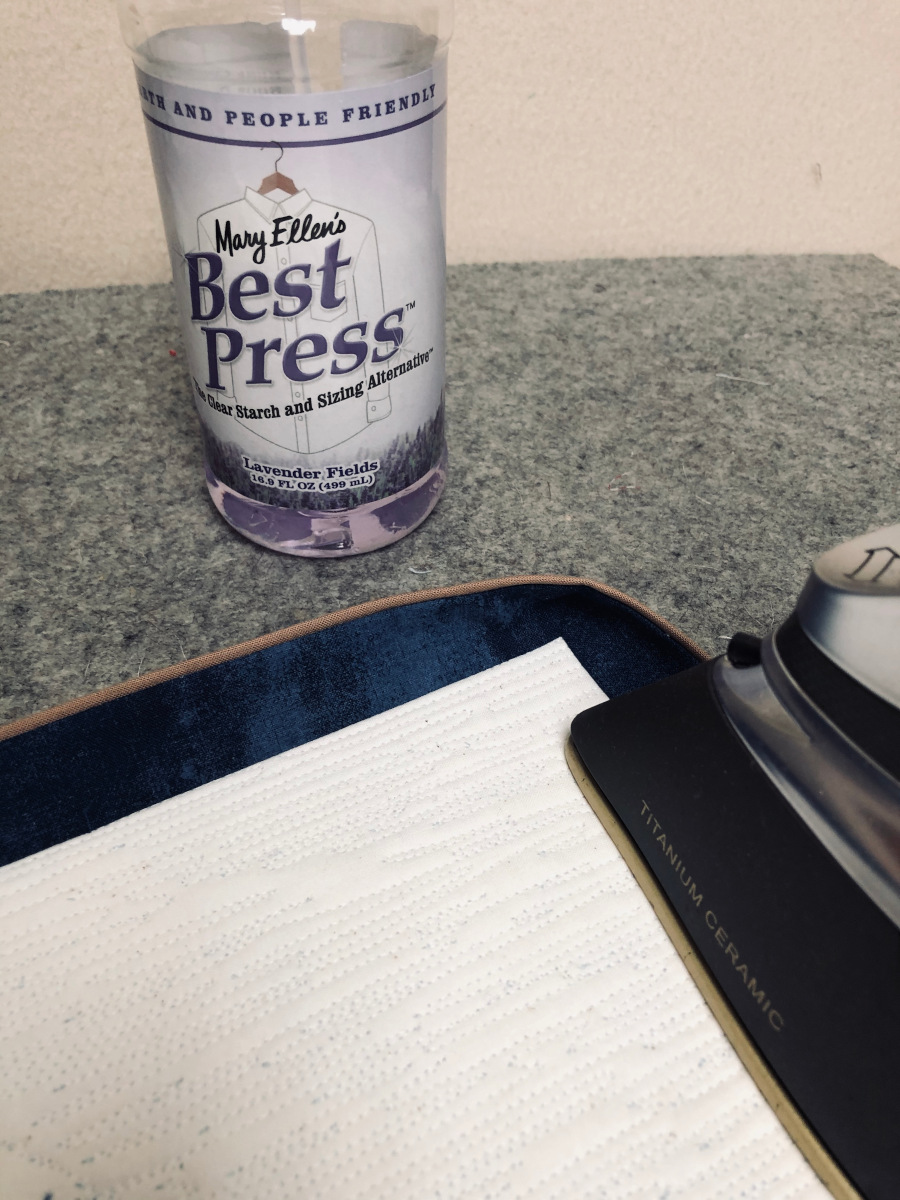
Press the binding AWAY from the backing. Use your iron’s tip to help coax the corner miter flat. Use spray starch or Best press to help the fold stay crisp. Now flip the quilt over and bring the binding to the front. Spray it again and press it flat and straight, mitering the corners as you press.
Step 7
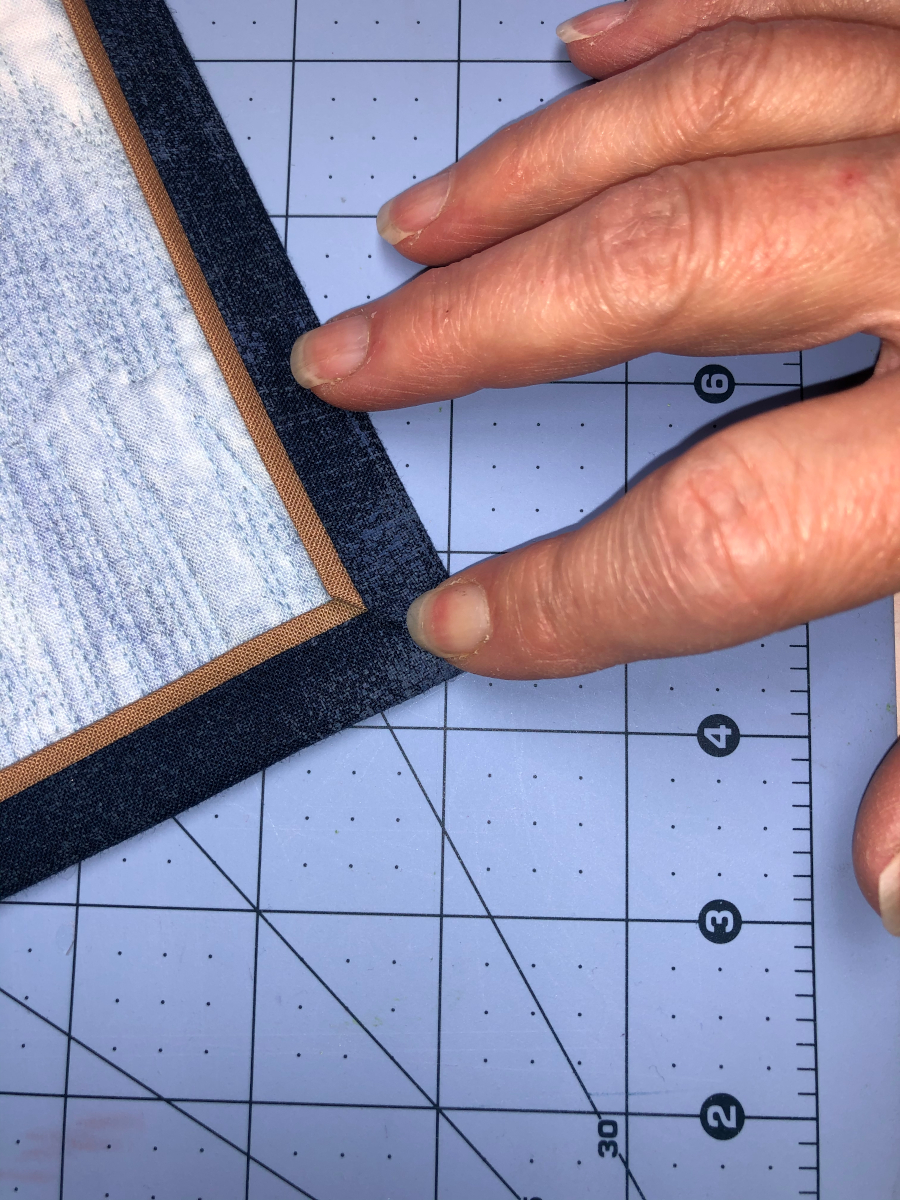
Stitch the binding to the front of the quilt right next to the seam between the piping strip and binding. Use thread to match the piping strip. Use a pin on the strip around the corner to help keep your miter straight.
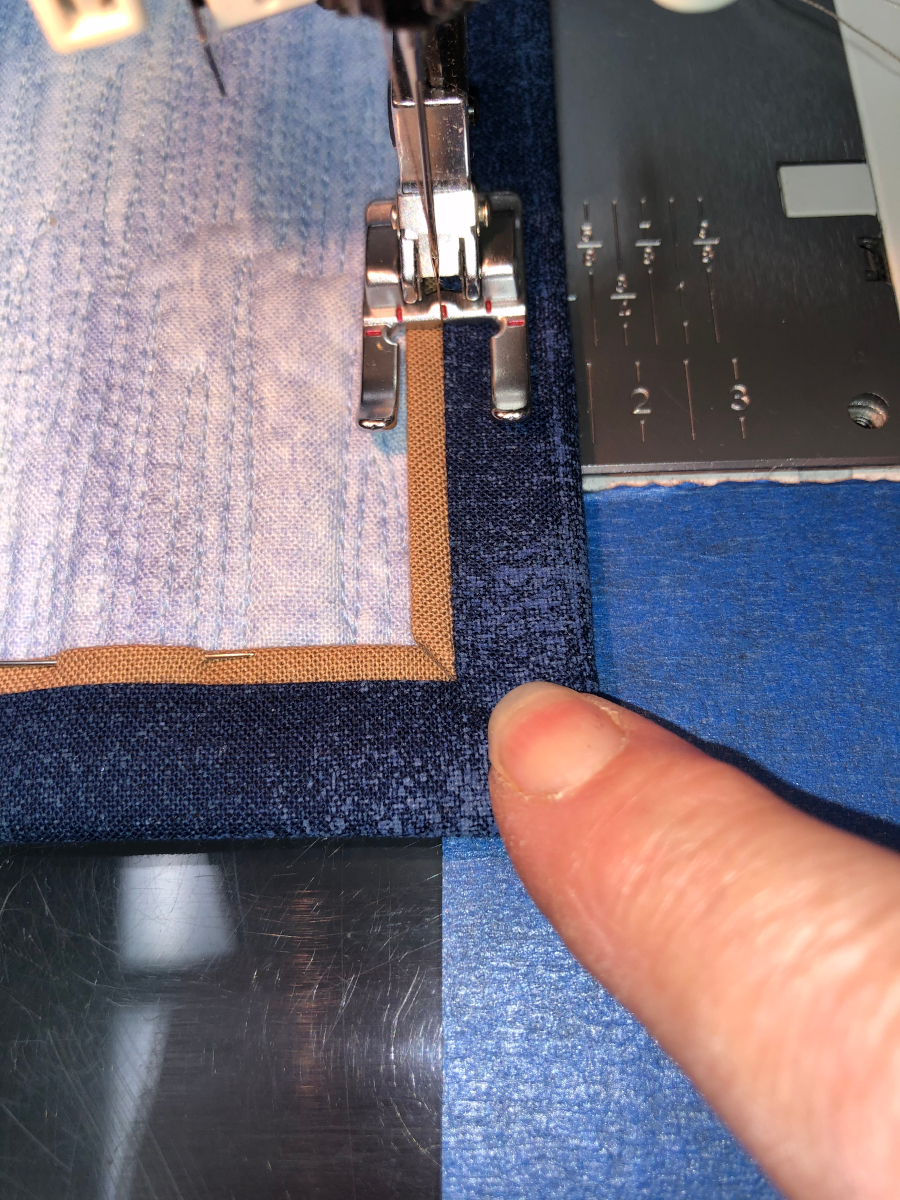
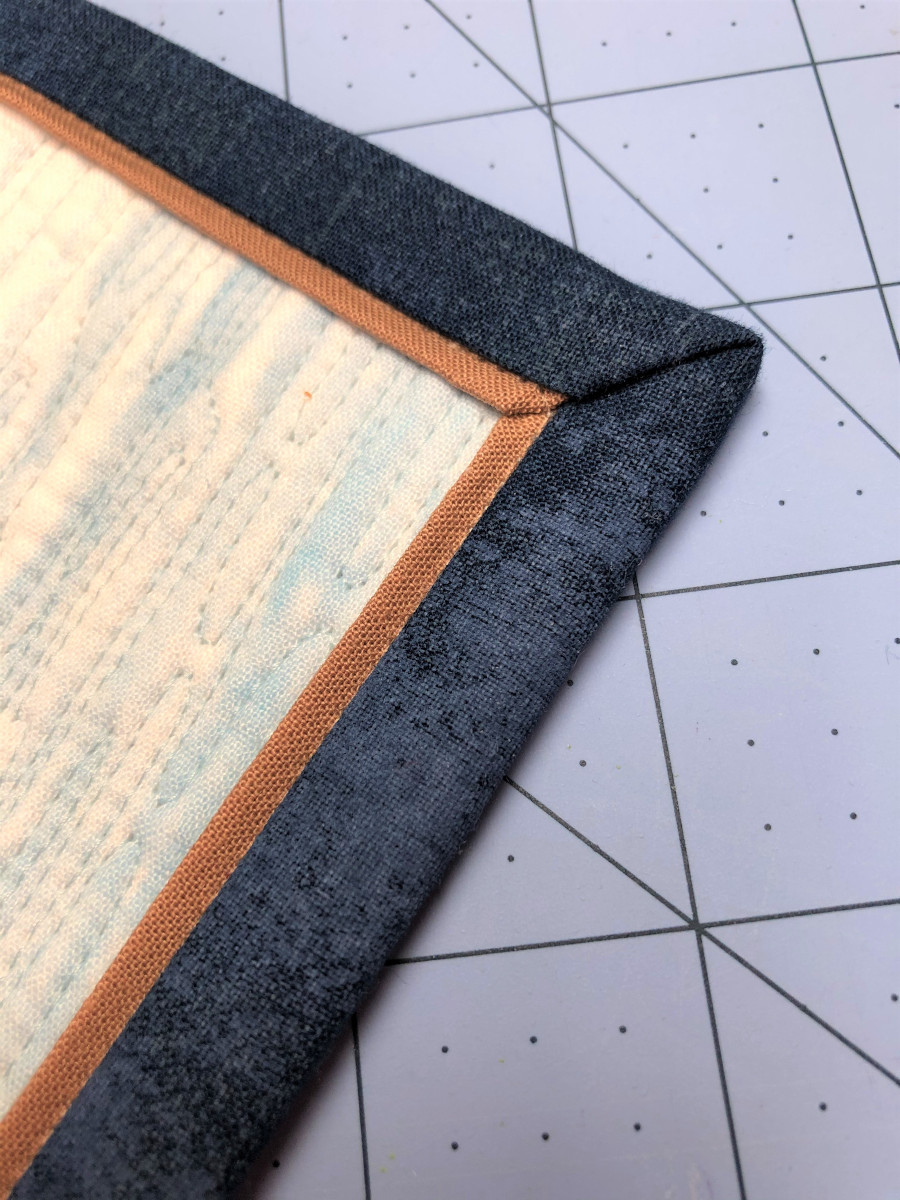
Look at how awesome that fake piping looks! Stitch the miters closed on the corners (front and back) for a pro finish.
I think Papa Bear thinks the faux piping made my binding “Just Right.”