Quilting the Quilt: Quilt panel pizzazz
Download this article as a PDF
Short on time but need a quick quilted gift? Quilt panels to the rescue! A quick internet search for “quilt panels” showed 484 options at one online retailer alone. Comic book heroes, movie stars, chickens, old trucks, aliens, you name it … it’s probably on a quilt panel!
A panel makes a great wall hanging. It’s typically just the right size and only needs a few extra pieces to complete the ensemble–backing, batting, a little quilting, and a way to hang it. Presto! Uncle Ed will love you for remembering he collects John Deere tractors when you give him his green tractor wall hanging on his birthday.
If Uncle Ed is your favorite uncle, you can use the panel as a centerpiece medallion and add separately pieced blocks, sashing, and borders to make it a larger quilt. Of course, it will take a lot longer, but he can snuggle under it while fondly thinking of you as his favorite relative, too. Many panels include fabrics that look like you’ve pieced additional borders or blocks.
These “cheater” panels can save you loads of time—no need to hunt for coordinating fabrics to match, or spend hours cutting and sewing on separate borders. To make the quilt look like you’ve done the piecing, stitch in the ditch right on the line between the printed pieces. Use batting with just a bit of loft (a blended batting works well for this purpose). Your stitches will pull that imaginary seam line down into the batting, making it look just like a real pieced quilt!
To help with the camouflage, use invisible thread for your top thread. That will hide any wobbly stitches as you quilt along the color breaks on the printed fabric. Struggled with invisible thread? Most quilters are frustrated by constant breaking—because someone convinced them that they shouldn’t change the tension on their machine! The trick to using invisible thread is to loosen the top tension until the thread doesn’t look like a curly spring when you pull it through the needle and then let go of the thread tail.

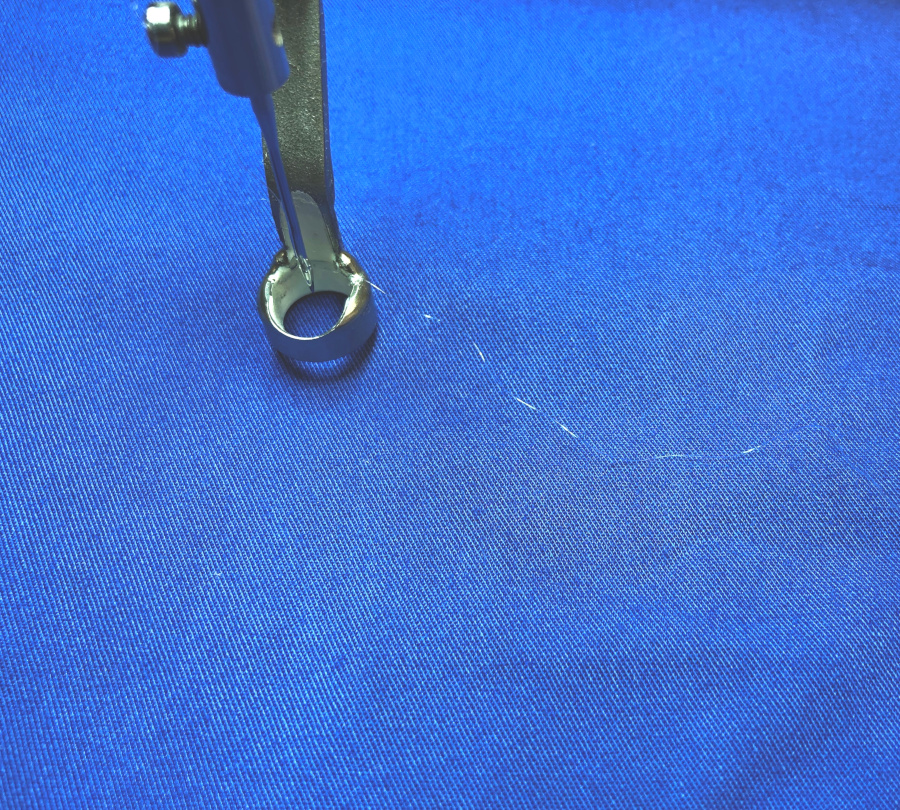
In this photo, the tension is still too tight. The curly spiral indicates that the thread is stretching as it’s passing through the thread path. Once it stretches, it breaks much faster and it won’t have strength to pull your bobbin thread up into the quilt layers. Loosen the upper tension until the invisible thread has the gentle wave you see in the photo below. Then do some sample stitching before you work on your panel.
It’s possible to have the top tension too loose— even with invisible thread—which will make your bobbin thread lie flat on the quilt back. In that case, you might need to tighten your top tension back up a bit, and loosen the bobbin tension so it will allow the invisible thread to pull it into the quilt layers.
If you’re also using invisible thread in the bobbin (Let out that gasp! I have done it for 25 years and the quilting gods have yet to strike me down.), then only wind your bobbin half-full as you see in this photo below. Using a “big bobbin” in your machine? Stop winding when it’s about 1/4 full.

Winding more than that causes tangles and stretches out the bobbin thread, increasing its chances of breaking. You might need to loosen your bobbin tension if you pull up the thread and it’s kinky-curly. To work best, it should also have just a nice, gentle wave as you pull it out of the bobbin case.
When deciding how to quilt the panel, a lot rests on how much time you want to invest, and if you want the panel’s design elements to take center stage or to blend in. To illustrate, I picked up three panels of a mama polar bear protecting her young cub and quilted them differently. (With summer approaching, thinking about a cool winter ice cap feels good about now!)
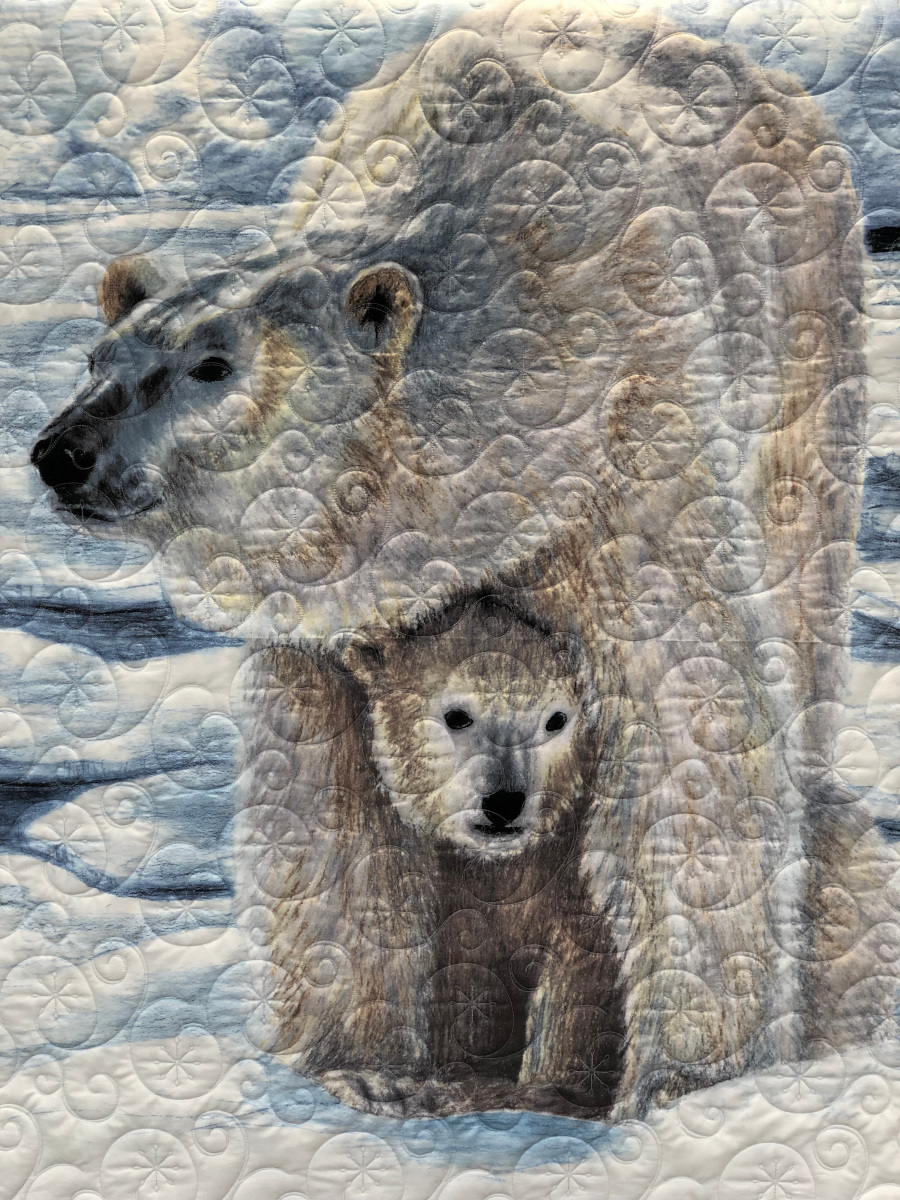
I quilted an overall snowflake design using the APQS Quilt Path computerized system right over the top of the panel. This photo shows that the design certainly plays up the winter scene well. But the bears have blended into the background and aren’t really the stars on the ice floe; the quilted flurries draw more attention:
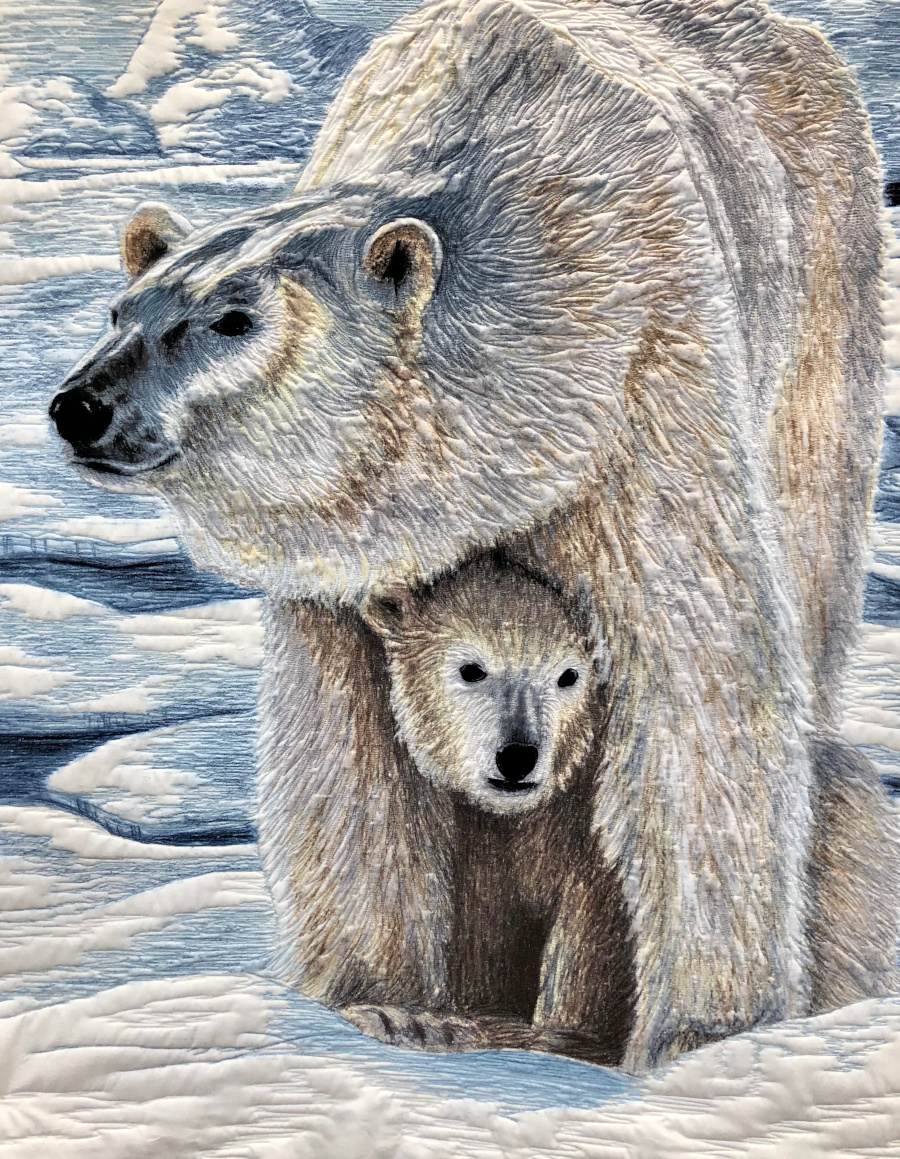
On the second example in this photo, I used invisible thread to outline the panel’s main design elements. Some elements are clearly delineated, such as the mountain, some of the snow shadows, and the bears’ facial features. But as the imaginary winds blow their fur around, the lines aren’t as distinct. Look for subtle color changes in the panel’s shading, and outline those sections as well:
Sometimes you’ll need to fill in lines where you imagine them to be, not necessarily where you see them. You’ll want to do this to keep the quilting density about the same across the entire panel. If you leave too much space between quilting lines in some spots, but add too much detail in others, your panel will bubble and be distorted.
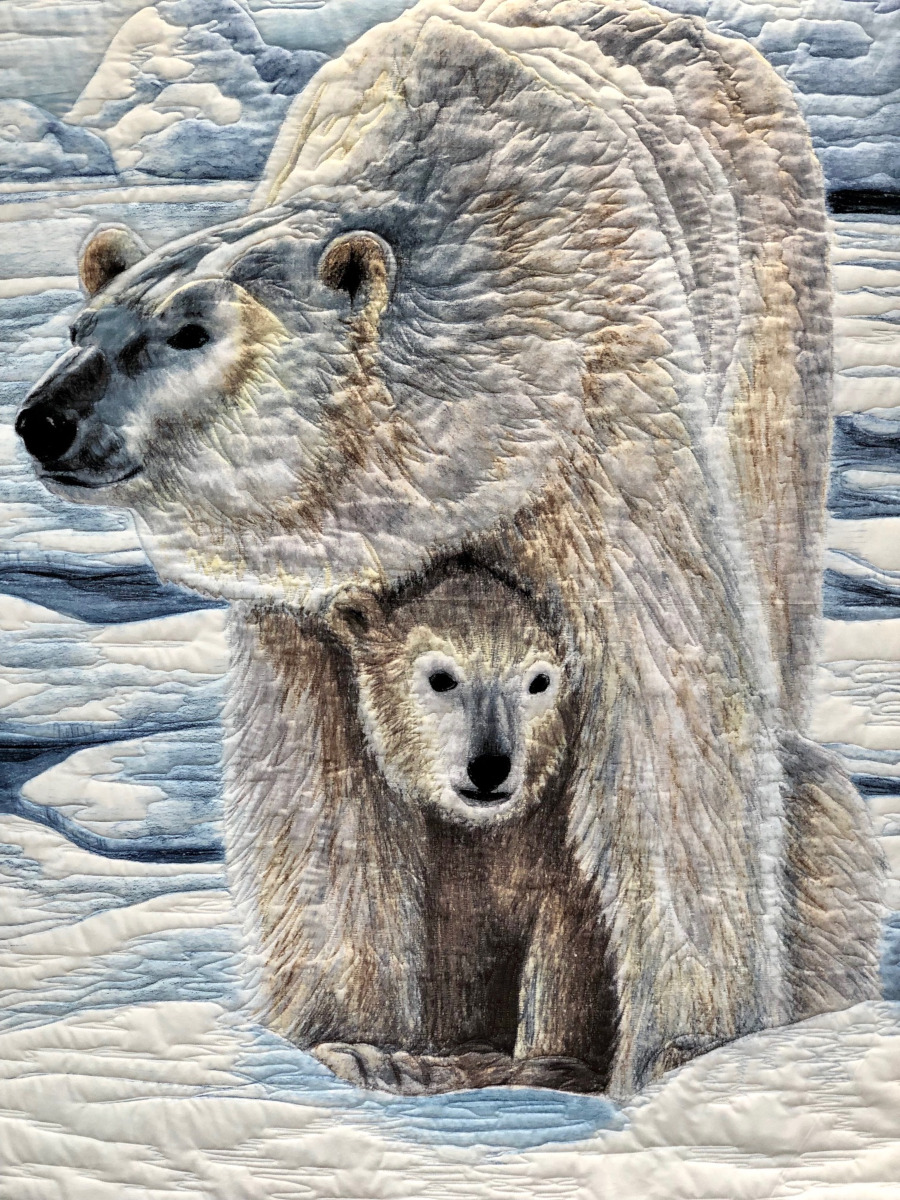
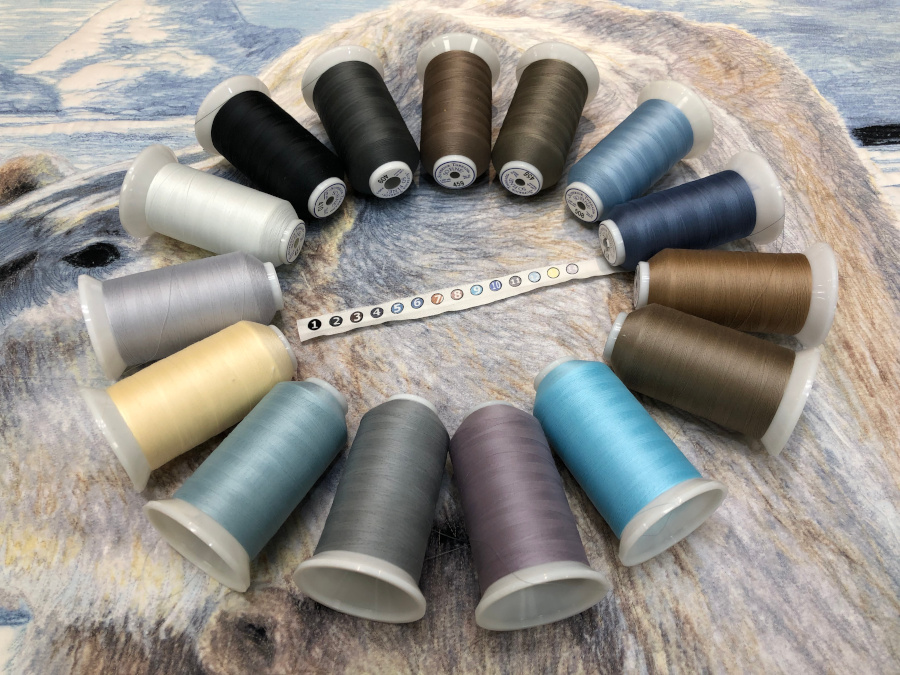
If you have lots of time or you’re tired of adult coloring books, raid your thread stash and try some thread coloring instead! This panel works particularly well for thread painting since it also resembles chalk drawing. Check to see if your panel includes the color code that was used to print it. (These are found on the selvedge of many fabrics, and are super helpful for choosing coordinating fabrics as well as thread!) This panel had 14 different shades! I admit I got lazy and only used about 9 different colors, but it was fun (and a bit revealing about my thread collection) to see if I could come close to matching all of them.
With lots of shading options already printed on the fabric, don’t worry about covering the entire surface with thread. Instead, you can let some of the fabric color peek through. The thread painting took nearly 3 times as long, but I love the result! No matter what quilting method you choose, don’t lose focus on why you chose a panel in the first place…showcase its theme and have fun! 🙂