How to attach borders to a quilt top
Have you ever seen a quilt top with wavy borders? These “friendly” borders wave at you and are a sign that you have excess fabric locked into the edges of your quilt. This excess fabric may increase the likelihood of having pleats and puckers form in the border during the quilting process. YIKES!
If you are like me when piecing a quilt, you get to the borders and get excited about finishing. It can be tempting to take a shortcut and just get the quilt top DONE! It is so tempting to grab a strip of fabric, slap it down, sew it on and cut off the excess. However, in doing this you are inviting problems that may make the quilting process much more difficult than it should be.
Many things can influence how well your border is applied. Some common mistakes are unconsciously holding the fabric a bit too tight when sewing it on, which changes how the two layers feed through your needle. This can create ripples and ruffles. Or, you might have a fabric that has a bit of stretch to it based on the thread count of the fabric you are working with and before you know it you’ve got outstretched fabric that traps extra inches in your border.
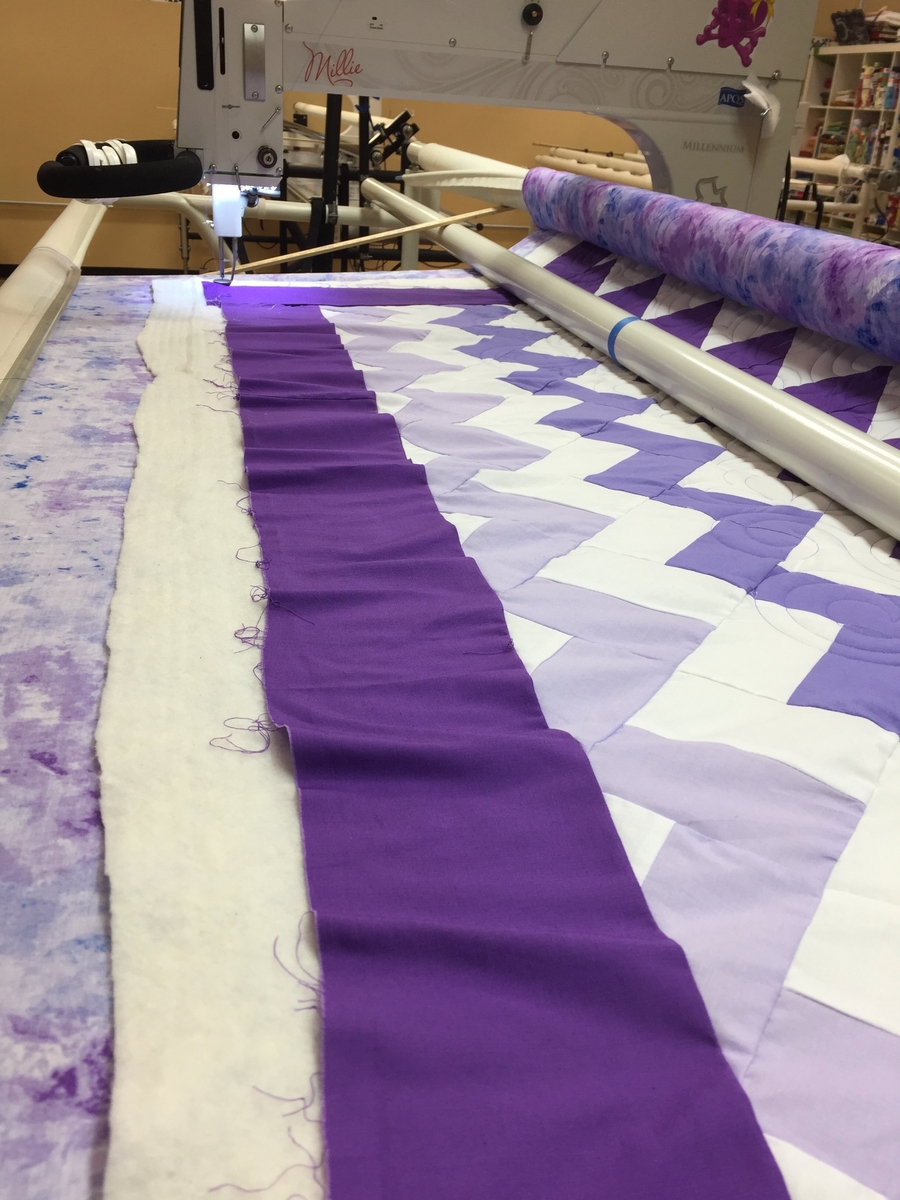
Thankfully there are a few things you can do to be sure your quilt’s borders go on beautifully and are easier to quilt on either a domestic sewing machine or a fabulous longarm quilting machine like the APQS Millie. These steps do take a smidge of time, but the result is worth it! Like most things with quilting, there is measuring involved. But once you learn how simple the process is, you’ll take this small step each time you make a quilt top to force it to be flat and square.
First, identify which two sides you’ll be adding the border to first. Then, find a large space to lay out your quilt top so it is flat. Measure the quilt top in three places. One measurement will be in the middle but the other two should be near the far ends of the quilt. I don’t use the actual edge of the quilt as it is the least trustworthy edge and may have stretched a bit. Instead, I’ll find an interior seam or sashing near the edge of the quilt and use it.
Once you have the three measurements, you’ll find the average so you can cut your border fabric to that new number. Basically, you are putting your foot down and declaring your quilt’s measurement regardless of its opinion.
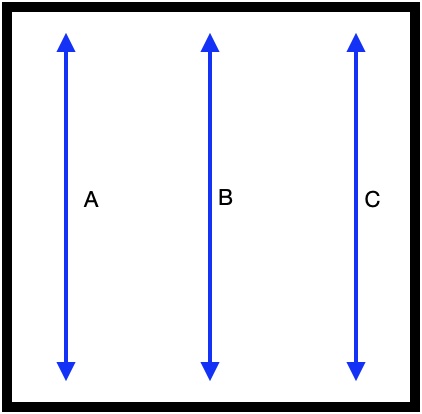
For example, if your quilt top measures…
Left side 50.5”
Right Side 50.25”
Middle 50”
…your average would be 50.25”, and that is the length your two side borders should be cut to. If any of your measurements have more than a half-inch difference, you’ll want to examine your quilt top to see where an error may be. You may need to square up your quilt top or find a popped seam that causes this great of deviance.
Once you know what size your border should be cut, you may need to piece some fabric together so it is the correct length. Always remove any selvages from your border fabric before seaming it together to use in your quilt’s border.
I prefer using a straight seam to piece my borders and not a diagonal, mitered seam as it can be difficult to avoid stretch. If you prefer that look, consider using a generous amount of starch on the yardage before cutting it. That will help its stability when using it on your quilt.
Fold your cut border fabric in half and mark it with a pin. Then fold it again and mark the quarter marks. If your border is very long you can fold it once more to find the 1/8 mark. Do the same with the quilt top and match these marked, pinned points to each other.
Align the two ends of the border fabric with the two ends of your quilt top and pin them in place. Then, work down the length of the border pinning as you go being sure the border is laying nicely along the quilt top. Once you have several pins in you are ready to sew the border fabric and the quilt top together along those two sides.
Be sure you press this seam well. Take your time with a hot iron to make sure the seam is nice and flat. This will make the next steps much easier.
Repeat the process on the other two sides. Of course, you’ll wait to measure the other two sides until after you have the first two sides attached.
These simple steps will ensure your borders lay nice and flat and are ready to quilt. Correctly applied borders make it far easier to quilt and you’ll love how nicely your quilt will look when you are finished!