
Free quilt pattern: Modern mission monogram
A dear friend of mine recently had foot surgery and she’s been ordered to put absolutely no weight on that foot for 14 weeks—an eternity in my book! It doesn’t take long to realize how many things we take for granted in our daily lives when we have two legs to stand on. Even the most basic human needs like using the restroom become a difficult challenge and humbling experience.
What’s my friend’s gimpy leg got to do with this blog? Well, if YOU had to stay off of your foot for over 3 months, having a nice warm quilt to wrap up and hug you when you’re feeling down would sure be sweet, wouldn’t it?
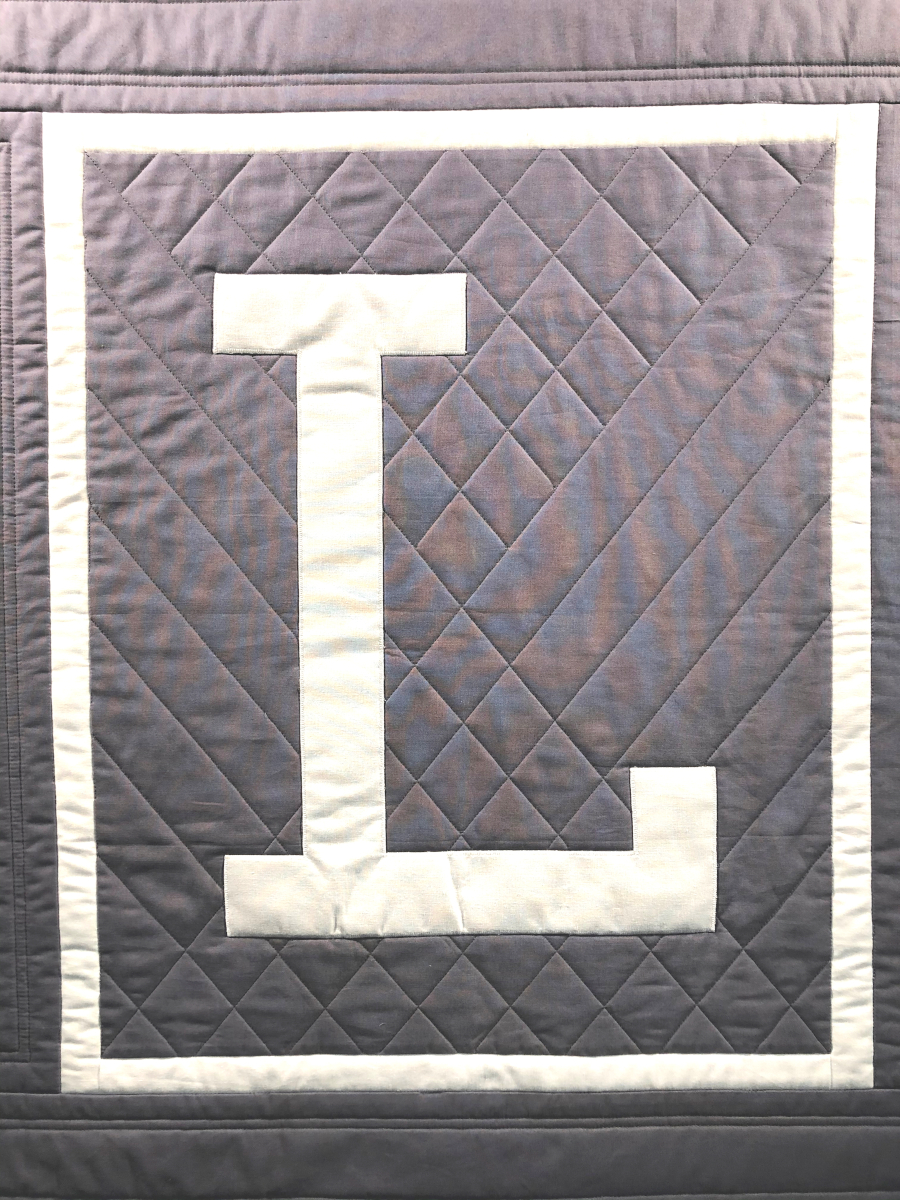
To hopefully provide just a little homemade comfort during her long recovery, I designed and made this monogram quilt that sports the first letter of my friend’s family name. Since they recently renovated their house with lots of clean, white trim and a modern grey color palette, simple lines and minimalism with the quilt’s design ensure that it won’t fall out of style too quickly. It’s just the right size to cover up a cast, or throw over the back of the couch!
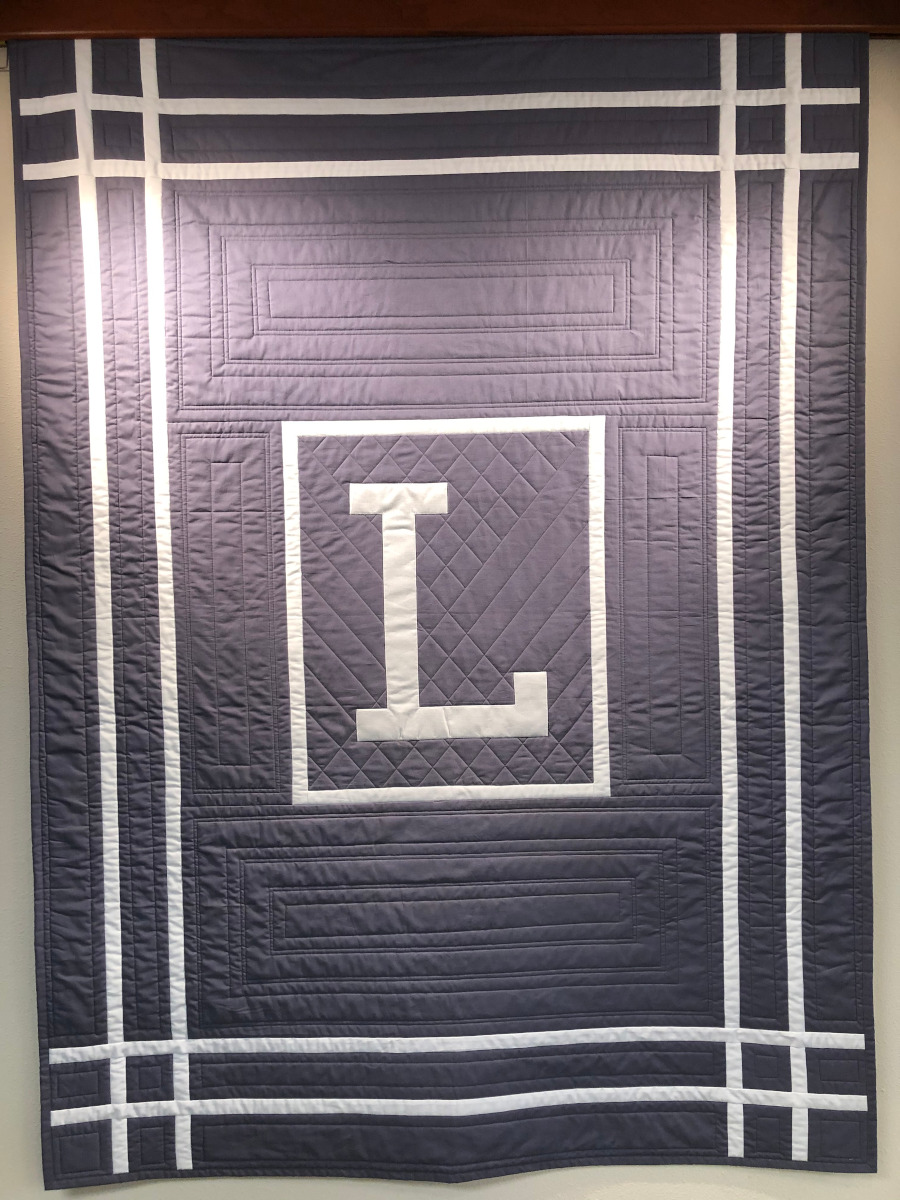
Don’t worry if your last name doesn’t start with “L”! I’ve included all the letters of the alphabet for you in the free pattern provided. While you could hand applique the monogram in place, I used light fusible webbing to speed up the process, and simply used a small zig-zag stitch to stitch around the raw edges for extra security.
To enlarge the letters, simply create a 2-inch grid on the paper side of the fusible web. I taped my web to my cutting mat so I could easily see the lines through the paper as my guide.
Tape your web to your cutting mat.
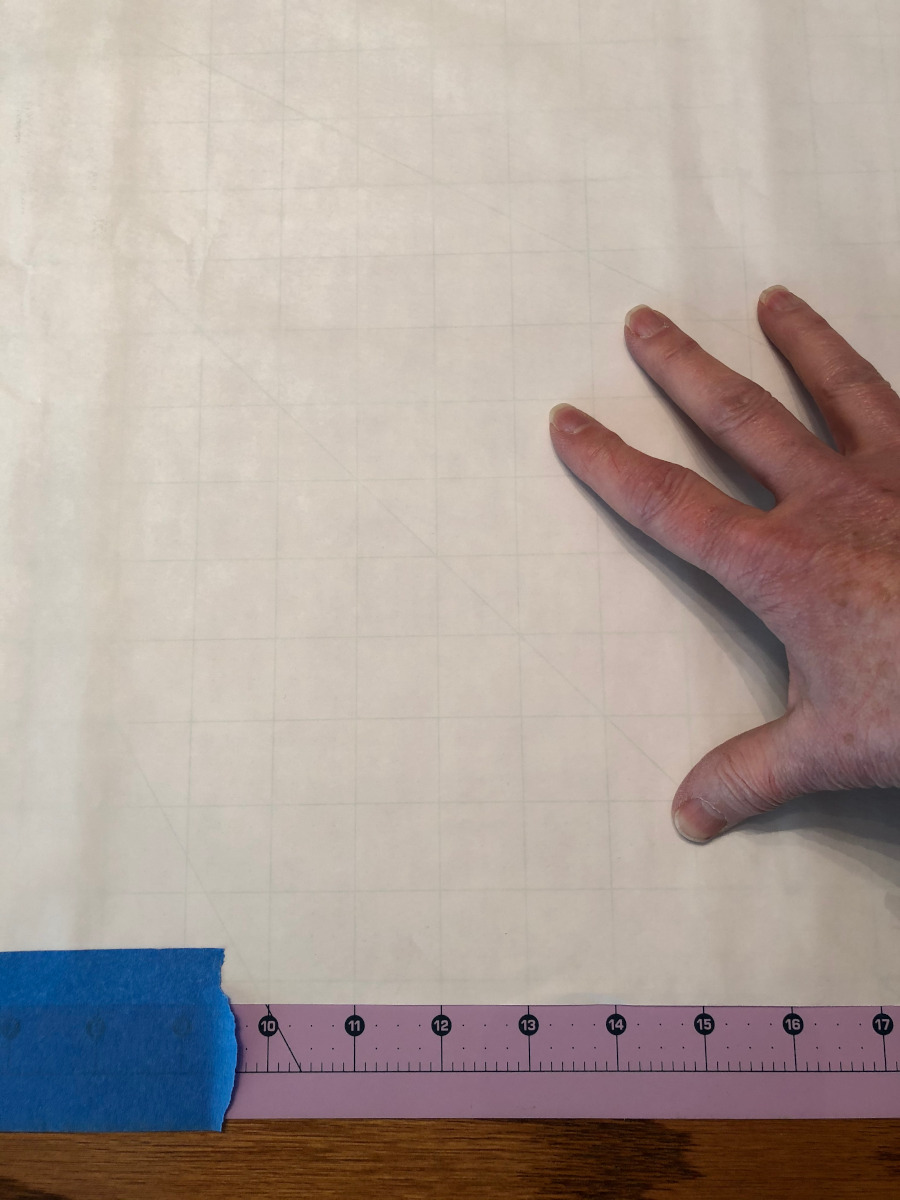
Create a 2-inch grid.
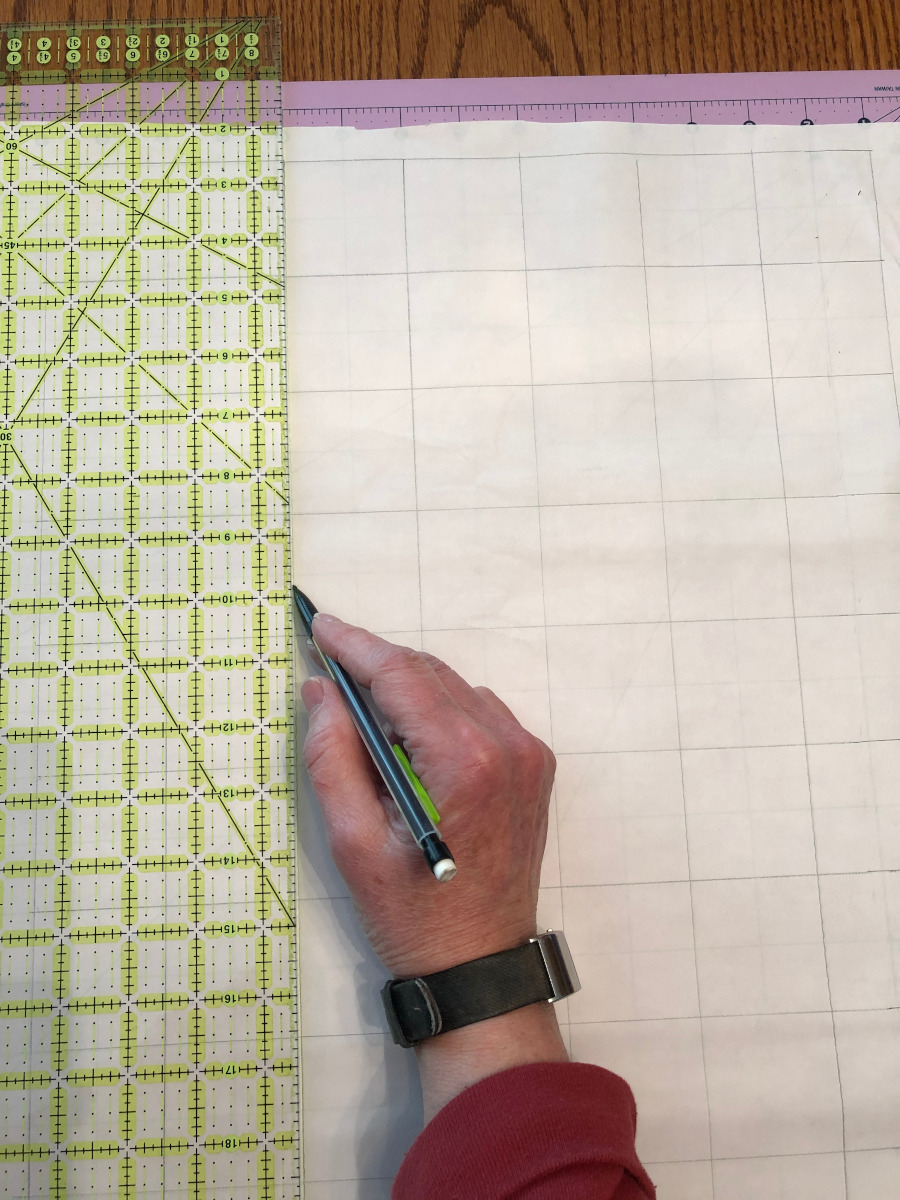
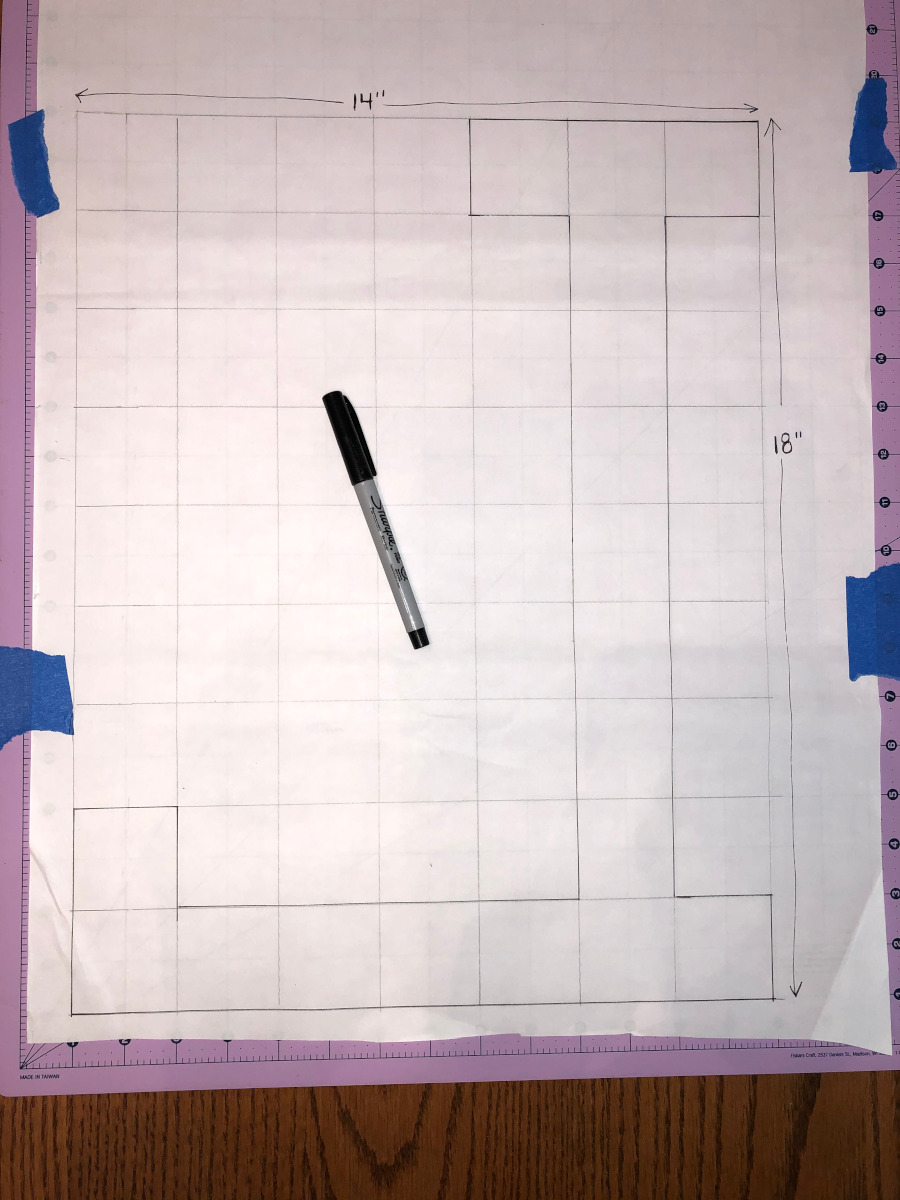
Next, use the grid included with the pattern and draw the letter on to the fusible web. Remember, it has to be reversed so that the letter will be correct when it’s fused to your fabric!
Draw your desired letter.
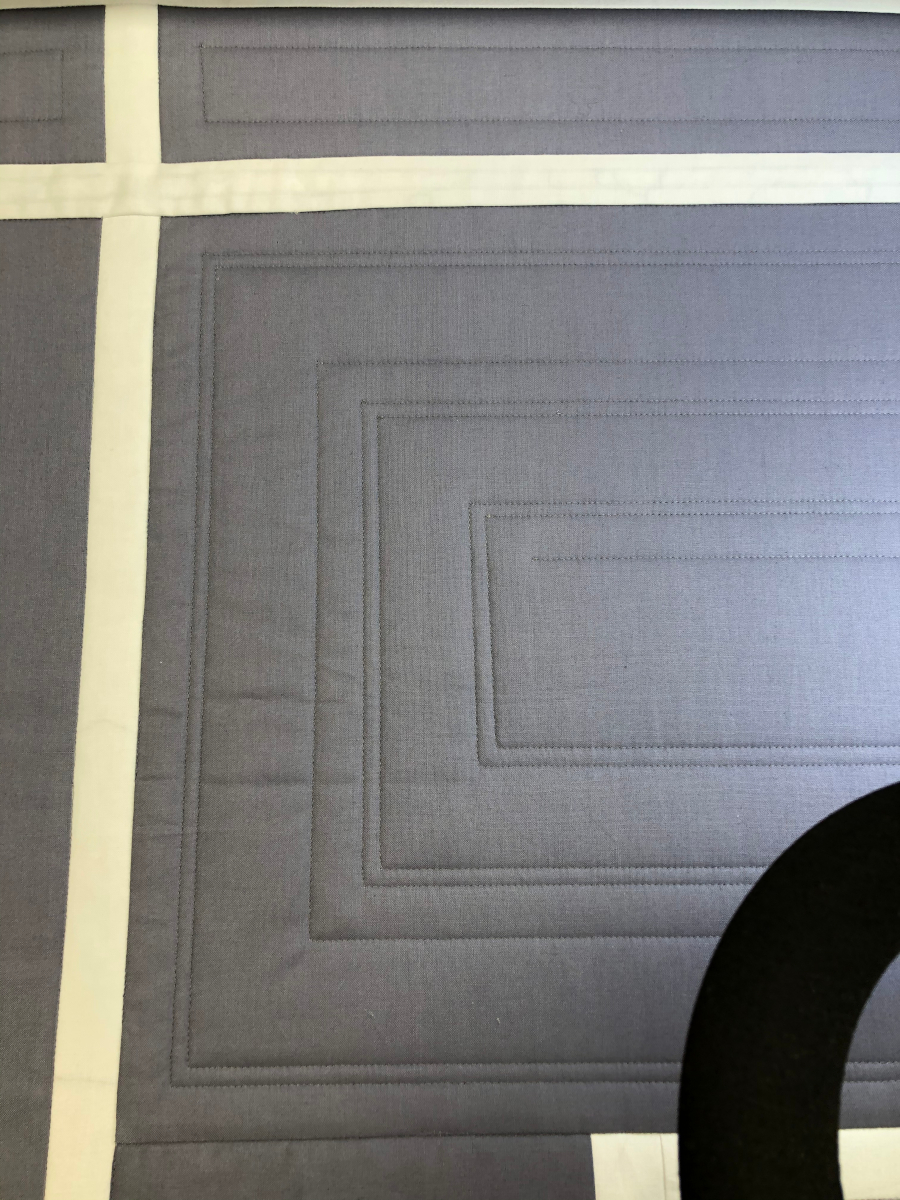
Since my quilting plan involved lots of straight lines, loading the quilt squarely on the frame was very important. I used the directional horizontal lock to baste the quilt’s top edge to the batting and backing. After rolling the top ahead, I engaged the lock again and slid the machine’s foot along a horizontal seam without stitching to ensure the quilt was still straight before I added quilting.
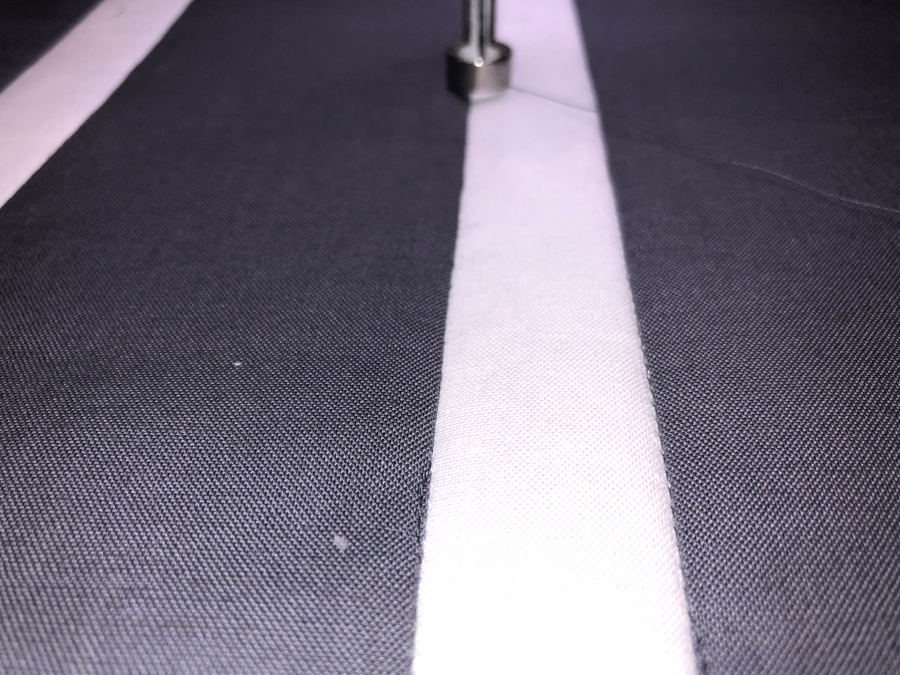
To make sure that my long white fabric lines stayed straight, I stitched in the ditch on each side of the white strips first. I typically turn my quilts to do the side borders instead of quilting them as I go along. That also means that I don’t normally stitch any long ‘vertical’ quilt sections like the long vertical white strips until after I’ve turned and remounted the quilt. But since my ‘boxy’ quilting design relied on those strips to be straight and parallel to the quilting, I also stitched the ditches of those vertical strips as I went.
Pro Tip:
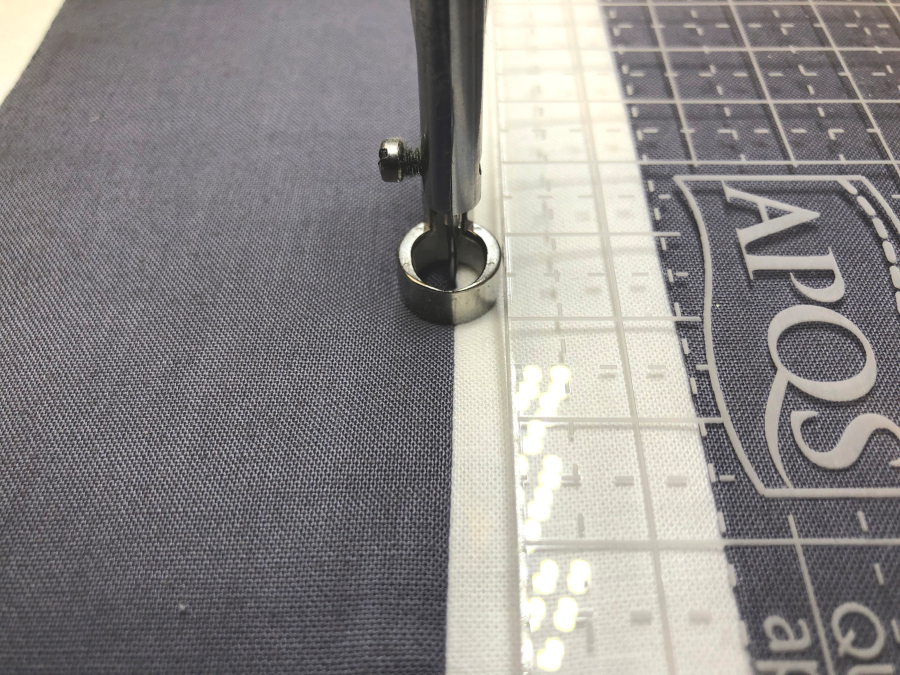
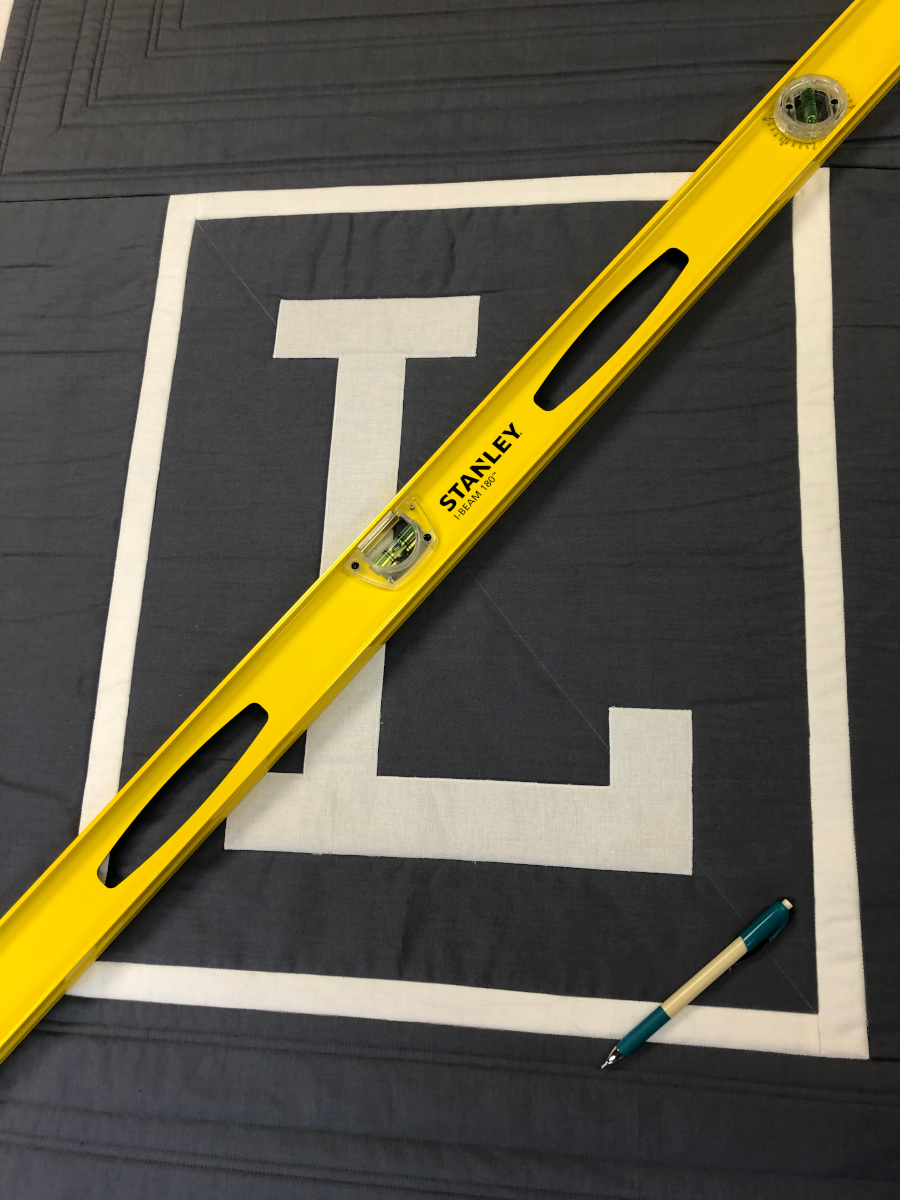
Hold your guiding ruler on the opposite side of the seam from the direction you pressed the seam allowances. I pressed my seams to the dark fabric, so I’m holding the ruler on the white fabric side of the seam as shown below. This increases your accuracy because the ruler won’t press down on the seam fold and push it over—which can make you think you’re stitching closer to the seam than you really are.
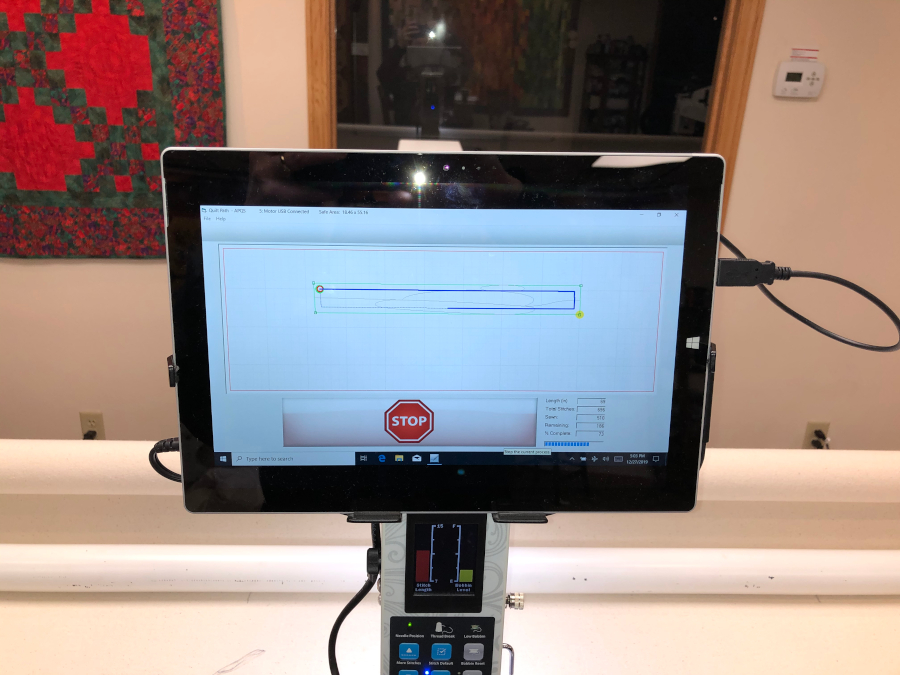
Though I could have stitched all my nested boxes using a longarm ruler and expanded base, the APQS Quilt Path made it so much easier. I love the idea of no math, plus it can stitch a line straighter than I ever could—even with my 25 years of practice!
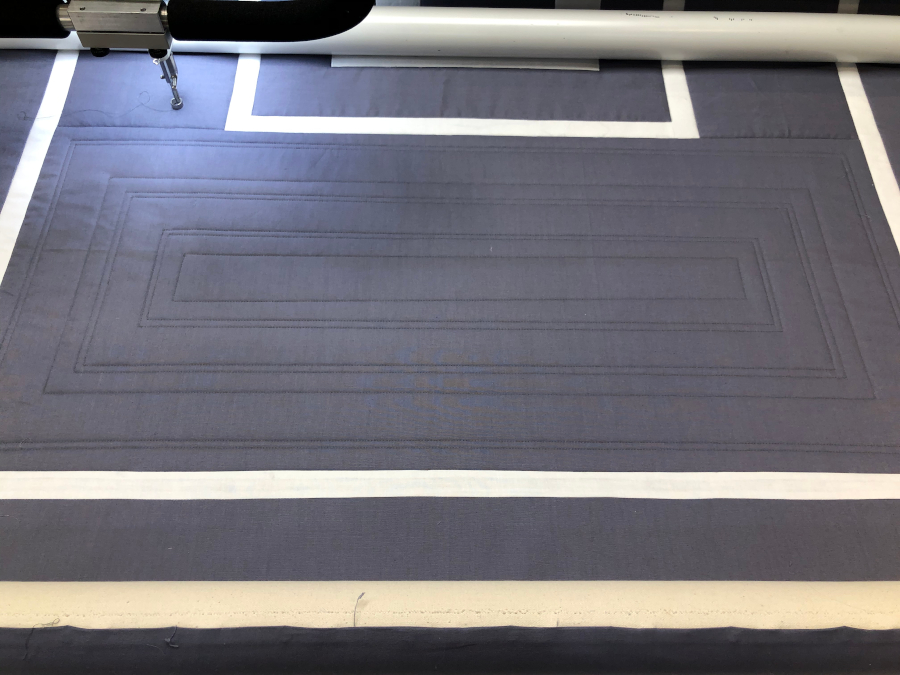
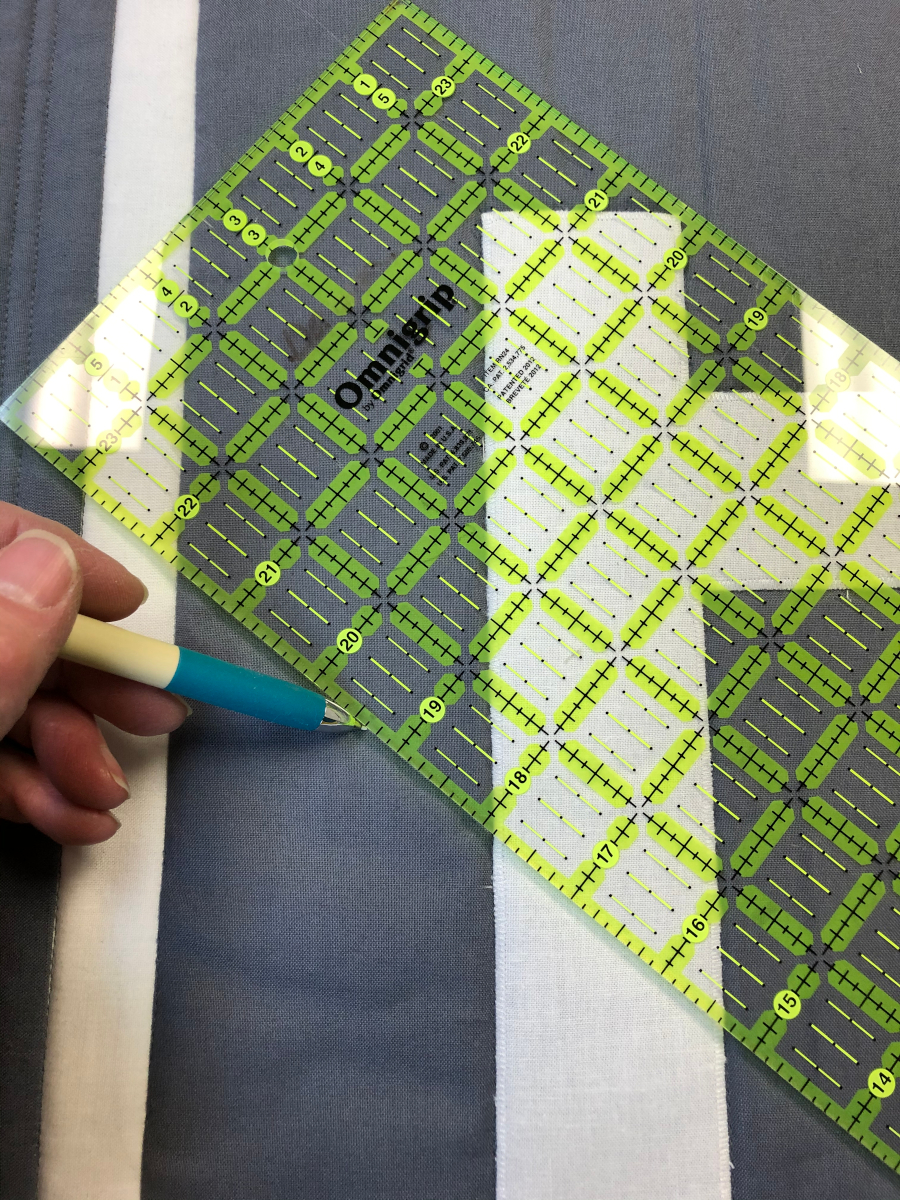
To provide a little contrast to all those quilted boxes, I decided to use cross-hatching behind the monogram. Normal 45-degree cross-hatching seemed too traditional, but the math didn’t work out to use any other common angle. Instead, I simply chose to go “corner to corner” with two diagonal lines, using a fine-line chalk marker and a straight edge.
Next, I used my rotary cutting ruler to draw more lines, each 2 inches apart.
After finishing the bottom half of the shape, I was pleased with the diamond cross-hatched section on the bottom. But I was also intrigued by how the slanted lines on the left and right sides created more interest. I decided to leave those lines alone and then filled in the crosshatch section at the top to mirror the bottom section.
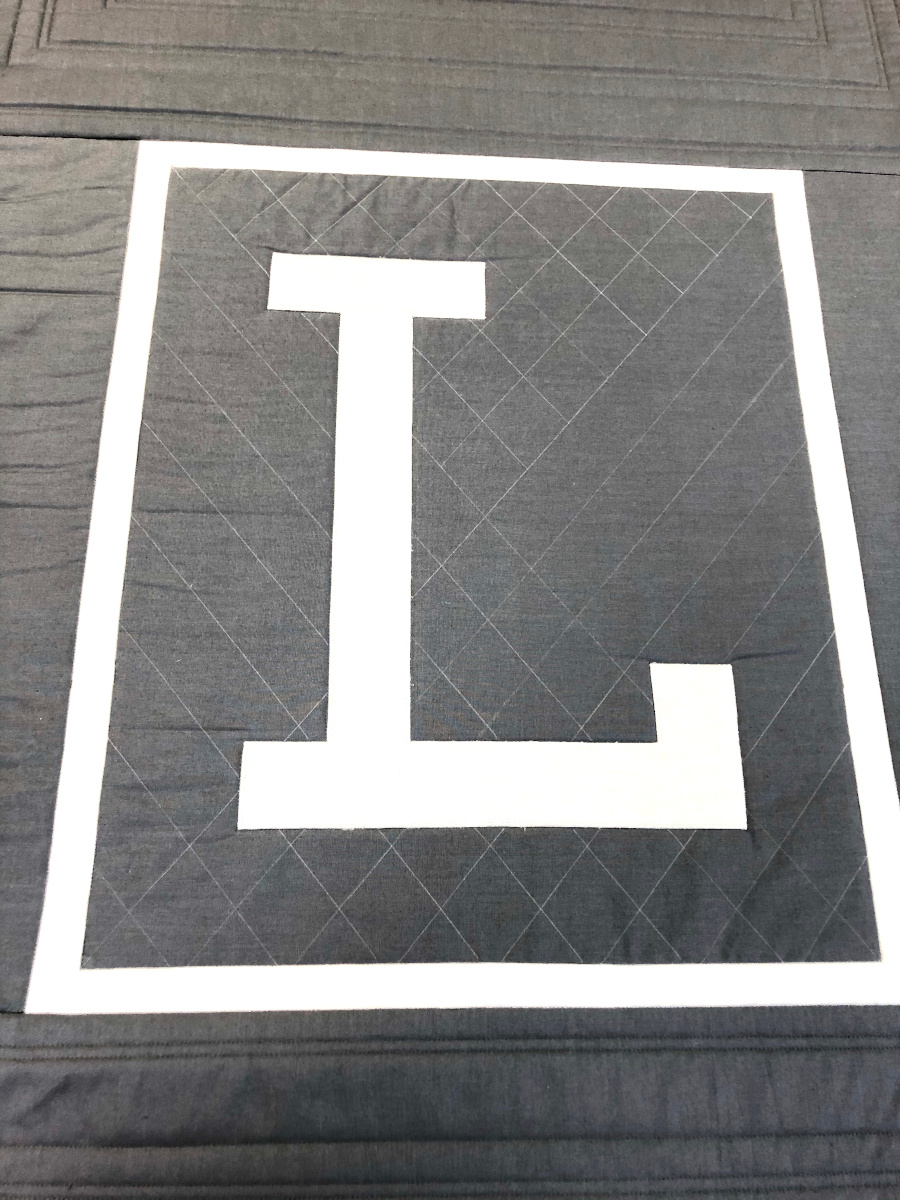
I did use a ruler and base to stitch those lines. Where practical, I stitched along the monogram’s edge to get to the next line.
When that didn’t make sense, I stitched up to the monogram, stopping just shy of its edge. Then I turned off the sewing motor and held in the single stitch button to make teeny, tiny close stitches to secure the thread ends. Next, I dragged the machine to a new starting spot, and reversed that process, starting with teeny tiny stitches, then turning on the sewing motor to continue the stitching line. (Want to see a video about neat starts and stops? Click here.) That just left trimming the ‘traveling threads’ on the top and bottom.
This quilt stitches up quickly! Even if you don’t have a friend who needs a quilted hug, make one for yourself in no time!


