
A guide to bias binding
When I was 16, I picked up a stack of pre-cut fabric squares at our local five & dime and decided to make myself a quilt. I figured that it couldn’t be all that hard. The squares went together just fine. I went back to the dime store and bought a lovely yellow bed sheet for the backing. I even managed to stitch some fairly straight lines along the seams as “quilting.”
But when it came to finish the edges, I was stumped. Very few quilting books were around in the mid-70’s, and as a typical teenager, I wasn’t keen on asking for help—because teenagers know it all! 😊 So, I decided that the best way to cover up the batting edges was to turn the sheet over to the front and stitch it down.
Doesn’t that make you smile? 😊 The second quilt I made was the result of a formal quilting class in my 30s. I learned how to piece, applique, and hand quilt, but finishing the edges was still a mystery. I had no clue what to do, so I folded the top around the batting. Then I folded the backing inside as well, and hand-stitched the edges closed. I later learned that method is called a “knife edge,” but at the time I called it “desperation.”
By the time I made my third quilt, I finally learned about this wonderful thing called “binding.” What an idea! Wrapping a fabric strip around the quilt edges to finish it off made so much sense…except for the corners. Those made no sense to me. I reasoned that you must add strips to two opposite sides of the quilt, then trim them flush with the top. Then the remaining strips get added, and you tuck in the raw edges and sew the strips down.
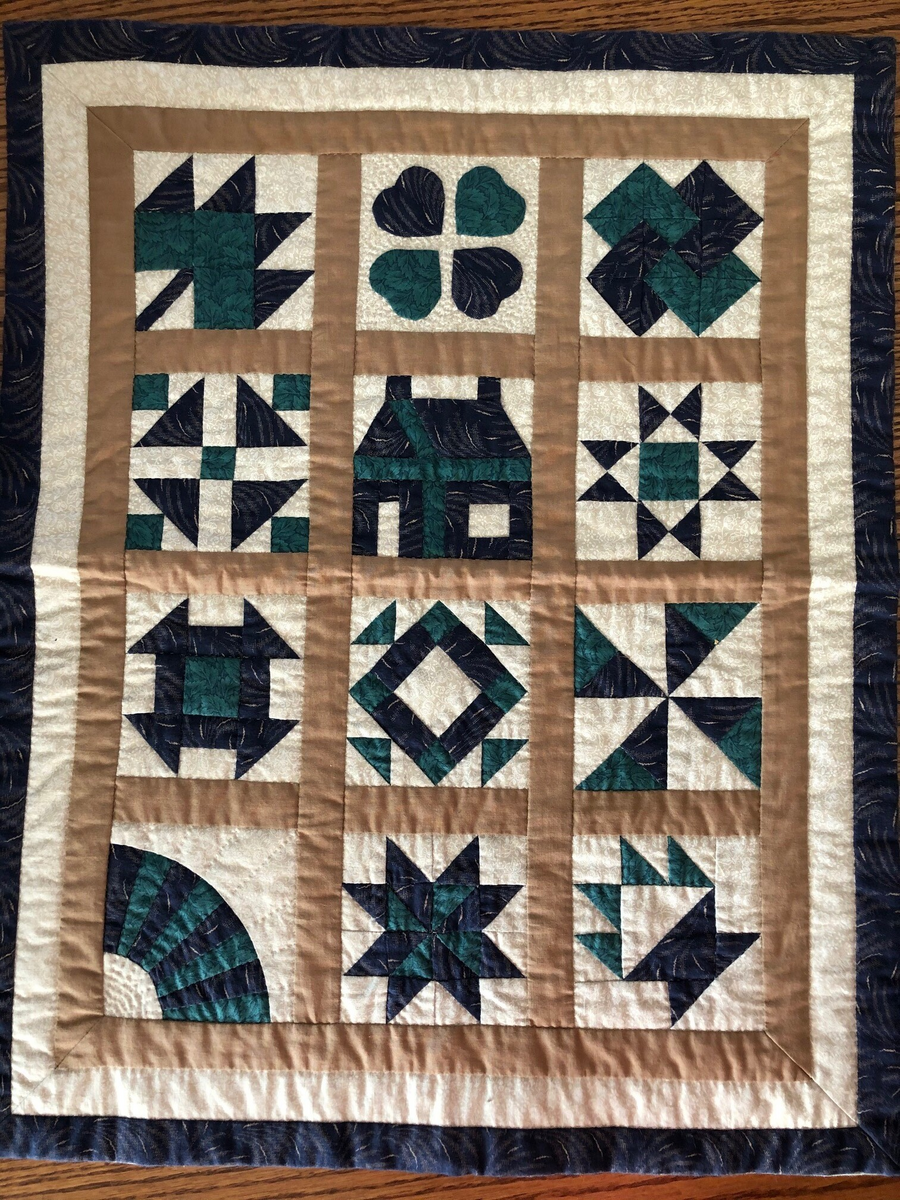
Quilt #3 was done, but the corners were a struggle and weren’t at all pretty. That’s when I had a brilliant idea for Quilt #4—which was to avoid corners altogether! (Thank goodness I’ve since mastered corners—click here for a tutorial.) I grabbed a dinner plate and rounded all four corners of my garden twist quilt. I thought I was so smart…but being averse to corners introduced a new problem. The straight grain binding buckled and wobbled around the curves. Time to learn yet another binding technique—using bias binding. Once I cut the binding on the bias, the curves were finally graceful and flat.
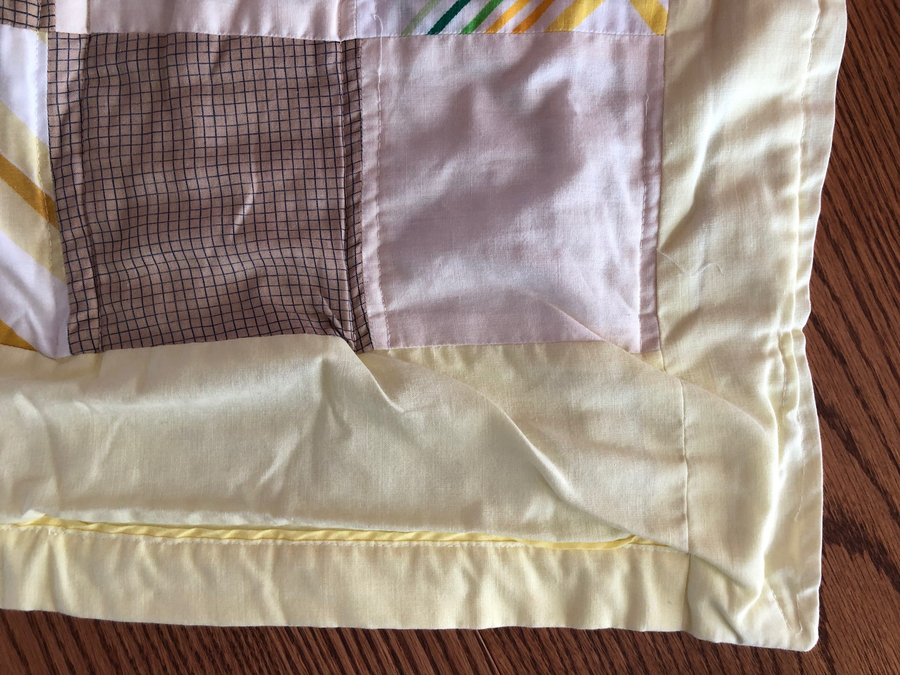
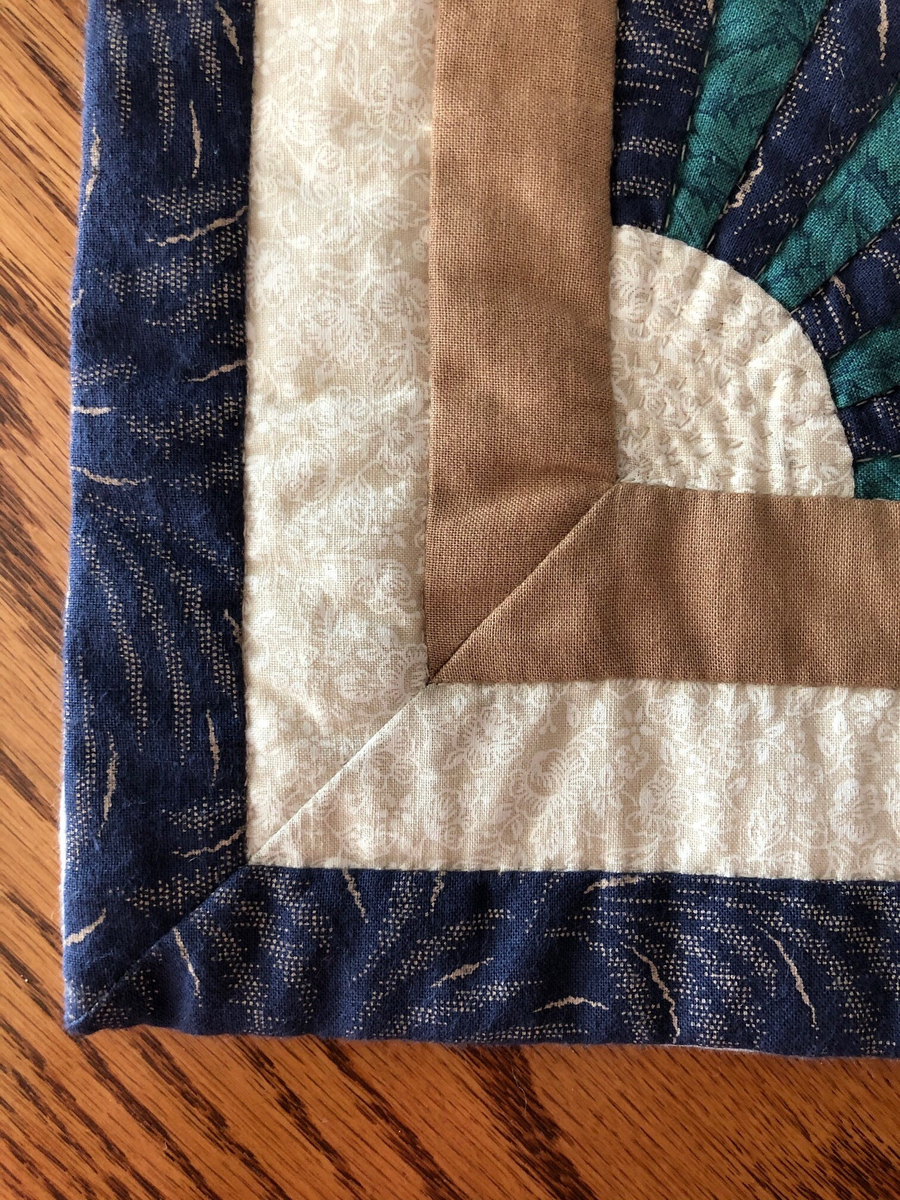
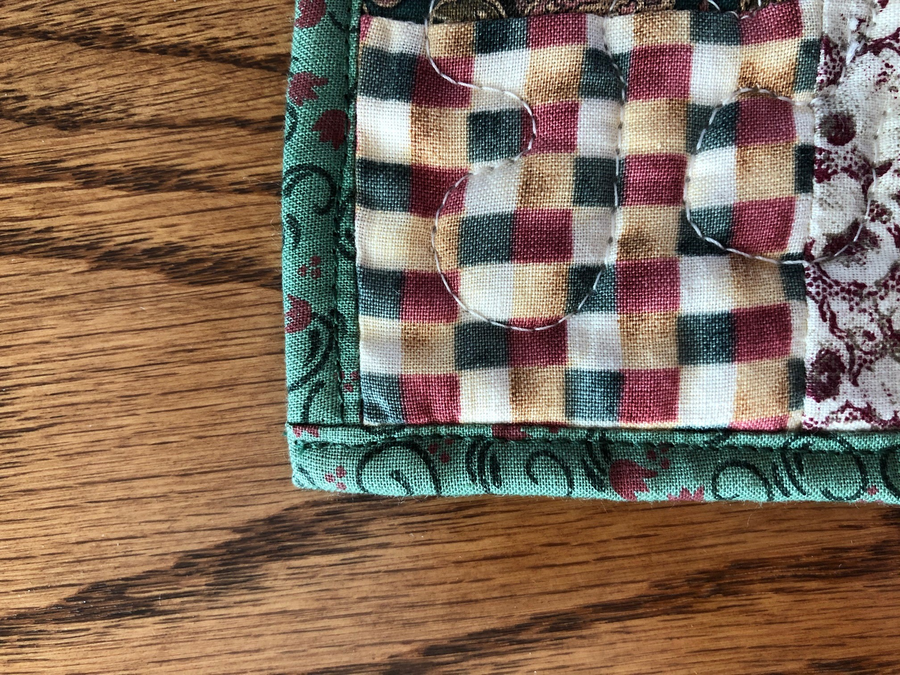
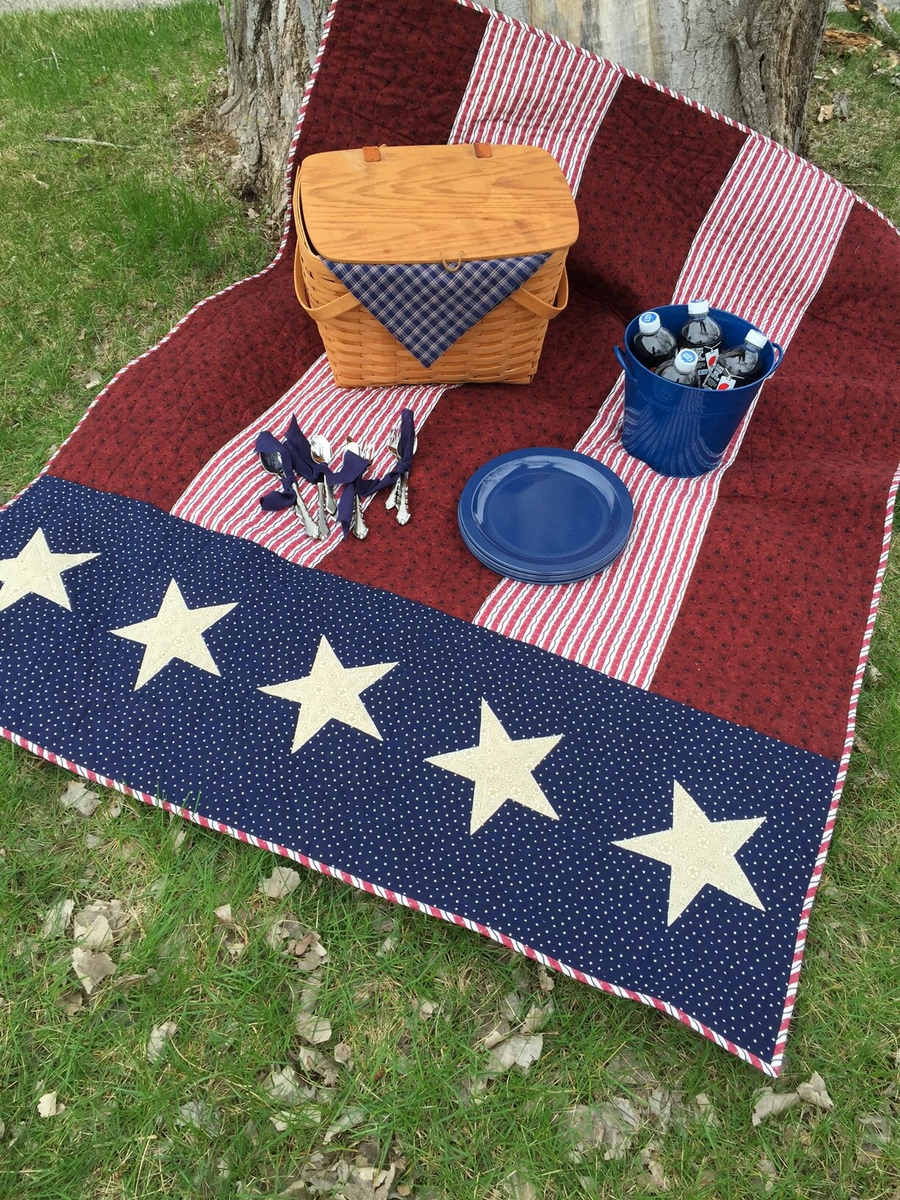
Bias binding is a must for quilts with curved or scalloped edges. It will stretch around the arcs but will remain flat along the edges. But it can also be used for straight edge quilts. A striped fabric cut on the bias creates wonderful contrast and a little pizzazz. In this patriotic quilt, the striped fabric is on grain in the quilt body, but that same fabric was cut on the bias for the binding. Plaids and checked fabrics can look fabulous as bias-cut binding as well.
Since bias binding stretches, you’ll need to handle it carefully as you work. Some quilters find it helpful to use spray starch on the fabric before cutting for extra stabilization. You can use strips cut on the bias to the width you desire, using either fabric yardage or a square of fabric. Then sew the strips together to form a continuous bias strip. Or you can create a bias fabric “tube” to make a continuous strip all at once. The first method requires multiple seams where the strips join, whereas the tube method requires only two. However, you’ll spend time marking and cutting lines on the tube fabric.
The first step is to determine how much fabric you’ll need for the length of binding required for your project. Though you can start with yardage lengths, it’s often easier to begin with a fabric square.
Download our handy Bias Binding Chart to discover what size square you’ll need for various binding lengths.
Method 1: Cut individual bias strips
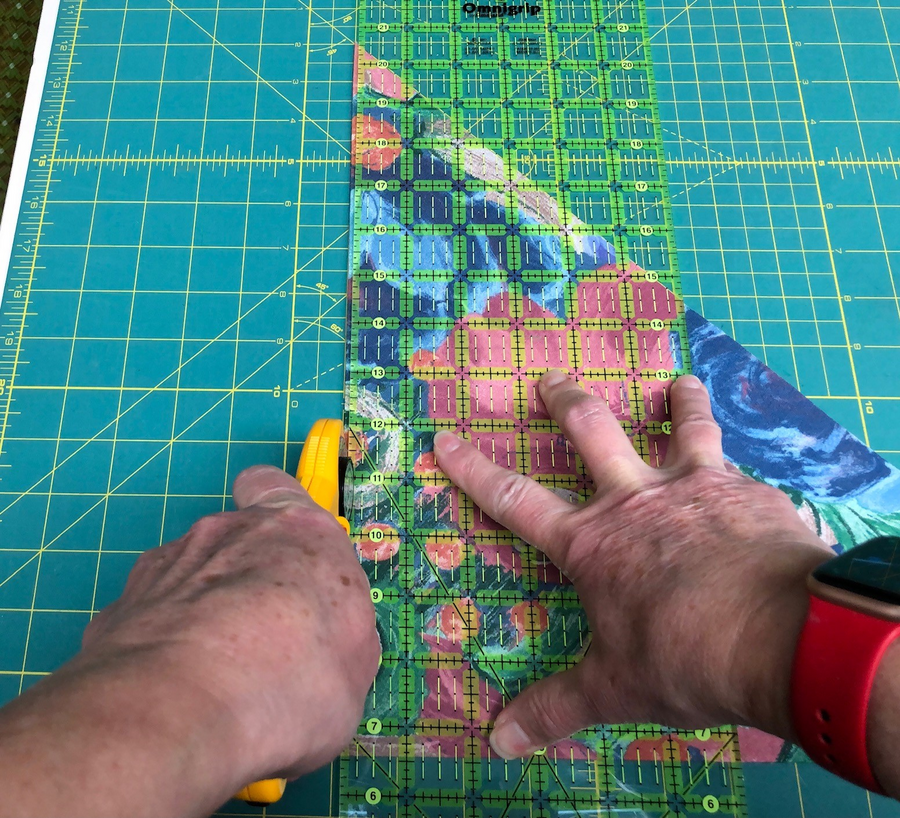
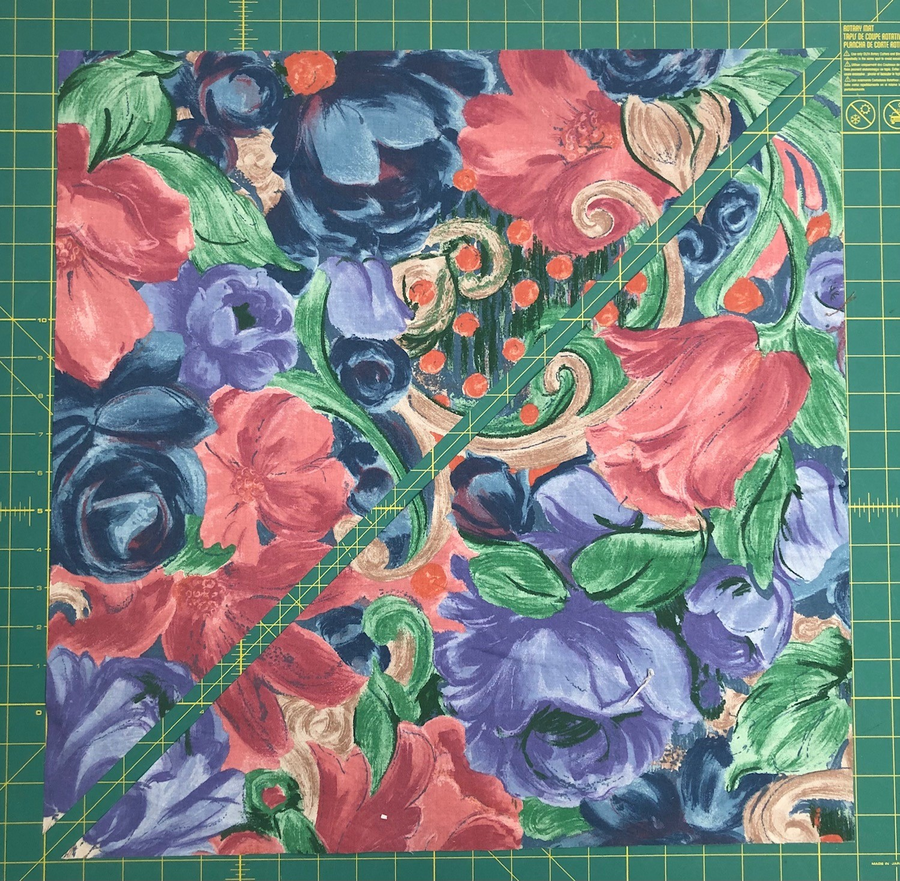
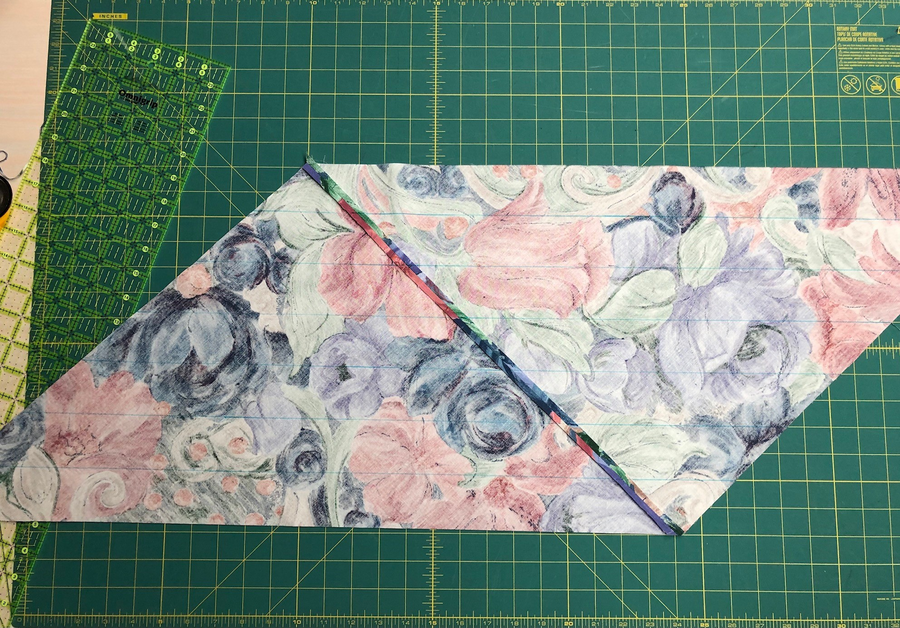
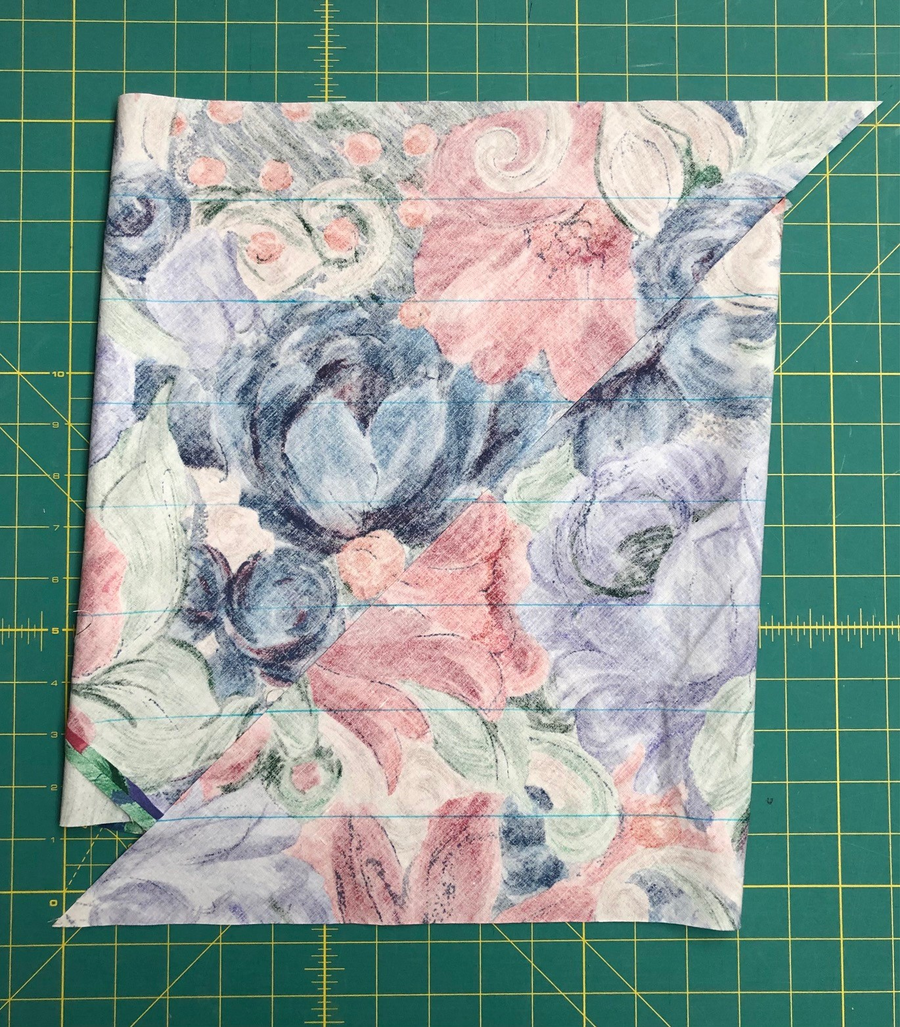
To quickly cut bias strips that you’ll then join with ¼-inch seams, start with a fabric square as shown above. Then fold the square in half diagonally and press.
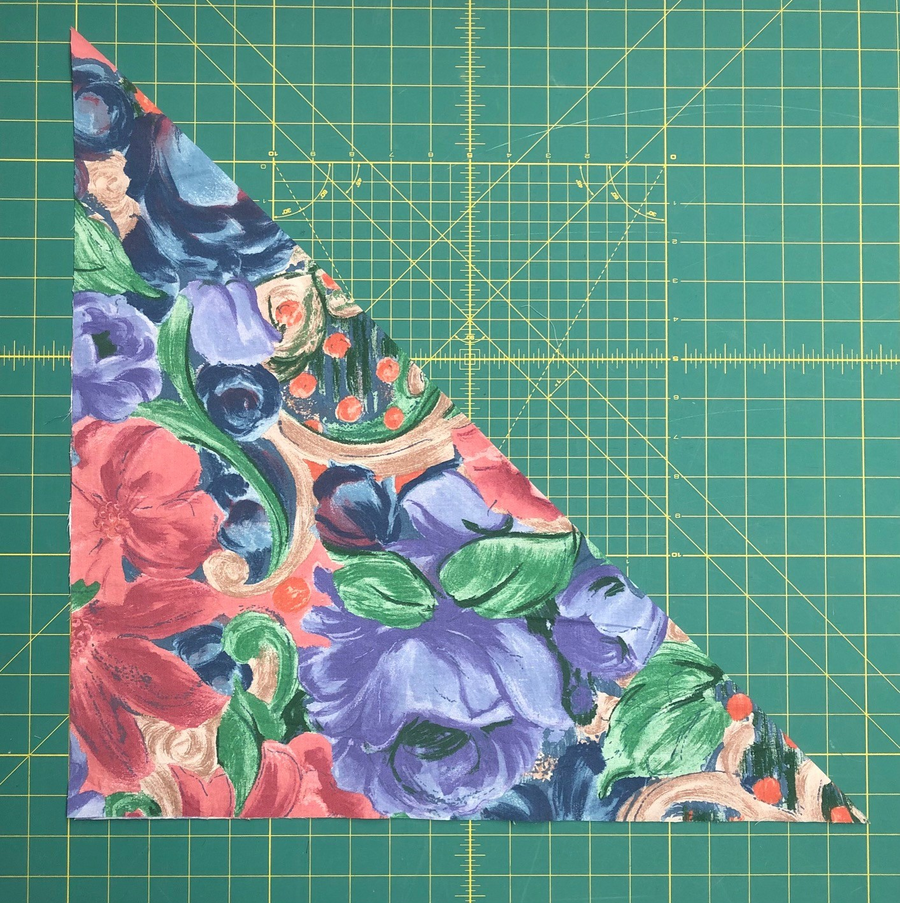
Fold in half diagonally again and press once more.
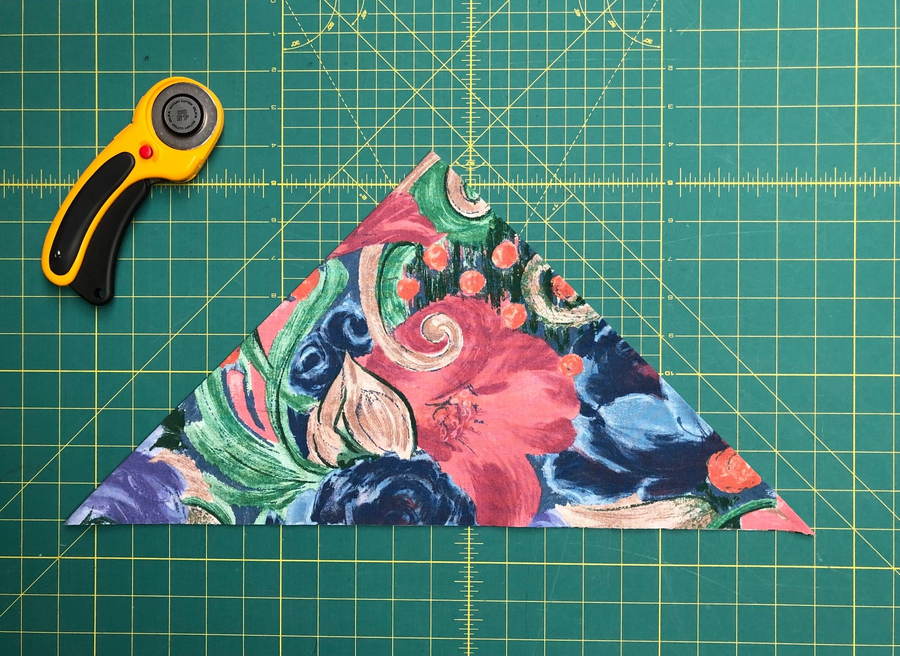
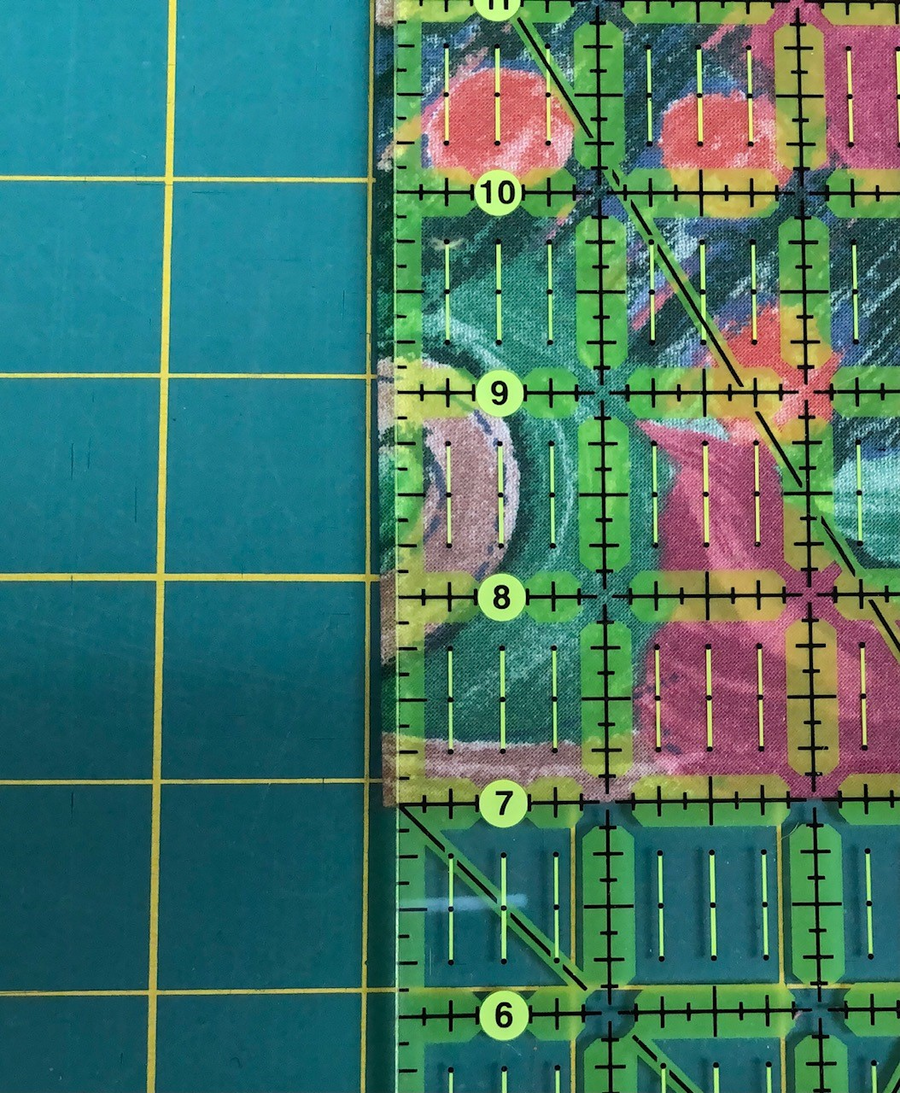
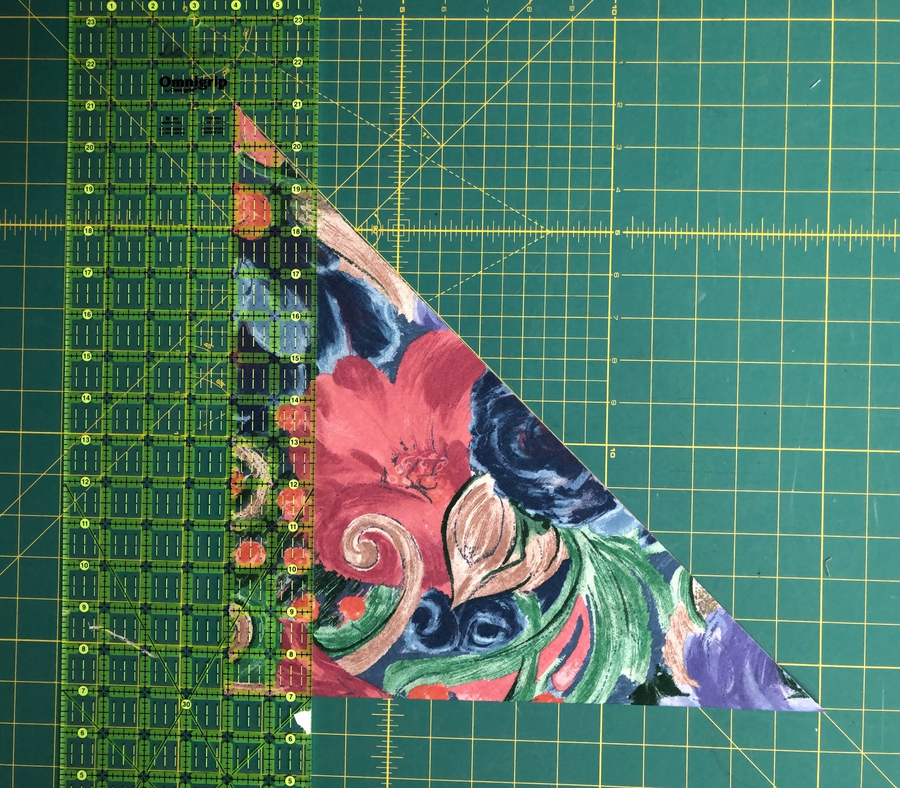
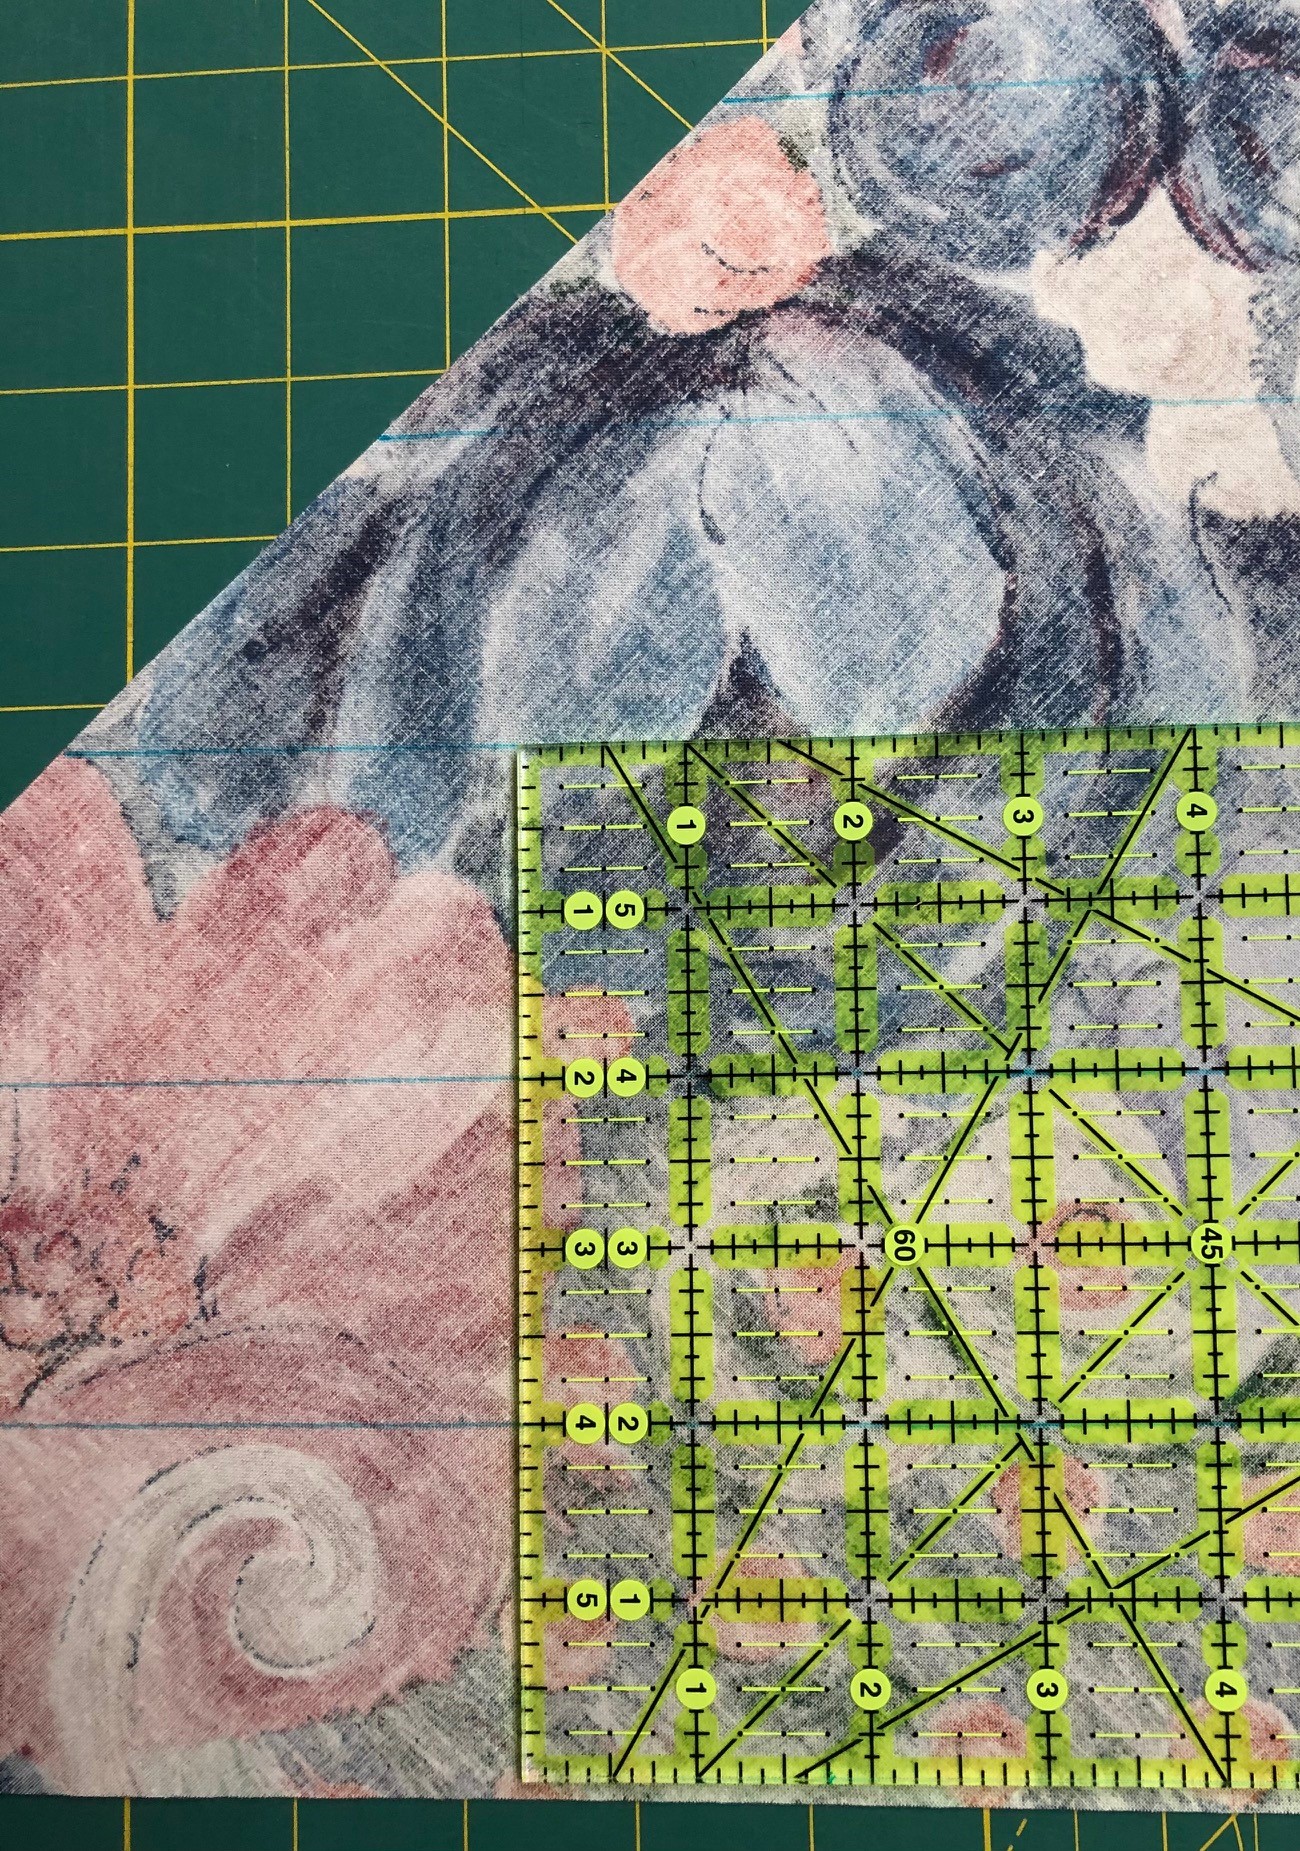
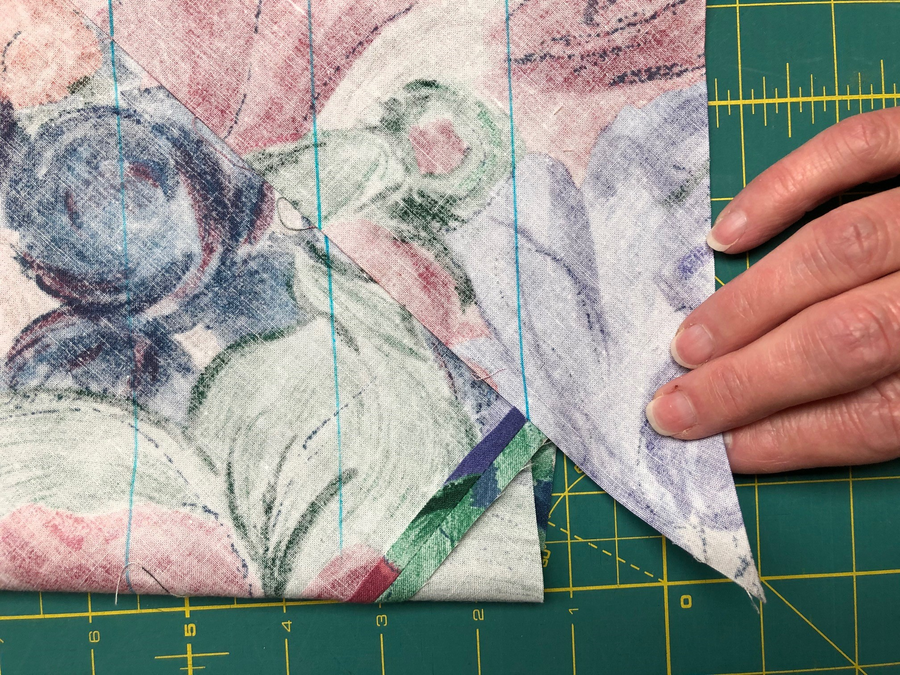
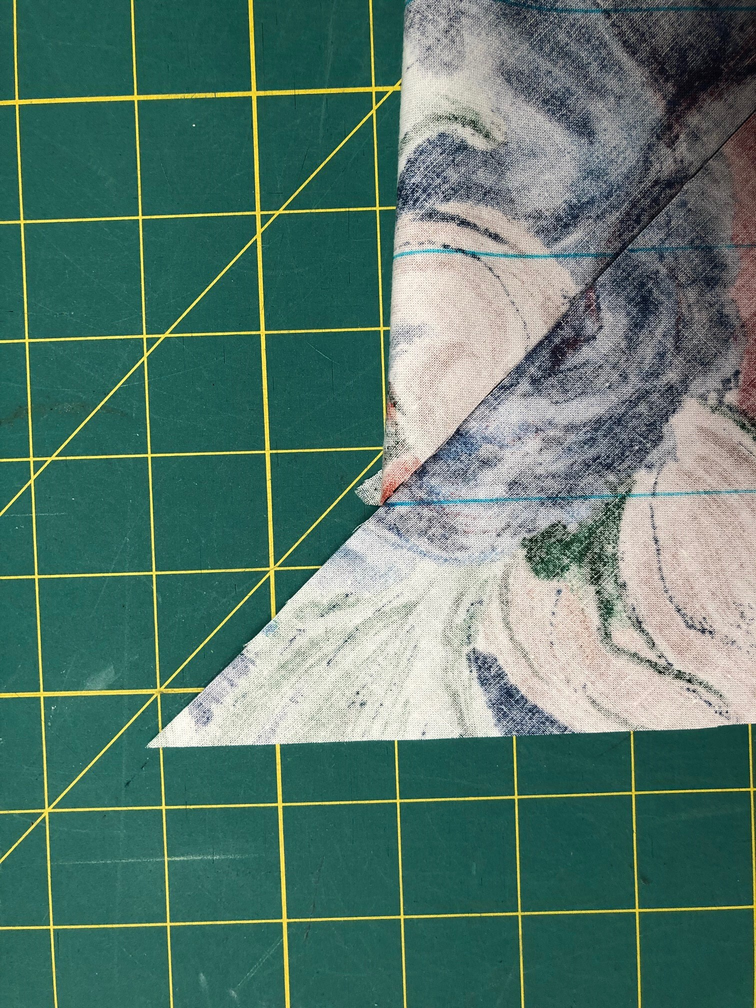
You’ll have a single visible fold on one side of the triangle, raw edges on the second side, and a double fold on the third side. Position the triangle so that you can trim off the double fold, just inside the edges. Align your cutting ruler with a horizontal line along the single fold side before you cut to ensure that your cut is at a 90-degree angle to that fold. Trim off the double fold edge.
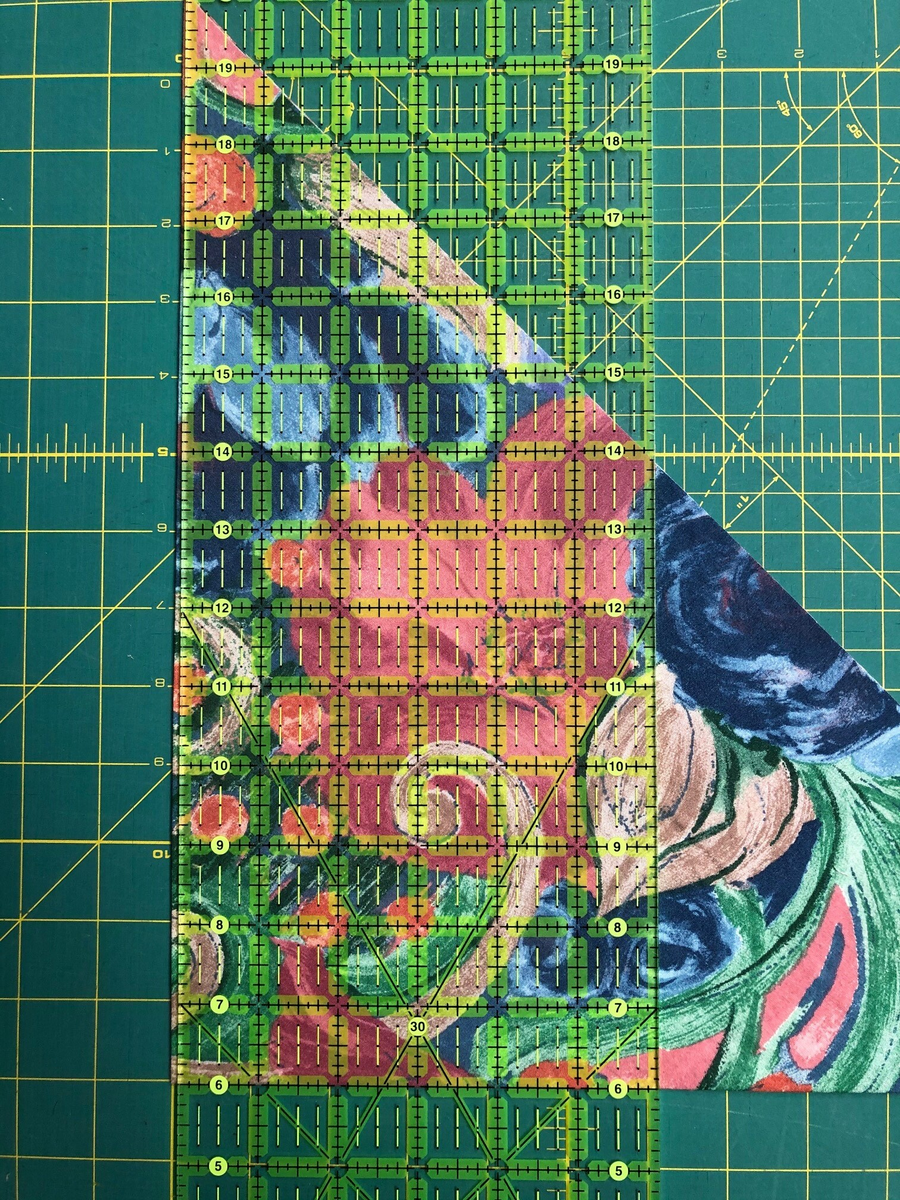
Now slide the ruler over and cut strips to the “cut width” of bias strip you want (not the “finished” width of the strip.) Continue cutting to the desired strip width across the triangle.
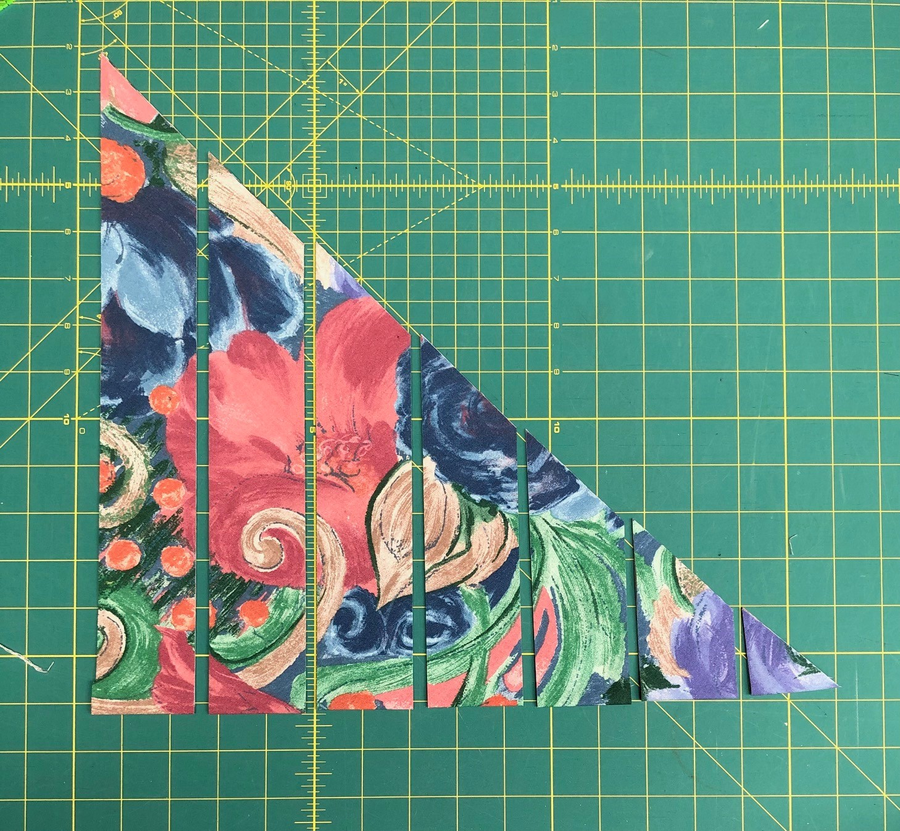
When finished, join strips with a 45-degree seam allowance just as you would for straight or cross-grain binding. Press the seams open.
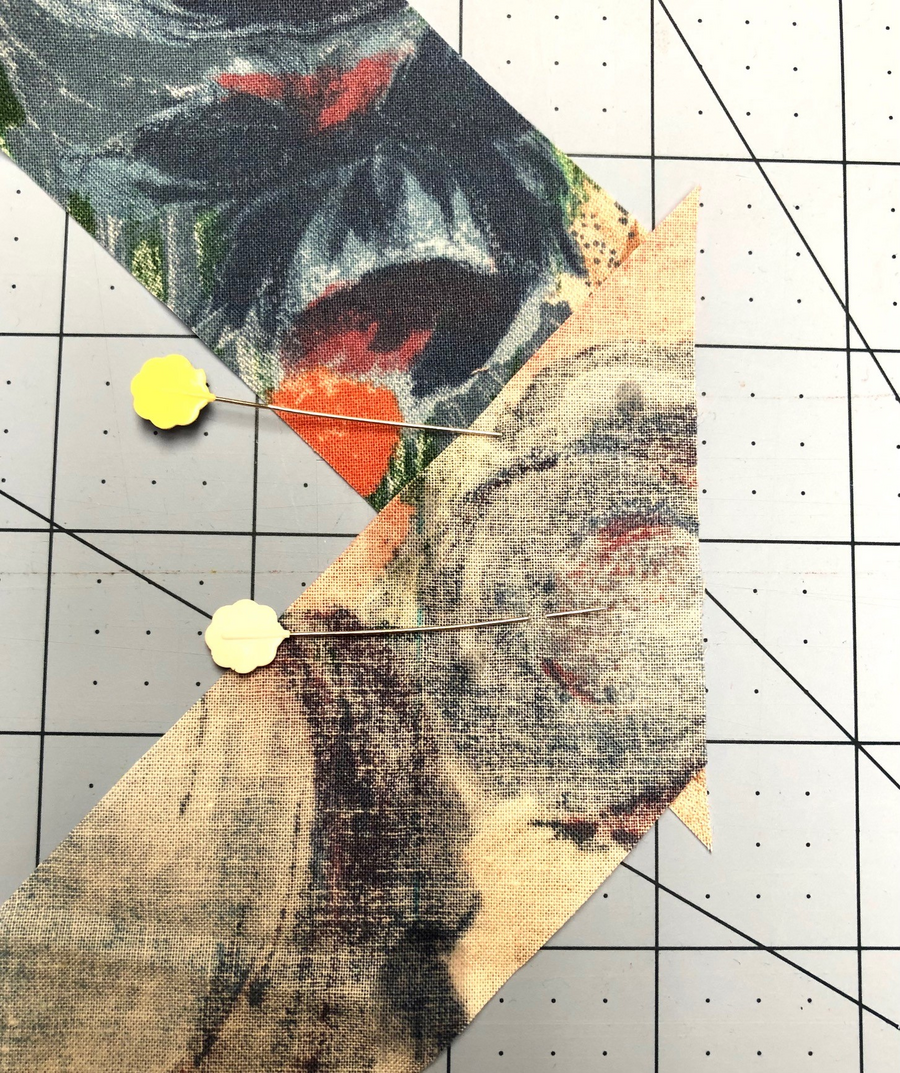
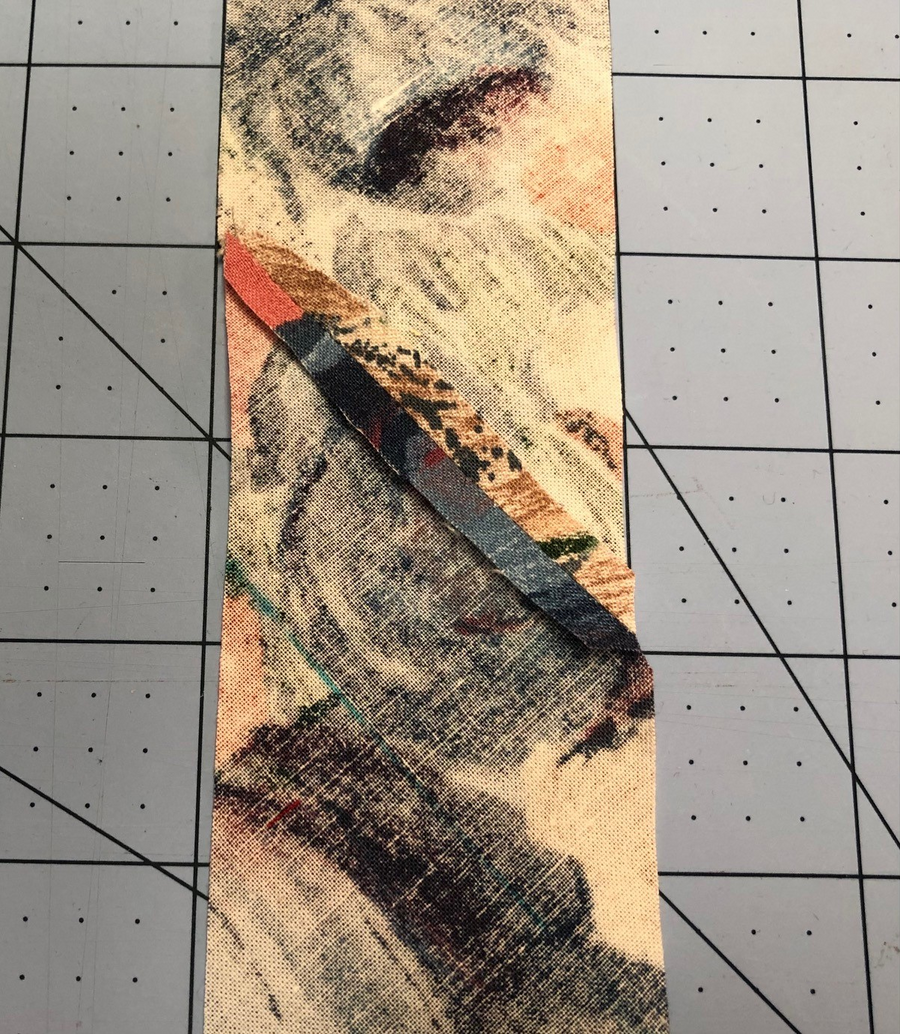
Fold the strip in half lengthwise with wrong sides together and then press, taking care to lift and place the iron (don’t slide it) to avoid stretching the binding.
Method 2: Cut continuous bias binding from a tube
With this method only two seams are necessary, but you’ll spend some time marking cutting lines on your fabric.
Determine the size of square needed for your bias binding length using our downloadable Bias Binding Chart.
Fold the square in half diagonally; press the fold, and then cut right on the fold to form two triangles.
Place the two triangles with right sides together, then rotate one triangle so that its short side aligns with the short side of the other triangle as shown below.
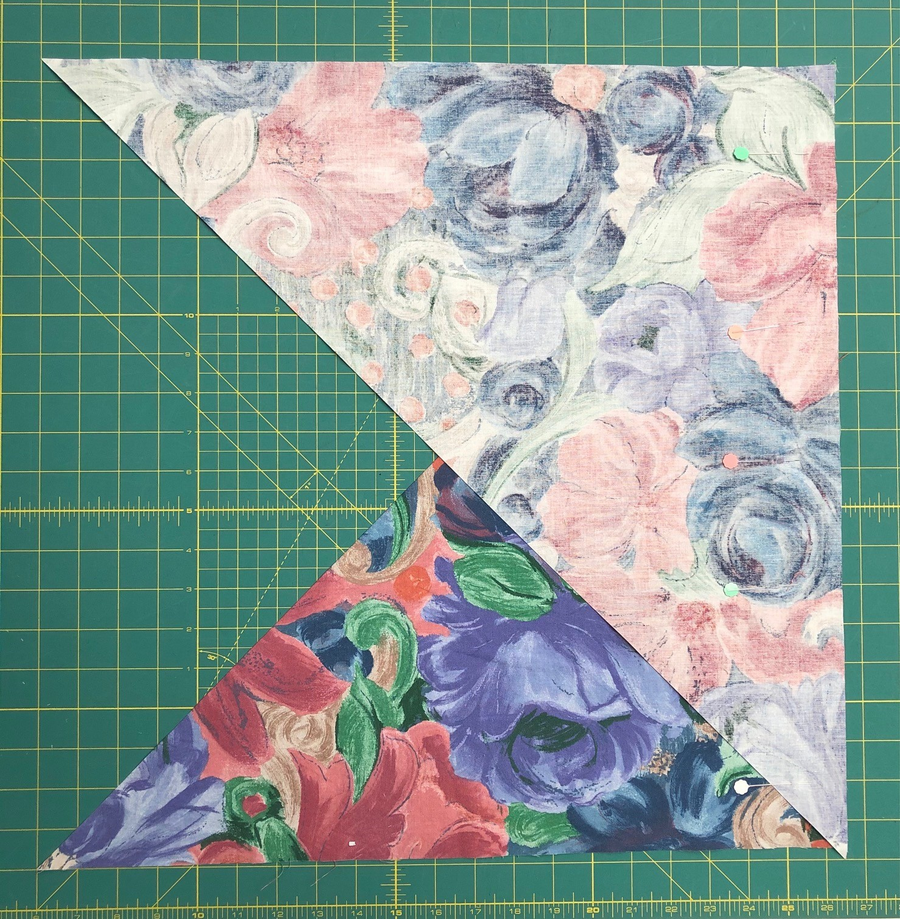
Be sure to scoot the top triangle over slightly so that its tip extends past the bottom triangle ¼”, and the bottom triangle’s tip extends past the top triangle that same distance. This will ensure that the two pieces align when you sew them together.
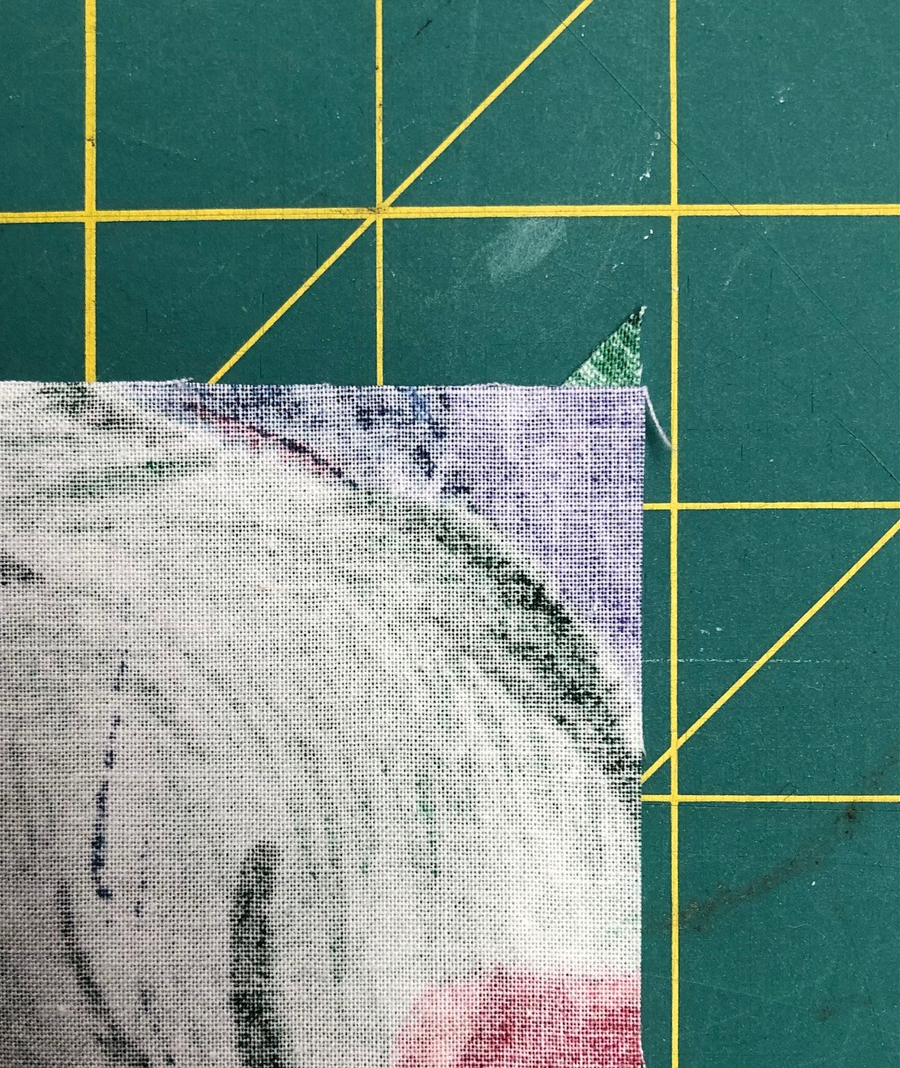
Sew the triangles together with a scant ¼” seam allowance. Press the seam open. You’ve got a parallelogram! On the wrong side of the fabric, mark a line parallel to one bias edge of your parallelogram that equals the cut width of your desired bias strip width. Continue marking lines across the piece at that same interval until you reach the opposite edge.
The last mark on the parallelogram may not be the correct distance from the edge. Trim the fabric edge so that you end with a marked strip that is the correct width.
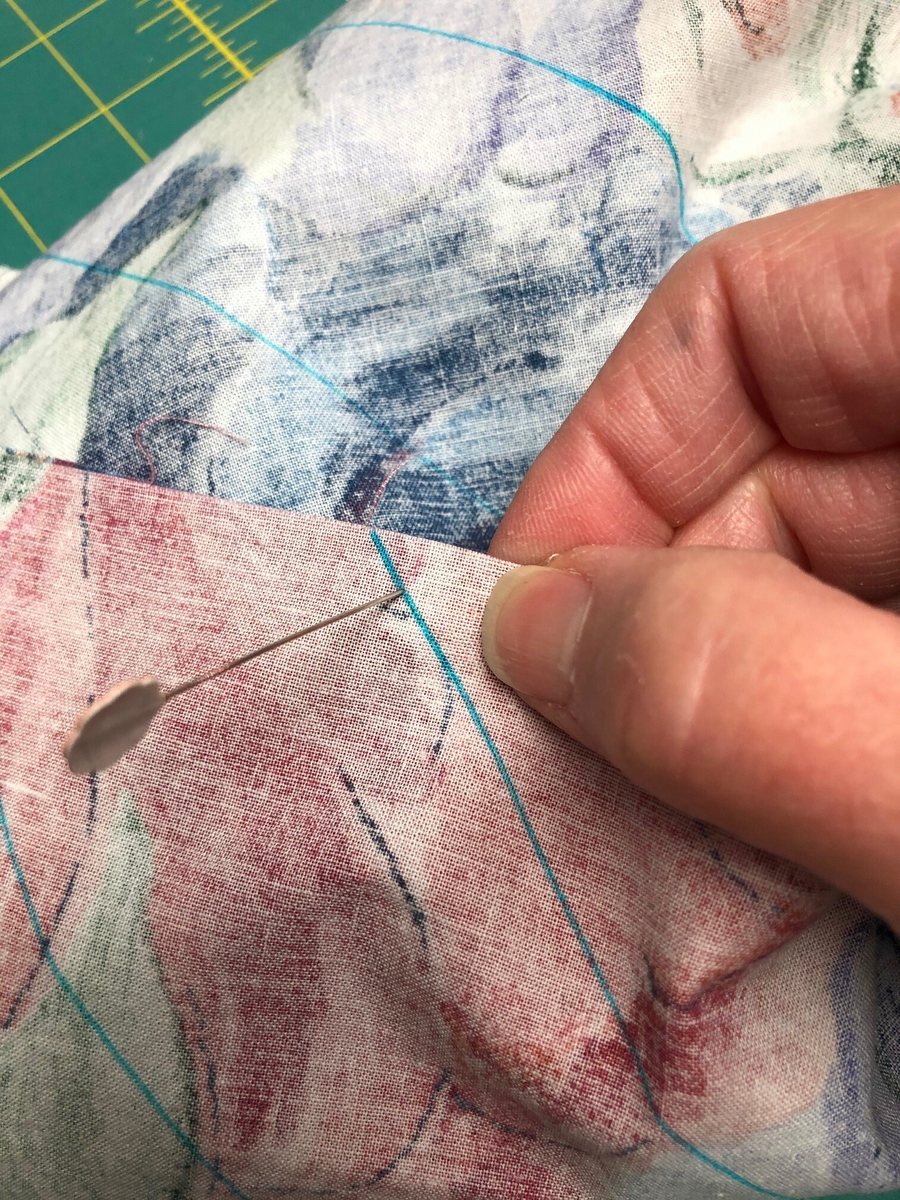
Now for the magic part! Flip the piece over so the right side faces up. Bring the two shorter edges of the parallelogram together and align the raw edges next to each other. Now scoot the two edges so that the first line on one side aligns with the raw edge of the other side. This will feel awkward and skewed—don’t worry, it’s supposed to feel that way!
When you’re sure everything’s aligned correctly, pin the sides together. Insert a pin ¼” away from the raw edge of the fabric, piercing the drawn line. The pin should pierce the drawn line on the other piece of fabric, while also keeping a ¼” distance from the fabric’s raw edge.
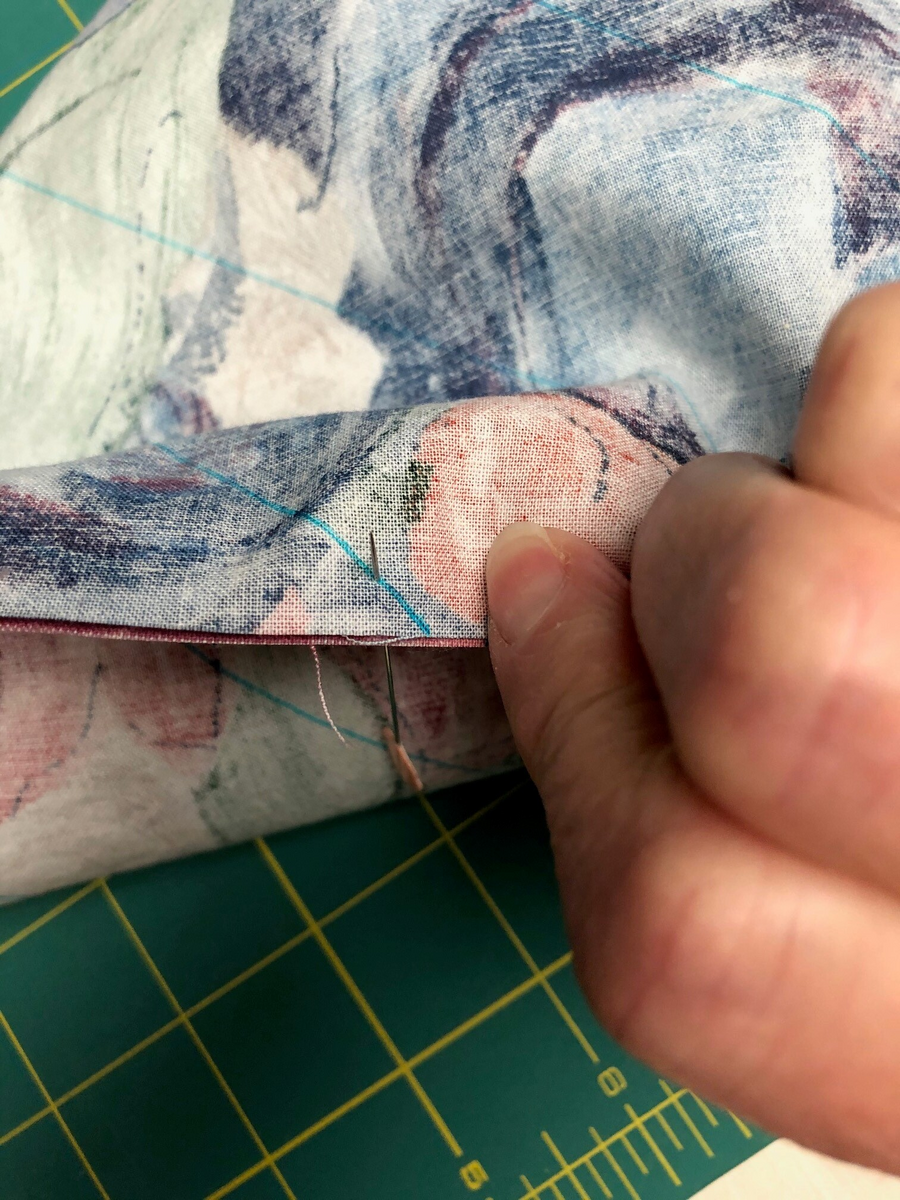
Sew with a scant ¼” seam. Before you cut the tube apart, check that your lines form a continuous path around the tube. You may need to flip the seam to one side and then the other to double-check.
Rip it out and do it again if the lines don’t match up. Press that seam open.
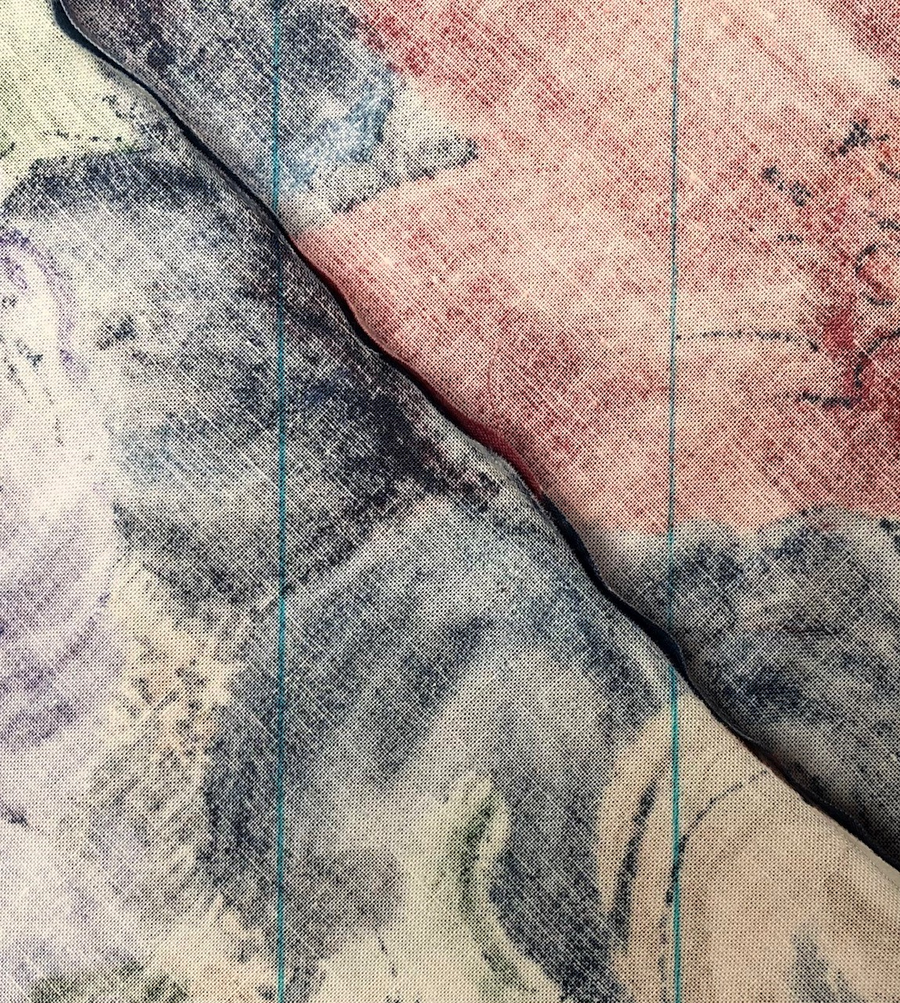
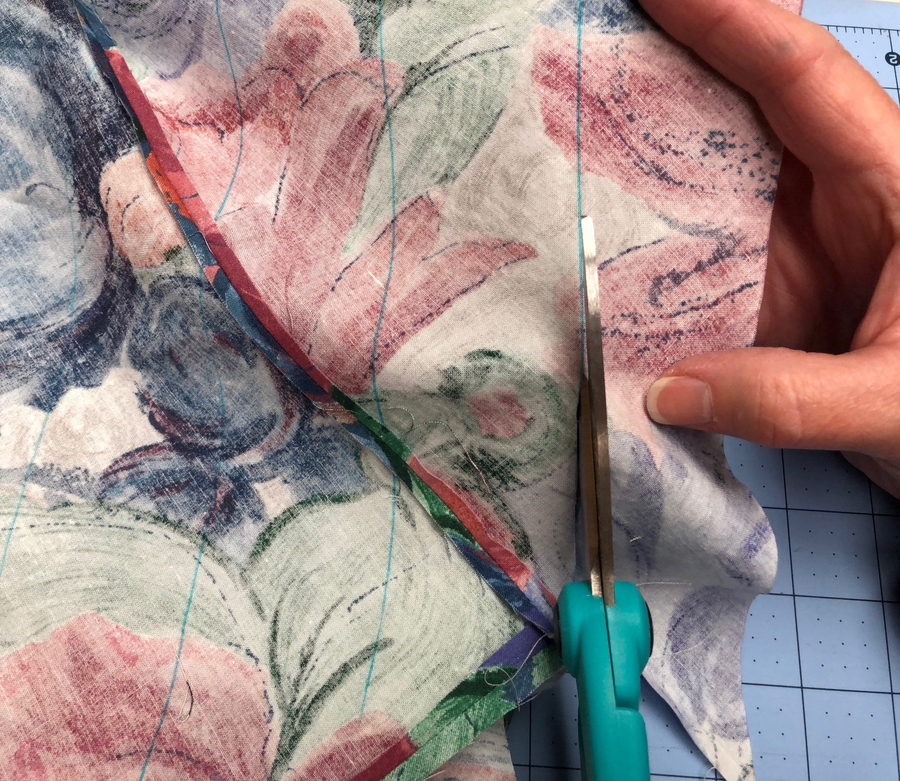
Now simply cut on the drawn line, starting at one of the uneven ends. You can do this with scissors, or you can try a rotary cutter (be careful to keep the bottom layer out of the way.)
For the rotary cutter option, if your tube is large enough, set a small cutting mat on your ironing board, then slide the fabric tube onto the ironing board’s end. Use your cutter and ruler to cut on the lines, rotating the tube around the end of your ironing board as you go.
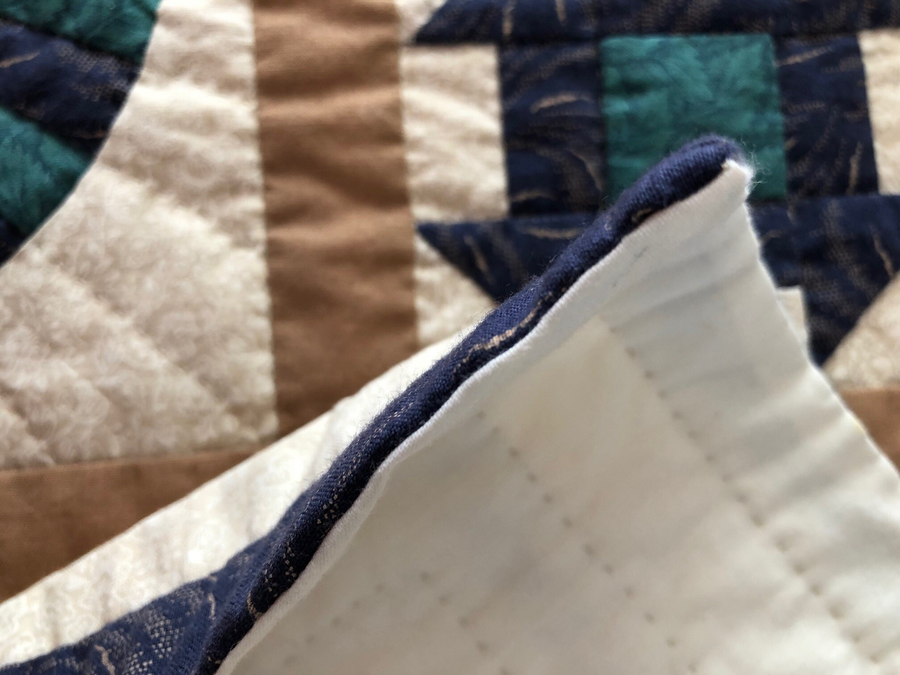
No matter which method you use to make your bias binding, remember to handle it gently, even as you attach it to the quilt, to avoid stretching and distortion. The next time your quilt throws you a curve, bias binding can help you hit a home run!


