Rule your Quilt: Branching off from traditional crosshatching
Download a PDF of this article
Crosshatching is a traditional design found in the earliest hand quilted masterpieces of yesteryear. If you think crosshatching is limited to a straight grid or a diagonal grid then you will love the variety of designs we will cover in this article!
Don’t miss some of the other variations that can be stitched from a basic crosshatch that you’ll find in the free downloadable student packet below.
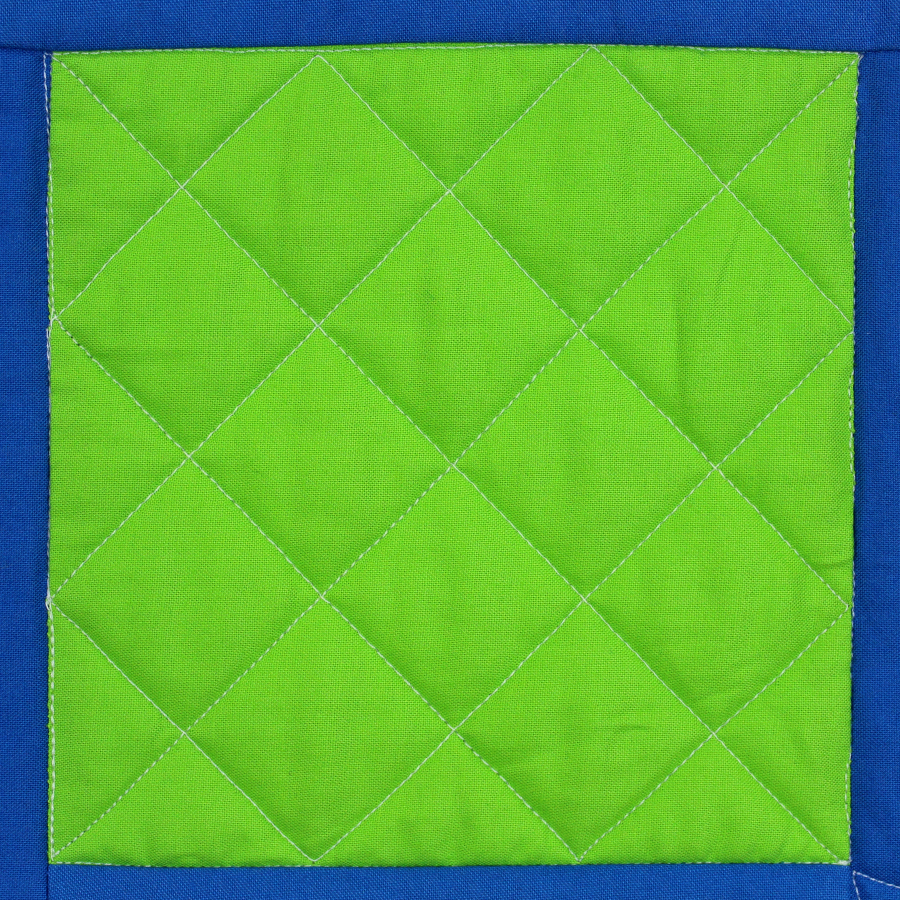
I’ve chosen to use a one-inch grid on all of the designs discussed in this article. It isn’t necessary to mark the entire one-inch grid. Instead, mark small hatch lines along the outside edge of your desired space every inch. You’ll use these to align your ruler when stitching.
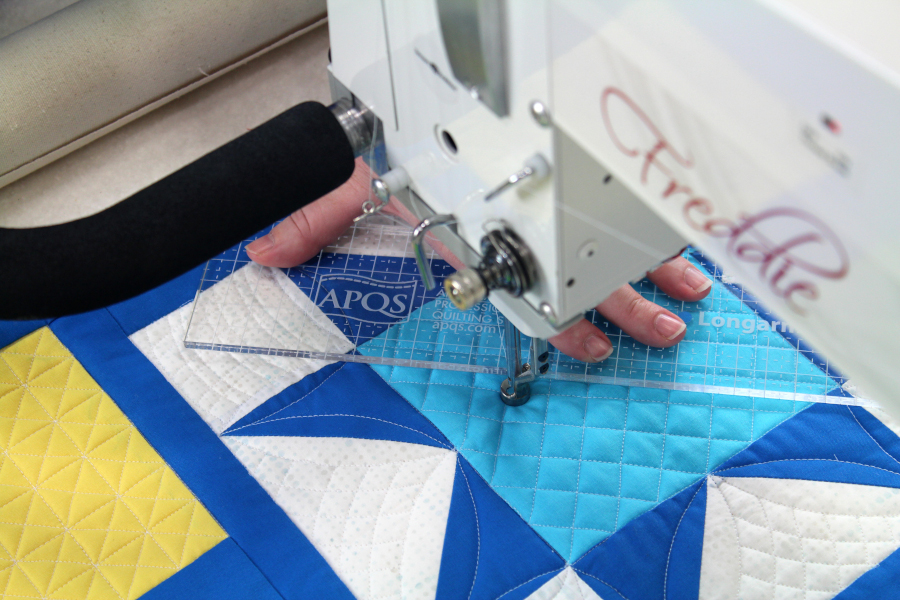
If you are using a longarm machine you’ll hold the ruler with your non-dominant hand using gentle downward pressure as you use your dominant hand to guide the machine. If you are using a sit-down domestic machine you’ll move the ruler and the quilt sandwich in unison under your needle as you guide it against your machine’s special ruler foot.
REMEMBER: You must have a ruler made for machine quilting as they are tall enough that they won’t slip under the needle while it is running. Always use a ruler foot on your machine when working with rulers. Longarm machines also need a ruler base installed. Lower the feed dogs for free-motion stitching if you are using a domestic sewing machine.
TIP: Stitch in the ditch first to stabilize the space before stitching your motifs in order to keep things stable and square
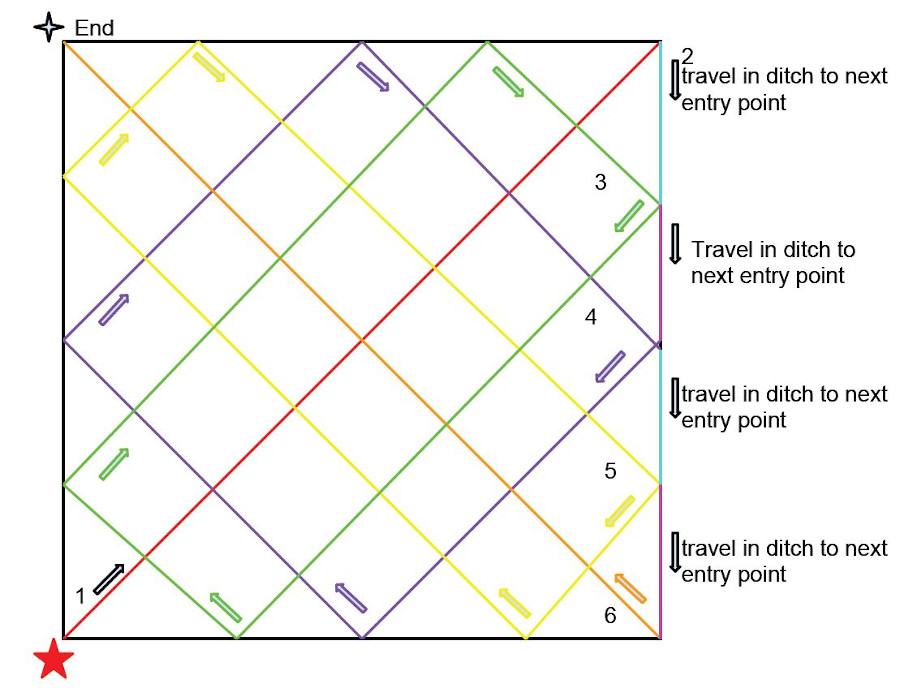
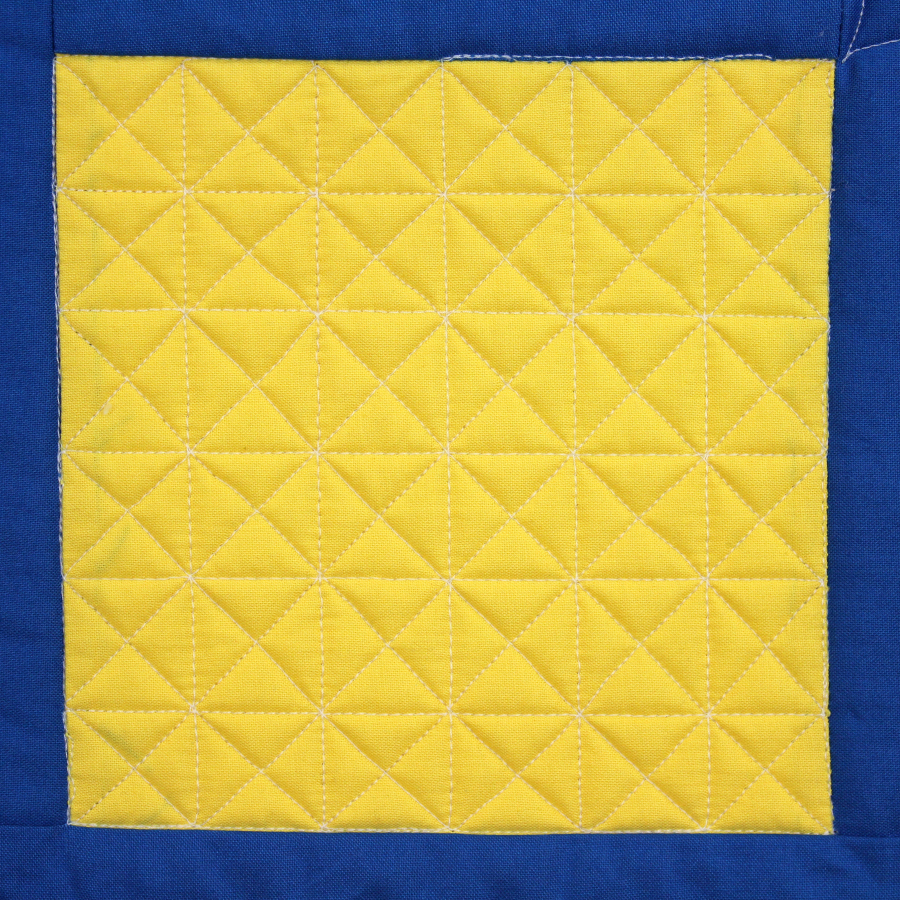
Diagonal Crosshatch
To stitch this traditional design continuously, you’ll notice that you are stitching boxes upon boxes upon boxes. Start in the bottom corner and stitch to the opposite corner. You will use the seam’s ditch to sneak to the next entry point as shown. If you are placing this design behind appliqué you’d likely tack your stitches and drag your threads out across the appliqué before restarting the line on the opposite side of the appliqué. Depending on the size of the block you are working with, you may need to grab a longer ruler than you anticipate, as you will need one that can span the diagonal distance without needing to reposition the ruler.
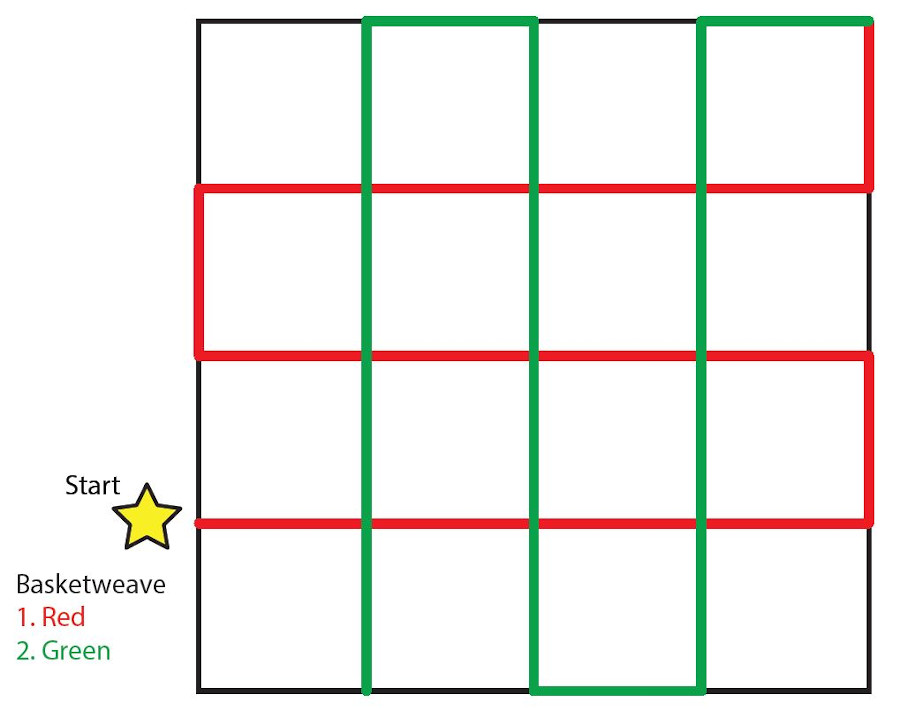
Combo Crosshatch
This one reminds me a bit of a 1950’s diner booth! I like to start by stitching the horizontal grid first followed by the diagonal crosshatch path from above.
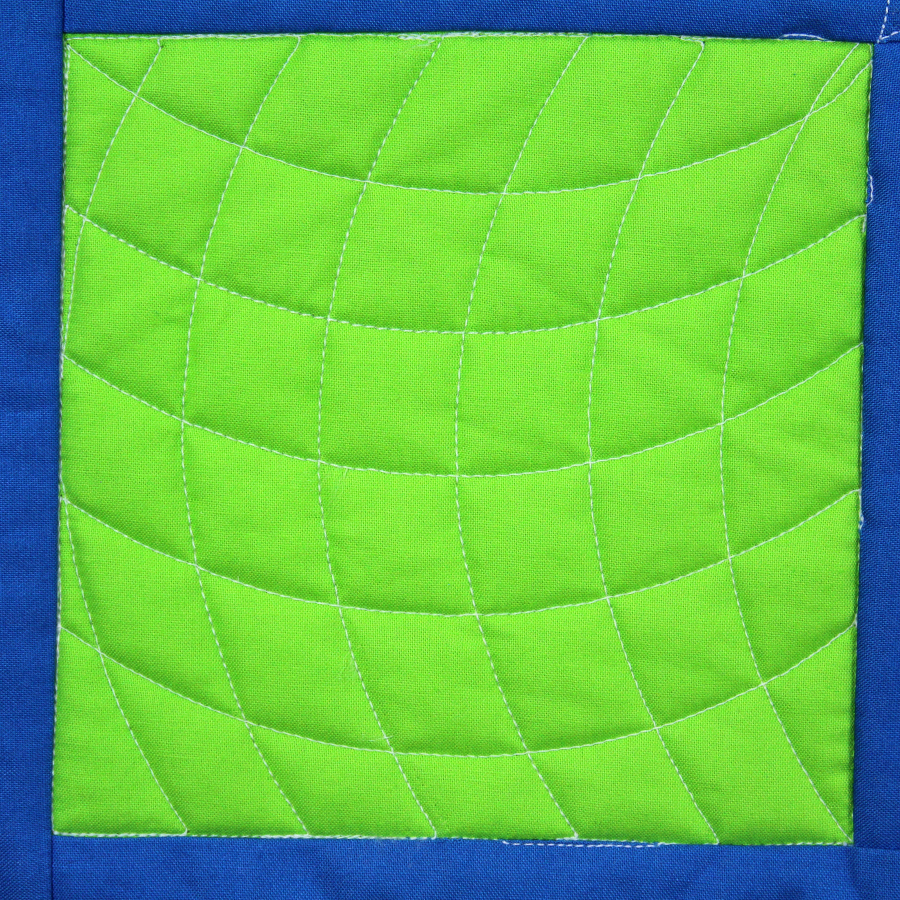
Curved Crosshatch
This design uses a curved or arched ruler on a horizontal grid. When the arch you are working with hits a seam, just travel down the seam to complete each arch. The design diagram is in your free student bundle, too.
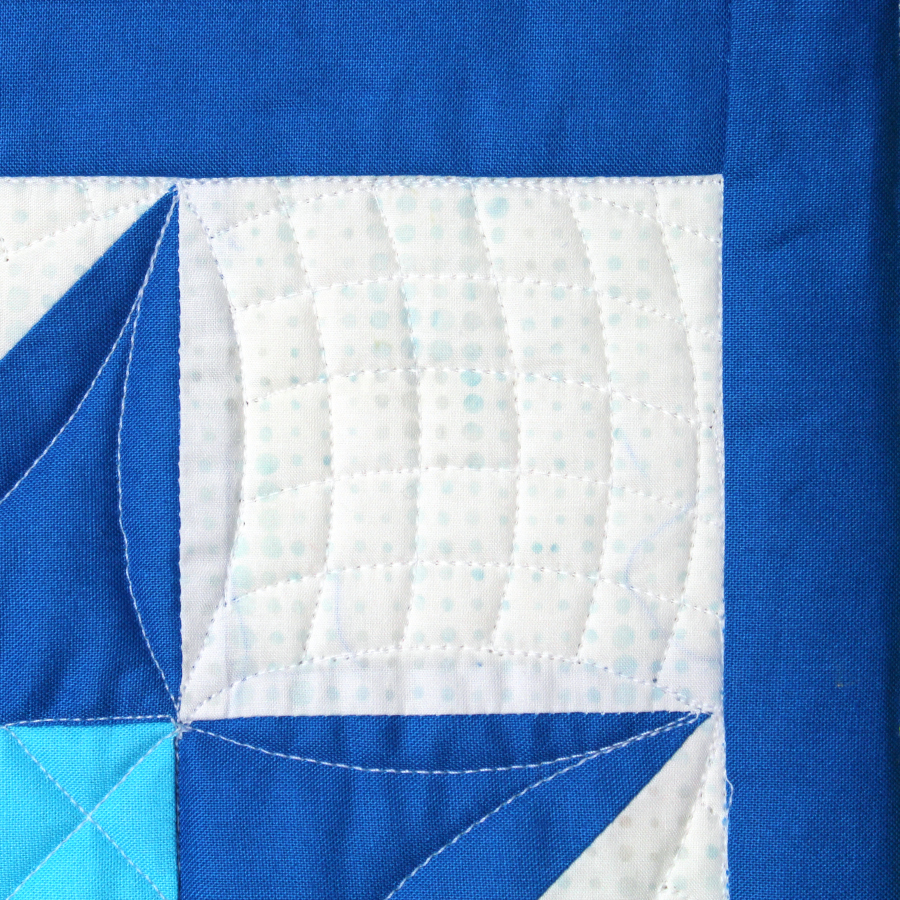
Curved Crosshatch with a Gutter
This is my favorite way to use curved crosshatching. You begin by making the first two arches on two sides of your square.
Then, your remaining arches will stop when they meet up with those original stitching lines, leaving a gutter of negative space between the curved crosshatching and the seam.
Student bundle
I have other designs I think you’ll enjoy which include double and triple crosshatching along with more curved crosshatching. You’ll find worksheets and diagrams in your free downloadable student bundle.