
Quilting the Quilt: Positive outcomes with negative space
A quilt top carries charm and personality and can make us “ooh and ah” over everything from color placement to piecing accuracy, technical difficulty, and overall design. Yet even the most astonishing quilt top can seem lackluster without the element of quilting, which adds texture, depth and detail. Seeing an unquilted top is like watching a standard 2-D movie, but when it’s quilted it’s like putting on 3-D glasses as it springs to life!
All quilting adds some texture to quilts. You can control the overall effect by using flatter or thicker batting, thinner or thicker thread, and contrasting or blending thread color. These elements are great tools when you want to create depth of field that causes part of the quilt design to recede into the background while other areas appear to jump to the foreground.
Background quilting is another technique that can help with that illusion. Heavy quilting in one area will push that section into the background while the unquilted areas will appear more dominant. When you combine background quilting techniques with thicker batting and contrasting thread your design will jump out and grab you! If you need more subtlety, switch to thinner thread in a blending color to quilt background designs. Or you can straddle the fence between bold and bashful by using lofty batting and a blending background thread color, but by also quilting the main design in a contrasting thread color.
Sometimes it’s hard to decide which areas of a design should be dominant and which should be relegated to the background. Fabric color and placement can give obvious clues when it comes to the patchwork pieces. But when you look at an actual quilting design and try to determine which areas represent positive and negative space, the choice isn’t so clear.
Before you start stitching, make a couple of paper copies of your quilting design and use them to test your ideas first. No quilter wants to rip out tiny background stitches! Color in the areas you intend to fill with background quilting. Then look at the design carefully to make sure that the areas you want to highlight are still the focal point. This photo shows a block design with no background quilting.
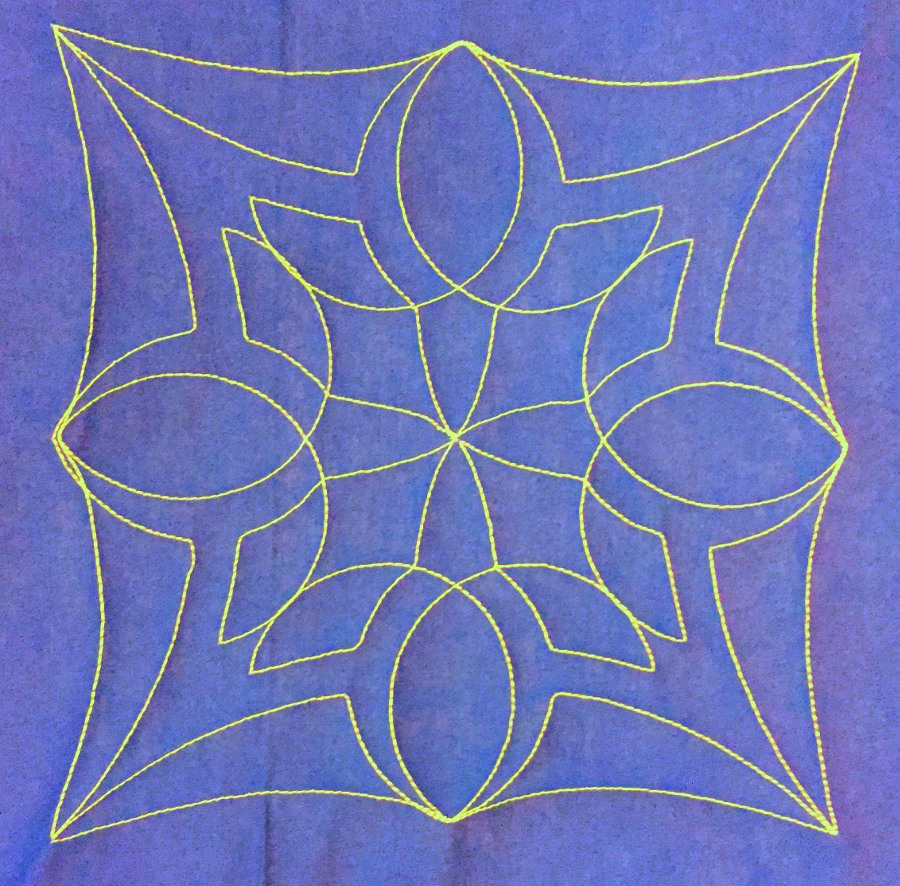
Compare that to the next two images, where different areas of that same block were quilted with micro stippling. The two blocks are dramatically different!
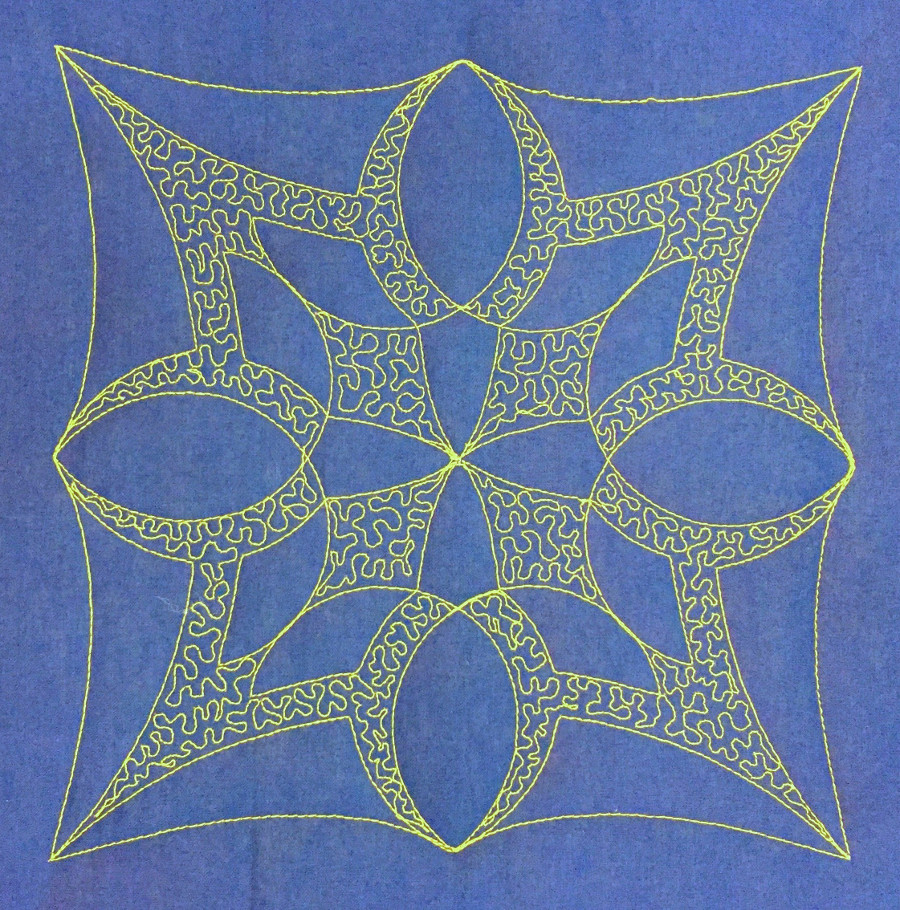
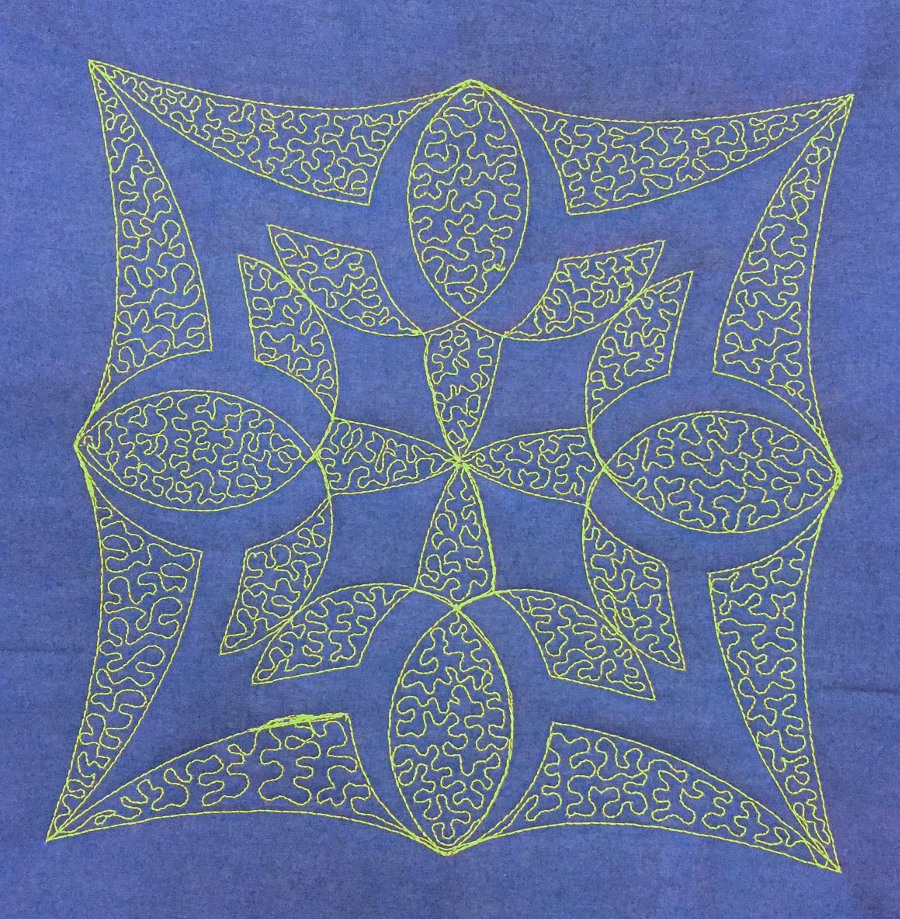
In these examples the block design had balanced interior spaces that could be quilted to set off the block while still retaining the block’s form. However, sometimes you’ll also need to add quilting around the outer edge of a design to balance out density on the inside. In the photo below, a narrow band of stipple quilting around the feather perimeter ensures that the individual feather plumes don’t get lost and helps maintain the block’s design equilibrium, balancing out the dense grid in the center.
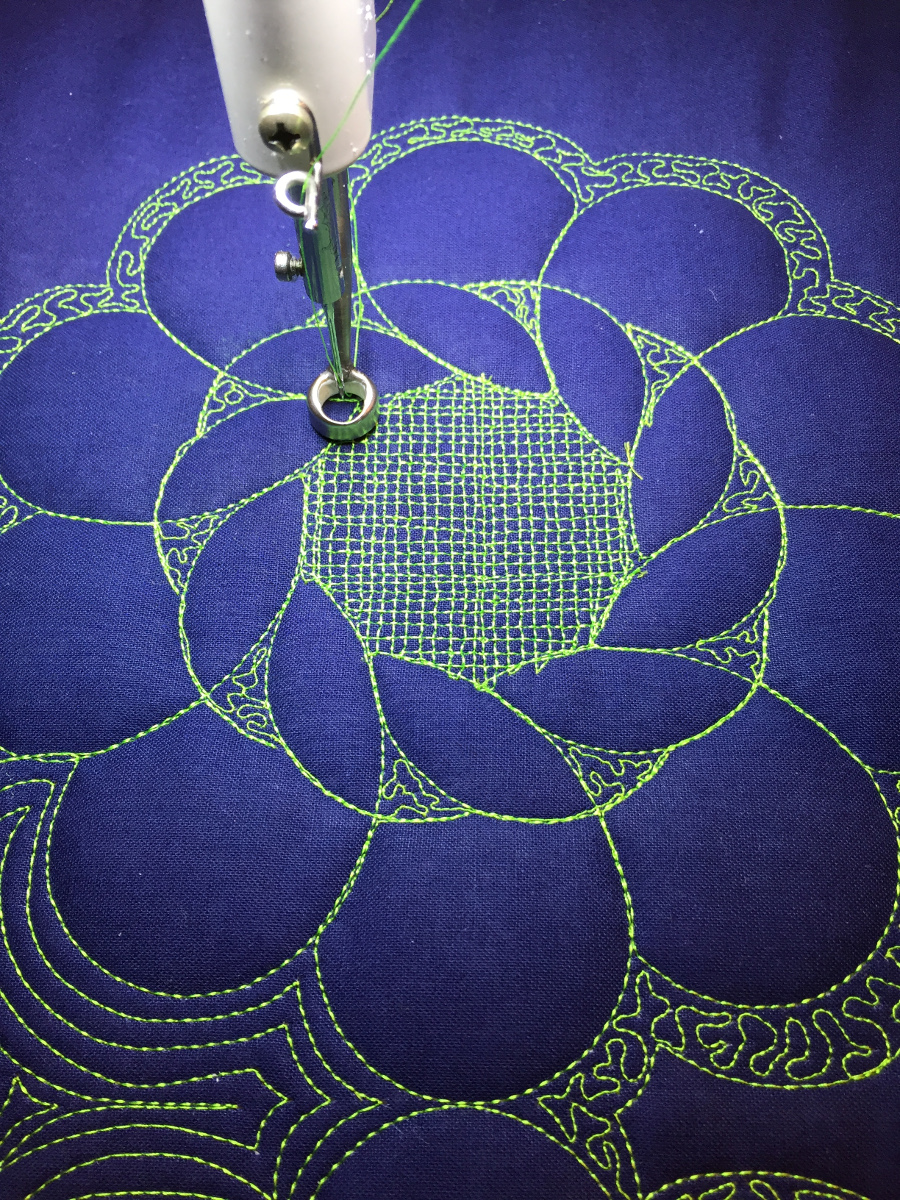
Micro stippling is just one design option for background quilting. Small circles, straight lines, or even tiny swirls are possibilities for filling negative space. If you’re using a longarm machine to do the quilting, accessories like the Microdrive Handles shown in the photo below can make the task much easier. Moving your hands closer to the needle increases your control of the machine and allows you to do very precise quilting, much like holding a pencil near the tip to draw instead of near the eraser gives you more control as you write.

As you plan your next quilting project, take a few minutes to experiment with the negative space you see in the fabric or in your quilting design. Fabulous secondary designs can appear simply by filling in space strategically. Mix in a little contrasting thread and batting with a little loft and you’ve got the makings for a fantastic eye-popping quilt!


