Keeping your leaders in line: the quilter’s guide to straight leaders
Quilting is an art that blends creativity and precision, and it hinges on the fundamental aspect of aligned leaders. From preserving straight edges to handling replacements, this guide provides essential insights into ensuring your quilting setup remains poised and precise.
We hope this will help you maintain your quilting leaders with precision, handling canvas replacements when necessary.
Mastering straight leaders
Maintaining parallel edges
The sides of your leaders may not roll directly on top of each other. However, the crucial part of keeping your leaders straight is ensuring the long straight edge remains perfectly parallel to your roller. This parallel alignment is key for maintaining precision in your quilting process.
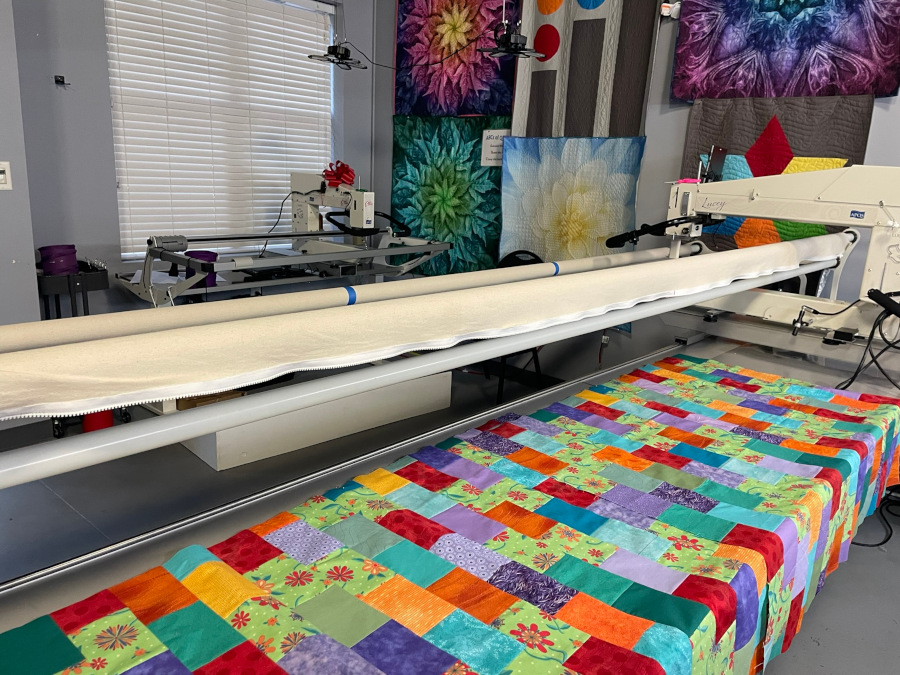
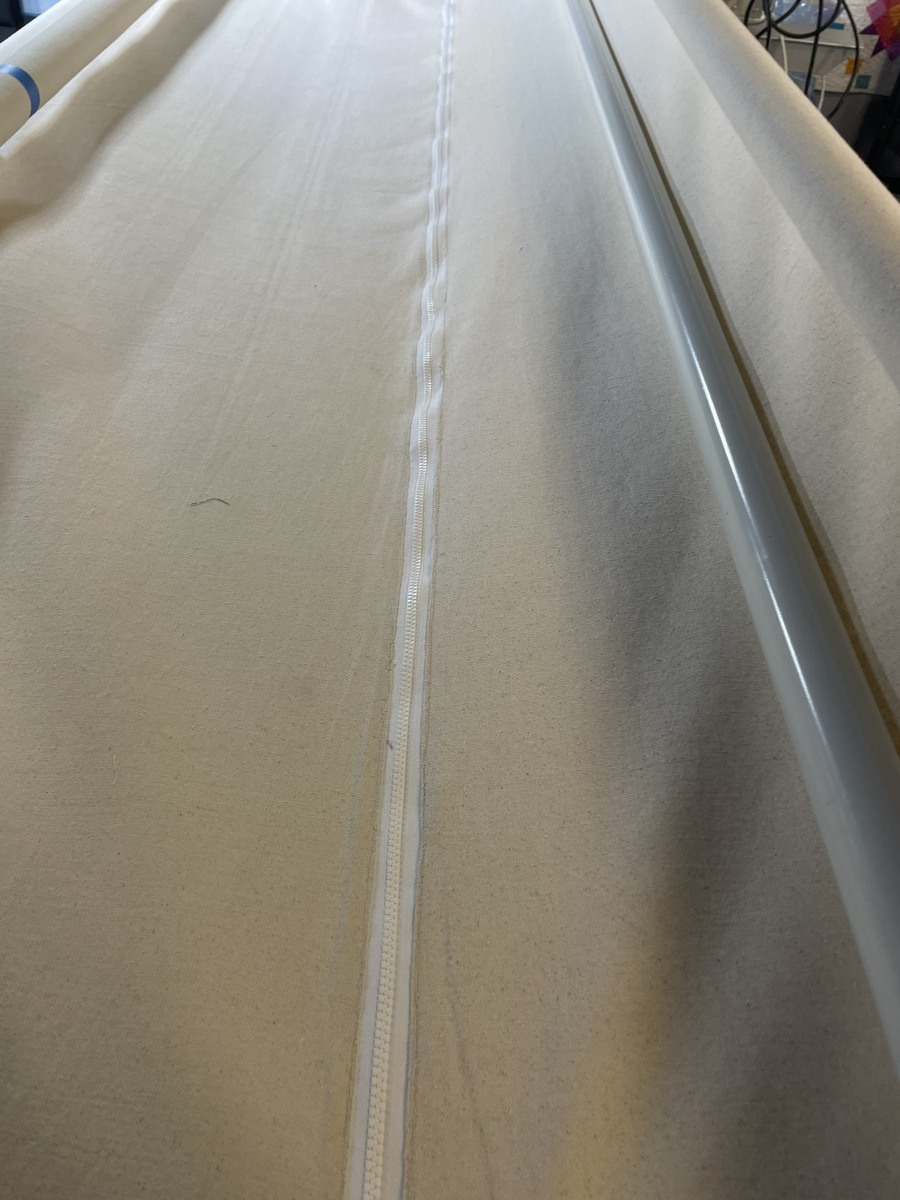
The picture below shows the bow that is formed in your leaders over time. This bow was addressed by simply zipping the quilt back leader and the take-up leader together and rolling them back and forth onto the two rollers under tension.
Understanding tension impact
Quilting involves tension on leaders, causing the canvas to stretch over time. This leads to distortion. To prevent this, ensure roller bars are tightly secured to maintain centered leaders.
Aligning and rolling
Pin the take-up and top leaders together, matching their centers. Unroll and roll them back and forth to reveal any warping or distortion. Stitch straight lines across each leader to establish new straight edges.
Marking centers
Mark the centers on the quilt top and backing rollers after they’re installed. Ensure the canvas is smooth and aligned before marking the centers with a fabric marker. Periodically check and readjust if necessary.
Pressing and re-hemming
Use a hot steam iron to create crisp, straight edges along the stitched lines. Stitch new hems about an inch away from these pressed edges, maintaining neatness.
Seamlessly attaching quilt accessories
While using a hot steam iron to ensure those crisp, straight edges along stitched lines, don’t forget the importance of maintaining neatness in your quilting world.
Stitching new hems approximately an inch away from these pressed edges is a game-changer, especially when working with quick-loading dowel-based systems, enclosed magnet systems or zippers.
Sometimes, even after diligently following the aligning and rolling steps, leaders might develop a ripple or two. When this happens, consider creating a new casing or edge to attach these quilt accessories. This simple adjustment can smooth out any wrinkles or ripples that persist, ensuring your quilting tools seamlessly integrate with your leaders. It’s like giving your quilt setup a fresh outfit to keep up with the rhythm of your quilting routine!
Canvas care
Checking straightness
Before each quilt loading, verify that the selvage edge of each canvas appears straight and parallel to its roller. If not, gently adjust by unrolling and tugging on less-used portions. Or by pinning or zipping the two backing leaders together and using the rollers to help straighten them but rolling back and forth under tension.
Dealing with damage
In case of accidental cuts, iron-on patches used for children’s clothing to effectively patch the canvas area.
Canvas replacement (if necessary)
Your current canvas leaders are factory-attached using products like “Liquid Nails” to ensure centered alignment during the assembly process. Keep in mind that when you replace old canvases, it isn’t necessary to use this technique.
Removing old canvases
To begin, make note of the way each canvas wraps around its roller. Unroll the roller to reveal the attachment point and remove any adhesive tape present. Gently pull the canvas off the roller, scraping off residual Liquid Nails with a plastic scraper or putty knife.
Attaching new canvas
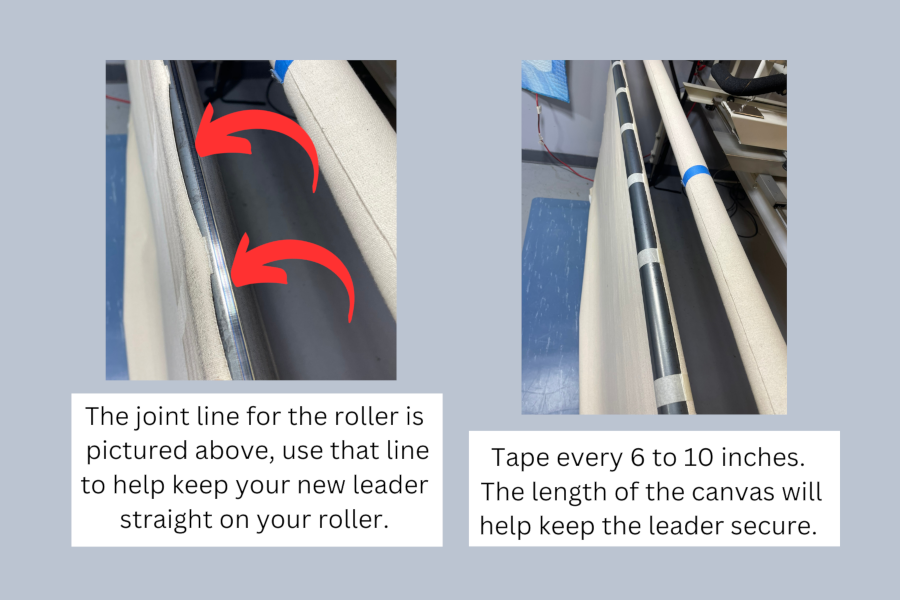
Observe the “seam” line along the roller or conduit tube where tubing was formed; this serves as a reference. Fold the new canvas in half to find its center and mark it temporarily.
Locate the center of the roller and mark it. Align one long selvage edge of the new canvas with the stamped “seam” line on the roller, securing it with tape along the way.
Ensure the canvas aligns properly for smooth unrolling. Tape along the canvas length, ensuring the selvage edge stays in line with the roller seam.
Repeat for remaining canvases
Apply the same method to attach the remaining canvases, ensuring they align and unroll properly.
Re-marking canvas centers
After attaching all canvases, re-mark their centers to aid in quilt loading. Use a water-soluble marker for temporary marks on each roller canvas.
Measure and mark the centers along the loose selvage edge of each canvas, ensuring alignment across all rollers.
Adjusting temporary marks
Periodically check these temporary marks as you load quilts. Should the canvases shift slightly, readjust the marks using the water-soluble pen until they stay consistently aligned.
Once satisfied with the accuracy of the marks through multiple quilt loadings, consider making them permanent using a fine point marker.
Realigning and marking the new canvases meticulously ensures your quilting setup stays precise and ready for seamless quilting adventures.
We hope you’ve found these tips helpful. If you have other questions, don’t hesitate to let us know!