How to photograph your quilts
Last week one of my kids was looking through the photos on my phone and said, “Momma, all of your pictures are either of us, quilts or cats!” I had to laugh because I am guilty as charged. I take photos of quilts all the time but some photos are better than others. There are certainly ways to help you get the best possible photos of your quilts.
Equipment
First, don’t think you have to have a super fancy camera. A digital camera will do just fine. With a digital camera I can instantly see the photos I’ve taken and tell right away if the lighting was bad or if the focus was off. Plus, I can crop or do some light editing in my computer to give me some forgiveness if I’ve held the camera little wonky.
Ideally, use a name brand camera with at least 5 megapixels and don’t forget to use a tripod to hold the camera steady. Thankfully, tripods for still cameras are pretty cheap and it will allow you to be able to position the camera at the same height as the quilt top.
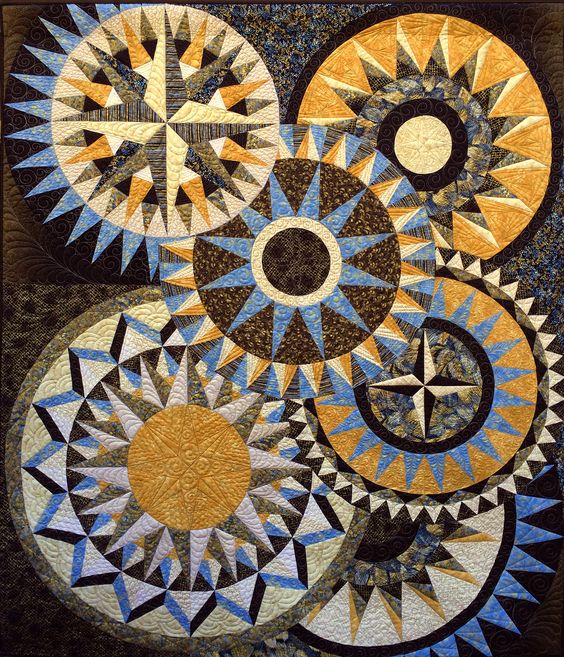
Take a look at this great photo Cheryl took of her quilt. She positioned the camera so it was directly across from her quilt and not at an angle. Positioning the camera in this way gave her a wonderful photo.
Lighting
You’ll also want to think about the lighting for your quilts. If you are taking your quilts photo outside, keep in mind that stark daylight isn’t a great idea as it creates strong shadows and it is just too harsh. Filtered light, like dappled light through a tree’s leaves or even the light found during a cloudy day is softer. This type of light will help you capture your quilt’s beauty more easily.
If you are going to shoot your quilt indoors, you will want a couple of light sources.
I like to get my quilts near a window to use the light from the sun as a nice side illumination that will highlight the quilting nicely. In this photo from StarlitQuilts.com you can see that there is some soft natural light coming in at the side of the quilt that helps illuminate the quilting nicely.
Alternatively, set up a light source to the left and to the right of the camera’s position on your tripod to help create even lighting. Avoid using the flash on your camera as it can create harsh lighting and shadows on your fabric.
Composition
Next, think about the composition of your photo. Do you want to get a wide shot of the entire quilt top? Depending on the size of the quilt, this may require a great deal of space.
However, if you are taking photos to enter the quilt into competition you will need a wide shot. I picked up some tent poles at a garage sale and I will either fish the tent pole through the hanging sleeve of a quilt top or I will use pants hangers from my clothes closet to clip my quilts and hang them on the pole. Then I will grab two of kids/neighbors/relatives to hold each end of the tent pole steady and even so I can operate the camera.
Recently I found some photography stands at a yard sale that were made to hold up backgrounds in a photography studio. Now, I can place my tent pole on those to stands to easily hold up my quilt tops for their big paparazzi moment.
If you are instead taking photos of a quilt for social media you might want to place the quilt in its “natural” setting. Take a look at the way the folks over at Fons & Porter’s Love of Quilting magazine dress up the quilts they feature.
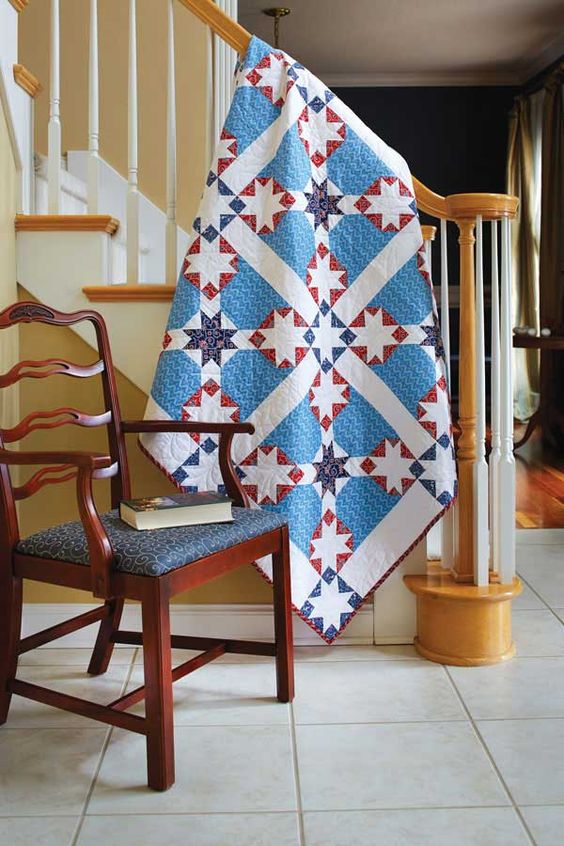
You’ll find them dropped over chairs, fences, hanging on hooks, and nestled over railings. They do a great job of making the quilts look at home while still allowing you to see enough of the pattern so the quilt comes to life.
Notice that in many of their photos they use a prop or household item in the photo next to the quilt that is the same color as a bit of the fabric in the quilt top to help bring the whole photo to life. Use your favorite quilt magazine for inspiration on how you can dress up your next quilt to capture its beauty.
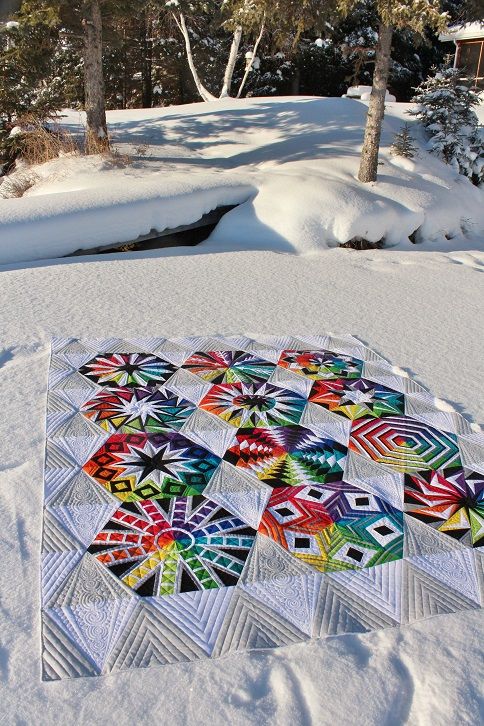
One of my favorite quilt photographers is Kathy at the Tamarack Shack. She uses an APQS Millennium and she lives in beautiful Northern Manitoba. Her icy winterland is an incredible complement to her quilting photographs. I love how she combines the natural textures of her neighborhood with her quilts.
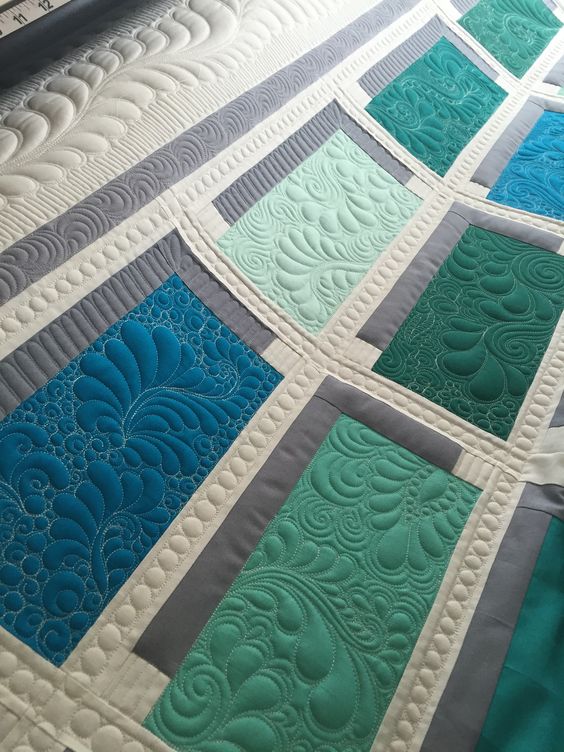
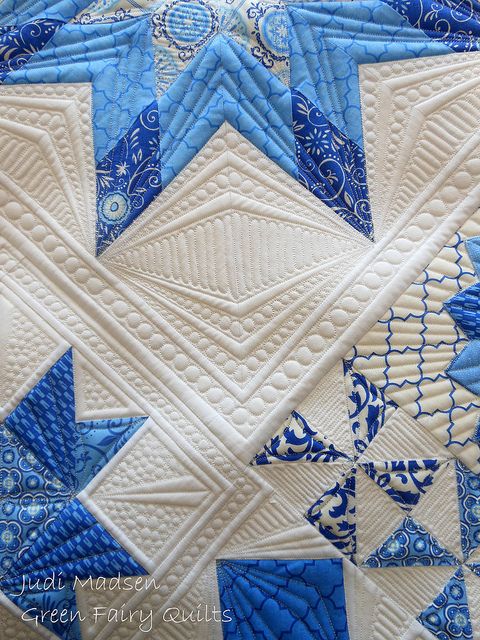
Of course, as a longarm quilter, my favorite type of quilt photo is a closeup that shows the actual quilting! The photo below shows off the beauty of Judi Madsen’s wonderful quilting mastery. You can find her at GreenFairyQuilts.com
Many times I have to remind myself when I’m at a quilt show to grab a wide shot photo of the entire quilt because I’m so pulled into the quilting motifs used in individual blocks or borders. I love these intimate photos of small sections of a quilt! When trying to capture a small portion of a quilt to highlight the quilting, I like to use natural light that comes in at a quilt on an angle. I find it brings the colors and the quilting dimensionality to life.
Edit
One of the best ways to take your quilting photography to the next level is to edit your photos so you crop out anything unneeded- like those feet sticking out from the person holding up your quilt. Your desktop computer likely came with a simple photo editing software that you can use to crop your photos and tweak the colors if needed.
I will readily admit that I like using the camera on my smartphone because it is always with me and it is super easy to upload the photos to social media. If you look at the quilts I share on my Instagram feed, they are all shot quickly with my phone.
I suppose the biggest lesson is this: while you can always take better photos, don’t let it stop you from sharing pictures of our quilting world with your friends. The more pictures of quilts that we place up on social media for others to enjoy, the more likely it is that we create a new lover of quilts!
Do you have a photo of your latest quilty creation? Please share it with us at this link, post it over on the APQS Facebook page or in the APQS online forums. Are you on Instagram? If so, tag your quilts with #APQSquilting so we can see them too!