
How to handle quilts with open seams
You may have heard the phrase “every quilt tells a story,” but let’s face it—some quilts seem like they come from a horror novel. Every quilter has struggled with some aspect of the process at one time or another, and each of us has a horror story to tell about one or more of our quilts. Sometimes the story ends with the quilt destined for the scrap pile, but many times we can “right the wrong” and still arrive at a happy ending.
In this post, we’ll come face to face with that dastardly villain known as the “open seam.” It creeps up on unsuspecting quilters who hurry through a project convinced they can eyeball a ¼-inch seam with one eye closed, leaving unsewn sections in the patchwork. It haunts quilters who eschew pins and rely on brute force to align slippery fabric edges only to leave lots of frayed fabric along the edges. It cackles at quilters who fight feed dogs by pulling and stretching savage fabric to tame it into submission, leaving a puckered wobbly mess.
And once it has weaseled its way into a quilt, it dares the quilter to find a seam ripper, challenging him or her to a duel. Most times the quilter will pick up that gauntlet and rip, rip, rip until they can re-sew the seam properly. But other times the open seam wins the battle and it sneaks into the quilt anyway, where it lies in wait for an unsuspecting longarm quilter to discover it by accident.
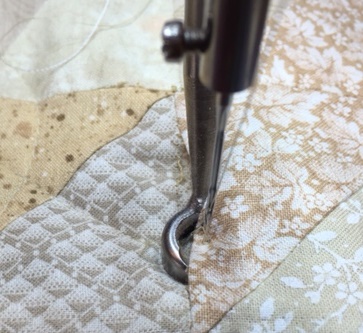
If the quilter’s lucky they’ll catch the problem before it goes on the frame; if they’re not so lucky the hopping foot on the quilting machine may slip right between those two unsewn fabrics where they’ll quickly stitch herself inside the quilt like a prisoner in a maximum security cell. If you have ever had that happen, then you know that doesn’t result in a happy ending!
In a fairy tale quilting world, every quilt would have precise ¼-inch seams—not too big and not too small, but just right. They would be perfectly pressed with no threads to trim, no fraying, and no bulk. That is indeed every quilter’s dream. But alas, even if our quilts depict a fairy tale kingdom we must snap out of it and get back to reality. We quilters were born to be real, not perfect. Even award-winning quilters struggle with making intersections align perfectly every single time, and have been known to skimp on that ¼-inch seam if it meant that their points would not be cut off in the block.
It’s how we handle those imperfections that measure our success. Inaccurate seams pose lots of challenges, but with a little planning and forethought we can make lemonade from those lemons and still taste the sweetness of a job well done.
As a machine quilter, the best way to handle those horrible inaccurate seams is to conquer them before you load the quilt on your frame. Take the time sew the seam properly, even if it means ripping out a section to do so. If you quilt for others it is helpful to educate your client about the pitfalls of open seams. Option 1 is to pay you to do repair them, in which case you’ll want to have a fee structure established for the service. Option 2 is showing the client how to do it themselves (thus saving your time and her money). The advantage to Option 2 is that if they learn how to correct the error (and will learn how long it takes to do that) then there’s a good chance they’ll be more careful with her next quilt before ever bringing it to you. You might need to teach them about the merits of pins, how to work a seam ripper, or how to add a second row of reinforcing stitches right next to the original line to help secure the seam.
Personally I prefer to educate the client about how an open seam can impact the quilt’s final appearance, not to mention the risk of tearing the quilt if I accidentally catch on an open seam. But there’s still an Option 3—where the piecer decides to do nothing about the seams, and doesn’t want to pay me to fix them either. At that point I let the piecer know that the quilt will have “holes” in the piecing but I work within those limitations while still protecting my quilting machine and the quilt as best I can using one of the methods below.
Use these tips if you are faced with the horror of an inaccurate or open seam and won’t be fixing it before quilting:
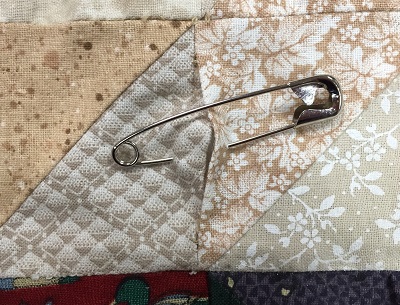
Most importantly make sure you are aware of the trouble spots before you load the quilt. Spend as much time examining the back of the quilt as you do the front. Look for inconsistent seam allowances and put a safety pin in them on the front of the quilt so you can find them later.
If you are doing an overall design using a pantograph, locate the safety pins with each advance of your fabric before adding your quilting stitches. You can do a “dry run” by moving your machine along the pantograph line near the safety pin without actually sewing. If the open seam falls under or near the stitching line, use a dry-erase marker on top of the clear protective cover over your pantograph to redraw the design near the bad seam so that you will not quilt over it.

Alternatively you can hand baste or machine baste the seam closed on the quilt top and then quilt the design. Remove the basting when complete.
You can run a straight stitching line on top of the seam to permanently close it (This will appear as a straight stitched line in your design, which may not blend in. This solution works better when custom quilting where you can camouflage it like stitching in the ditch.)
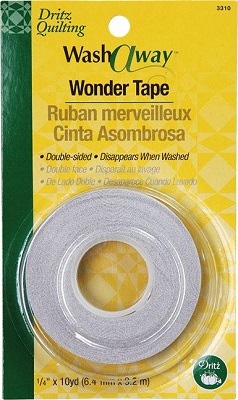
Use a double-sided wash away adhesive like Dritz Wonder Tape to temporarily hold the seam together while you quilt over the top. Follow the instructions on the package and slip the tape inside the seam to secure it.
You could use wash away fabric glue to hold the offending seam in place.

Leave the safety pins in the quilt when you are finished (or put them back in to identify the open spot if you needed to remove them to execute one of the methods above.) Show the client the pins and advise her to hand-sew each of the open seams closed so that the quilt will not prematurely come apart. If you couldn’t convince the client to repair the open areas before you quilted it (or pay you to do it properly) then perhaps the sight of those safety pins glaring back at them will be a reminder that if you don’t conquer the open seam demons when you have the chance, they will come back to haunt you!


