
Quilt Shows – How to clean your quilt for judging
Editor’s note – This is the second article in our series about quilt judge expectations and solutions to the most commonly cited areas for improvement. To view the first article about getting your quilt safely to the show, click here.
As a quilt show contestant, we muster up our courage and put our best quilting efforts on display for all to see. And we simultaneously expose our quilts to the critique of complete strangers who are tasked with finding flaws in our work and comparing it to others.
Though winning a ribbon or receiving recognition for a job well done is a great bonus, the biggest advantage to entering a show is learning from the constructive comments judges share with entrants and becoming a better quilter.
While a quilt is comprehensively evaluated during the judging process, the criteria used to differentiate entries fall under three main categories that we will explore in our series:
- General appearance
- Design
- Workmanship
The term “general appearance” refers to the physical properties of a quilt. Evaluating the quilt’s general appearance can also apply to how well it meets the criteria in a category. Always read entry instructions carefully to ensure your quilt fits the guidelines. Before you close the box on your entry, answer these questions:
Is the quilt clean?
A quilt can be flawlessly constructed and beautifully designed, but if it arrives covered in cat hair or with an offensive odor it may not even make it to the judging room.
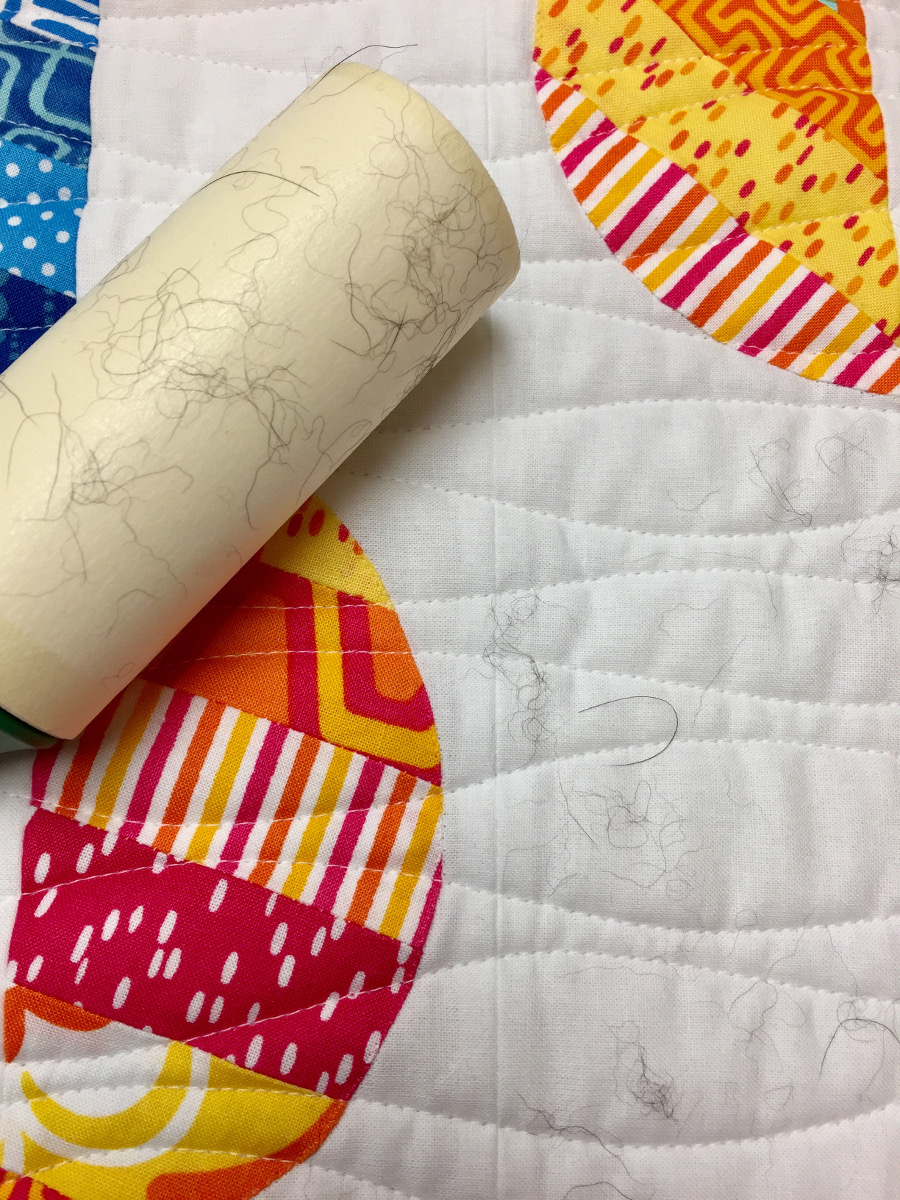
TIP: Use a sticky lint roller over the entire front and back of your quilt. This not only picks up pet hair but it also will pull up loose threads or thread tails you forgot to trim.
TIP: Try airing your quilt outside on a calm, sunny day. Place a bedsheet on the ground, then place your quilt on top of the sheet. Next add another sheet on top to protect the quilt. Weigh the corners of the sheet down and let Mother Nature help remove the nasty smell.
TIP: Quilters have also had some success by putting a bar of soap in a sealed bag with the quilt to remove odors. Another option is to use a fabric freshener product (check for color-fastness first).
Be cautious before washing a quilt before a competition. It can dramatically change the “hand” or feel of the quilt, it can cause shrinkage or distortion, and it can even cause color bleeding.
TIP: If you must wash a quilt, use a soap designed specifically for delicate fabrics such as Orvus Quilt Soap. Do not agitate the quilt in a washer; instead fill the washer drum with cold water and then gently hand-submerse the quilt, allowing it to soak. Next drain the water from the tub and use gentle spin to remove water from the quilt. Water-soaked quilts will be heavy! Gently lift it from the drum to avoid straining the quilting stitches and patchwork. Carefully spread it out over a bed sheet to air dry. You may choose to “block” the quilt at this point (we’ll cover blocking in an upcoming article in this series.)
Is the fabric bleeding?
Bleeding is color migration from one section to another. Fabric can bleed when the dye is not completely removed from the fabric. Hand-dyed fabric, batiks, and even commercial fabrics can bleed.
TIP: To reduce the chance of bleeding, prewash your fabric before using it in a quilt if you are concerned about color transfer. Use a dye fixative such as Retayne (available at quilt shops and online) before using the fabric for the first time to “set” the dye. Fabrics treated with Retayne must be able to withstand hot water up to 140 degrees. Be sure to follow label instructions carefully.
TIP: If the bleeding has already occurred, you may be able to remove it by soaking the quilt for several hours in hot water mixed with a mild dishwashing detergent such as Dawn Ultra Free and Gentle. This detergent has no dyes or perfumes, but contains surfactants that suspend the dye in the water, preventing it from settling back on to the quilt. Quilters report good results with this product.
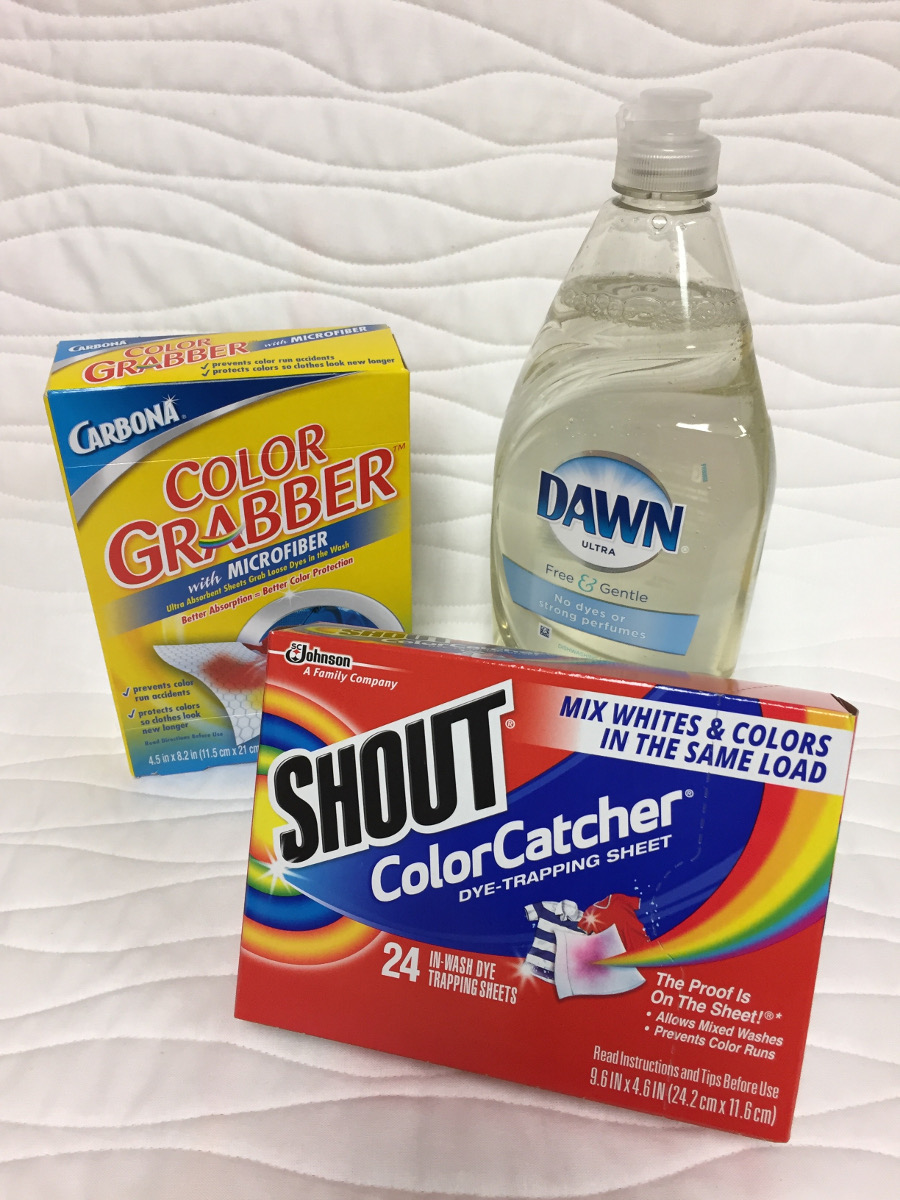
TIP: For mild bleeding, try using a color-catcher product from the laundry aisle while soaking the quilt. Do not dry the quilt until as much of the dye as possible has been removed. Depending on the severity of the bleed and whether the dye was heat-set by a dryer, it may not all come out.
Is the batting bearding?
“Bearding” refers to a situation where batting fibers have migrated through the surface or back of a quilt.
TIP: Choose batting that has been bonded or needle punched to reduce the chance of bearding. Look for batting with consistent, even density across the entire piece. Avoid batting that is particularly bumpy or full of slubs. (A slub is a thick ball or bump on the batting; your needle may not be able to penetrate the slub so it will push it out the back of the quilt instead). Also, be sure to match the batting color to the quilt. A dark quilt with lots of white fibers pulling out of it will not fare well in the “General Appearance” category.
TIP: Be sure to place the batting with the right side facing up as you layer the quilt together. This ensures that your needle will penetrate the batting the same way it was needle punched, reducing the chance that the needle will drag batting fibers out with it as you quilt. Not sure which is the “right side” of the batting? Click here to learn more.
TIP: Always begin quilting with a new needle, and replace it often. A dull needle will push batting fibers out the back of your quilt. Hint: If you see batting poking out of every needle hole on your quilt, the cause is almost always a dull or burred needle. But if you only see random dots of batting poking out, the problem relates to the batting itself (such as the needle hitting a slub in the batting.)


