Quilting the Quilt: Fixing thread snarls and g-r-r-owls
Download a PDF of this article
G-r-r-r-eat. Everything was humming along so smoothly! The quilt went together fast; you found just the right quilting thread color to complement the fabric. The quilting design makes the pattern sing; the stitches look perfect, and even better—you’re on the very last row of quilting. Life is good… until you hear a funky rattling noise and THIS happens!
When faced with sudden, dramatic stitch quality changes like thread backlashes, huge loops, or “bird nests,” quilters instinctively reach for the tension knob first. However, that’s almost always the wrong solution if you’ve been stitching just fine up to that moment. Adjusting the top or bobbin tension won’t do you any good if the thread isn’t where it’s supposed to be in the first place!
On longarm quilting machines, the thread is typically mounted on the machine’s rear side—a throwback to the days when these machines were exclusively used in decorator workrooms and factories. In that setting, operators only followed paper pantograph patterns, so it made sense to have the cone near the operator so she could glance at it during quilting to ensure all was well.
That means the top thread has to travel a considerable distance before it reaches the needle—and that distance increases as a longarm machine’s throat size increases. Some companies try to control the thread with complicated, multiple thread guides where the thread twists and turns through each of them; some even have two rotary tension assemblies along the path to try and tame the thread! That leaves a lot of places where things can go wrong before the thread ever reaches the needle.
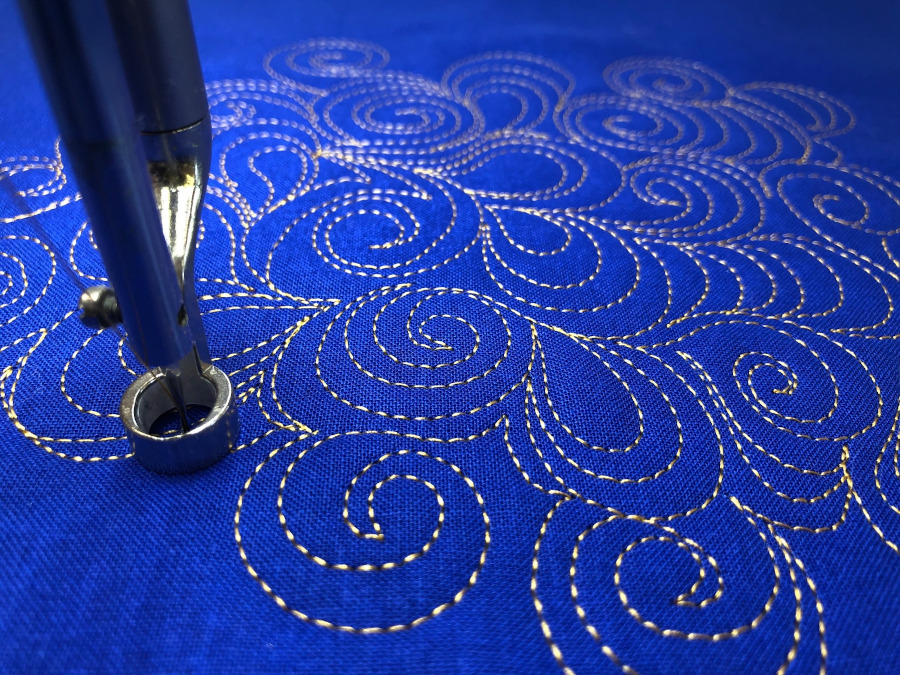
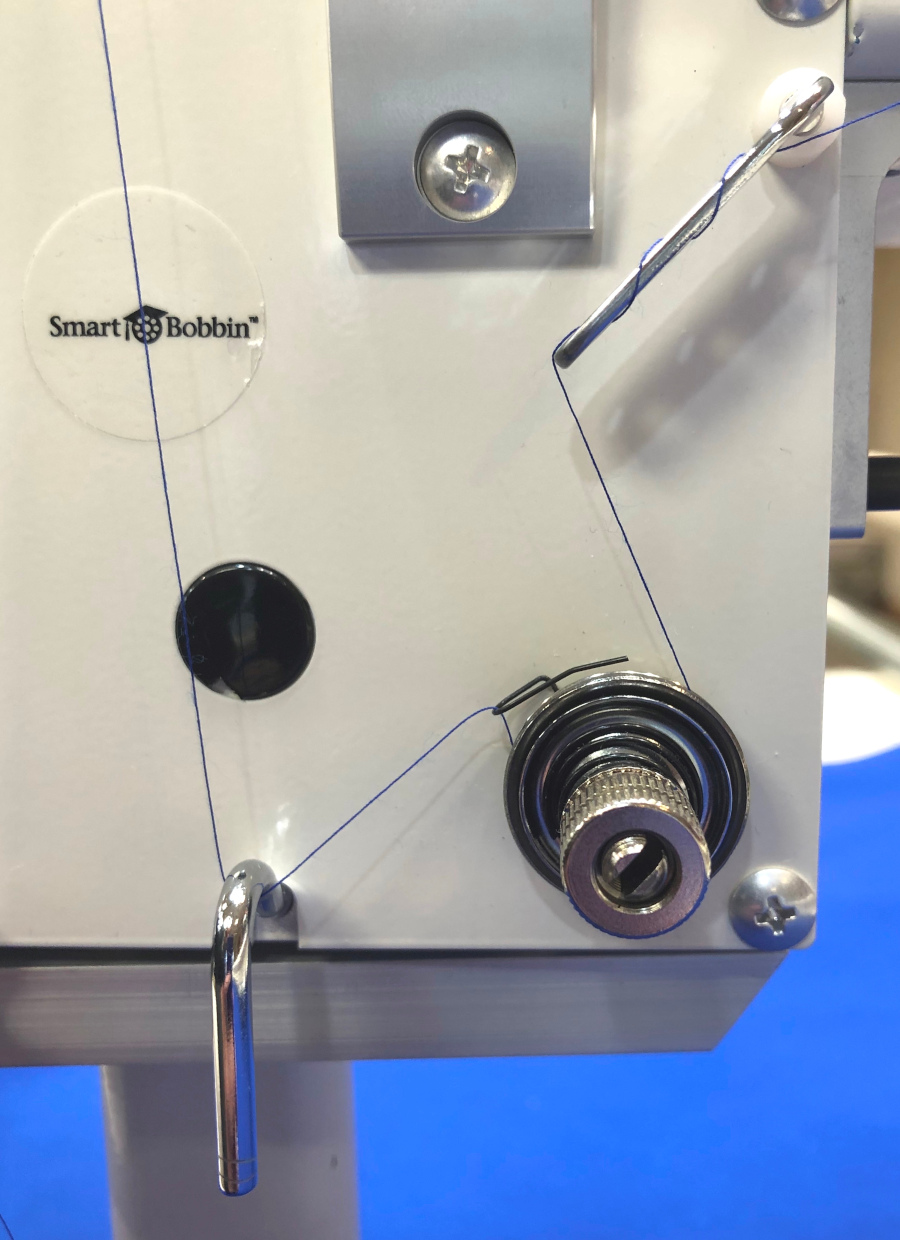
That’s why APQS machines use a very simple thread path and only one easy-to-adjust, simple disk tensioner. (Photo 2) That not only makes it much easier to get beautifully balanced stitches, it also makes thread path troubleshooting a piece of cake!
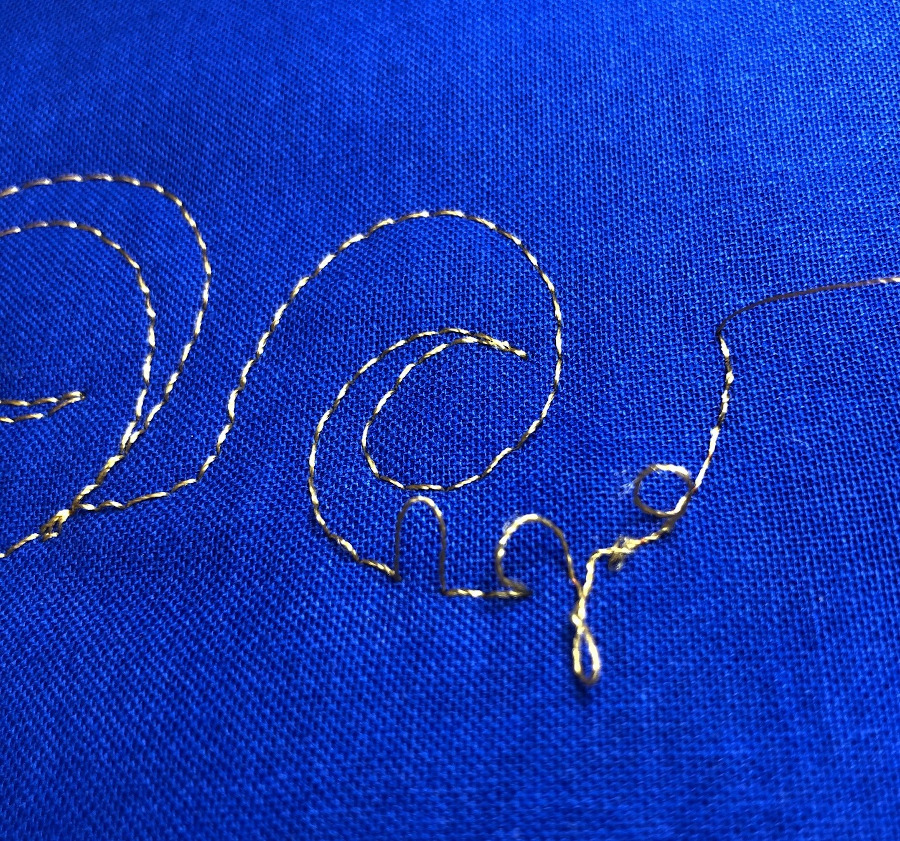
When stitching suddenly goes haywire—especially if the stitches have been good up to that point—start by checking the top thread along the entire thread path. Loose, sloppy top stitches or huge loops on the quilt back (Photo 3) typically indicate that the thread has escaped a thread guide or has slipped out of the tension disks.
Hint
Slippery threads can slither down the thread cone, allowing a lot of slack in the thread path. Slip a thread net over the cone to control it, or try this trick: Cut a piece of cotton batting about 1” x 3” long and roll it into a little tube. Slip it into the first guide directly above the thread cone, pushing it down so that it just touches the thread. This slight downward pressure prevents thread puddling on the cone and keeps the thread path smooth and straight to reduce tension issues. As an added bonus, if you’re working with a fussy thread like metallic or cotton, add a few drops of sewer’s silicone lubricant to the batting piece to resist snarls and reduce breakage.

Check out the images below. Can you tell which photo shows the problem? At first glance, the thread looks like it’s traveling properly around the tensioner in both photos. But in the first picture, the thread is just resting in the shallow valley around the disk’s outer edges. It is NOT between the disks. Your top thread suddenly has no tension at all, and your thread will flail around with abandon and spit out gigantic loops on your quilt top and even on the quilt back. Tightening the tensioner at this point won’t help at all.
When threading your machine, hold on to the thread just above the tension disks as you pass it around them, then pull up on the loose end thread firmly until the thread snaps between the disks. In the bottom photo, the thread is sandwiched deeply between the tension disks. Now your thread will respond to tension adjustments.

Every time you re-thread, visually check each guide— that can save you hours of “unsewing” later!
I take a shortcut when I change thread colors. I cut the current thread just above the cone, and then tie the new color on to the old thread tail. Then I pull the new thread all the way through the thread path to the needle. This is a slick way to quickly re-thread the machine, but sometimes the thread knot can pull the thread out of the tension disks on its way through them. Take 10 seconds and double-check that the thread is still properly between the disks before you start.
If you use this trick, it’s also amazing how quickly our brains let go of ‘trivial’ information like how to manually thread the machine. If it hasn’t happened to you yet, your turn will come! One day you’ll pull that thread through, and that knot you so deftly tied will suddenly come apart, leaving you with a halfthreaded machine! Luckily, APQS machines are super simple to thread—and use a thread path very similar to a regular sewing machine, so re-threading is easy.
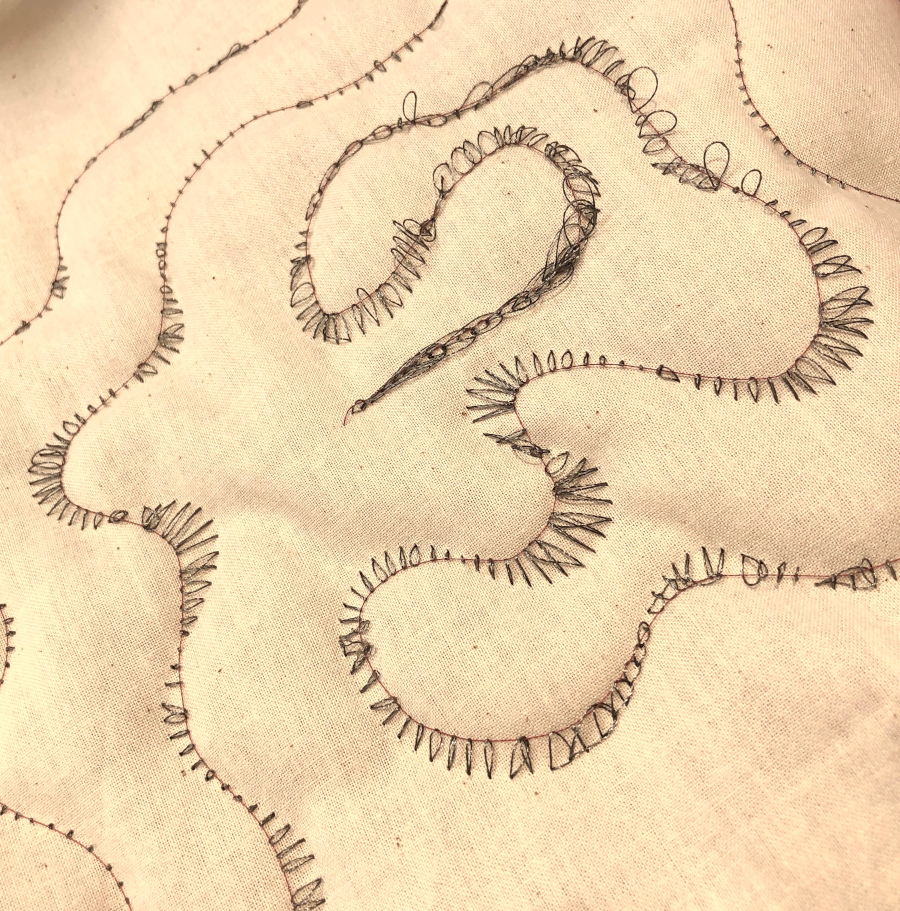
Take another look at the second photo above. After the thread exits the tensioner, it travels over a “tension check spring” that takes the slack out of the thread path as stitches form. Then it travels down to a “shepherd’s hook,” up through the eye of the “take-up lever” and on through two simple thread guides before it enters the needle. If you miss the tensioner or one of these guides, you’ll have bubbly, snarly stitches galore like the third photo!
Every time you change thread colors or re-thread the machine, visually check each guide—those few seconds can save you hours of “unsewing” later! Stitch out a quick sample to ensure that your beautiful stitches are back.
Don’t forget that it takes two threads to tango—the bobbin thread or bobbin case can also be the culprit when you’ve got sudden thread “spit up” on the quilt. We’ll tackle that trauma in the next issue!