Ruling the World: Getting the most from your templates
The quilt show season is in full swing, and quilters everywhere are finding even more gadgets and gizmos designed to make their quilting faster, easier, and more accurate. In the longarm industry, rulers and templates are always highly sought-after tools of the trade. You’ll find rulers designed to help you with stitching in the ditch, cross-hatching, paisleys, waves, circles, feathers, and more. You’ll even discover guides cut for specific patterns like wedding ring quilts or apple core quilts.
As someone who began her career without any gadgets available 15 years ago, to me the selection today is a bit overwhelming! From this meager beginning, I learned to be very choosey when it came to buying accessories. If I couldn’t find more than one use for it, or if the gadget was so specific to a design or technique that is wasn’t a practical investment for more than one or two quilts, I learned ways to do without or suggested other options to my customers.
I guess my advice to you, given today’s economy, is to be a savvy consumer and really analyze what advantages a particular tool will give you before swiping your credit card. How many double wedding ring quilts do you foresee quilting in your future? Does the $40 price tag for the specific ruler translate into $40 worth of time savings for you, or will the tool sit in a drawer most of the time?
If you’ve got gadgets tucked in your drawers that haven’t seen the light of day since 1998, sell them! Make room for new purchases that will really be helpful to you, and eliminate the space wasters. You may discover a tool you’d long forgotten about, and find that it becomes your new “can’t live without it” gadget!
Here are hints on making those acrylic rulers really work for you, both safely and smartly (be sure to install an appropriate expanded base to your machine before beginning any kind of ruler work for best results):
Hint #1
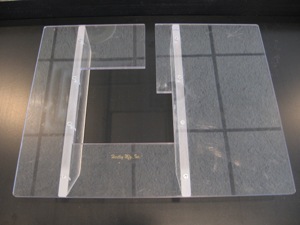
Put something on the bottom of each of your rulers that will provide some friction. You’ll find products in your quilt shop for this purpose, including InvisiGrip, Sandpaper Dots, Slip Grip, and more. You can even shop in the hardware store and buy a sheet of adhesive sandpaper; cut a few small pieces from the sheet and stick them on the bottom of your ruler.
Preventing the ruler from slipping is the key to accurate stitching. With the grips to assist you, you will not need to provide as much downward pressure on the ruler, which can increase the drag on your machine. Too much downward pressure can also raise up the machine’s rear axle, causing skipped stitches or inconsistent stitch length when the encoder is lifted out of place inside the wheel.
Hint #2
Treat any long ruler like a rotary cutting ruler. If you are already following safety guidelines when cutting your fabric, this will be easy. If not, then practice a little before you use a long ruler for cross-hatching or other techniques.
Position your hand so that your thumb and forefinger point toward the hopping foot. Think of the hopping foot as a rotary cutter; you are supposedto walk your hand down a long ruler as you cut fabric, keeping the cutter in line with your hand. This gives you ultimate control and prevents injury. The same is true for longarm rulers. Walk your hand down the ruler as you quilt along its length, moving your hand when the hopping foot reaches your thumb or forefinger. This is true no matter which hand you use to hold the ruler in place.
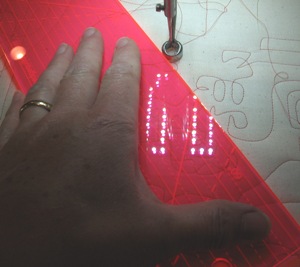
As the machine approaches your finger, walk your hand down the ruler.
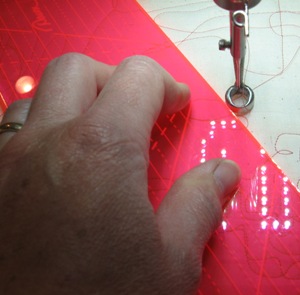
Lift thumb and place it next to your finger.
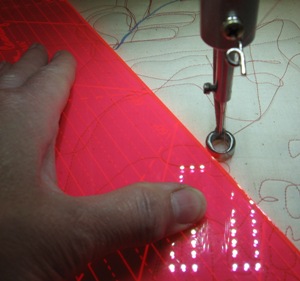
Slide your fingers up the ruler and begin again.
This will prevent the ruler from accidentally slipping over the foot and under the needle bar. If that happens, you’ll probably take a nice hunk of plastic out of your ruler, jump from the loud “thunk” the machine makes, and may throw the machine out of time if the needle bar hits the ruler hard enough to slide inside its clamp. Yikes!
Hint #3
Even though the APQS foot is designed to allow you access all the way around it, you’ll have much less control trying to hold the ruler on the back of the foot. This awkward position makes your wrists and fingers fatigue quickly, and you’ll have a harder time keeping your lines straight as you try to push the machine toward the ruler without moving it.
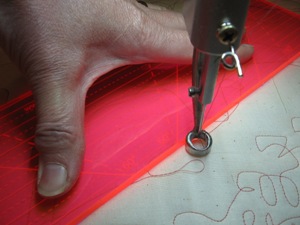
Holding the ruler from the back does not provide enough leverage for accuracy, and is very tiring on your muscles.
Instead, use your stitch regulator mode (or poise your hand over the “on” button if your machine does not have a regulator) and practice holding the ruler so that one hand ALWAYS has a thumb and forefinger pointed toward the foot.
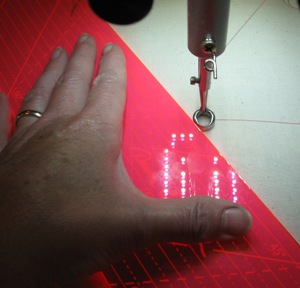
Left Hand – “L” shape created faces the foot; drive with your right hand.
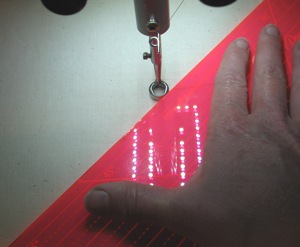
Right Hand – “L” Shape faces foot; drive with left hand.
Yes, this means sometimes holding the ruler with your left hand, and sometimes holding it with your right hand (using those grippies from Hint #1 makes this much easier!) Since the stitch regulator is engaged, you can drive the machine with either the left or right handle. Spend some time practicing this “cross over” and soon it will become second nature. If you have no stitch regulator, you will literally cross your hands over so that you can tap your “on” button with the hand that is notholding the ruler at the time.
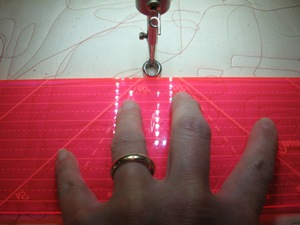
If you feel you must use a ruler for straight horizontal lines, use the position shown below to give you the best accuracy and control.
Hint #4
How you hold the ruler can make a huge difference in your control. Some rulers have built-in handles, while many others are flat. Each has advantages, but my personal favorite is a flat ruler, especially for cross-hatching and stitching in the ditch. Look at the photos below and notice that I do not rest all five fingers on top of the ruler.
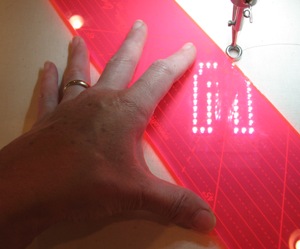
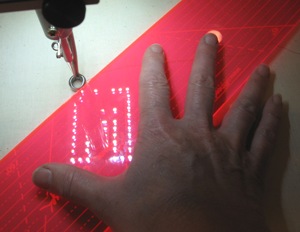
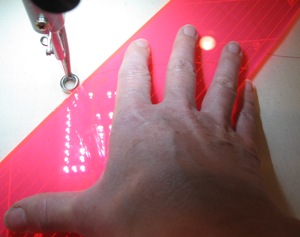
Let your outermost finger or fingers rest off the edge of the ruler to give you the power to swivel or turn the ruler as you guide the machine along its edge.
This is great for inaccurate piecing, applique curves, and other instances where you need to shift the ruler without completely stopping the machine.
Instead (depending on the ruler’s width) I rest either my ring finger or pinky finger off the edge of the ruler, with the thumb and remaining fingers on top (and pointing toward the hopping foot). This simple grip allows me the control to swivel the ruler, since the pinky and thumb act like steering handles, and the other fingers act as pivot points.
Using this position, I can manipulate a straight ruler around curves, crooked seams, and even appliqué pieces. If all of your fingers remain on top of the ruler, you have no way to adjust its position. That single finger off the edge also provides resistance for me so that I can hold the ruler in place withoutpressing down hard on the ruler (if all your fingers are on top of the ruler, it’s easy to push too hard to try to control it).
Hint #5
If you’ve made it to the bottom of this article, this hint is your reward! Lenni and Lucey owners engage their stitch regulators by flipping a switch, then turning on the sewing motor to begin quilting, just as Millennium, Freedom, and Liberty owners do. The difference for them is that when they turn off the sewing motor, the stitch regulator remains active until they flip a toggle switch to turn it off. They can leave the regulator engaged, move their ruler, then hit the “go” button again and quilt away.
When Millie, Freedom and Liberty owners touch any colored button, the machine cancels the sewing motor AND the stitch regulator, leaving you to start over by turning on the regulator again when you begin quilting. At least that’s what you may think. You can actually turn off the sewing motor withoutturning off the stitch regulator!
Exercise 11 in the manual reviews this procedure. To put it to use, activate the stitch regulator the way you normally do by using the left handle’s buttons. Turn on the sewing motor with the “Command-Blue” sequence on the RIGHT handle. When you want to stop (for example, to re-position your ruler), HOLD IN the command button on the RIGHT handle, and tap the BLUE button again. You’ve just turned off the sewing motor, but the regulator remains engaged! (You should hear the familiar chirping or see the regulator light flashing. If you don’t, you hit the blue button first and canceled the regulator function. Start over and try again.)
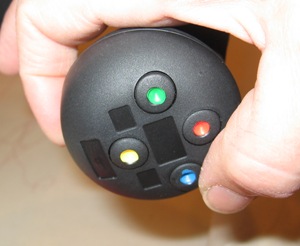
To turn off the sewing motor only,hold in the command button and then tap the blue button.
Remember, to toggle the sewing motor ON and OFF, hold in the command button before tapping the blue button on the right handle. If you neglect to hold in the command button and touch the blue (or any other colored) button, you’ll cancel both the stitch regulator and the sewing motor.
This trick is extremely helpful when using rulers. Practice it a bit before you begin, especially if you’ve been used to cancelling both functions and re-starting them each time you end your stitching line. Come to think of it, practice is a big part of getting comfortable with rulers. Here’s one last hint on using them:
Hint #6
To stay as close to the “ditch” as possible when using a ruler for stitching in the ditch, try to hold the ruler on the side of the foot where there are NO seam allowances. If you hold the ruler on the side to which the seams are pressed, your downward pressure causes the top layer of fabric to slightly fold over toward the opposite fabric. You may think you’re right on target when you begin stitching, but you’re actually stitching next to the fold instead of truly next to the ditch. Then you are dismayed when you lift the ruler and your stitches appear too far away from the seam. Whenever possible, flip the ruler to the side of the foot opposite the seam allowance, and you’ll see improvement in your accuracy!


