
How to load a quilt [part 2]
This is part 2 of our series about the basics of loading a quilt. To read the first article in the series, visit this link: How to load a quilt – 3 basic methods.
Now that you know more about the possible methods you can choose, let’s review the basic steps for quilt loading:
Step 1: Prepare your quilt layers
Press the top and backing fabric
Trim stray threads
Check for loose or open seams
Make sure the batting is 4 inches larger than your quilt on all sides.
Make sure the backing is at least 4 inches larger than your quilt on all sides (you’ll need 4- 6 inches more than that if you use Red Snappers or Leader Grips).
Mark the top of the quilt with a safety pin.
Mark the top of the backing with a safety pin.
Step 2: Choose your loading method
While all three methods are options with advantages and disadvantages as earlier described, we’ll concentrate on the most popular method for this article— partially floating your quilt.
Step 3: Choose your loading device
Every loading device can present its own unique challenges as well as advantages. We encourage you to start out with pins since they’re often already in your sewing room, but also so that you can get the process down and understand what you like and don’t like about the loading process before investing in other loading gadgets.
The pin type you choose is often dictated by what is readily available to you, as well as by whatever type or brand your longarm instructor personally favors. Experiment, and don’t feel married to any given pin type. You are the one loading your quilt, so you must be satisfied with the tools you use. I personally prefer Clover Flower Head pins because I turn a lot of my quilts and re-mount them to the frame. These pins help me make that process easy and quick since I can leave them in the quilt as I go and not worry about them bending or snagging my quilt.
Step 4: Partially mount the backing fabric
Consider how you’re going to quilt your project before you determine which backing edges to attach. For example, many pantographs look just as nice traveling up a quilt vertically as they do crossing it horizontally. If that’s the case, you can mount the quilt “sideways” on your frame instead of “top to bottom”. You won’t need to roll the quilt as many times and you’ll get more quilting done with each row.
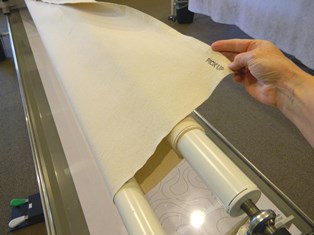
Place a safety pin on the edge that represents the “top” of your backing, even if you’re going to mount it sideways on your frame. You’ll also put a safety pin in the “top” of your quilt. When it’s time to load the layers on your frame, make sure the safety pins end up on the same side of the frame. You don’t want your backing fabric accidentally mounted upside down or sideways!
No matter what loading method or attachment device you use, the backing fabric must always be loaded to the Quilt Back Roller and the Pick Up Roller. While your backing doesn’t need to be completely “square” it DOES need to have two straight, parallel edges—the ones you decided to attach to the rollers as described in the previous paragraph. Find the center of each of those edges and mark them.
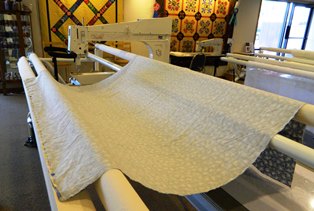
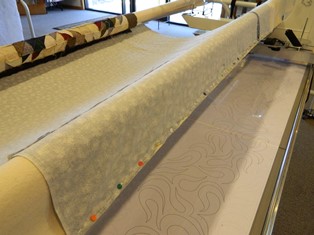
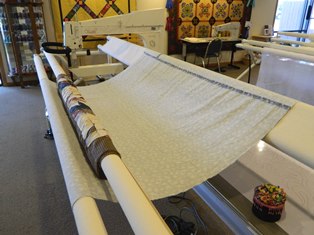
Stand at the needle side of your machine. Hold your backing fabric wrong side up. Align one of the straight edges so that it’s parallel to your Quilt Backing Roller. Toss the excess backing across the frame and over the Pick Up Roller. This will help smooth it as you wind it on the Quilt Backing Roller and will keep it off your floor.
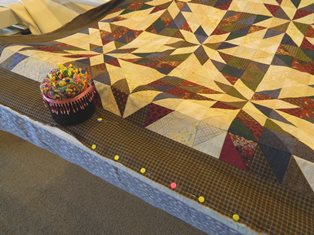
Align the center mark you made on the backing fabric with the center mark on you Quilt Backing Roller. Begin in the center and align the raw edge of the backing with the raw edge of your canvas. Start in the center and pin the backing fabric to the canvas, keeping the pins close but not overlapping. Work from the center all the way to one end, then return to the center and pin to the other end of the fabric. Position them about ¼-inch in from the raw edge.
Roll the fabric on to the Quilt Backing Roller. Smooth the fabric as you wind, working from the center out toward each edge. If you have backing seams that wrap around the roller, grasp the seam and twist it tightly on the roller. Since three layers of fabric build up on this seam as it encircles the roller, the backing may distort in this area. When you tighten this seam on the roller it helps compress the layers there, reducing the chance for puckers and tucks on the back.
Step 5: Mount the quilt top
Find the “true center” of your quilt top along the two opposite edges that you’ll attach to the frame. Mark this with a pin or marking tool (Remember that if you’re mounting your quilt sideways to conserve quilting time, you’ll need to find the center of the sides of your quilt, not the top and bottom edges.) That might be a seam that runs through the middle of your quilt, for example. Resist the temptation to simply fold the quilt in half along the borders to find the center. If any border has too much fabric in it and you use that as your center, it may not match the opposite side of the quilt. Your quilt will not load squarely or quilt squarely. Remember to add a safety pin to the side of your quilt that represents its “top” edge—even if you are not loading that edge to the frame.
Stand at the needle side of the frame and hold the quilt top right side up. Find the safety pin you added to the backing fabric which designated its “top edge”. Hold your quilt so that the safety pin you added to it is located in the same position. For example, if you loaded your quilt sideways and the safety pin in your backing is on the left side of the frame, hold the quilt top so its safety pin is also on the left side.
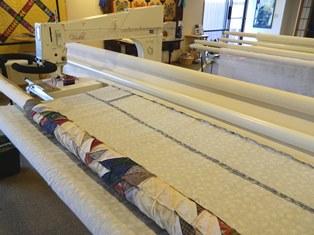
Toss the excess body of the quilt top across the frame and over the Pick Up Roller. Then align the straight edge with the Quilt Top Roller’s canvas edge, matching your center mark from the quilt top with the center mark on the canvas. Pin as you did the backing fabric, working from the center out.
Wind the quilt top on the Quilt Top Roller. Smooth the fabric out to the left and right as you go, making sure straight seams in the quilt lay parallel to the roller. When seams wrap around the roller, reduce their bulk by grasping them and twisting them tightly on the roller. This is very important to prevent your outer borders from waving. You can wind the quilt all the way on to the roller if you like to keep it out of the way as you finish attaching the backing fabric.
Step 6: Finish attaching the backing fabric
Your APQS quilting machine uses a leveler bar to keep your quilt sandwich level as you work, and to keep your quilting space consistent from beginning to end. You’ll need to make sure your backing fabric passes under this bar before mounting it to the Pick Up Roller. To make this easier to do, unwind enough of the canvas from the Pick Up Roller so that you can pass it under the leveler bar toward the Quilt Top and Quilt Backing Rollers.
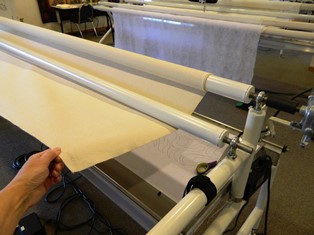
Then bring it up over the leveler bar and back over the top of the Pick Up Roller, wrapping the leveler bar inside the Pick Up Roller canvas. The leveler bar will be hiding inside the wrap-over of the Pick Up Roller canvas.
Now bring your quilt backing across the table and over the top of the Pick Up Roller. Line up the backing’s straight edge with the edge of the Pick Up Roller canvas, again matching the center marks. Pin it in place just as you did on the Quilt Backing Roller.
Once you have it completely pinned in place, wind the excess backing on to the Quilt Back Roller once more, smoothing as you go.
The edge you attached to the Pick Up Roller will drop down off that roller, and will automatically be underneath the leveler bar for you. Wind up the backing until the edge attached to the Pick Up Roller is just inside your quilting space, next to the leveler bar.
Step 7: Position the batting
Find the right side of the batting and hold it with the right side face up. Slide it between the Quilt Backing Roller and Quilt Top Roller toward the throat of the machine. If it binds on the backing, unwind the backing slightly to reduce friction.
Align its raw edge near the edge of the Pick Up Roller and the opposite end of the backing. Adjust the batting and backing until they are smooth. Allow the excess batting to drape on the floor under the frame.
Step 8: Secure the quilt edges
You’re nearly there! Remember, partially floating a top means that it is NOT attached to the Pick Up Roller Canvas—it will rest on the backing and batting instead. However, you’ll want to keep the quilt straight, and if you’re going to stitch off the quilt and back on again, you’ll need the edges to be secure.
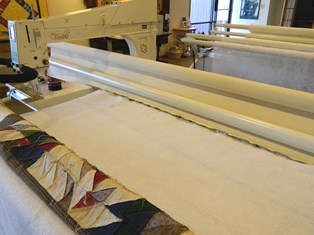
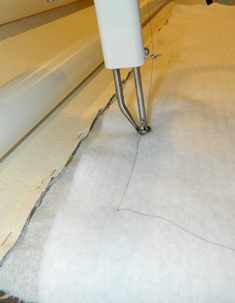
Stand on the needle side of your machine. Move your machine’s needle until it is on the left side of your backing and batting, about two inches below the pins holding the backing fabric to your Pick Up Roller. Engage your horizontal channel lock and stitch a straight line all the way across the backing and batting. This will give you a wonderful reference line for your quilt top!
Next you need to unwind the quilt top and bring it across the batting and backing until it’s aligned with your reference line.
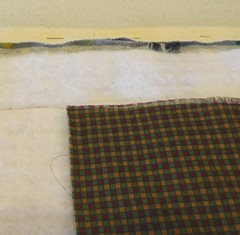
Be sure to place the quilt’s center mark in line with the center line on the Pick Up Roller canvas (extend that center mark down to your reference line in your mind’s eye or use a ruler to mark it.) Now you can secure the quilt along this reference line. Disengage your lock. If you’ll quilt off the edge with a pantograph, baste the top of the quilt in place, taking care not to stretch the fabric. You might wish to start in the center and baste out to the left and right, for example. If your quilting will stay on the quilt top (such as a border design that stays inside the border) you can use pins along the reference line instead.

Secure the left and right edges of your quilt with pins or basting stitches in the same manner as you go. Place your side clamps on to the backing fabric. Adjust their pressure so that they don’t distort your backing fabric, but they should keep your backing smooth.
You’re ready to quilt!!!


